Get started in Blender CRAZY FAST!
There’s no shortage of 3D software out there, each with their own strengths. Blender has the advantage of being robust, powerful and free. And while Blender may not be a mainstream tool in the professional 3D space yet, it’s definitely being used more and more, with amazing results.
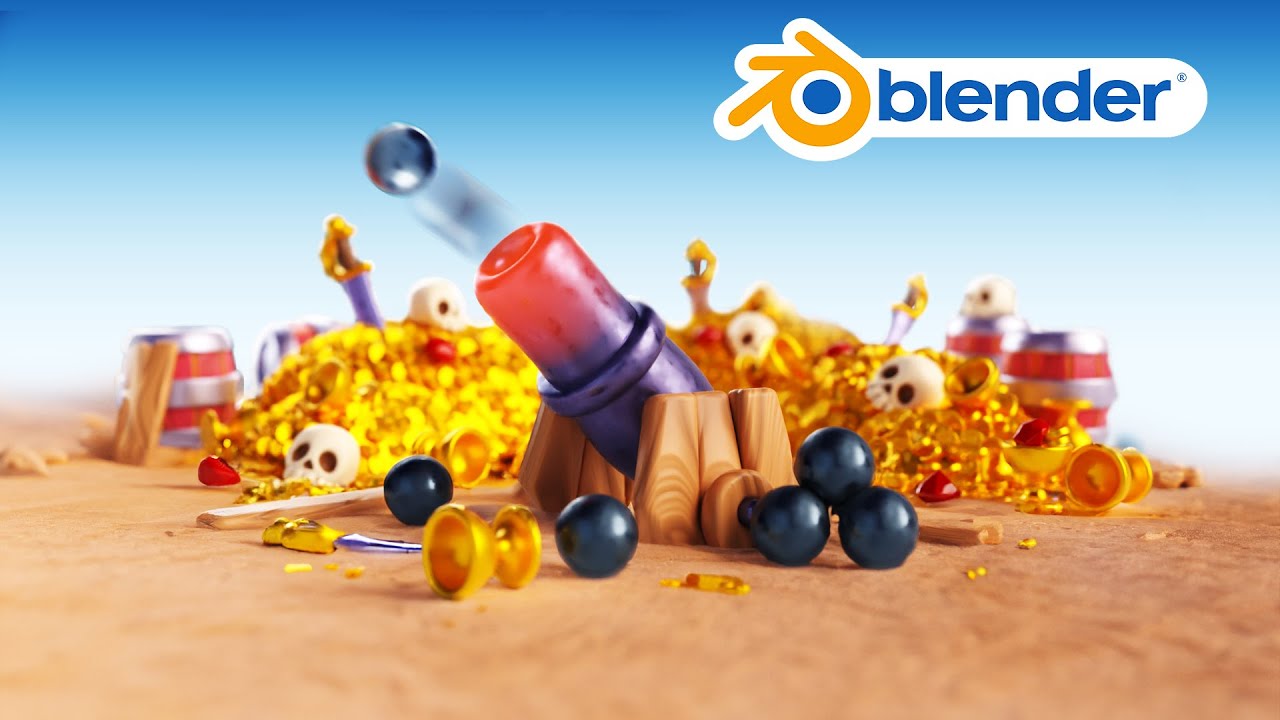
But getting started in Blender can be a bit overwhelming. The UI is not as simple as some other tools. So in this tutorial, Elijah Sheffield, an artist who uses Blender in his professional work, will help you jump in and show you how to model, light, texture and render a fun, simple 3D pirate cannon - all in UNDER 20 MINUTES!


Download the free corresponding Blender file
First things first...download the corresponding project file to follow along. 👆🏻👆🏻👆🏻
We encourage you to watch the video above, but here are some of the highlights:
For this Blender tutorial we teamed up with Elijah Sheffield, also known online as Sweet Boy Motion. Elijah is a seasoned motion designer/illustrator (with a unique hobby in antique stamps....rad 📬) and brings a wealth of knowledge and excitement to this Blender tutorial.

Modeling the Cannon & Adding Details
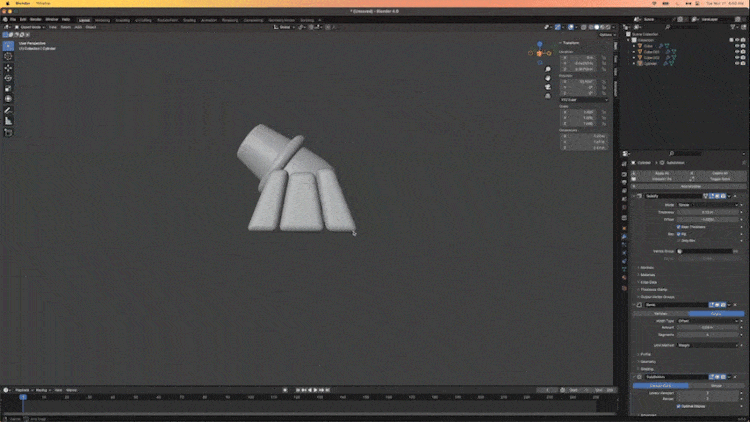
This Blender tutorial kicks off with the box modeling technique, using a cylinder as our starting point. This section of the tutorial emphasizes modifiers like Solidify, Bevel, and Subdivision Surface to refine our cannon's appearance. We'll further enhance it by adding detailed edge loops and bevels, ensuring every aspect is tailored to perfection. The base of the cannon receives a similar level of attention, using techniques like UV sphere scaling and smooth shading for a polished look.

Non-Destructive Modeling
A key aspect of this Blender tutorial is learning about non-destructive modeling with modifiers. While we'll focus on the mirror modifier in this session, we encourage you to explore Blender's diverse range of modifiers to enhance your 3D modeling toolkit.
Preferences & Setting Up the Camera/Lighting
Now it's time to set the stage. We start with optimizing our Blender preferences and settings for a smooth workflow. Following that, you'll be guided through setting up the camera and lighting, using a three-point lighting setup to highlight the model effectively.
With the lighting setup, the next step is to create custom shaders for our cannon model. Experiment with base colors, metallic textures, and sheen effects to achieve a realistic look. Adjusting the color ramp and fine-tuning the material output will bring our cannon to life, giving it a distinct, polished appearance.

By the end of this Blender tutorial, you'll have not only created an animated 3D render of a charming cannon but also tackled a range of Blender techniques. These skills are versatile, opening doors to endless animation possibilities. 🚀
Want to Master the 3D skills that will take your career to the next level?
Learn Cinema 4D from the ground up in Cinema 4D Basecamp, our introductory C4D course led by Maxon Certified Trainer, EJ Hassenfratz. Unlock your creative potential as you master the essentials of 3D modeling, lighting, and animation—key skills for 3D motion design. Gain command over the basic principles that will set the stage for your future in advanced animation.