


Just how well do you know the top menus in Adobe Premiere Pro?
When was the last time you took a tour of Premiere Pro’s top menu? I would bet that whenever you jump into Premiere you’re pretty comfortable in the way you work.

Chris Salters here from Better Editor. You might think you know a lot about Adobe's editing app, but I'll bet there are some hidden gems staring you in the face. Now we’re getting into some good editing timesavers under the Clip menu.
The Clip menu doesn’t get the credit it deserves. Under its humble four-letter roof is the power to:
- Replace clips without using a three point edit
- Enable and disable clips
- Automatically synchronize clips
- And—taking a cue from After Effects—nesting sequences like precomps
Replace With Clip in Adobe Premiere Pro

One of my favorite tricks, this gem of a tool can greatly speed up your workflow when mapped to a hotkey. With a clip (or clips) selected in the timeline, and a new clip in the Source Monitor, clicking Replace With Clip will replace the selected timeline clip(s) with what is in the Source Monitor. It uses the IN point set in the Source Monitor or the head of the clip for the IN point in the sequence. What makes this feature so great is you can essentially perform a three-point edit in Premiere by using only a single hotkey. Here’s an in-depth look at Replace With Clip, with examples.
Enable in Adobe Premiere Pro

Another favorite (I have a lot), but I personally think it’s named backwards. Enable allows you to quickly disable a clip in a timeline—that’s why I think it should be called Disable, but what can you do? Anyway this is very handy when trying multiple clips or graphics out in the same spot on an edit. Rather than constantly cutting and recutting clips into the same spot in a sequence, the clips can be stacked and turned on and off by hitting Enable. Enable works best when mapped to a hotkey.

Enable is also useful when working with reference footage in an edit. Keeping the reference footage on a higher video layer, use it when needed and disable when ready to export.
Synchronize in Adobe Premiere Pro
A powerful feature within Adobe Premiere, Synchronize can line up clips in a timeline based on
- Clip Start
- Clip End
- Timecode
- Clip Markers
- Audio Channels
Syncing via audio channels is particularly impressive because it can line up multiple audio and video clips automatically based on their waveforms. Think different camera angles with an external audio source. Things are just better when they're...N'Sync.

To make Synchronize work with audio, roughly align the relevant clips in the timeline on different layers, then click Clip > Synchronize, selecting the audio option. A few seconds later Premiere will have done its magic.
Nesting in Adobe Premiere Pro
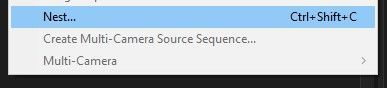
Premiere’s Nest function is akin to using precomps in After Effects. Have a group of stacked clips with effects taking up too much space on the timeline? Nest them. Need to Warp Stabilize a clip and also speed it up or slow it down? You’ll need to Nest it. The possibilities that nested sequences provide are endless, but a word of caution—use a good naming convention when making them so you can keep track of where nests are used.
The logic behind nesting to me is honestly so similar to precomping that it’s even mapped on my keyboard to the same hotkeys as precompose in After Effects: shift+ctrl+C (PC) or shift+cmd+C (Mac).
We’ll close out the Clip menu with that, but there’s more menu items to come! If you want to see more tips and tricks like these or want to become a smarter, faster, better editor, then be sure to follow the Better Editor blog and YouTube channel.
What can you do with these new editing skills?
If you're eager to take your newfound powers on the road, might we suggest using them to polish up your demo reel? The Demo Reel is one of the most important—and often frustrating—parts of a motion designer's career. We believe this so much we actually put together an entire course about it: Demo Reel Dash!
With Demo Reel Dash, you’ll learn how to make and market your own brand of magic by spotlighting your best work. By the end of the course you’ll have a brand new demo reel, and a campaign custom-built to showcase yourself to an audience aligned to your career goals.

Dive into real-time 3D with our Unreal Engine beginner's course by Jonathan Winbush. Master importing assets, world-building, animation, and cinematic sequences to create stunning 3D renders in no time! Perfect for motion designers ready to level up.
Explore this Course ➔
Unlock the secrets of character design in this dynamic course! Explore shape language, anatomy rules, and motifs to craft animation-ready characters. Gain drawing tips, hacks, and Procreate mastery (or any drawing app). Ideal for artists seeking to elevate their craft.
Explore this Course ➔
Elevate your freelance motion design career with our guide to client success. Master a repeatable method for finding, contacting, and landing clients. Learn to identify prospects, nurture leads, and develop a thriving freelance philosophy amidst chaos.
Explore this Course ➔
Rev up your editing skills with After Effects! Learn to use it for everyday needs and craft dynamic templates (Mogrts) for smarter teamwork. You'll master creating animated graphics, removing unwanted elements, tracking graphics, and making customizable templates.
Explore this Course ➔
Stand out with Demo Reel Dash! Learn to spotlight your best work and market your unique brand of magic. By the end, you'll have a brand new demo reel and a custom campaign to showcase yourself to an audience aligned with your career goals.
Explore this Course ➔
Illuminate your 3D skills with Lights, Camera, Render! Dive deep into advanced Cinema 4D techniques with David Ariew. Master core cinematography skills, gain valuable assets, and learn tools and best practices to create stunning work that wows clients.
Explore this Course ➔
Master After Effects at your own pace with Jake Bartlett's beginner course. Perfect for video editors, you'll learn to create stylish animated graphics, remove unwanted elements, and track graphics into shots. By the end, you'll be equipped for everyday AE needs and more.
Explore this Course ➔Revolutionize your Premiere workflow with customizable AE templates! Master creating dynamic Motion Graphics Templates (Mogrts) in After Effects to speed up your team's work. By the end, you'll craft easily-customizable templates for seamless use in Premiere Pro.
Explore this Course ➔

Not sure where to start?
If you’re a beginner, here are some great courses to help you get started:

After Effects Kickstart
Dive into the fundamentals of motion design with our most popular (and recently updated) After Effects course.

Photoshop + Illustrator Unleashed
Master the basics of Photoshop and Illustrator and gain invaluable insights in this introductory level course.

Design Kickstart
An introduction to the design principles behind all great work.
More Advanced?
If you’re a more advanced student looking to up your game, here are some great options:

Animation Bootcamp
Learn the art and principles of creating beautiful movements in Adobe After Effects.

Design Bootcamp
Learn to design for motion in this intermediate-level, project-based course.
Cinema 4D Basecamp
Learn Cinema 4D from the ground up in this exciting introductory C4D course.
Now is the time to learn the skills you need to advance in your motion design career:


