Start Your 3D Journey in Cinema 4D
Master the essentials of 3D modeling, lighting, and animation in C4D. Enroll in All-Access to unlock C4D Basecamp and 50+ other courses.

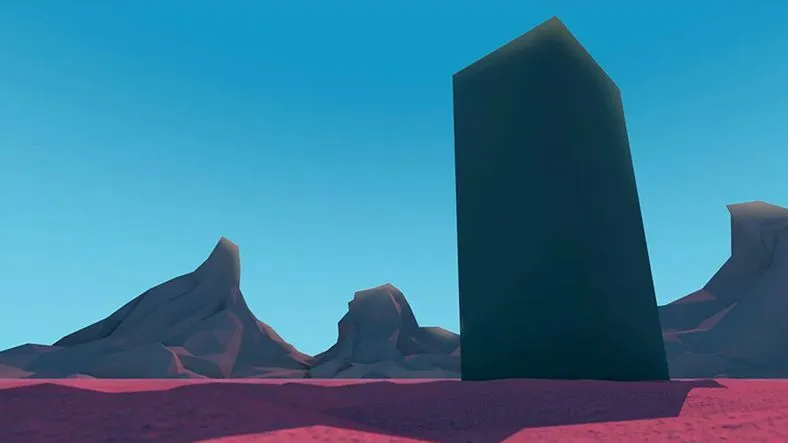
Here's how to create an environment in Cinema 4D.
In Part 1 we came up with an idea and roughed it out. In Part 2 we edited an animatic and got more specific with our structure. Now, we have to get to the business of modeling, texturing, lighting, and you know… making this piece look nice.This video deals with the creation of the desert environment in Cinema 4D. We’ll talk about color choice, layout, modeling, texturing, and lighting…plus we’ll hit on the role Compositing will end up playing in the end so you can get a sense of how all these pieces will fit together.
{{lead-magnet}}
-----------------------------------------------------------------------------------------------------------------------------------
Tutorial Full Transcript Below 👇:
Music (00:02):
[intro music]
Joey Korenman (00:11):
Well, we've got a story and an animatic. It's like the skeleton of our short film. And now we have to start getting specific. Like what the heck is this thing going to look like? So there's really three big pieces to the puzzle, the plant slash vines thing, the building and the environment, the desert, let's start with the environment since we'll need that anyway, to get some lighting and reflections to, you know, kind of show up on our two main actors, the plant in the building. So let's just do it. Let's hop into cinema 40. I've already made a copy of the first shots scene. And you know, here it is. And one of the great things about working this way is that we've already figured out where the camera's going to be and how far away all this stuff is from the camera. And so a lot of the decisions about how much detail we need to add and all that kind of stuff have already been made.
Joey Korenman (01:08):
And that's really important because, you know, for example, if we were going to be flying over the tops of these mountains and flying through them, we'd need them to be a lot more detailed and probably a lot more, I guess, specific in terms of their shape. All right. So let's start by dealing with the ground now, you know, I want that low poly look for the ground. I want like some lumps and I want it to feel faceted. And I'm just going to open up a new project here. The basics of the low poly look right, are, um, you know, you've got, you've got to shape, which on the surface, you know, you can see all these little polygons, right? You can see them on. Let me, let me actually go ahead and just bring the segments down. Um, when I render this, it's still looks perfect right now.
Joey Korenman (01:53):
We've actually got a render perfect setting on the sphere. So let's turn that off. But even with render perfect turned off, it still looks smooth. Right? Well, I mean, basically what you do is you delete this font tag, just kill it, right? And now there's no more smoothing. You get that nice, low poly look you're done, right? And the rest is just lighting, compositing, texturing, modeling, you know, all the easy stuff. So what I'm gonna do is create a, I need to basically lump refy this a little bit and make it, make it feel a little less. Even now here's the problem. Here's the ground. And let me, let me go into my isometric views here for a second. If we look at this ground, it's enormous, right? This scene is very big. You know, I have to zoom away way, way, way, way in here.
Joey Korenman (02:39):
If I want to look at the building, for example, right? The building is like way here and it's like, it's tiny compared to everything else, you know, you've got, um, like here's the building and then you got to go way out and here's the mountains and here's the ground. So, um, the problem is if I want this ground to get a little lumpy and say, I want to take a, you know, the way I would typically do that is just take a displacer deformer let me go ahead and delete this Fong tag that's on there. And in the displacer deformer, I'm going to go to shading and just add some noise. All right. And what that's going to do, let me, I'm going to do this quite a bit. I have a feeling is jumping to, uh, a fresh cinema project so I can, um, I can demonstrate stuff a little bit easier before we go back to the big project.
Joey Korenman (03:27):
What you're doing is you're putting the displacer on a plane, right? This is what our floor is going to made out of. And we'll put some noise on there and boom, it's going to displace, you know, the, that, that plane. And if I turn off the falling tag, you get this nice, interesting, kind of low poly ground, and you can then adjust the settings on the displacer and you can go into the shading tab and you can change the, you know, the scale, you know, make it bigger. Uh, I can make it a lot bigger. So you can get kind of more like a little bit more of a uniform, kind of a, you know, kind of, not every polygons facing a different direction. So the problem is this plane is very small, so it's easy to see what's going on here. This plane is frigging huge.
Joey Korenman (04:12):
So if I turn the displacer on, even if I crank it, it's like everything's too big, right? There's just not enough detail to it. And I would have to crank this setting up probably as high as it will go. It won't even go above a thousand. So if I go a thousand by a thousand, I'm still not getting the detail I want. And now this scene is going to start to chug, right? So this, this isn't working, okay. Having this giant ground that covers everything, just isn't the right approach. So what I'm going to have to do is kind of on a shot by shot basis. Figure out how big this ground needs to be. So let me, uh, let me just turn the displacer off for a second and let's take the ground here and what I'm going to do. Let's go to the ending here.
Joey Korenman (04:58):
Okay. And let's just scale this sucker down. Let me turn the width segments down to like 200 in the Heights. 200. Okay. So we're not, we're not killing cinema 4d here. So look like on this last shot, this little sliver is all I need like to cover all of the ground. That's in the frame. All I need is that now at the beginning here probably need a little bit more. Right. But even then, because I've got such a wide angle here, I mean, that floor goes almost all the way to the horizon so I can make it a little bit longer just to kind of be safe, but, you know, I mean, make this view bigger. You can see it even just that seemingly little floor that we just created that will actually cover the frame. Let me just do a quick render and make sure that there's not like a gap between the floor up and it's not rendering because I'm still in the software render mode.
Joey Korenman (05:51):
Let me go to standard here. Um, and actually what I want to do, let me switch this to hardware. Cause that's what we ended up using. Uh, for this play blast setting. We changed it after we did the first shot and we change it so we could see the shadows on it. I'm going to make a new setting or actually I'm just going to rename this one and we're just going to call this, uh, let's say basic crappy render. Okay. And for basic crappy, I'm just going to have the standard renderer anti-aliasing sets of geometry, just so I can do some quick little renders. Okay. So now you're seeing there is a gap there. All right. So I do, I either need to make the ground longer. So it reaches closer to the horizon or I can just cheat. I can just take the mountains and just nudge them down a tiny bit, you know, and right about there, it looks like they should intersect with the horizon.
Joey Korenman (06:40):
Cool. Visually it looks fine and that's really all we need. So now that I've got the ground laid out, um, and I have my display set to grudge shading lines, and I think what I'm going to do is I'm going to go to my, a filter and I want to turn off the grid so that I'm not getting confused by the world grid. I can just look at the floor right. There we go. So we now have enough floor to cover up our whole scene. And I can then just go ahead and up these segments to get more resolution. So let's try 400, 400. All right. And I think I need to up the width a little bit more. So they're roughly square shaped. Cool. And now I can turn the displacer on and I've got that thing cranked. So let's turn that. Let's turn that down pretty low.
Joey Korenman (07:27):
Let's try. Let's try like five. No, not 1 65, 5. There we go. All right. And let's just do a quick render. Cool. So you can see you're getting like some nice variation and we'll put a little texture on that and make a little nicer. And then when we get over here, all right. So now we've got a problem. So that displacer is actually, uh, going to be hitting it. It's going to be covering up the camera. Uh, unfortunately, so we can figure out there might be some setting like there, right? Like just by lowering it just a little bit. Um, I was able to get rid of that. I also could have moved the camera up a little bit. It wouldn't have been the end of the world and it's really not going to change the look of this too much if I wanted this to really have some variation, right.
Joey Korenman (08:12):
Like if I wanted this at like a six or seven, then when I might have to do is come over here and go to this ending camera and I might just have to like lift it up a little bit, which again, isn't the end of the world. And then just pan down just a tiny bit. Okay. Now it, this, with this shot here, now this is feeling a little bit lumpy. So, you know, I'm going to kind of just split the difference here. I'm going to, let's take this down to like five. There we go. All right. So now we get a little bit of variation here and it does kind of give it like a nice kind of landscape we feel, but then when we're flying over the top of it, right, you still get some nice variation, you know, but it's not going crazy right now, here we are going through the ground for a moment.
Joey Korenman (08:59):
So that's not gonna work. All right. So I may have to actually take this down a little bit. We're doing a little balancing act here. If I bring that back down to three and uh, I think that'll work. Okay. So now we don't intersect that ground anymore. All right. We still have some nice variation and we'll use, we'll use a texture to get even more variation out of it. All right. So there's that. Um, and now we need to do the mountains. So I just used these, these pyramids to kind of rough out the mountains and you know, what I want is I want them to kind of be like crackly and gnarly and, and, and have some, some interesting kind of features to them. And I want to be able to just sculpt that in a really easy way. So here's a pretty simple trick.
Joey Korenman (09:43):
Um, what you can do is you can take a sphere. All right. And I want to make sure I can see the polygons of it, and I'm going to change the type to, uh, I go to Hedron. Um, and there's other kinds you could do to an octahedron might work better, but I think an ecosystem will work and what it's going to it's cool because it's going to give it these triangles, which are going to look a little less regular than something like this. Um, which is important if you're doing something organic, like a mountain, next thing I want to do is make this sucker editable. And then I'm going to grab a, I'm going to go to points mode. I'm gonna come down here. I want to make sure that I don't have only select visible elements on, and I just want to delete the bottom half of this thing.
Joey Korenman (10:28):
There we go. And, uh, you know, these little points here, that's fine. I'm not too concerned with that. Um, and then I want to run the optimized command on it so that I can get rid of any extra points that were lingering around. And then I want to go into my, uh, access center tool and I want to push the access down to whatever the bottom is of this. Right. And it's pretty much right in the middle. So it didn't really need to do that, but it's a good habit to get into. Now, what I can do is I can go into point mode or polygon mode. It doesn't really matter. And I'm going to hit em to bring up my modeling tools. And I'm going to use the brush, which is the C key, right? If you didn't know about this, this is the quick way to get to your modeling tools, hit em, don't touch your mouse.
Joey Korenman (11:10):
If you move your mouse, it goes away and then hit whatever tool you want. And I want the brush and I'm going to turn the radius down a little bit. And what this brush lets you do is just push and pull stuff around. Okay. Um, I'm going to take the phone tag off this guy. She can imagine. And now I've got this cool little mountain starting to form. Now. Um, you can also, uh, hold the, um, you can kind of push and pull these things. And if you hold the command key, it'll actually do the opposite. So this'll pull, right. And if I hold command, it'll actually do the opposite, which on this tool, um, doesn't really make a difference. But on some of the brush tools, you can actually, you know, it's, it's actually very handy be able to hold the command key and do the opposite kind of, you know, operation on your model.
Joey Korenman (11:59):
All right. So I'm just kind of basically roughing this thing out. I want to make sure I don't have any weird little like holes in it, you know, so if something looks weird, I'm just going to kind of just tweak it. Um, you know, like this edge here is getting a little weird. I don't want to pull this guy out, pulled this point out a little bit. Um, and I may end up subdividing this thing again and getting a little bit more detail out of it, but you know, something like that for about like, you know, 30 seconds of noodling, it's kind of an interesting looking rock formation. This looks weird. I don't like this. So what I'm gonna do, I'm gonna manually, um, I'm gonna, I'm going to grab my knife tool and I'm just gonna connect those two points and cutting edge. So I'm just giving myself an extra ed, an extra point there, which will let me smooth this out.
Joey Korenman (12:43):
And, and you can do this. Um, you know, you can do this all along the way. Like any point you want, you can also open up, um, edge cut. And if you go into edge mode and I just want this edge here, if I wanted to cut that edge, M and then AF for edge cut, and I can, I can just click and drag and it will actually cut that edge. And since I clicked and dragged, it gave me two points when really all I wanted was one. So let me just do M and F one more time and click it and actually let me undo that and set this to one. There we go. One subdivision, there we go. See, there's so many settings, right? And now I've got this extra point that I can move around. And, um, and it, because I ha I don't have a fond tag on there.
Joey Korenman (13:33):
Um, I shouldn't get any kind of weird, like, oh, they're still getting a little weird shading there, but it's kind of interesting. It goes with the low poly thing, but you can get a little extra control that way too. Um, you can actually break your geometry, which is what I did. That's why there's this weird piece here. So let me undo that and do this like a better way. Modeling is not my strong suit, which again is one of the reasons I decided to do a low poly piece. Um, let's see. Let me just grab my, uh, let me just go like this. I'm gonna select this. I'm gonna select this polygon. I'm using my knife tool and I'm just gonna cut right there and then I'm gonna cut right there. There we go. All right, cut. There we go. So now I've actually done this the right way. So now I can use my brush tool and, uh, I want to not select anything and then I can pull this up and I can fix any little holes or weird things that happen. That's kind of how you can fix it. You just need to add an extra intersection. Right? All right. So let's say we're happy with this. We think this is cool and I'm not actually happy with it, but I think it's going to be a good enough start. I'm going to rename this mountain.
Joey Korenman (14:43):
So I'm going to copy it, hop back into scene one and paste it in there. And then I'm just going to parent it under one of these pyramids. All right. And what I want to do is I'm going now since it's parented and just zero out the position set all the scales to one and all the rotations to zero. All right. So now it's in about the same, it's in exactly the same spot as this pyramid. And then I just need to scale it way, way, way up, because that pyramid is huge and you can see here, it's getting bigger and bigger and bigger and bigger. And there we go. Okay. Um, and so now that it's about the same size visually, um, you know, I can, I can rotate this thing, right. This thing is pretty long. Um, and so I could actually like scale it back a little bit and try and get it a little bit closer in size to that pyramid that was there.
Joey Korenman (15:33):
Um, I'm actually transforming the pyramid and not the mountain. I want to transform the mountain. There we go. All right. And I'm basically just trying to match roughly, um, what's, what's going on with the pyramid, right. Um, and now I've got this thing rotated kind of funny. So let me fix that to let me unparented from the, from the pyramid for a second. And then I can just, I can just UN rotate it like this, and now it'll be oriented correctly again. And let me turn off pyramid to now. All right. And so here's my mountain now. Okay. And it's pretty much in the same spot as the, the initial period pyramid was. And let me turn off the plant too. So it's not in the way, and what's cool is that now I can actually, like, while I'm here, grab my brush tool. And if, for example, I'm going to have to turn the radius way up now.
Joey Korenman (16:23):
Cause it's a much bigger mountain, but if I wanted to, I could grab these points and change them even from really far away. So if I want this thing to be pointed a little bit more deliberately at that, you know, at the top of this building here, and then I want like a little bit more of a crease here, and then I want this to actually come out a little bit further, like this. It's really easy to do that and see it in context. Right. And if we just do a quick render, there you go, nice low poly mountain. That's not a ton of detail to that mountain. I actually, I think I'd like more, so I'm just going to select it. Um, and I'm going to go up to mesh and I'm going to use a subdivide command and it will literally just add more geometry to it.
Joey Korenman (17:11):
Um, I want to have a little more randomness to this too. So I'm going to add a displacer to this mountain and, uh, we'll turn the shading to noise and we will set the height. There you go. You got to crank it. Cause this is a gigantic, um, you know, mountain now it's enormous piece of geometry. It's very far away, which is why, um, you know, it looks small on screen, obviously. So the height for the displacer is huge. But now that I added that, now I've got all this little faceting looks really nice. Um, and even with that, displacer on there. I can, let me turn this thing way up. Here we go. I can still go in and add a little bit more variation to this if I want to. Right. And kind of really shape this shape, this mountain, exactly the way I want.
Joey Korenman (18:02):
All right. And, uh, I'm digging that. I'm digging that. Cool. Next I got two more mountains. So I'm just gonna copy this one, parent it under here, right. Zero out the coordinates. So it's in the same spot. Um, and then I'm going to unparented, I'm gonna move it down. So, and I'm going to rotate this one on the heading. So it's facing a totally different direction and you know, I'm going to, I'm going to come in here and I'm gonna cheat it back a little bit further. So there's going to be a little bit more parallax to it in the end. Um, I kind of want it to feel like it's behind this mountain a little bit. Um, so I'm just gonna, I'm gonna push it back here and just trying to line it up visually with this pyramid, which I can now turn off.
Joey Korenman (18:48):
Right. Okay, cool. So now this one is feeling a little bit pointy to me. Um, so let me turn the display off and see if that's doing it now. That's not the problem. The problem is a, I need to, you know, I can play around with, um, spinning it to see if like a different angle is gonna work better. Right. Um, and I like, I dunno, that's kind of a neat angle, but it's still very pointy. So I'm, I'm going to need to just do a little bit of modeling here. So let me go into point mode and I've got my brush and I'm just going to pull this one kind of along the edges like this. And I don't want it to be like a pyramid. I really don't want it to look that way. I want it to look like, um, you know, kind of like a mountain range, kind of irregular with some interesting like nooks and crannies and stuff.
Joey Korenman (19:33):
And like maybe the top of this mountain is more flat, you know, like kind of like this, right. So let's just do a quick render and, and see what this is looking like. Okay. All right. We're seeing some weird stuff off in the distance there. So let me actually, let me actually go and take a peak close up at this thing. I need a flatness a little bit. Right? Let me grab this. Here we go. Um, so I actually just, I, I went out into my editor camera so I could come in and, and see the good thing is these are so far away from the camera that, you know, as long as they look right, that's all that matters. We're not going to ever get close enough where you're going to see like a lot of, you know, a lot of the issues that we're creating by modeling it this way.
Joey Korenman (20:14):
This is gonna work just fine. All right. So I flattened the top of that one and I've gotten a nice, you know, there's like a lot of nice little nooks and crannies on that. Let me move this mouse out of the way. There we go. All right. It's getting a little wonky in there. So I'm gonna try to stretch that out a little bit more and kind of push things down and I may need a pop back to that editor and just come over here and make sure there's nothing like really, really bad happening, like really, truly awful. Um, and I could maybe even like blend in this part a little here where these two things are intersecting. It's going to look all funky in the editor, but when you render it, because there's no Fong tag, it's just going to look like one piece of geometry.
Joey Korenman (20:53):
See that, there we go. Cool. All right. So let's hop back to our camera. Uh, and then we've just got this one more mountain over here. So let me go ahead. And these are our, these are our pyramids that are off. I can just, let me, let me actually start cleaning this up. I'm going to group these and call these off. And, uh, and then I'm going to, uh, copy this mountain under this pyramid and I'm going to zero out the position. And, uh, now this mountain is actually closer and since it's closer, if I want it visually to maintain the same scale, I'm going to have to shrink it. So let me just grab a scale tool, scale it down like this until visually is about same size. Um, you know, I could also push it back a little bit, but I think that's a pretty good spot for it.
Joey Korenman (21:44):
Um, all right, remove it. Turn this pyramid off, stick it in the off group. All right. And then we can just sculpt this thing, right? So this I'm going to start by just rotating it, just to try and find like an interesting angle. That's kinda cool. And then I'm gonna lower it. So it's in the ground. There we go. Uh, and then I'm going to grab my handy-dandy brush tool and I'm just going to come in here and I want this to, you know, like essentially these mountains are there to point your eye up in this direction. So that's my main concern is just making sure that they're doing that, that the contour of that mountain, let me zoom out and come over to this one. Right. I want the contour of this mountain to really just be pointing up in this direction. So I'm seeing some like weird stuff over here.
Joey Korenman (22:34):
Um, and I'm going to, uh, let me actually, let me kind of look at the building for a minute, so I can come down here with my editor camera and kind of get an idea of what's going on here. I think maybe what I need to do, uh, basically the, here's the, here's the issue I'm having. I'm trying to, I'm trying to manipulate this side of the mountain, but I can't actually see it. So what I could just do is just temporarily scale this thing down on X so I can see it right. And then I can like play with this stuff and push it. And I kinda like, you know, having a little bit of a gradual kind of fall off like that. Thanks. Scale it back up. Now it's out of the frame again, and this needs to have a little more variation to it, and I want this to really kind of be pointing and almost arching inward like that.
Joey Korenman (23:22):
Um, and then let's, let's take a look. Let's just do a quick render. Cool. All right. So we've now added a whole bunch of visual detail to this. It looks really nice. So now let's start adding some textures and colors and start to, you know, figure out how this thing's actually going to look. So what I need to do is first, you know, pick some colors. All right. So I want to bring in one of those cool reference images I found on Pinterest. Uh, so I'm just going go. I have it right here. Look at that. It's almost like I knew I was going to need it and I'm going to bring it down and just drag it right onto cinema 4d. So it's now in a picture view and I can just bring it over here. Um, cool. All right. So now I remember seeing this and thinking, you know, these are colors.
Joey Korenman (24:00):
I would not have thought of to use their V they're. Cool. They're really beautiful. Um, and so it might be cool to, to pull like some kind of this reddish purple color or something like that. So I'm gonna make a new material. Um, and you know, one of the things that has annoyed me is the way that, uh, this new Mac color picker doesn't really work in cinema the way I wish it would. Um, so what I'm going to do is just kind of eyeball this. Uh, so I, I need a reddish color, right. With a little blue to it. Um, so that's going to be this side of the color wheel. Um, and you know, for the color, I want it to be fairly saturated. I'm not going to look too much at like the specularity you're seeing on this photo and the shadows stuff like that.
Joey Korenman (24:42):
I'm looking for kind of the base color. I think it might be even a little more blue than that. Okay. So this is now our color, and I'm just going to drag this onto the mountains and I was the ground. Then I want the sky. So let me rename this and let's rename this ground and I'm going to want a sky. So let's add a sky object, just your standard sky, and let's make a sky texture. And for this, we're going to keep it simple. We're just going to use a gradient. So let's, uh, in the color channel, add a gradient pop in here, this gradient, it needs to go vertically the way, you know, the sky is darker at the top and it is at the bottom. So let me pop that on there. And let's go to the gradient and what I want, you know, I like this color.
Joey Korenman (25:24):
I like that blue color. So I'm going to try and try and get as close to that as I can. Um, you know, so it's like somewhere in this blue zone, somewhere in there, um, maybe a little less, little less green to it. Yeah. There you go. Right. That's pretty close. Um, and that, you know, that feels pretty dark. So that could be the dark color. All right. So the dark color is going to be on one side and the light color is going to be on the other. So let's now pick a light color. Okay. And one of the things that you got to realize is a sky is actually a giant circle, like a sphere. It goes all the way around your scene. So this horizon line here is actually right in the middle of this gradient. All right. So I need the, I need it to start in the middle and now you can see kind of fades up into this nice dark color and look at that.
Joey Korenman (26:15):
This is actually looking pretty, pretty nice. Okay. Um, now there's a ton of specularity happening here. That's why you're getting all these kind of like white blown out, glowy looking things. Um, and so we need to come up with kind of a better texture for the ground. And on top of that, in order to really know what a texture is gonna look like, I can close this now, in order to know what a texture is going to look like, you need lights, you really do. So let me get rid of this light. Cause that was kind of our temporary light. We don't need that anymore. What we need now is, um, is a sunlight. Okay. And I, you know, eventually I'm gonna want that sun to be casting a shadow, hopefully that we can see visibly here. So what I'm going to do is I am going to grab, um, I've got actually got a better idea.
Joey Korenman (27:01):
Why don't I open up scene two, which has the light, right? It has this light already on it. So let me just copy that light. I don't need this anymore. I'm going to paste it in here. I need to reset this target tag. The target tag is going to lose its target object when I copy and paste it. So I'll set it to the building again. Um, and, and there's key frames on it, which I don't need, so I can get rid of those light key frames for now. And I'm gonna want that to be, uh, probably a little higher in the sky. Right. And it's casting shadows. And just out of curiosity, let's see what that looks like. Okay. So that's cool. It's like making these nice, um, you know, kind of silhouettes of the mountain ranges. It's really kind of nice it's way too dark, obviously.
Joey Korenman (27:47):
So don't worry about that. We'll deal with that in a moment. Um, but you know, I, I want to see the shadow and I'm not seeing it. And, uh, I'm not quite sure that we're going to be able to accurately see it. So what I'm going to do is I'm going to just get out of this camera for a minute and I'm going to come up here over the top. All right. So here's where the camera is down by the plant. So I want to look here and I want to see, I don't think we're really going to be able to, um, to see this very well, but let's try it. Uh, what I want to do is turn on shadows in my options. Can I see it? If you remember, the issue we had was that when you have a ton of geometry in the scene, you don't get very good look at your shadows.
Joey Korenman (28:31):
Right. Um, and the, the, the issue is, let me just do a quick render. The issue is that, remember in shot two, we actually had to cheat where the plant was to make the shot look, prettier, the plants over here and this shot, but in shot two, it's actually more over here. So I need to shift where the sun is. Um, and so, you know, one way I could do it is just kind of, um, actually, actually I just came up with a better way. This is the beauty of doing this type of quote, tutorial. Um, you know, it's a little less planned and you get a little bit more of a realistic idea of how these things tend to work in the real world, what I want to do. So the plant is turned off, let me turn it back on. And I'm a crank that up just so I could see where it is.
Joey Korenman (29:15):
And then what I'm gonna to do is open up the interactive render region and move it over there. Okay. Now I could pretty quickly move this light so that I'm casting the shadow pretty much pointed right at that thing. All right. And then I can come down to, uh, to the main camera and I can see what that's gonna look like. Cool. Okay. So that is casting a nice shadow right on that scene. All right. And now I can just scale that plant back down to the size that it kind of was, it was like kind of there, right? And you can see, uh, you could see the shadow. Now. I want to now take that shadow and cheated over a little more even right. I'm moving it the wrong way. I want it to move back the other way. So it looks longer. There you go.
Joey Korenman (30:12):
And then as the sun gets lower in the sky that shadow's going to creep forward and actually end up, let me turn off interactive render region. Now it's going to end up actually coming all the way across and hitting that plant, which is awesome. Okay. And the density of that shadow is pretty low right now. So I'm going to up that because that'll give me a better idea of, of how it's going to look. That's pretty cool. I know we're going to need some kind of fill light or a backlight to make that plant more visible. Eventually. We're not gonna worry about that yet. All right. So let's turn the plant back off now. How do we deal with how dark everything else is? Well, in the real world, even if there was only one light source, the sun in this scene light is bouncing off of every single object in the scene.
Joey Korenman (30:54):
Okay. So that in 3d terms is called [inaudible] global illumination. Okay. That means global, the light bounces off of everything. Uh, and it's gonna make our render times much, much higher, but you're instantly going to see more detail. What's awesome too, is that we're actually getting some bounce from the sky. The sky is blue. It's giving these shadows this beautiful purple bluish tint. Okay. Which I love, which I really like. Um, now it is getting a little bit flat over here for my taste. Um, and so what I probably need to do is actually put kind of a fill light over here. Um, so I'm just gonna put just a normal point light. I'm going to call this light a fill and I'm going to move it so that it is basically like, kind of up in the air, off to the side of these mountains.
Joey Korenman (31:51):
And then I can just dial it back, you know, quite a bit, let's make it just like 20% or something. And when we render with global lumination, that light is going to add a little bit more variation to these mountains. Okay. Um, a good way we could check this is to just make sure that we're not rendering every single frame. We're just rendering the current frame. Um, and for my basic crappy render, I'm actually gonna lock the ratio and set this down to half HD. So it will render really quickly. Okay. So here is that render with that fill light. And then if I turn it off and do another render, we can compare and we can all learn something today. Right. And it, it might be a subtle little difference, but, you know, yeah. So here's without and here's with, and you can really tell right there having it, it just a little bit of that detail back to these mountains, which is cool.
Joey Korenman (32:42):
Now they should be dark because the sun's back here, it should be a silhouette. Okay. Um, cool. So the way the environment is looking, and you have to imagine that there's, you know, there's like some nice compositing and these mountains are far away, so they're kind of hazy. Um, it's going to look a lot better. Another thing I want to do, and I want to look at this now is I want to, I want to add a little grit to this. I don't just want a flat color. Um, I want a little bit of, you know, I want it to feel a little dirty. So what I'm going to do is start by, um, just adding a bump channel and I'm going to add noise to it, and I'm going to go into the noise and I'm going to change the default noise type to something like this. [inaudible]
Joey Korenman (33:21):
kind of a dirty, noisy feeling texture. Um, and, uh, and so then if I just hit render, all right. And, uh, with global lumination or renders are going to take a little bit longer. So I'm actually going to start doing renders here. This will make it a little bit easier to, uh, to compare and contrast to, um, another thing we should do is actually turn our global lumination settings to where it, the caches autoload, um, and that will make our global illumination, um, renders happen a lot faster. Okay, cool. So look here, this looks terrible, right? It just, and basically what's happening is our noise is set to texture space and the texture space is, you know, it's basically texture mapped around the entire object. So that noise is mapped around these mountains, which are relatively small compared to the ground, which is huge right in the frame.
Joey Korenman (34:14):
So what I want to do is instead of texture space, I'm just going to be world space, and I'm gonna turn the global scale down to like 25%. And I want to get a lot more fine detail here, even that's not, not even close. So this maybe needs to be like 5%. I want tiny, tiny little details here. Right? Like that, that's what I want. Just find little details and you won't really make them out too much on the mountains, but that's okay. Um, and so right now, what this bump is doing, it's just simulating some bump here. It's, it's, you know, it's kind of pretending that there's little grooves and stuff in the, uh, in the sand, and it's just breaking it up a little bit. What I like to do once I have a bump, I like is copy that channel, put that same channel in the diffusion channel.
Joey Korenman (34:57):
And what diffusion does is it makes things less shiny or less reflective. Um, so what I can do is I can just paste that channel, like, so, and by default it, it hits it pretty hard. So I'm gonna turn the mix strength down to zero, and then just kind of walk it up, looking at this, right. So around like 30%, it's darkening it quite a bit. And I also want to make sure that once I turn reflectivity on or reflectance on that, I have a effect reflection, but look at that. So this is interesting, cause you've got a low poly scene with some nice texture to it. It looks, it looks cool. And with a little bit of depth of field, just right at the front of the camera here, I think this is going to look pretty nice. Okay. So, uh, let's talk about the reflectance channel.
Joey Korenman (35:42):
I want just a tiny bit of reflectance. Okay. Not a lot, but just enough so that it feels like there's a little bit of a Polish to these rocks and maybe it'll reflect, you know, the sky a little bit more interestingly. So, uh, I'm going to add, um, just, you know, kind of the default Beckman layer, and that means now I can get rid of, um, this default specular that I don't want and let's rename this Beckman. Um, and I want very little reflection, like 10% and specular. Uh, I want to bring that down as well. I don't, I don't want a ton of specular. Um, and I want to set the roughness up to like, I don't know, let's try like 5% and let's just do a quick render. And what I'm hoping this gives me is just, yeah, that's, that's a little too much reflection already, but you can see how it's reflecting the sky and in the ground.
Joey Korenman (36:31):
It is too. Um, so let's see if we turn the reflection down to like 2%, um, and then roughness up to like 10% and let's see what that gives us. So this process that I'm going through right now, I would consider look development. Um, and you know, it's, it, it can be kind of a, a long painful process. Um, but doing it this way with the picture viewer is actually a good way to do it. Now we're getting all these little, um, the specular hits here, uh, you know, when, when samples kind of hit in the wrong spot. So maybe what would work better is instead of using a Beckman layer is to use one of these old Orin Nayar layers. And these, the Orin Nayar, I don't know the technical details. It just, it kind of works better for like rougher smoother things. Um, and so what I can do is, uh, just, you know, just call that orange Nair and set the roughness up to 10, and now we'll do a render and hopefully that'll get rid of those terrible little, uh, spec highlights that we're getting down there.
Joey Korenman (37:30):
Yep. That got rid of those. Um, and, and, you know, because of this acts a little differently, I may need to up the reflection brightness on the shader now to actually be able to see any kind of blue reflection happening. Ah, there you go. See, it just kind of catches a little bit more of the sky. It's nice. Like here's before here's after, and you can see that having that reflection, it just helps catch a little more detail here. And this is before we've even turned on ambient occlusion, which is going to help catch even more detail in these shadows back here. Okay. Um, now of course, this is not always going to be what the shot looks like. So let's take a look at it when we're here. And, uh, you know, now looking at this, you could see there's another mountain over there that we need to deal with.
Joey Korenman (38:13):
Um, that one's going to be easier. What I'm going to do is just, uh, go ahead. Here is that mountain, by the way, um, I'm going to take this mountain and copy it. And I'm just going to move that mountain over here and I'm going to rotate it. So it's kind of oriented the same way. Um, and then I can turn this pyramid off and stick it in here. Right. And so now I've got another mountain over here providing like a nice little kind of balance, right. And let's just do a quick render of this frame and see what it looks like. And what I'm hoping is through combination of some lighting and some nice texturing, this shot will look good too. And we'll actually be able to see some of that variation in the ground. Um, awesome. Yes, this looks pretty much like I'd hoped it would, which is good.
Joey Korenman (39:03):
All right. And there's a lot of composite thing that can happen here too, to make this even cooler. Um, but this is, this is working okay. Like this, this is a cool scene. You composite this nicely. Um, you put a title over it, cause I'm kinda thinking maybe the titles going, going to go over this shot. I love the way the colors are and that's even before we've composited anything. Okay. So now we've got a pretty good setup for the scenery. Um, you know, one thing that I may want to do, uh, just thinking about it here is if you look at the density of these polygons, when we're pulling back, right, you kinda look at that and then look at the density when we're back here. Um, you know, when we get to this shot, these polygons are so much bigger because there's so much closer to frame or low to the ground.
Joey Korenman (39:53):
We've got a wide angle lens. I may want a little bit more visual detail to happen here now. You know what I was about to really over-complicate it. I won't, but I'll tell you what I was going to do just in case you're curious. Uh, what I was going to do was actually make this ground editable. Let me make a copy of it. Just to show you, I'll turn this one off, make this editable so that now I could select make sure that I'm only select visible elements. And I could select these polygons that are close to the camera like this, and come up to mesh command subdivide, give them a little more geometry. Right. So now back here, we've still got that same visual density, but as we get closer to where that camera's going to land, we've subdivided these and we subdivided too much, but it's going to give it a little bit more visual density there.
Joey Korenman (40:48):
Um, you know, which can just kind of add interest and, and, and that's one of the things that's, that's tricky when you're making something that's supposed to look really big. Uh, dang it. I actually really liked the way that looks, oh man. Well now I guess I'm going to have to keep it. Um, I just want to make sure that it also looks good in this weird part here where we're kind of starting to transition from the non subdivided polygons into the subdivided. Is it going to start to look really noticeably different? It may not because the lighting is sort of flat at that point and that texture that we placed over everything is going to help give it kind of a uniform scale. So it might still be okay, but we'll know in a second I have a feeling that's not going to bother me.
Joey Korenman (41:33):
So if it does, uh, when we end up rendering out the shop for real, we'll go ahead and fix that. But I am pretty happy with the texture and the lighting on the shot right now. And, uh, I think we might be able to move on to the building before we tackle the building. I want to talk about the stuff that you're not seeing yet the Polish and finishing touches that will really help sell this image when it's all done. At this point, I have a vague sense of where I want this to go visually, and it's not there yet, but rather than spend hours and hours and hours trying to nail the look in 3d. I know I can do a lot of that work in the compositing stage, which comes later. For example, this scene doesn't have much depth because there's no distance fog and I could add distance fog to my 3d scene, but then I'm kind of locked in to whatever I get in the render.
Joey Korenman (42:27):
I also want more of a backlight kind of look on the building and the mountains and a little more contrast in the ground. Uh, I might want some subtle depth of field in the foreground, not too much, because this is a very wide angle lens, but just enough to help you dry your eye back up to the building. Uh, and these colors are gonna get pushed and tweaked as well. And I'll probably add a vignette and some lens distortion. I'm showing you this because one of the things that blew my mind the first time I did something like this was just how far the image gets pushed in the composite, the raw 3d renders you work with often look nothing like the final product, and you have to get the hang of knowing when to stop yourself from going too far in 3d and instead saving some of that work for the compositing stage, where you can control stuff a lot more easily and quickly. So now in the next video, I promise we are going to tackle the building
Music (43:37):
[outro music].
ENROLL NOW!
Acidbite ➔
50% off everything

ActionVFX ➔
30% off all plans and credit packs - starts 11/26

Adobe ➔
50% off all apps and plans through 11/29

aescripts ➔
25% off everything through 12/6
Affinity ➔
50% off all products

Battleaxe ➔
30% off from 11/29-12/7
Boom Library ➔
30% off Boom One, their 48,000+ file audio library
BorisFX ➔
25% off everything, 11/25-12/1

Cavalry ➔
33% off pro subscriptions (11/29 - 12/4)

FXFactory ➔
25% off with code BLACKFRIDAY until 12/3

Goodboyninja ➔
20% off everything

Happy Editing ➔
50% off with code BLACKFRIDAY

Huion ➔
Up to 50% off affordable, high-quality pen display tablets

Insydium ➔
50% off through 12/4
JangaFX ➔
30% off an indie annual license
Kitbash 3D ➔
$200 off Cargo Pro, their entire library
Knights of the Editing Table ➔
Up to 20% off Premiere Pro Extensions
Maxon ➔
25% off Maxon One, ZBrush, & Redshift - Annual Subscriptions (11/29 - 12/8)
Mode Designs ➔
Deals on premium keyboards and accessories
Motion Array ➔
10% off the Everything plan
Motion Hatch ➔
Perfect Your Pricing Toolkit - 50% off (11/29 - 12/2)

MotionVFX ➔
30% off Design/CineStudio, and PPro Resolve packs with code: BW30

Rocket Lasso ➔
50% off all plug-ins (11/29 - 12/2)

Rokoko ➔
45% off the indie creator bundle with code: RKK_SchoolOfMotion (revenue must be under $100K a year)

Shapefest ➔
80% off a Shapefest Pro annual subscription for life (11/29 - 12/2)

The Pixel Lab ➔
30% off everything
Toolfarm ➔
Various plugins and tools on sale

True Grit Texture ➔
50-70% off (starts Wednesday, runs for about a week)

Vincent Schwenk ➔
50% discount with code RENDERSALE

Wacom ➔
Up to $120 off new tablets + deals on refurbished items


Start Your 3D Journey in Cinema 4D
Master the essentials of 3D modeling, lighting, and animation in C4D. Enroll in All-Access to unlock C4D Basecamp and 50+ other courses.