Free Unreal Engine plugin | UE 5.5-5.8
Stop building materials by hand.
Node Ninja reads your texture folders and automatically builds complete, production-ready Unreal materials: every map connected, every projection option ready. Free from School of Motion.
The old way
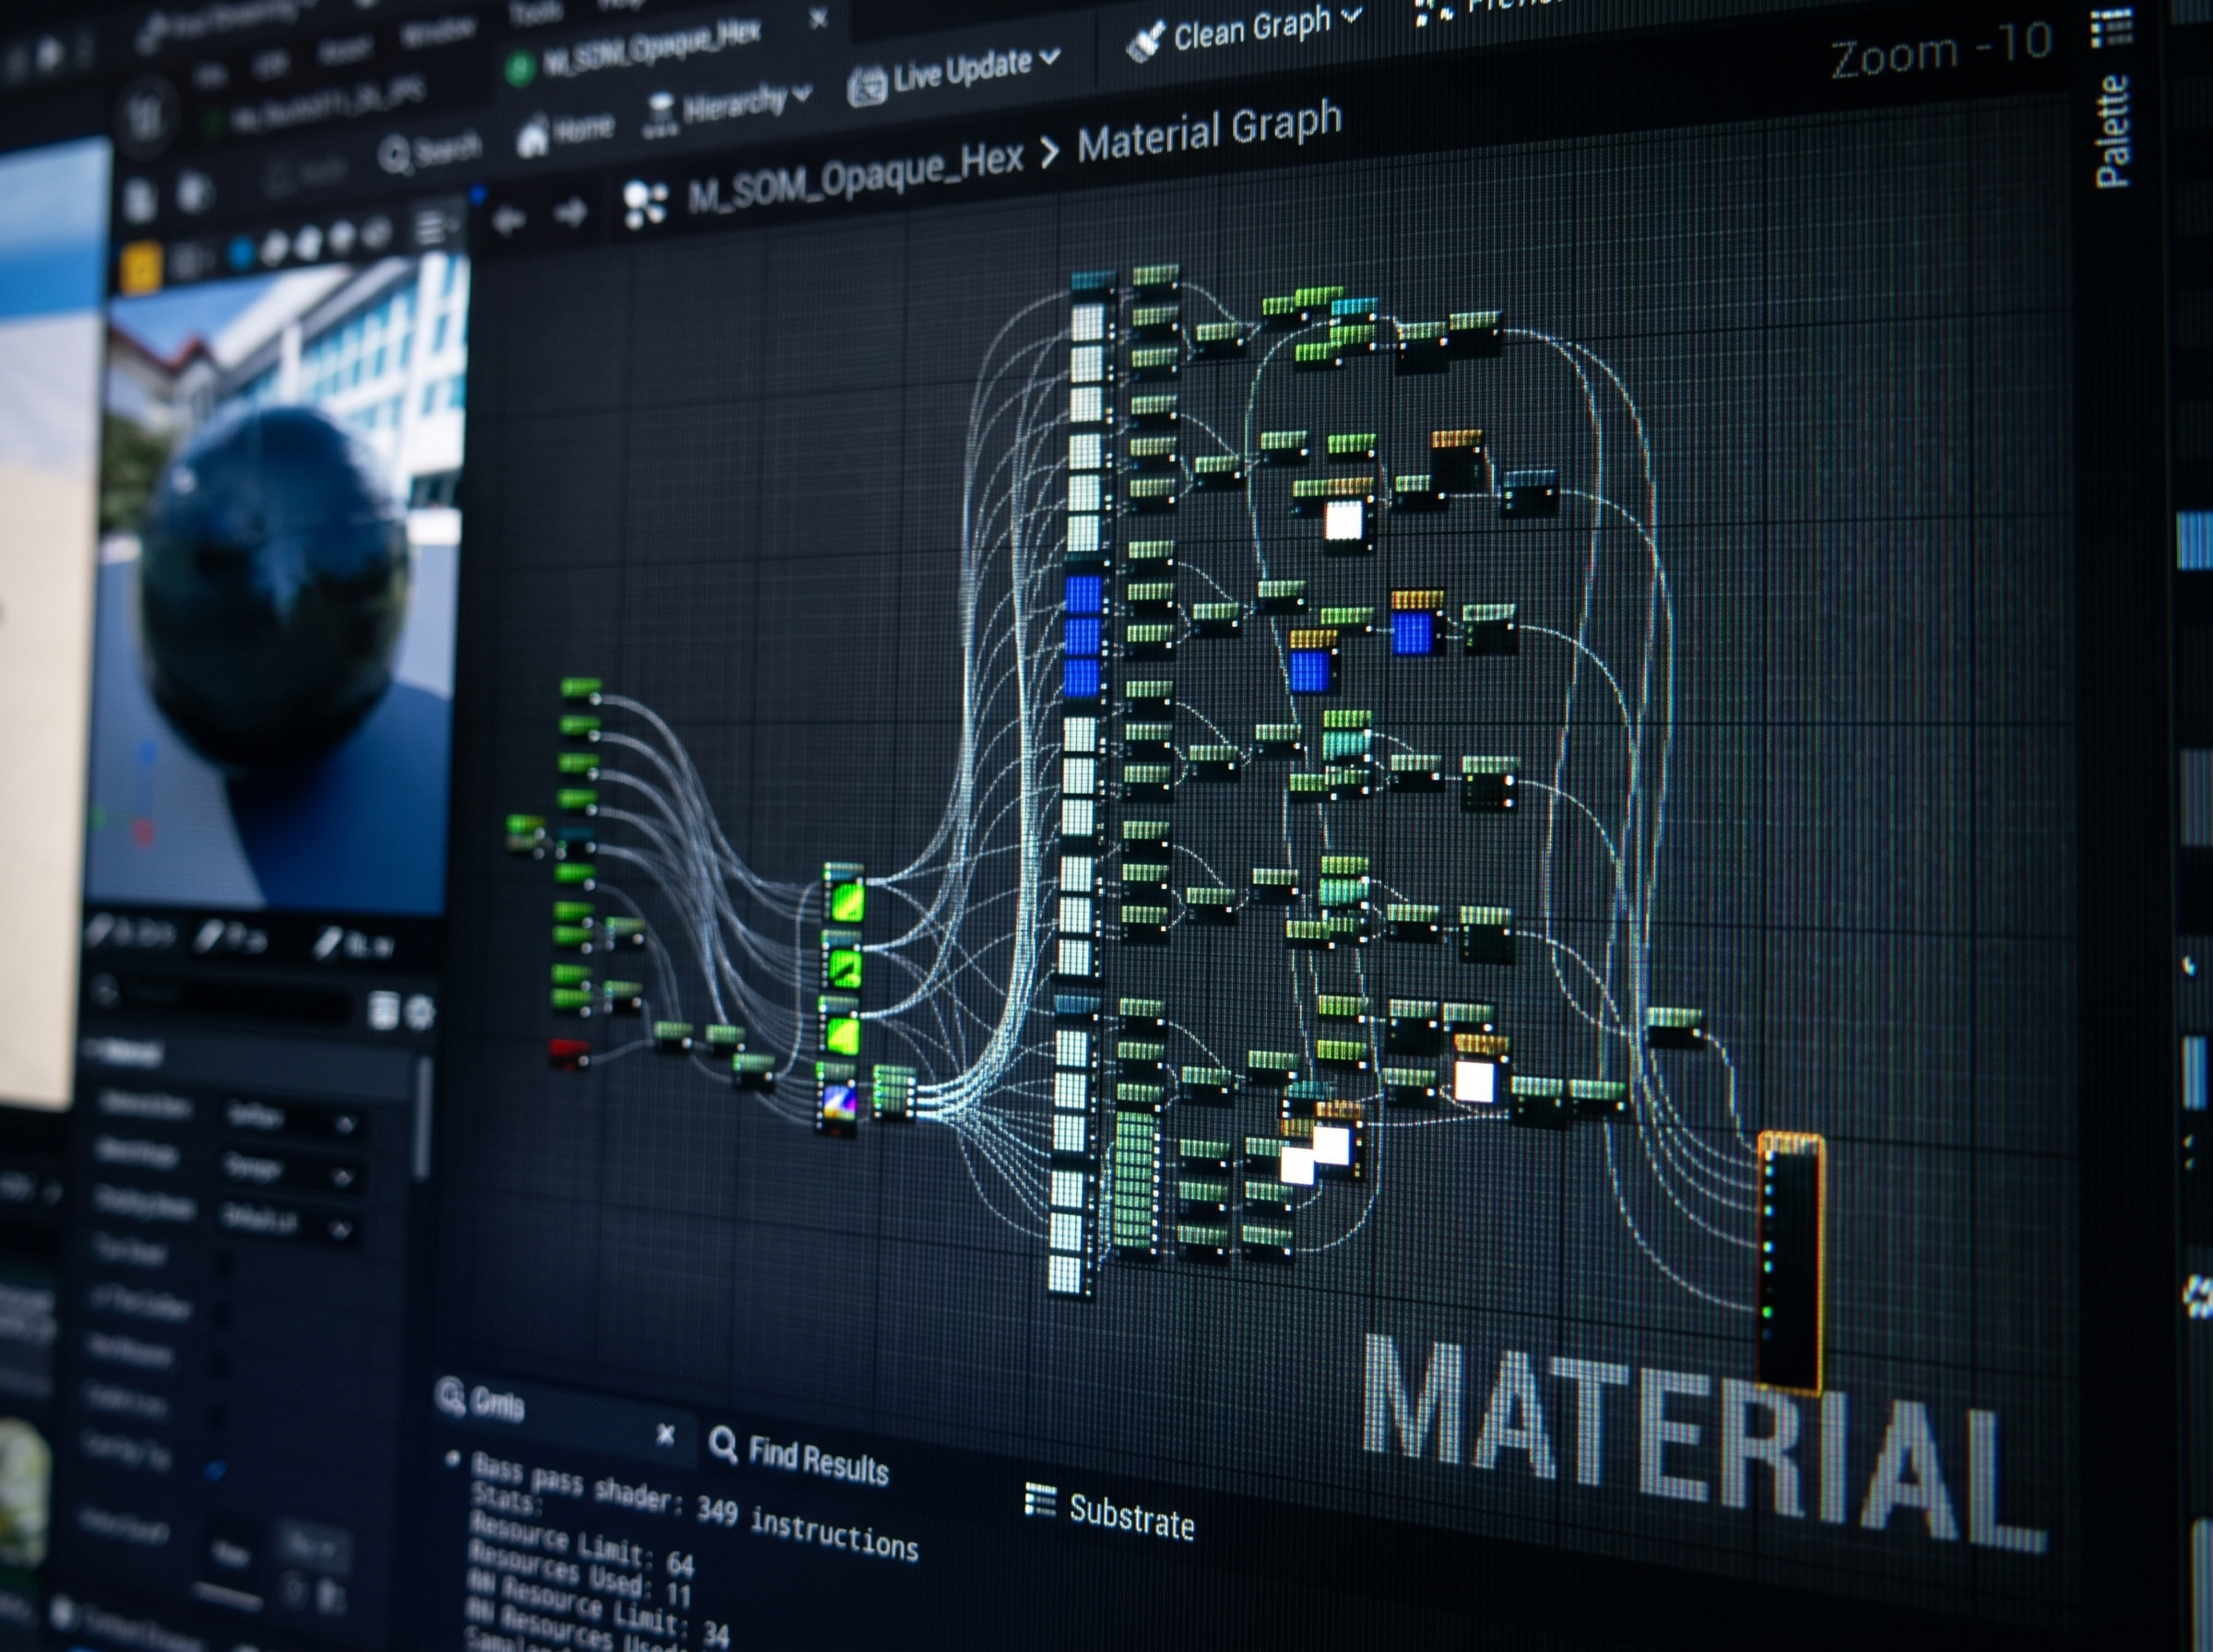
Setting up an Unreal material by hand is a grind.
Every PBR texture set comes with 4-8 maps. Each one needs to be imported, assigned to the right parameter, and wired into the Material Graph. Roughness and normals need the right sampler type or they render wrong. Pick the wrong projection setup and you are starting over.
The Node Ninja way
Point it at a folder. Get a finished Unreal material.
Node Ninja scans texture folders, identifies maps by filename, builds a complete Material Instance, sets sampler types, and gives you projection and displacement options without the busywork.
Texture folder scanning
Albedo, roughness, metalness, normal, displacement, AO, emission, and opacity maps are recognized automatically from filenames.
Hex Tile to reduce repetition
Built into every projection mode, Hex Tile breaks up visible tiling on large surfaces like ground, rock, and concrete.
UV or Triplanar
Choose standard UV projection or world-space Triplanar at build time. No UV setup is required for Triplanar.
Material Instance or Master Material
Build a Material Instance parented to a SOM master, or generate a standalone Master Material with nodes wired directly.
Nanite displacement when you need it
Node Ninja can build materials with true Nanite tessellation, and Nanite Ninja enables Nanite on meshes in one click.
Import one material or a library
Point Node Ninja at a single texture folder or a parent folder full of them. It builds one material per subfolder.
Use existing Texture2D assets
Select assets you have already imported from Quixel Bridge or anywhere else and run Node Ninja directly.
Clean, consistent Material Instances
Every material is organized the same way, so it is easier to read, hand off, and update with Node Surgeon later.
See it in action
From folder to finished material without the busywork.
Watch Node Ninja scan a texture folder, pick projection mode, and build a complete Material Instance automatically.
Also included
Already have materials? Node Surgeon upgrades them.
Node Surgeon is included free with Node Ninja. It can switch SOM Material Instances from UV to Triplanar, add displacement, or add hex tiling without losing texture assignments. Select the materials, run Node Surgeon, choose the new settings, and it re-parents everything automatically.
Node Surgeon works with SOM Material Instances built by Node Ninja. It is not a converter for custom or procedural setups, but if Node Ninja built it, Node Surgeon can upgrade it.
What's included
Everything you need. Nothing you don't.
The download includes the Unreal tools and documentation for building materials, upgrading them, and enabling Nanite faster.
Plugin
Node Ninja
PBR texture auto-setup for Unreal Engine.
Plugin
Node Surgeon
Material Instance upgrade tool for projection and displacement changes.
Plugin
Nanite Ninja
One-click Nanite enabler for any compatible mesh.
Guide
Full documentation
Complete installation and usage notes for all three tools.
Versions
Unreal Engine 5.5, 5.6, 5.7, and 5.8
Each engine version gets its own quick installation.
Requirements
Windows and standard PBR texture sets
Nanite displacement requires Nanite-compatible meshes in Unreal Engine 5.5+.
Download the free plugin
Get Node Ninja for Unreal Engine.
Drop in your email and we will send it right over. No spam, no upsell - just the plugin. Free for personal and commercial use.
Check your email,your free download is on the way!