
Learn After Effects the Right Way
Master the After Effects interface and build a real animation skillset. Enroll in All-Access to unlock AE Kickstart and 50+ other courses.

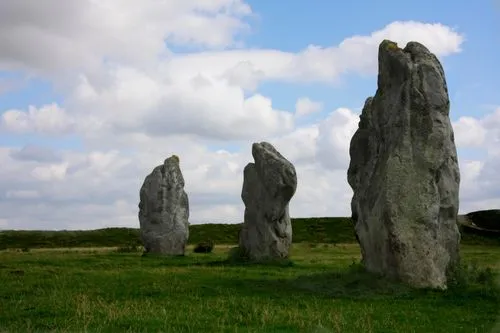
Fake 3D using a photo with this After Effects tutorial.
Creating a fake 3D world from a still in After Effects is a very handy technique to know. Even if you never have to do this with a photo, you'll still want to understand how to set up this kind of faux 3D environment in After Effects to create depth using parallax. In this lesson Joey is going to break down everything you need to know to really sell the illusion of something being 3D in After Effects. Check out the resources tab for the photo that Joey used in this lesson. You'll also find a very handy article from Greyscalegorilla about different camera focal lengths that you'll want to check out.
{{lead-magnet}}
-----------------------------------------------------------------------------------------------------------------------------------
Tutorial Full Transcript Below 👇:
Joey Korenman (00:18):
Hello, Joey here at school of motion and welcome today for 30 days of after effects today, what we're going to talk about is taking a photograph and turning it into a 3d scene inside of after effects. I'm sure a lot of you have done this before, but I'm going to show you some tricks. Maybe you haven't seen yet how to really, really sell the illusion that this is a 3d scene and how to make it look great. And fool everybody, don't forget to sign up for a free student account so you can grab the footage and the project files from this lesson, as well as assets from any other lesson on school emotion. Now let's hop into after effects and get started. So one of the things I love about this technique is that it's just kind of instant cool. Um, you know, you take a still image, you turn it into a 3d scene like this, and you know, it's not that hard to do, but it's really impressive.
Joey Korenman (01:06):
Um, and if, if any of you are familiar with, uh, the concept of matte painting, which is used on, you know, feature films to kind of extend sets and, and add, you know, castles to the background and stuff like that, um, this is pretty much the technique that's used and you can do it in after effects pretty effectively. Now I want you to notice there's a few things that, um, that I do when I do this type of thing that, um, I think makes it feel a little bit more natural, um, than sort of the simplified version of this. And the main thing that helps sell the shot is the ground. If I kind of scrubbed through this, you can see the ground is not, you know, it's not like this hill or these rocks where it's just this flat image, um, that kind of, you know, it looks like it's facing the camera.
Joey Korenman (01:51):
It actually looks like it's oriented correctly on the ground. Um, and you know, there's a lot of sort of blending going on to make this feel as seamless as possible. And then I also did some compositing tricks and some other things that maybe I'll show you a couple of those, but the main thing is how do you set this scene up? So it really sells the effect. Okay. So you got to start in Photoshop. So let's hop in there. This is the original image I started with, and I won't go through the process of cutting everything out. Cause it takes a long time. If you need help with that, you should definitely check out. Um, there's a tutorial on my site called how to cut out difficult images in Photoshop, and that'll give you some good tips. So I'm going to turn on this layer here, just so I can kind of see these pieces on a background that lets me focus on the edges.
Joey Korenman (02:38):
So these are the three rocks that I cut out. Um, I want you to notice that I spent some time to kind of fix the edges after I cut them out. Um, a lot of times when you cut things out and Photoshop, no matter how careful you are, you're going to get, you know, edges that have, you know, bright pixels or dark pixels. You know, this, these rocks are up against a sky. So some of the pixels of these clouds would show through and I took the time to paint those out so that, um, you wouldn't notice any of that when you actually composite this thing. I also want you to notice that down at the bottom of each of these rocks, I feathered the edge of my layer mask so that I could sort of blend the bottom of the rock into the grass.
Joey Korenman (03:21):
All right. So that's the first thing is just cutting out all the foreground elements. So the next thing I need to do is create a clean plate. Uh, and this is the clean plate that I created. All right. And all the clean plate is it's just, you know, it's your shot without your subject in it. Um, and so, you know, you have to use a few Photoshop tricks to get to this. Um, and I'll show you a quick one, really, really fast that I use all the time. And it's amazingly effective. What I'm going to do is, uh, I need to select all three of these rocks. So I'm going to, I'm going to hold command and I'm going to click on the layer mask for this layer and you can see it made a selection there. Then I'm going to hold shift in command and click the other two.
Joey Korenman (04:03):
So now I've got all three rocks selected and with those three rocks selected, I'm going to go up to select modify, and I'm going to expand my selection by two pixels. Okay. And all it did was just kind of push that selection out to pixels. So now I've selected a little bit of the clouds behind it. You know, a little bit of the background. That's just going to help me blend in whatever patch I need to create. Okay. Now here's the magic part. First, let me, uh, let me make a copy of this. It's always, always, always a good idea. Keep a copy of the original image in your Photoshop file. That makes it a lot easier when you're in after effects. So we'll call this clean oh two. Um, and here's the trick you go up to edit fill, or you hit shift F five and you want to make sure it says content aware.
Joey Korenman (04:53):
And this is one of those magic Photoshop features when I hit, okay. All right, done. Right. I hit de-select command D and look at what it's done for me now. It's not perfect. You can see that, you know, this is the ground, right. And then all of a sudden it jumps up here. That's not right, but that's easy to fix, but the clouds are almost perfect. There's some little things to fix. Um, and so then the next thing I would do is I would take five minutes and I usually start by just hitting J and using this healing brush, um, which sort of automatically figures out for you, what to clone in there. Okay. Um, and you know, wherever you see little funky things like this, you just paint over them. And most of the time Photoshop can just kind of do the work for you.
Joey Korenman (05:42):
I mean, look how quickly that that happened. It's crazy. Um, and then what I would do is I would grab my stamp, the rubber stamp with AB S key. And I would just sort of, you know, take the time to fix all this stuff and, and paint it back. So it looks correct. Okay. Um, but that's how fast you can make a clean plate and Photoshop. It's pretty crazy now. So got rid of, I don't know what the heck this thing is, it looks like a dead animal, and then there's like some pipes or a road or something over here that just kinda drew my eye. Right. So I got rid of all that. So here's my clean plate. And then I have the rocks. Okay. Uh, the next thing I did was I took that clean plate and I separated out the ground and I feathered the edge of the ground a little bit.
Joey Korenman (06:25):
And then that hill, right. And basically I was looking to separate out things that are on different planes. So that ground is one kind of plane it's facing straight up and down, but then this hill is kind of at an angle. Right. And then the sky. And if I turn the hill off, you'll see, I also extended the sky down here. I just used, I did the same trick. I actually, uh, I cut the sky out. Um, and then I selected the hill and then I use that content aware fill, and it painted in those clouds for me. And I cleaned it up and it took like a minute. So those are all my layers you've got. And I'll just, and you know, I'll show you from the bottom up, you've got your sky, your ground, the hill, and then you've got your three rocks and that's it. Okay. So once you've prepped the Photoshop file, then we go into after effects. Okay. So let's, uh, let's start a new scene here. All right. We'll call this a rocks scene.
Joey Korenman (07:26):
Alright. And I imported the Photoshop file with all the layers here it is. Okay. So what I'm going to do is a, I don't need this clean layer, but I do need the original. So I'm going to copy all of this stuff into my new scene. Um, and then I'm going to parent everything to the original for a minute. Um, just so I can scale it up and kind of position everything. So it's filling the frame. Okay. Um, and I just kind of want to set this up where, you know, I like the framing of it. All right. So that works for an initial framing. Um, now here's the thing with this technique, you kind of have to decide ahead of time. Um, you know, what, like what kind of camera you want to use. Okay. And, um, if you, if you don't know a lot about, you know, different focal lengths and, and why you might use one over the other, um, Nick Campbell over at grayscale gorilla just did an excellent tutorial for cinema 4d about that topic.
Joey Korenman (08:28):
So I'll link to it in the notes for this tutorial. Um, but in general, what I usually do with images like this, um, more, I'm not gonna move the camera too much is I'll use a 50 millimeter lens, uh, on an after effects camera. And I will tell you why in a minute, but, um, if you're going to do a wide angle lens, like a, you know, a 25 millimeter, 15 millimeter lens to get some crazy effect, you need to add that camera before you start setting the scene. Um, otherwise it won't look right. So that's just something you need to be aware of. All right. So what I'm gonna do is, uh, I'm going to unparallel all of these things from the original cause I don't need them parented anymore. Um, and I'm going to turn my original layer on, but I'm going to set the mode to difference.
Joey Korenman (09:12):
Okay. Um, and you'll see the whole scene turns black, and this may not make sense now. Um, but what the difference mode does is it looks for pixels that are the same and it turns them black. And then the brighter, the pixel, the more difference it's detecting. Okay. So you can see that the edges of all the layers I cut out are slightly different than the original image, but for the most part, everything's identical. And we're just going to leave this up here and turn it on and off occasionally to check that our 3d scene matches the original photo. And this is a really neat, easy way to, to make sure that that's happening. All right. So step one, let's first position the ground. Okay. So I'm gonna, I'm going to turn all of these layers into 3d layers. Okay. Um, now the reason we're seeing this weird kind of three-quarter view here is because my camera is set to custom view.
Joey Korenman (10:09):
Let's go back to active camera when I'm doing this. A lot of times, I like to switch between the active camera, which is just your comp camera and this custom view, because with the custom view, if you hit the C key, it brings up your camera tool. You can kind of move around it and kind of check the three Denas of your scene. So we're going to jump back and forth between this view and your active view and the hot key for that is escape. Okay. Really simple. Alright. So the ground, so first thing I want to do is I need to make the ground, uh, actually oriented like a ground. If we look at this custom view right now, the ground is this flat plane, and that is not the way a ground works. Okay. So what I'm going to do is I'm going to grab my anchor point tool, which is the Y key.
Joey Korenman (10:52):
I'm gonna move the anchor point to the horizon line like that. And then I'm going to rotate and let me go to my custom view so you can see exactly what I'm doing here. I'm going to rotate this on the X rotation and I'm going to rotate it negative 90 degrees. Okay. And so now what I'm doing is I'm setting up my floor of my scene so that it actually is oriented like a floor. And this is what's going to let you get that awesome perspective when you move the camera over the ground. Now here's the problem with this. We go back to our normal view. You could see that now the ground doesn't look right. It's, it's squashed visually because we've rotated it. So now you have to kind of correct for this. So what you do is you, uh, you first scale that layer, right?
Joey Korenman (11:38):
And I'm going to scale it on Y so that I can bring it back to the, you know, to the bottom of the frame. And if we look at our custom view, you can see what that's doing. Right. It's kind of, it's kind of, unstressing the image. Okay. Um, so what you want to do is you want to bring that just until it hits the bottom of the frame. Okay. Now let's turn on this original, uh, this original image for a minute, and you can see now, ignore all this stuff up here, but you can see that the grass does not match very well. There's a lot of image showing. And when it matches perfectly, it's going to be all black pixels when it doesn't match that well, you're going to see a lot of stuff. And that's what we're seeing. And the reason for that, right, is because by S by rotating this and scaling it, we're introducing perspective.
Joey Korenman (12:24):
You see how the, the ground layer actually comes all the way out here and all the way out here. So there's image over here that we can't see. And even just visually looking at it, it looks stretched. It doesn't look right the way to fix this is actually pretty easy. Um, what you do is you add a corner pin effect. So we're going to go to the distort menu and you can use the corner pin. I like to use the CC power pin, because it gives you this nice kind of guide here. And what you want to do is basically take the corners that are outside of the image and just pull them back over and you can hold shift and it'll lock it to that. Um, it'll lock it vertically. So you're only moving it horizontally and you move this back and you can kind of see that the plugin gives you a clue when you've got it back to a perpendicular, uh, orientation here.
Joey Korenman (13:19):
Okay, cool. So let's take a look at that now. So now our ground layer, visually, it matches pretty closely to this. Now it's still not exact. Um, and if you want to, you can sort of mess with the scale and try to nudge things around. Um, but it's matching pretty well. And here is what's really happening. If I hit escape and we go to the custom view, it looks very strange from this view, right? But the key to this trick is it doesn't matter what it looks like, you know, from this view, it matters what it looks like from where that camera is. And you can see as I, as I kinda line this back up, and if I hit see a couple of times, I can use different camera tools like the zoom tool. And you can see that now, if I zoom in the ground actually moves and behaves like the ground, it looks correct.
Joey Korenman (14:09):
And I get that nice kind of parallax when we're moving. Okay. So that's probably the biggest trick. And a lot of you could probably turn the tutorial off right now, because now you know how to do that. Um, and just to check it, I'm going to add a camera to the scene and I'm going to leave it as the default, uh, which is 50 millimeter. If it's not 50 millimeter on your after effects, just click here, switch it to 50, be good to go. And so then what I can do is to just check it, um, I can just scoot the camera forward and backwards on Z, right? And you can see that, that, that ground really does move like the real ground now. Okay. So that's step one, step two, uh, is going to be to you to start positioning everything else. So let's do the hill.
Joey Korenman (14:54):
All right. So if we hit escape and look at this, this is where this view really comes in handy because you can actually get a good sense of where that hill is and where the rocks are going to go, make sure everything looks right. So what I'm going to do is switch back here. I'm going to set the anchor point of the hill, um, to be the bottom of the hill. So let's grab a, hit why to bring up my anchor point tool, grab the anchor point, move it down here. And I'm going to parent it to the ground like this. Um, and the reason I'm going to do that is because now I can zero out the, uh, now this is going to seem weird. I, if I change the Y sorry, the Z position of the hill, it moves up and down, which doesn't really make sense because it looks like this is the Y axis.
Joey Korenman (15:41):
So shouldn't I be adjusting the Y axis. Well, what's happening is because it's parented to the ground. This position, these coordinates are being shown relative to the ground, and the ground has been rotated 90 degrees. So the, uh, you know, the, the Y axis on the ground, um, doesn't line up with the Y axis on the hill anymore. So just be careful of that when you have stuff parented. But what I want to do is zero out the Z on the hill and what that, that just makes sure that the hill is connected to the ground. Okay. Um, so if, you know, because if you're not careful, if the hill is, you know, up, you know, if the Hills like down here or something, right. But then you compensate for that by moving it on. Y let me turn the sky off for a minute.
Joey Korenman (16:31):
Right. Visually it can look correct, but when the camera starts moving, you're going to get a gap there. Right. And so you always want to make sure that you actually have your scene set up, so it's kind of physically correct. So I want that hill to be like this, right. Literally flush with the ground. There's a little bit of a gap there. Um, you can see that, you know, this feathered edge of the ground, um, there's, it kind of creates this gap. Um, and if that becomes a problem, I would just cheat this hill forward a little bit like this. Okay. But we'll see if that's actually going to be a problem. Um, let me turn the sky for a minute, because the same trick I did with the ground, I want to do with the hill, this hill, if I look at it right now, it's just sticking straight up in the air, but that hill is really not sticking straight up in the air.
Joey Korenman (17:21):
It's got more of like a gentle slope to it. Um, so what I'm going to do is come to this view and I'm going to rotate it on the X axis and just kind of bend it backwards a little bit. Okay. So until, you know, until it seems appropriate, right. That's probably, that might be a little too far. Um, but let's just try, let's try fixing it a little bit. Okay. So that feels pretty good, but now we're going to have the same problem. Okay. We've now distorted the image and we need to use a corner pin effect to fix that.
Joey Korenman (17:55):
Um, and so here's a trick, uh, that I found, because let me first show you, uh, what happens if you just add the corner pin effect. Um, and I try to grab, you know, these top corners and move them back like this. You see what happens. It undistort, but it actually moves the image down. And now we've kind of screwed something up. So let me reset this and turn this effect off for a minute. Um, and what I need to do is first, uh, zero out the rotation on the hill. Okay. And then I'm going to take, uh, make sure that you can see your rulers. If you don't see them, it's command R reveals them, and I'm going to drag a guide to the top of my layer. Okay. You see where the top is right here. I'm going to drag a guide there and J and then just in case I'll drag one to the bottom two.
Joey Korenman (18:42):
Okay. So now I'm going to rotate this, and I think it was 25 degrees, or was it negative 25 degrees? It was negative 25 degrees. Here we go. Negative 25 degrees. Okay. And then turn my power pin on. And now what I want to do is move my, uh, move my, my corner pin so that I've got a perpendicular line here and then move it up. So it's on that guide. Right. And if you do it this way and then move these corner pins as well to this guide, there we go. Okay. And you can see now you undistorted the image. Um, and it's much, much closer to the original. You're never going to get it perfect with this technique, because, you know, you're kind of, you're kind of cheating by using the corner pin. Um, but it's pretty close. And then you can just come into your custom view and take a look at what's actually going on. Um, and I can also see that I've stretched that hill out, um, horizontally. So what I'm going to do is scale that back this way like that. And then I'm just going to move it. I'm just going to cheat the whole thing a little bit closer like that. And then let's look through the camera.
Joey Korenman (19:59):
All right. And I'm going to move it down just a little bit. Uh, it looks pretty good. All right. I'm just kind of nudging it around. So it looks right. And if you want to check it, you can turn on your original, uh, image. Right. And get the difference, Matt. And you can see that there's tons of black, um, where that hill is. So we know that it's actually lined up pretty good. Okay. And now if we move the camera, you can see that you've got that hill back there. It's got a little bit of a slant to it. Um, the ground moves like the ground, but the hill moves like something that's, you know, kind of sticking up in the air. Cool. So, I mean, essentially what we're doing, you can do this in cinema 4d using camera projections. We're basically faking a camera.
Joey Korenman (20:45):
Projection were the perspective that's inherent in the image by stretching out the layer and corner, pinning it in a way to undistort it. Okay. All right. So now we've got the ground. Um, now let's do the rocks. So, um, we're gonna one at a time. Um, and actually let me turn off the ground for a minute. And I wanna, uh, I wanna make sure that the anchor point of each of these rocks is at the bottom of the rock. Okay. Um, and then there's two and there's three, and I'm doing this same reason. We did it for the hill. Okay. Because now I can parent those rocks to the ground, open the position in zero out there Z, and now I know all three of them are on the ground. Okay. Um, so let's turn the ground and the hill back on, and this won't look right.
Joey Korenman (21:43):
Don't worry about it yet. Okay. If we look at our 3d view, you can see that the rocks are not positioned correctly. Um, and so what I'm going to do is I'm going to use this view to kind of figure out where in Z, these rocks need to go. Okay. Um, so if I grab, if I grabbed the Z axis of this, rocket can pull it forward. And you know, what I can see is that right here on the ground, this is the shadow of that rock. So I think that's around the position. It needs to be on Z. Okay. And then rock too. It looks like the shadows probably there, around there. So let's put it there. And then for three it's right about there. Okay. So that, that to me looks like the correct relative position of these rocks. And then I'm going to go into my normal active camera view.
Joey Korenman (22:36):
And now I need to scale these things down in line them up with the original image. Okay. So rock one is obviously way too big. So let's scale it down and let's move it over. Cause it's not in the right spot. And let's turn on that original image. And this is where it gets really, really, really handy because now what I can do is I can leave that on and I can sort of scale my rock up and move it over. And I can really quickly see if I'm matching the original image or not. Okay. And if I need to move it down a little bit to cheat, it I'll do that. I'm just going to get it as close as I can. Um, it doesn't have to be perfect, but the closer it is the better. Okay. So that one's lined up pretty good.
Joey Korenman (23:19):
All right. So now we'll do rock to rock two is too big. So let's scale it down. Let's scoot it over. Okay. And that's not bad. Um, and then we'll do this. We'll do the third one and scale it down and scoot it over. Cool. Now let's turn off the original. Okay, cool. So now if we move the camera back and forth, right. You can see that we're getting parallax and we have a pretty good, seen a pretty good 3d setup. Um, now one thing it's actually, it's not a terrible thing and you may not even notice it, but look at the edge of this rocks. Yeah. There's a hard edge down there. What's happening is this by solo rock one, you can see that I've got this nice feathered kind of bottom to the rock. The problem is, um, you know, this is sort of extending down past the anchor point a little bit.
Joey Korenman (24:16):
So here's the anchor point. That's actually where that rock is attached to the ground. But what happens is when this layer intersects the ground, it just creates this hard edge like that. Okay. And so what I want is I want this rock to sit right there. Um, but I also still want to see all of that extra stuff. Um, that's down there to kind of help feather it into the ground if that makes sense. Okay. And if we look through the, um, if we look through this camera view, you can see that if I, if I kind of come down here, you can see that part of that rock layer is sticking out underneath the ground. Well, I want to see that stuff, but I still want this to be correct in 3d space. And so what I basically want to do is cheat. Okay.
Joey Korenman (25:00):
And there's a really cool way to do this. What I'm going to do is I basically want these three rocks to be exactly where they are in space, but no matter what I do not want them to intersect the ground and the way you do it is you just insert an adjustment layer between these layers and these layers. Okay. So I'm just going to add a layer and the way I normally name these is I just put a bunch of dashes like this and that way it's just a nice visual separator. I can kind of tell where my adjustment layer is. Okay. And so now watch as I turn this on and off, when it's off, you get those hard edges when it's on, it brings back all of that detail. Okay. But I still get the full 3d effect. Okay. And it just helps blend, you know, it's not perfectly correct, but it does really help blend those rocks into the ground now.
Joey Korenman (25:54):
Okay. Um, and if we look through, through this, um, you're not going to see the effect of the adjustment layer, but you can really see that we're starting to build out a 3d scene. That makes sense. Okay. So then the last thing we need to do is deal with the sky. Um, so now the sky, if we look right now, the sky is literally like right at the edge of the, uh, of the hill and that's, that's not where the sky is. The sky is actually very far away. So I'm going to just push the sky back in Z space, a really good amount, like maybe, you know, 15,000, right. Really far away. And then I'm going to scale it way, way, way back up. Okay. Um, and I'm going to turn on my original image here. Um, and actually you can see, I kind of did a good job.
Joey Korenman (26:43):
See if I made it too small as I scale it up, you can see right about there. See how it almost turns the whole image black there, um, that lets me know that the sky is now scaled and it's back in the right place. Let's turn this off. Okay. By the way, I want to point out, you see how the rocks are no longer lined up with the image. That's because I've moved the camera a little bit. If I move the camera back to the default position at all lines back up, so let's turn that off. Okay. Um, so now if we move this, you could see that the sky does move. Just not very much, which is what you want. And the last thing I do is I like to put a little bit of perspective on the sky. Cause again, the sky is not just a big flat, uh, you know, thing, right.
Joey Korenman (27:27):
It's kind of, it's actually above your head and going back into the horizon. And so what I'm gonna do is I'm going to change the anchor point of the sky somewhere around here. Um, and you can see that just by luck, these guides that I used on the hill layer work for the sky layer. Okay. Um, so what I'm going to do is rotate that sky layer on X and have it rotate backwards, you know, maybe maybe 45 degrees or something. And then I'm going to use that power pin trick. Okay. So I'm gonna, I'm just gonna move the corner pins to undistort this right. I'm using the guides to make my life easier. And there you go. And so now that sky is back undistorted, but if we look through our 3d camera, you can see it's actually got a little bit of an angle to it.
Joey Korenman (28:21):
Okay. So you're going to get a little bit of a perspective shift as this camera moves just a little bit, right. It's super subtle. Um, and that's kind of it, as far as the basics of setting the scene up, the rest of it is just making kind of a convincing camera move and doing some compositing. So I'll give you a few quick, you know, few quick tips on that. Um, what I did for my camera move, I just, uh, you know, I just did this very, very simply, um, it's moving on Z and I'm also rotating the camera a little bit on the X axis just to make sure that it's always looking at the same place. Like if I want the hill to always be right about there in the frame, then I'd put a key frame there. Um, let's go forward maybe five seconds and let's just push the camera forward a little bit, right.
Joey Korenman (29:12):
To there. And as it's moving forward, have it rotate down like this. So that way it's, it's kind of always orienting the same way. Okay. Um, and you can see, here we go. We've got our nice 3d scene. It looks great. Um, the ground is moving like the ground. And so from here, it's just a matter of compositing it, so it doesn't look so still in synthetic, um, I'll show you guys a couple of tricks. I did some, you know, I did some color correction and I added some and stuff like that to make it look a little more kind of, you know, like gladiator or something. Uh, but a really simple trick is, um, come back here really simple trick is, uh, add an adjustment layer, right? And use a, uh, use an optics compensation effects in the distort group, optics compensation. And it basically just simulates lens distortion.
Joey Korenman (30:07):
So if you turn on reverse lens distortion, you can see that it kind of, it, it kind of simulates having a little bit of a, of a wide angle lens where the, the edges of the frame, um, move faster than things in the center of the frame. And it's a subtle thing and you can really easily overdo it. But if you look at the edges, especially with this rock, when it gets towards the edge of the frame, it just gives it a little bit of a 3d look. Okay. It just helps it a little bit. Um, the other thing I did was I put a little bit of a wiggle on the camera just to, you know, make it feel a little bit less perfect. Cause camera moves in after effects by default, they're just perfectly smooth, linear camera moves. And, you know, we're kind of pretending that there's some Dolly tracks and we're doing a nice Dolly move here.
Joey Korenman (30:54):
Well, if Dolly tracks are happening over uneven lumpy grass, then you know, it's not going to be a perfect move. Um, so what I might do is make a, you know, make a null and call this the wiggle Knoll, uh, and on the position of that wiggle, right? And this needs to be a 3d layer on the position of that wiggle. I would just, uh, option, click position and type in a wiggle expression. Then maybe it wiggles once a second by, you know, two units and that's it. Right. And now I can parent the camera to that. No, and it's just going to do a subtle, subtle, subtle, subtle little wiggle. Right. And let me, let me Ram preview this one-to-one here. Um, so, you know, we're still getting the same basic move, but it's just not as perfect and it kind of helps sell it a little bit.
Joey Korenman (31:43):
Um, and then, you know, I did some color correction. Um, you know, I'll show you guys I'll show you guys a cool trick really fast. Um, cause this is something that actually sort of helped, uh, you know, whenever I do stuff like this, I stare at it a lot and I kind of go back and forth and I say, what is, you know, this there's something about this. That's giving it away. It just doesn't look totally natural. It doesn't look real. Um, and especially if you go into full Raz and we zoom in here, the edges of the rocks are just too hard. Um, and there's no like, you know, normally you would see like a little bit of the sky kind of wrapping around and lighting the back of these rocks a little bit. Um, and we're not really getting that because I cut them out in Photoshop and the edges are just too crisp.
Joey Korenman (32:31):
So what I did was, um, and it was actually kind of a pain. I want it to be able to independently work on just foreground stuff like the rocks and the grass, but not affect the sky. Um, and you know, this is one of those things that, uh, this is one of the reasons I love nuke so much. It's really easy to do that in after effects. You have to jump through a few hoops. Um, so where you can just do as this, uh, this is rock scene, I'm going to, I'm just going to rename this comp rock scene foreground, and I'm going to turn off the sky. Okay. And then I'm going to duplicate it and I'm going to say rock scene background. Right. And I'm going to turn the sky back on, but turn off everything else. Okay. And then I'm going to bring both of these into a new comp say, create a single composition and the background should be behind the foreground.
Joey Korenman (33:24):
And so now I've got, you know, my same camera move, but I can independently effect just the background or the foreground. Okay. Um, so what I want to do is I want to blur the edges of the foreground just a little bit. Um, so easy way to do that is to use a channel blur. So we go to effect blur channel board right there. Uh, and I'm just going to blur the alpha channel. And if I, you know, you can see what that does. I just want to blur it by one pixel and say, repeat edge pixels. So that on the edge of your comp you don't get this little funky line here. So make sure you have that checked. Okay. Um, and if I turn this on and off, you'll see, it's just super subtle, but I'm telling you all those little things they do help.
Joey Korenman (34:15):
Okay. So now I've got, um, let me make sure I can see this whole thing. Okay. So now I've got an edge blur on there. Um, and then for the next step, I want to actually add a little bit of a light wrap to this. Okay. Um, you can get light wrap effects for after effects. Um, and, and, um, you know, that's a cool way to do it. There's actually a pretty simple way. I'll show you just using built-in effects where you can get great light and, and really control it. Um, so what I'm going to do is first pre-com this again, and the reason I have to pre comp it is because I have a channel blur on this comp and I'm going to need to use this foreground as a mat to make my light wrap. And if I do that and I have this effect on it, um, it won't actually use this effect when it calculates the mat.
Joey Korenman (35:05):
I'm not sure that makes a lot of sense, but just trust me when, when I, what to do, what I'm about to do, you can not have any effects on your pre-com. Okay. So let's just, pre-camp it say, move all attributes into new composition and this would be rock scene, foreground, blurred. There we go. Okay, cool. So now we've got that. What I'm going to do is duplicate my background layer, and I'm going to call this light wrap. Okay. And I'm gonna move it on top of my foreground. Next thing I'm to do is I'm going to use an effect in the channel group called set mat. And this effect is awesome. I use it a lot and it just lets you use another layers, alpha channel instead of your current layer. So I'm going to say, take the mat from the layer called foreground blurred.
Joey Korenman (35:54):
Okay. And now if I solo this layer, you can see what it did. It's this is my background layer. Remember, it's a copy of my background, but I'm using the foreground is the alpha channel. I'm going to say invert that Matt, then I'm going to blur this image. Okay. So I'm just going to use a fast blur with repeat edge pixels on and I'm going to blur it. I don't know, 30 pixels. Okay. And just to sort of give you a sneak preview, you can see now, if you look at the edges of your rock, right, you can kind of see that it's now letting that sky bleed over it a little bit. And this works better if you set the mode to something like add. So it looks almost like you just getting some of the light from the clouds bouncing off and hitting that rock.
Joey Korenman (36:37):
Right. And you can adjust the opacity of it, but it sort of lights the rocks from behind and the back of the hill. Okay. Um, the problem of course, is you're seeing this blurred sky and you don't want that. What you now want is to basically cut out this, this layer here, cut out this light wrap. So you only see it within the foreground, the way you do that as easy you duplicate this set, matter of fact, move it after the blur and then uncheck invert. And there you go. And so now you've created your own light wrap. Alright, turn on and off. And you can see it just, you know, it, it's very easy to overdo the light wrap too. Um, and so, you know, you may want to play with the blur. If you blur it too much, you get this really kind of glowy look, which could be cool.
Joey Korenman (37:25):
Um, and then you can adjust the opacity. Okay. And I'll show you one other trick too, which I, I sorta just figured out which worked pretty well. And I, and I think it's pretty slick. Um, you know, one of the things that kind of stinks about doing it this way is the light wrap just gets applied uniformly to, you know, every piece of this. Right. Um, and you could, you could mask that out, uh, or create an alpha matte layer for it. Um, but because the camera's moving, you'd have to animate the masks and it would be kind of a pain. And so I was thinking it would be cool if the light wrap was only hitting the right side of these rocks, because if you look the light, it seems to be coming from that side. The left side of the rocks is darker.
Joey Korenman (38:10):
So what I did was I duplicated my foreground layer, um, and let's call this light rap mat and let's solo this. And what I did was I used an effect it's in the perspective, uh, the perspective group and I normally never use it. It's called bevel alpha. Um, and what it does is it just creates this cheesy, like, you know, Photoshop, beveled layer look. Right. Um, and what I, what I, but I figured like, you know, you see how it basically creates white on this edge and black on this edge. I thought maybe there's a way I can use this as a mat. So what I did was I also added an effect in the generate group called Phil and make sure bevel alpha comes after Phil and set that fill color to black and look what she got here. You actually get a black and white image, um, where you can sort of control which edge gets white and which one gets black.
Joey Korenman (39:12):
Right. So I created this. Um, and then I, and then I just told the light wrap layer, use that as a Luma matte. Okay. And if I solo that, you'll see, now we're only getting the light wrap on that one side and it actually tracks perfectly with the layer. Um, so there you go. If I turn that to no track mat, you see, I get the super glowy heavenly look, which may be a school, but if I use that luminance mat, it kind of constrains that to just one side of the rocks. Um, and who knows, maybe you could even sort of animate this and have the light kind of move around or something. But, um, I just thought that was kind of a neat way to control that. Um, so there you go. You've got, uh, you've got your 3d scene and let me switch this back to half rest.
Joey Korenman (40:01):
We can do quick render. You have your 3d scene. Um, you know, it hasn't been color corrected and you know, of course I would add a little bit of grain to it because if you're shooting with any kind of video camera, there's going to be some noise. It's not going to be perfectly crisp image. And there's a lot of other things you can do. I added like some little kind of, you know, wispies, blown in the wind and that kind of thing. Um, but hopefully you guys learned some neat tricks. And next time you're asked to do this with a still image. You have, you know, a few more tricks up, you know, in your bag of tricks and believe me, that is very handy. Uh, when you gotta, you know, do 10 of these really quickly, um, you don't really want to have to think too hard.
Joey Korenman (40:39):
Sometimes you just kind of want to know what you're doing and know the steps involved and just put your headphones on and get it done. So, uh, anyway, I hope that, um, everyone enjoyed this and I'll see you guys next time, 30 days of after effects. Thanks so much for watching. I hope you learned a new trick or two, so you can make your full 3d scenes and after effects look really great. If you have any questions or thoughts, definitely let us know. And we'd love to hear from you if you use anything from this lesson on a project. So give us a shout on Twitter at school emotion and show us your work. Thank you so much for taking the time to hang out and I'll see you on the next one.
ENROLL NOW!
Acidbite ➔
50% off everything

ActionVFX ➔
30% off all plans and credit packs - starts 11/26

Adobe ➔
50% off all apps and plans through 11/29

aescripts ➔
25% off everything through 12/6
Affinity ➔
50% off all products

Battleaxe ➔
30% off from 11/29-12/7
Boom Library ➔
30% off Boom One, their 48,000+ file audio library
BorisFX ➔
25% off everything, 11/25-12/1

Cavalry ➔
33% off pro subscriptions (11/29 - 12/4)

FXFactory ➔
25% off with code BLACKFRIDAY until 12/3

Goodboyninja ➔
20% off everything

Happy Editing ➔
50% off with code BLACKFRIDAY

Huion ➔
Up to 50% off affordable, high-quality pen display tablets

Insydium ➔
50% off through 12/4
JangaFX ➔
30% off an indie annual license
Kitbash 3D ➔
$200 off Cargo Pro, their entire library
Knights of the Editing Table ➔
Up to 20% off Premiere Pro Extensions
Maxon ➔
25% off Maxon One, ZBrush, & Redshift - Annual Subscriptions (11/29 - 12/8)
Mode Designs ➔
Deals on premium keyboards and accessories
Motion Array ➔
10% off the Everything plan
Motion Hatch ➔
Perfect Your Pricing Toolkit - 50% off (11/29 - 12/2)

MotionVFX ➔
30% off Design/CineStudio, and PPro Resolve packs with code: BW30

Rocket Lasso ➔
50% off all plug-ins (11/29 - 12/2)

Rokoko ➔
45% off the indie creator bundle with code: RKK_SchoolOfMotion (revenue must be under $100K a year)

Shapefest ➔
80% off a Shapefest Pro annual subscription for life (11/29 - 12/2)

The Pixel Lab ➔
30% off everything
Toolfarm ➔
Various plugins and tools on sale

True Grit Texture ➔
50-70% off (starts Wednesday, runs for about a week)

Vincent Schwenk ➔
50% discount with code RENDERSALE

Wacom ➔
Up to $120 off new tablets + deals on refurbished items


Download the files and follow along!
Learn After Effects the Right Way
Master the After Effects interface and build a real animation skillset. Enroll in All-Access to unlock AE Kickstart and 50+ other courses.