
All-Access Pass
Unlimited access to 50+ courses, unlimited critique, live events, and 24/7 community. Join School of Motion All-Access today.

Find, Modify and Convert Layers in After Effects
After Effects is based almost entirely on working with layers, so it makes sense that the Layer menu would hold some extremely powerful commands. Let's see what treasures we can find in here!

Knowing more about the options within the Layer menu can dramatically improve your toolkit as a motion designer. While there's a ton of good stuff in this menu, today we’re going to focus on three key functions:
- Reveal in Project/Finder/Explorer
- Create Shapes from Text Layer
- Create Shapes from Vector Layers
Find an After Effects Layer Source in Your Project or on Your Hard Drive
So you're mid-way through a project and need to track down one of your assets - a piece of footage, an Illustrator file, or any other file used in one of your compositions. There's just one problem: you can’t remember where you put the file. Don’t sweat it! The good news is that the Layer menu can help us locate any file in our After Effects project.
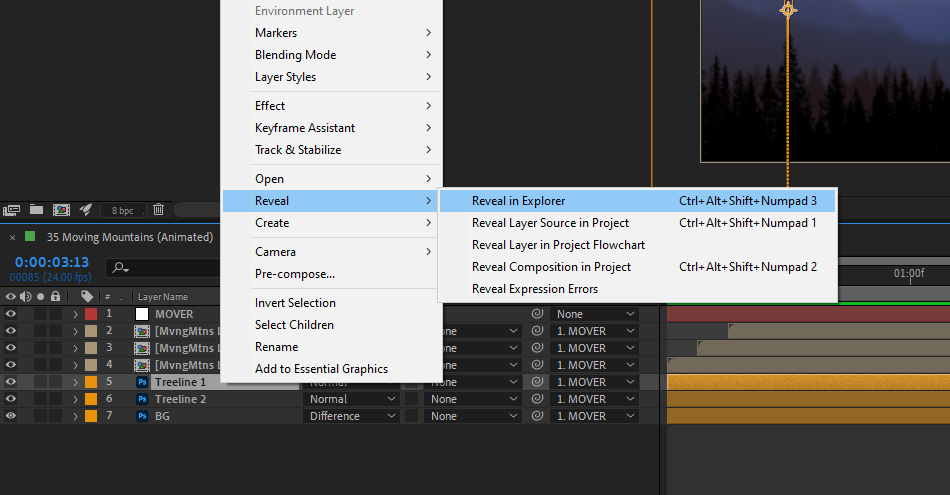
If you've been a little messy with your project organization, and just need to find the layer source within the project itself, select your layer, and then go to Layer > Reveal > Reveal Layer Source in Project. After Effects will take you right over to the Project panel, and highlight the appropriate file.

Need to actually find the original layer source on your hard drive? Select the layer, and then choose Layer > Reveal > Reveal in Explorer (Windows) or Reveal in Finder (Mac). Your OS file browser will open up, with the original source file selected.
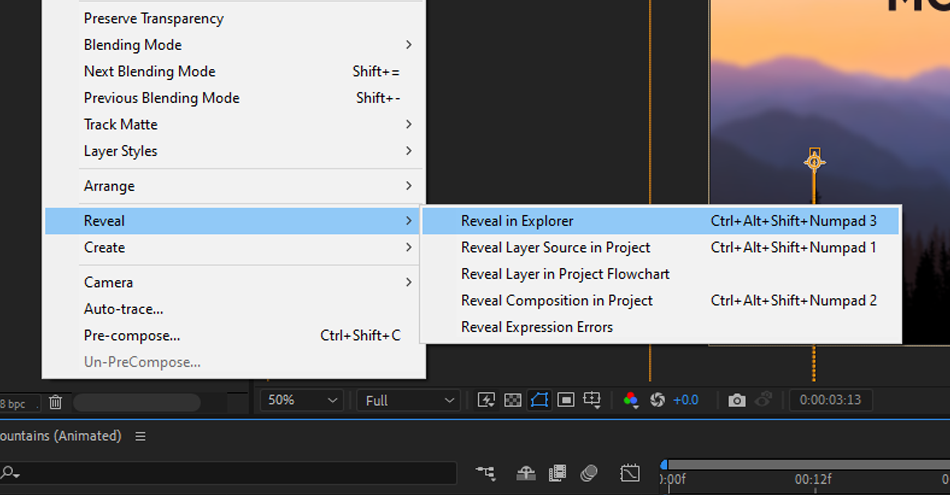
You can also access these commands (and almost everything else in the Layer menu) by right-clicking on the layer itself in the Timeline.
Create Shapes from Text in After Effects
Sometimes, projects require custom text animation like these snazzy smear text animations. Or perhaps you want to make some custom adjustments to the typography in a scene. If you need the ability to edit or animate custom paths on text, the Layer menu has a simple solution for this.
First, make sure that you’re happy with the text in your scene: once you convert text to a shape, you won’t be able to edit the layer with the type tool any longer. Once the text looks good, select the text layer that you want to convert. Then go up to Layer > Create > Create Shapes from Text
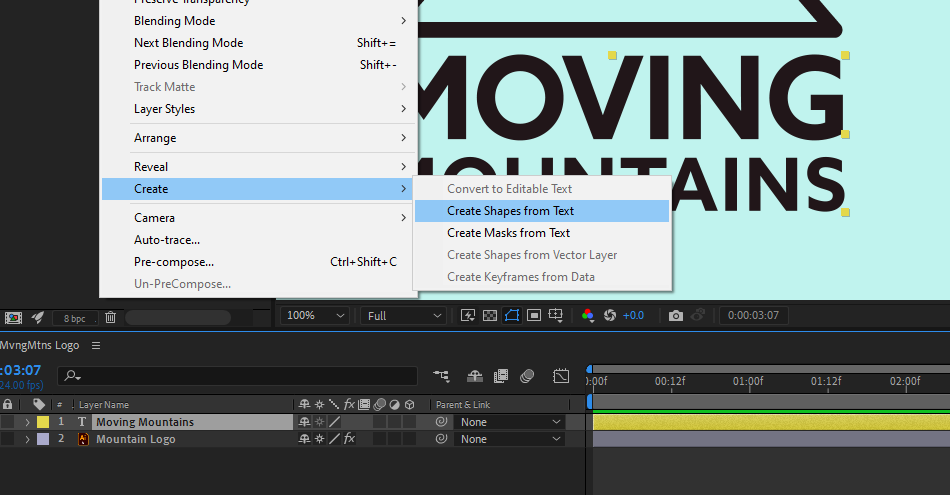
After Effects will convert your editable text layer to a shape layer, leaving a (disabled) copy of the original text below it in your layer stack. If you do need to go back and make changes, you'll still have the original text layer handy. Now you can edit and animate this path to your heart's content!
Create Shapes from Adobe Illustrator Vector Layers
Many motion designers rely heavily on Illustrator and other software for creating vector assets and designs. Once they're imported into After Effects, you can move them around like images, but sometimes you'll want more control and editability. To animate a stroke or edit the path of one of the objects, you'll require native shape layers in After Effects. The Layer menu has the exact tool to do this!
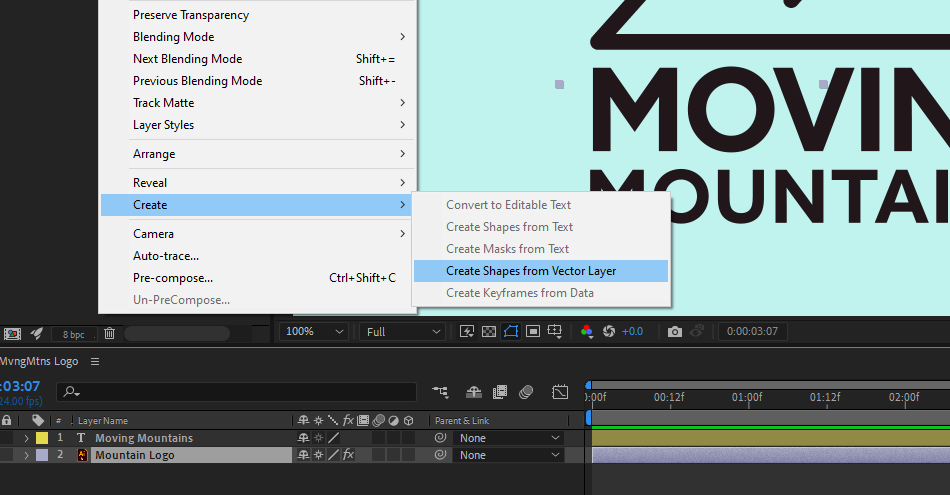
To begin, select any vector layers in your scene (you can do this on multiple layers at once). Then go to Layer > Create > Create Shapes from Vector Layer. Again, you can also right-click on assets directly in your timeline to do this, if you prefer.
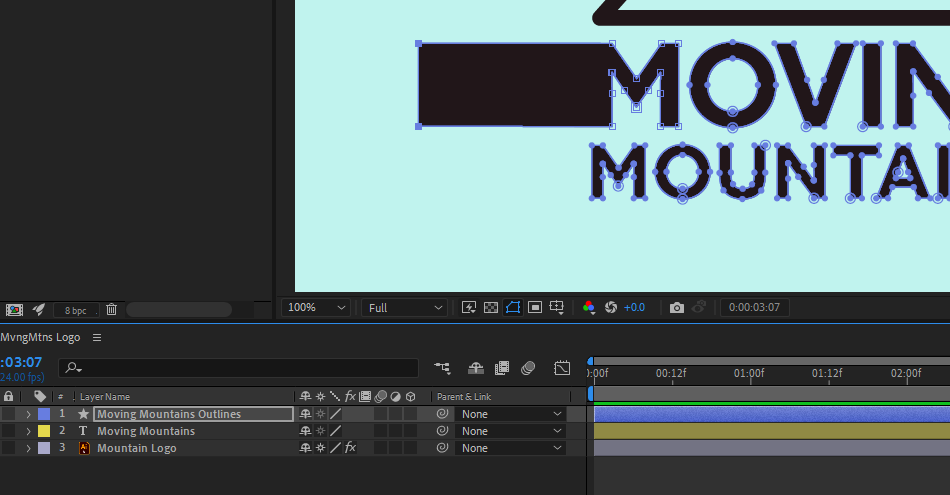
Once this is complete, After Effects will stack each new shape layer above the original vectors. If you do this with multiple items, it can start to get messy fast.
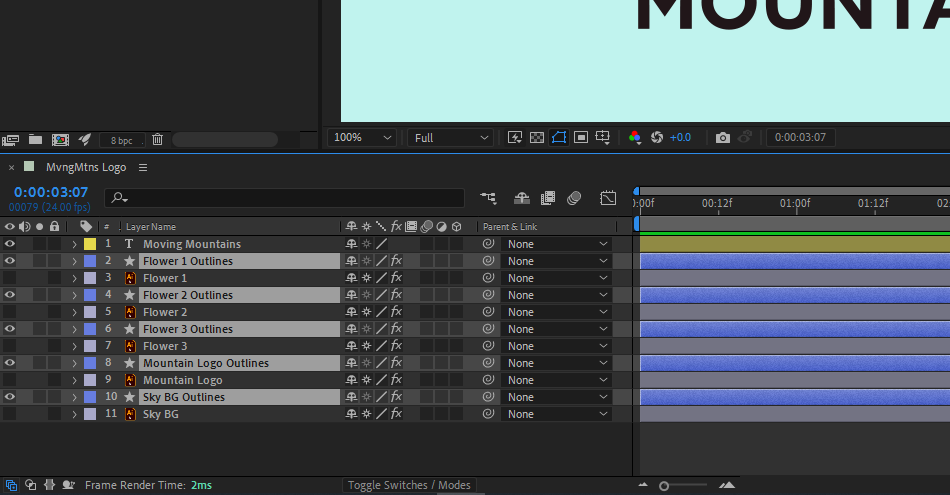
Notice how they all have "Outlines" added to the end of the new layer's name? If you’re overwhelmed with the new number of layers in your timeline, go to the search bar at the top of your Timeline panel and search for “outline”. This will isolate all of the (un-renamed) shape layers in your comp.
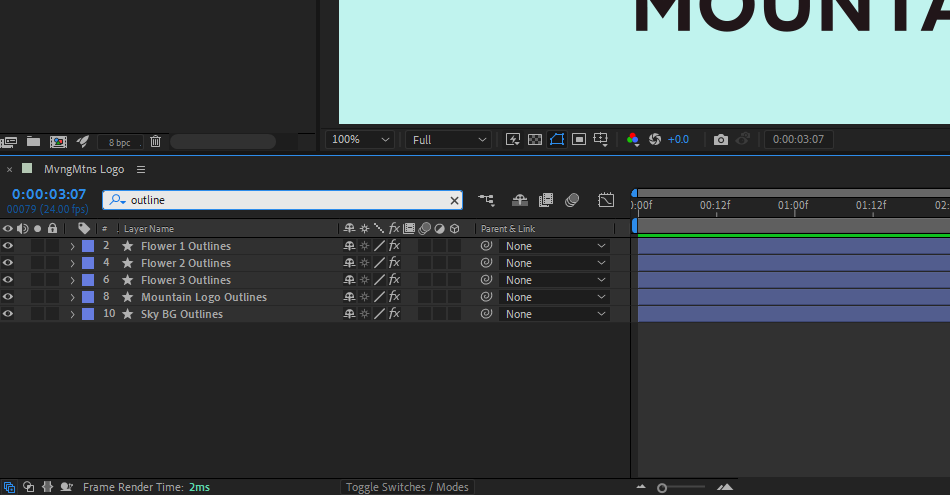
Select all of your newly-created shape layers and quickly move them to the top of your layer stack by hitting Shift + Command + ] (Mac OS) or Shift + Control + ] (Windows).
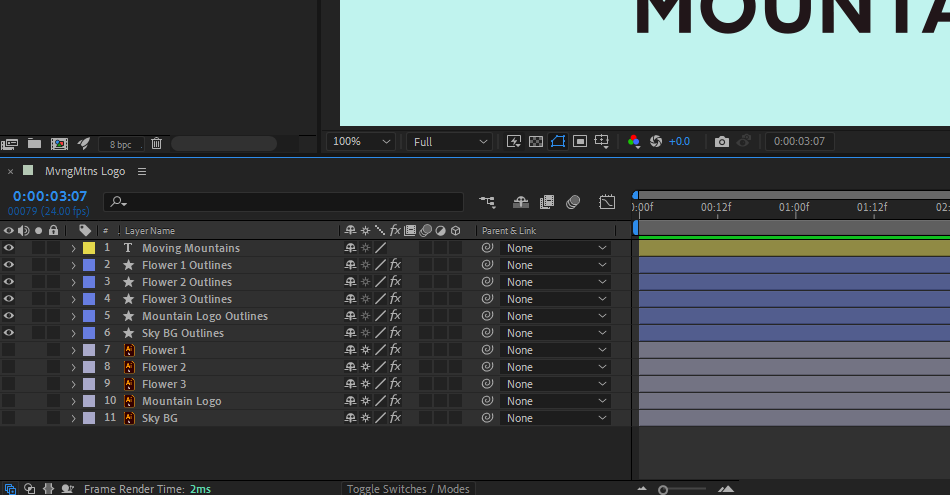
When you clear the search bar, your new shape layers will all be grouped together visually, and the old .ai layers will be less in your way. It's often smart to keep them disabled at the bottom of your comp, just in case you mess anything up on your new shape layer version, but you're welcome to delete them if you like to live on the edge!
Welcome to a Whole New Layer of Motion Design Skills
As you can see, the Layer menu is stuffed with all kinds of useful goodies. You can use the Layer menu to find your files, convert text to shape layers, turn vector files into shape layers, and tons more. Integrating these options into your workflow is going to save you a ton of time and make you a stronger animator. Be sure to experiment and test these tools out on future projects!
After Effects Kickstart
If you're looking to get the most out of After Effects, maybe it's time to take a more proactive step in your professional development. That's why we put together After Effects Kickstart, a course designed to give you a strong foundation in this core program.
After Effects Kickstart is the ultimate After Effects intro course for motion designers. In this course, you'll learn the most commonly used tools and best practices for using them while mastering the After Effects interface.
ENROLL NOW!
Acidbite ➔
50% off everything

ActionVFX ➔
30% off all plans and credit packs - starts 11/26

Adobe ➔
50% off all apps and plans through 11/29

aescripts ➔
25% off everything through 12/6
Affinity ➔
50% off all products

Battleaxe ➔
30% off from 11/29-12/7
Boom Library ➔
30% off Boom One, their 48,000+ file audio library
BorisFX ➔
25% off everything, 11/25-12/1

Cavalry ➔
33% off pro subscriptions (11/29 - 12/4)

FXFactory ➔
25% off with code BLACKFRIDAY until 12/3

Goodboyninja ➔
20% off everything

Happy Editing ➔
50% off with code BLACKFRIDAY

Huion ➔
Up to 50% off affordable, high-quality pen display tablets

Insydium ➔
50% off through 12/4
JangaFX ➔
30% off an indie annual license
Kitbash 3D ➔
$200 off Cargo Pro, their entire library
Knights of the Editing Table ➔
Up to 20% off Premiere Pro Extensions
Maxon ➔
25% off Maxon One, ZBrush, & Redshift - Annual Subscriptions (11/29 - 12/8)
Mode Designs ➔
Deals on premium keyboards and accessories
Motion Array ➔
10% off the Everything plan
Motion Hatch ➔
Perfect Your Pricing Toolkit - 50% off (11/29 - 12/2)

MotionVFX ➔
30% off Design/CineStudio, and PPro Resolve packs with code: BW30

Rocket Lasso ➔
50% off all plug-ins (11/29 - 12/2)

Rokoko ➔
45% off the indie creator bundle with code: RKK_SchoolOfMotion (revenue must be under $100K a year)

Shapefest ➔
80% off a Shapefest Pro annual subscription for life (11/29 - 12/2)

The Pixel Lab ➔
30% off everything
Toolfarm ➔
Various plugins and tools on sale

True Grit Texture ➔
50-70% off (starts Wednesday, runs for about a week)

Vincent Schwenk ➔
50% discount with code RENDERSALE

Wacom ➔
Up to $120 off new tablets + deals on refurbished items


All-Access Pass
Unlimited access to 50+ courses, unlimited critique, live events, and 24/7 community. Join School of Motion All-Access today.