All-Access Pass
Unlimited access to 50+ courses, unlimited critique, live events, and 24/7 community. Join School of Motion All-Access today.

An Overview of the Different Keyframe Types in After Effects.
If you're reading this than you probably have realized that keyframes are key (see what I did there?) for animation in After Effects. However, there is a lot more to keyframes than simply hitting a stopwatch or adjusting a value. In this exciting article-extravaganza we'll take a look at the ins-and-outs of keyframes in After Effects. We'll cover all sorts of nerdy terms like spacial and temporal interpolation. But don't worry it's easier to understand than you think.
Trust me, I get it. The verbiage used to explain things in After Effects can be hard to wrap your head around. But I know with a little patience (and a little bit of magic) you can figure this out.
Let's tackle interpolation first. Once we have a firm understanding of interpolation we’ll get into the different keyframe types we see in our timeline.
Understanding Interpolation in After Effects
In After Effects interpolation how the software calculates the values between two points. Meaning, that if you animate an element using keyframes, After Effects determines what the motion of that element is between the keyframes you set.
Now, interpolation can be spatial, and or temporal. So let’s quickly break down both of these terms and see what each is doing for us.
SPATIAL INTERPOLATION
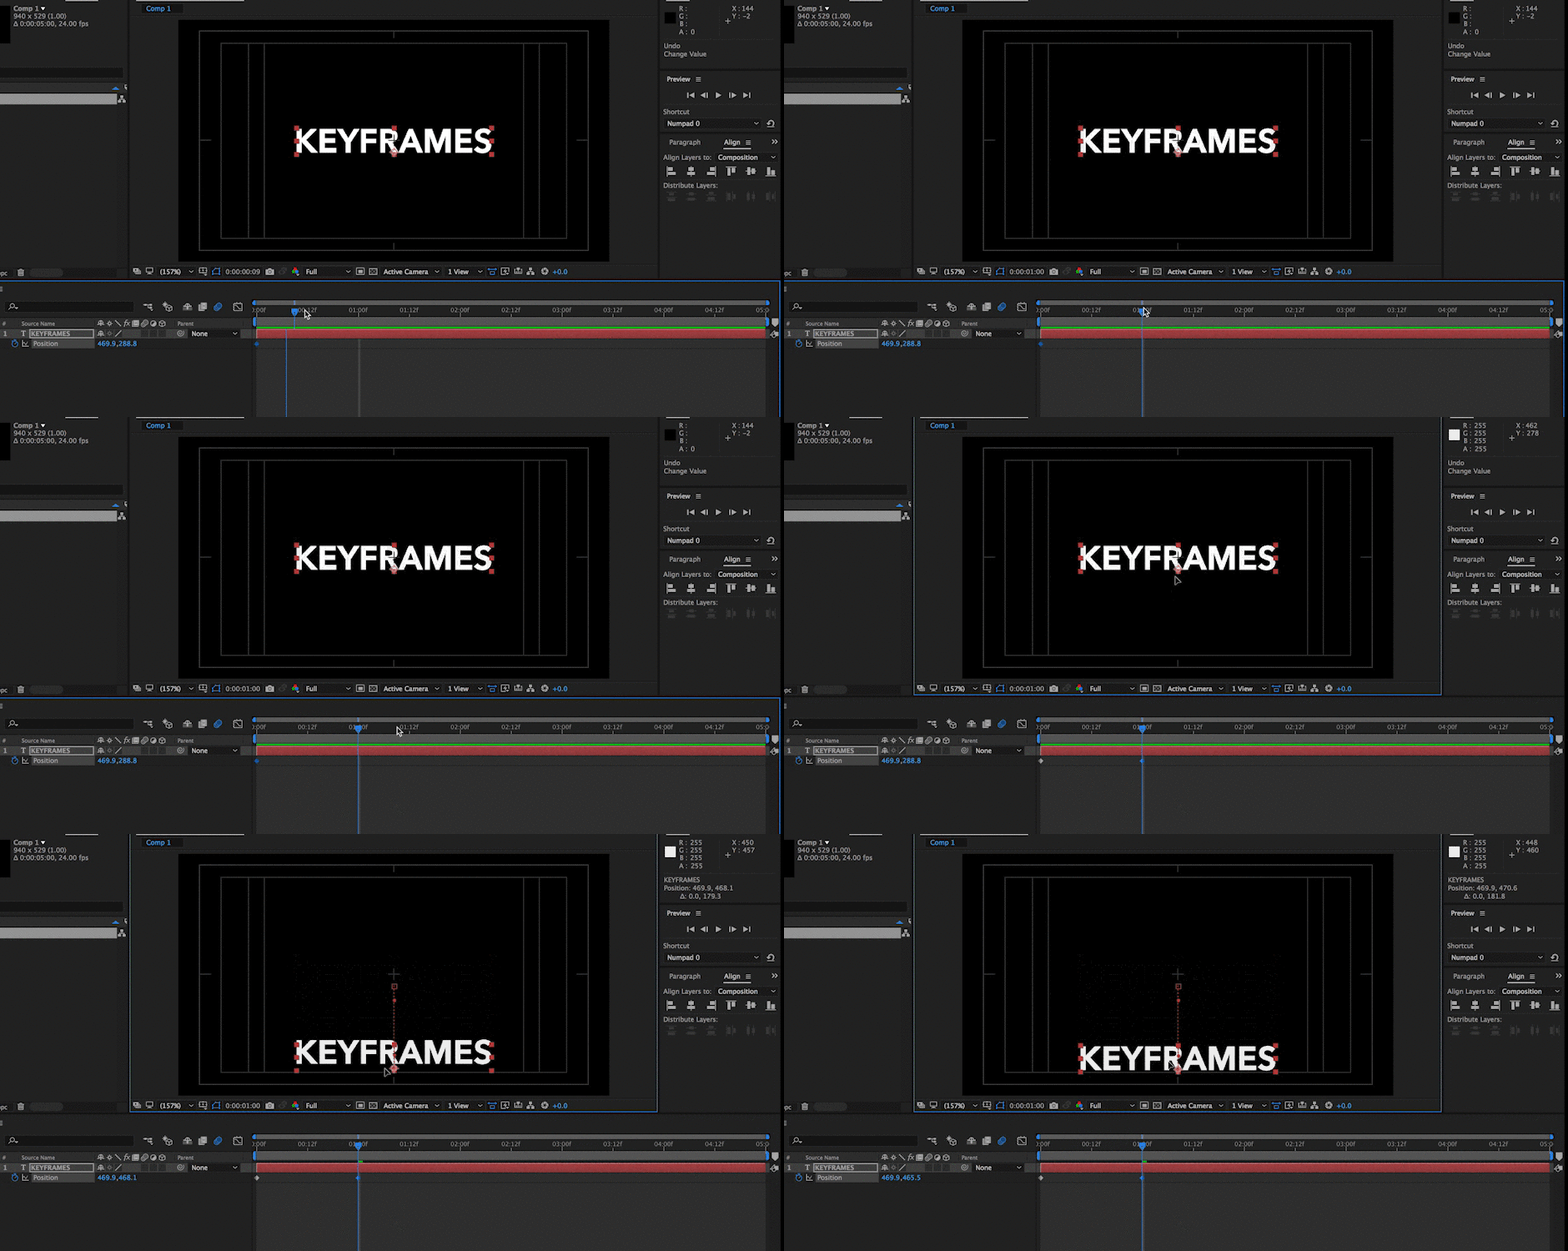
Spatial Interpolation relates an element’s motion path. By utilizing spatial interpolation you change the path of keyframes from harsh to smooth or vice-versa. After Effects will show you spatial interpolation by adding in a dotted red line where the line itself deals with the space (motion path) and the time (temporal interpolation) is represented by dots.
TEMPORAL INTERPOLATION
While spatial dealt with space and motion, temporal deals with changes to the time at which an element or layer will be at a certain point or points. Utilizing this interpolation can also help to smooth the motion of your animation out by giving the movement a more natural look.

Okay, so now we have a better understanding of interpolation, but what about a motion path? What does that mean exactly? Well, it's exactly what you think!
Understanding Motion Paths
Whenever you set two position keyframes, After Effects creates a path of motion between these keyframes. The created motion path dictates the movement of the element, and it can be adjusted by adding additional keyframes, or by adjusting the curve of the path. More on that below.
The Five Basic Keyframe Types and Their Icons
So now that we have a clear (or at least semi-opaque) understanding of interpolation and motion path, let's take a look at the different types of keyframes available to us in After Effects. Each one of these keyframe types comes with their own unique keyframe icon.
1. LINEAR KEYFRAMES
This is the most basic form of interpolation in After Effects and it utilizes a straight uniform rate of change between two keyframes. This keyframe type is indicated by the default diamond icon. Remember that this keyframe type is always abrupt and very mechanical. Most professional animators and Motion Designers will not use linear keyframes very often. For more on that check out the 12 Principles of Animation.
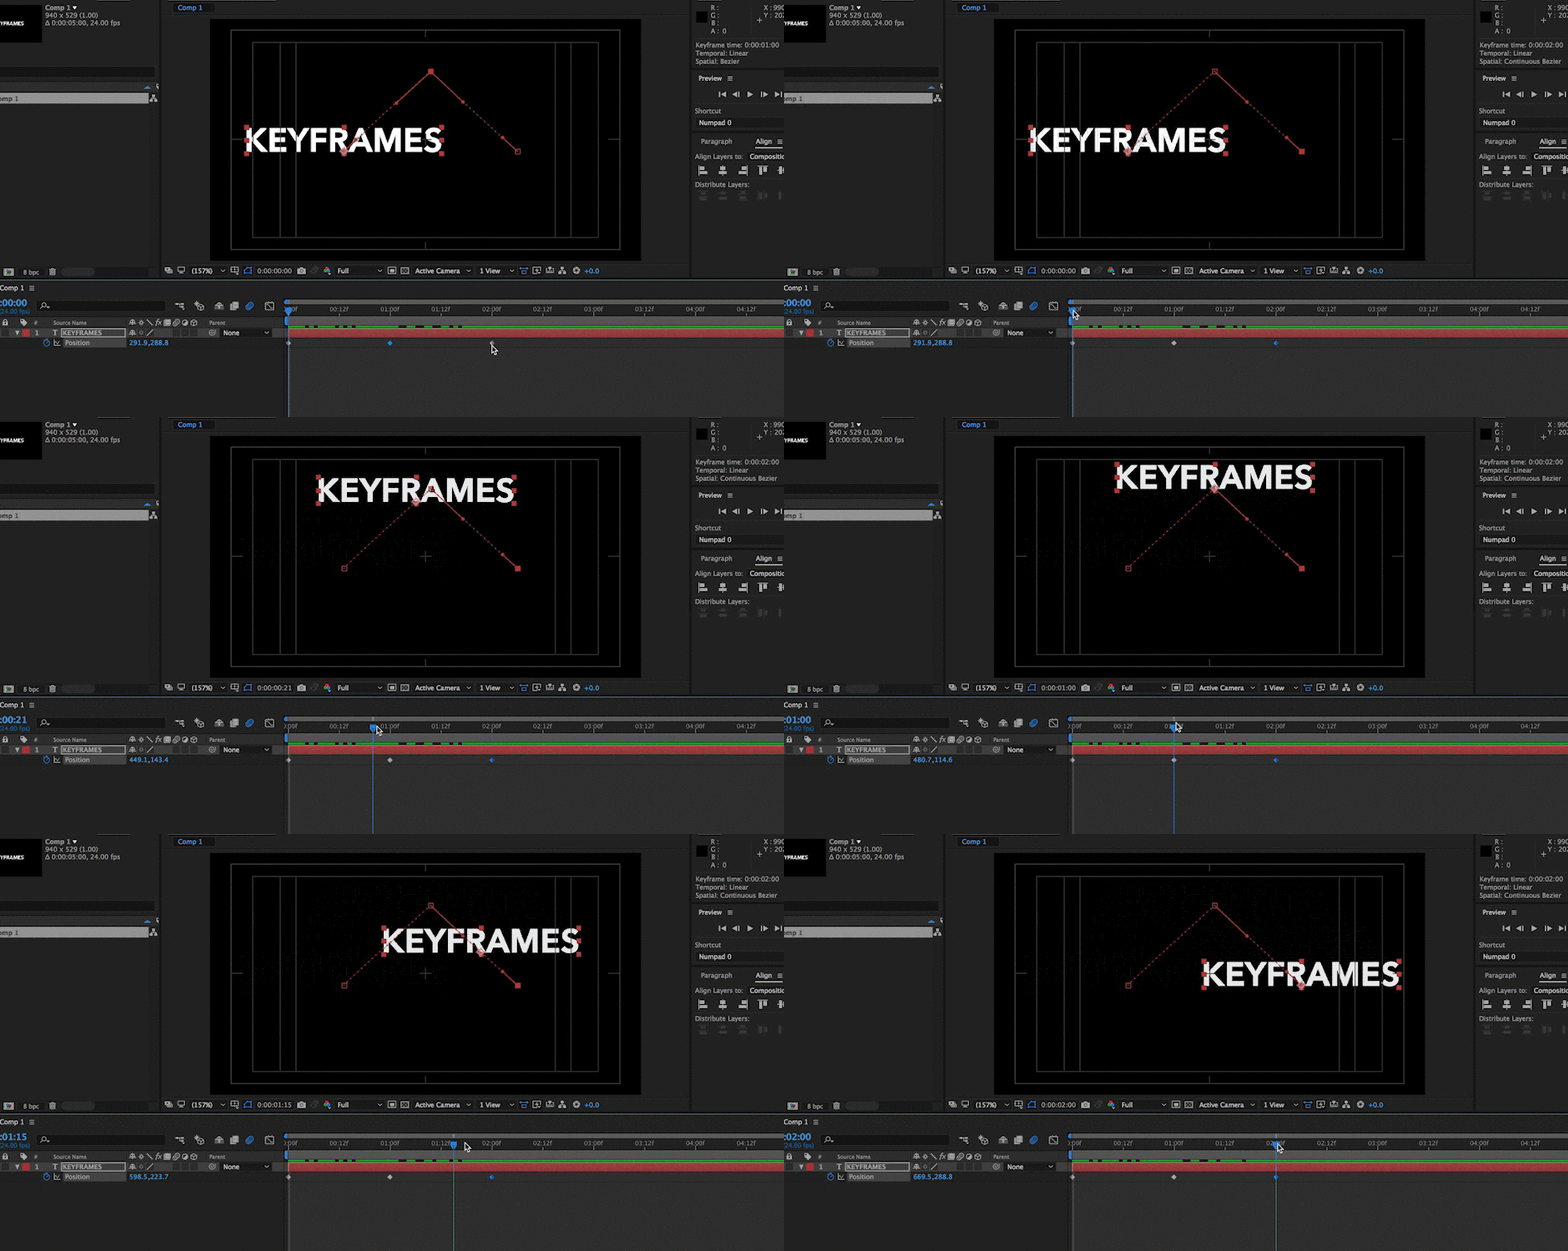
Linear interpolation is indicated by a diamond shaped keyframe, this again is the most common of keyframes and the type that you will automatically start with in After Effects.
2. Auto Bezier
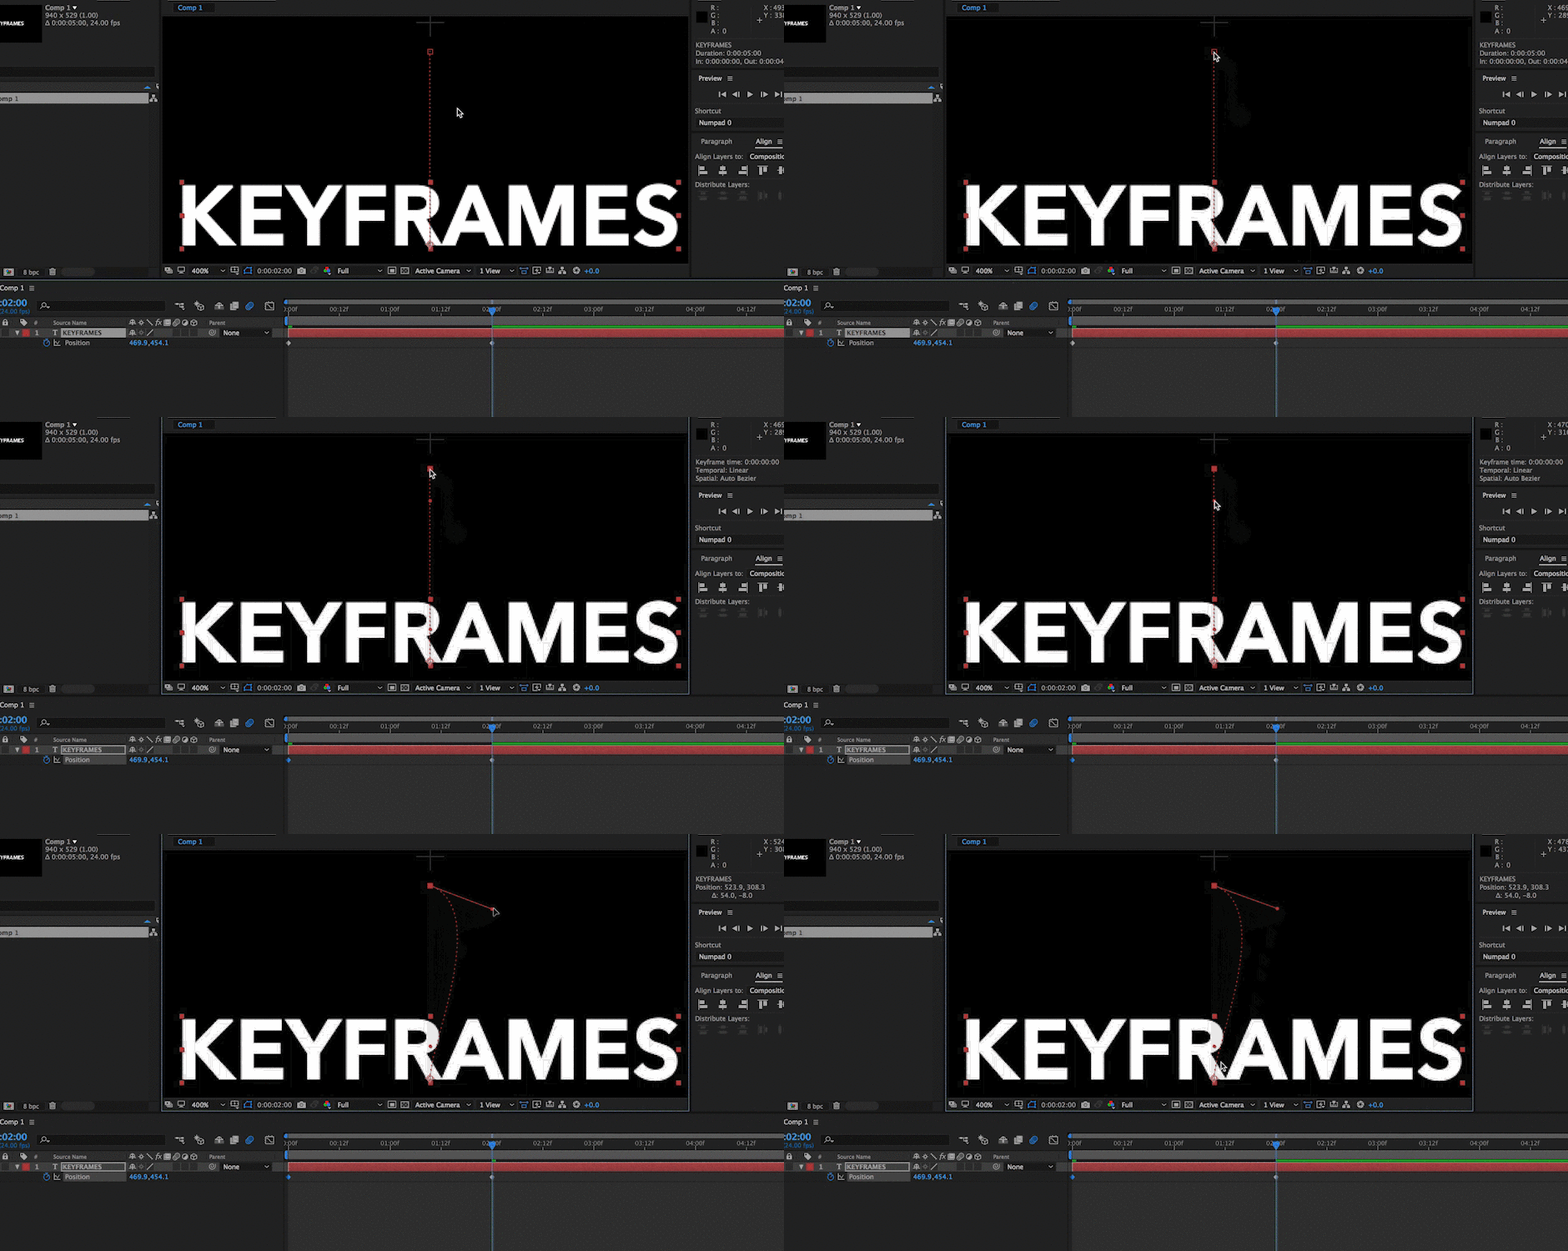
Auto bezier takes linear keyframes and smooth out the rate of change by automatically generating curves to the keyframes. This allows the element to move more fluidly. To change a linear keyframe to an auto bezier keyframe, just hold down the Cmd⌘ (Ctrl) key on your keyboard and then click the keyframe. Now, your linear keyframe is an auto bezier keyframe. If you want to revert it back to linear just repeat the process.
Note: This is only adjusting spatial interpolation (motion paths).
Auto Bezier interpolation is indicated by a circular shaped keyframe , and automatically changes the directional handles of your elements to smooth out the motion, this way it doesn’t feel as mechanical. However, just remember, if you move an auto bezier keyframe it changes to a continuous bezier, which we’ll take a look at next.
3. CONTINUOUS BEZIER
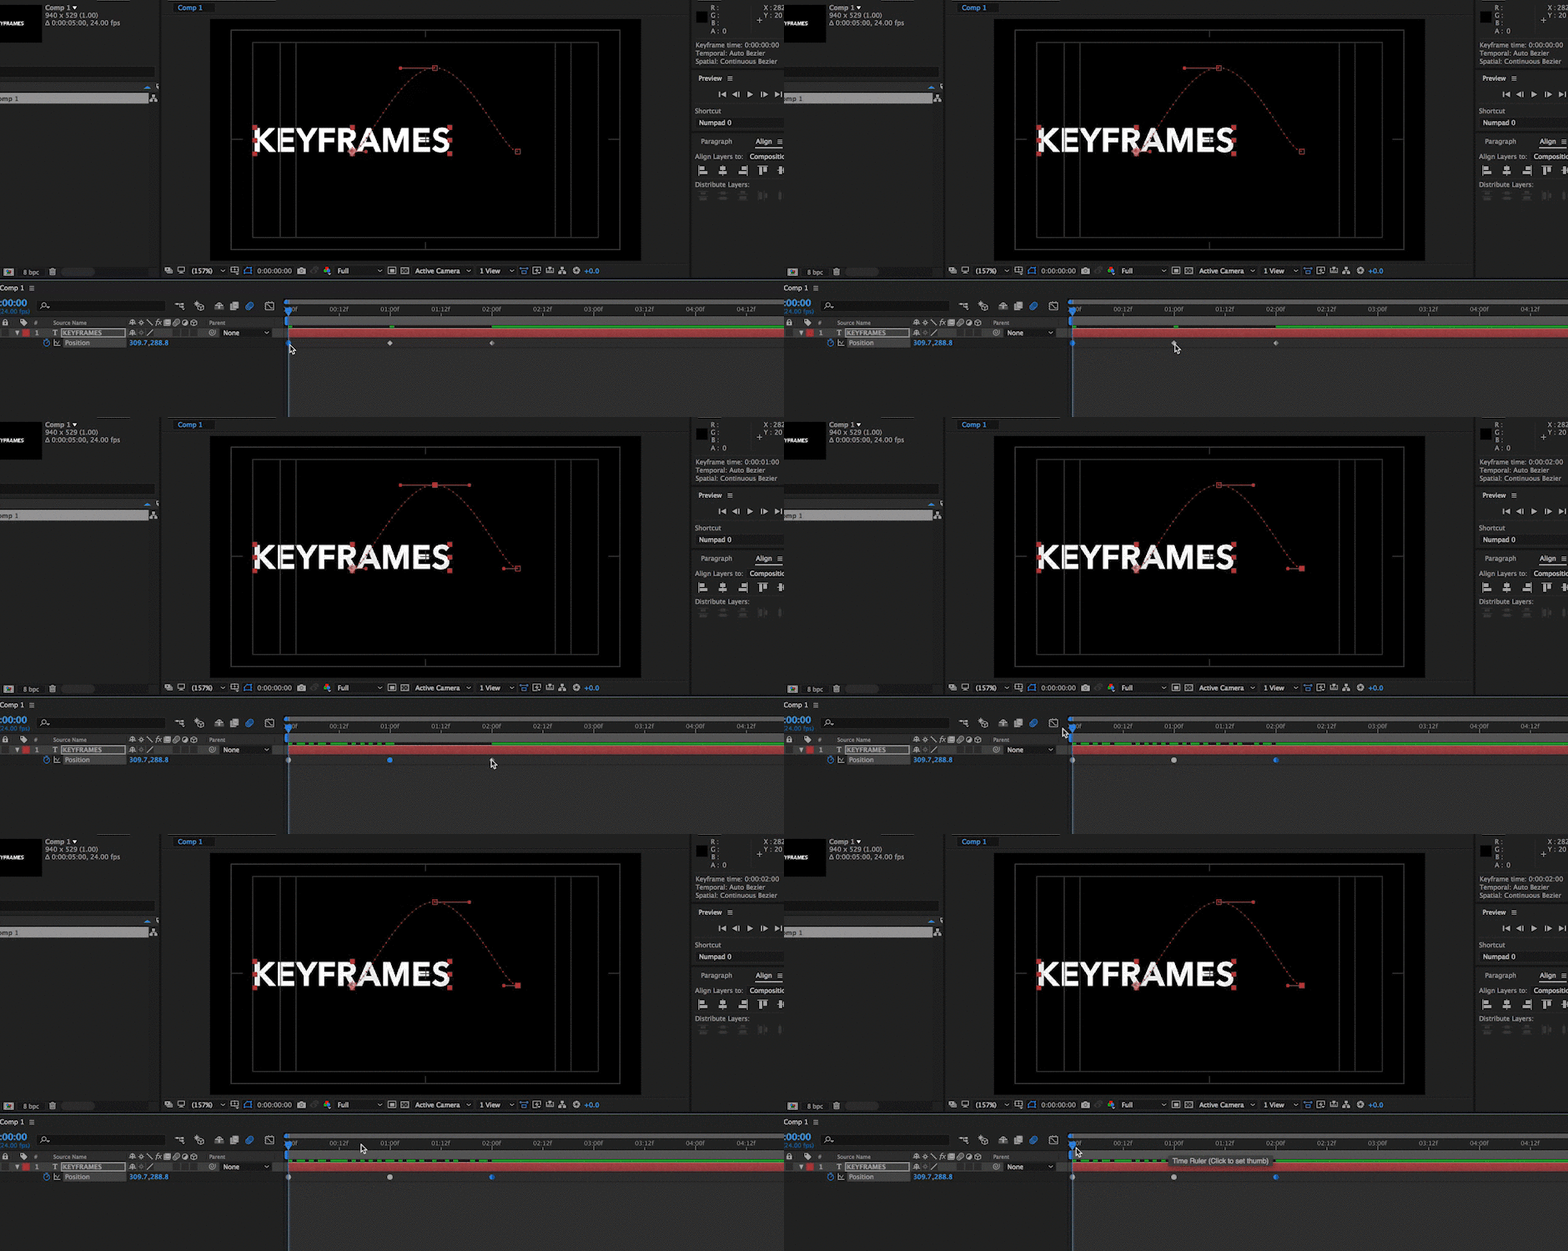
Whereas auto bezier smoothed out the rate of change automatically, continuous bezier does so manually. To do this you need to highlight the keyframes you want to change, then press Cmd⌘ (Ctrl) + Shift + K on your keyboard. A information box will then come up allowing you to manually adjust the interpolation.
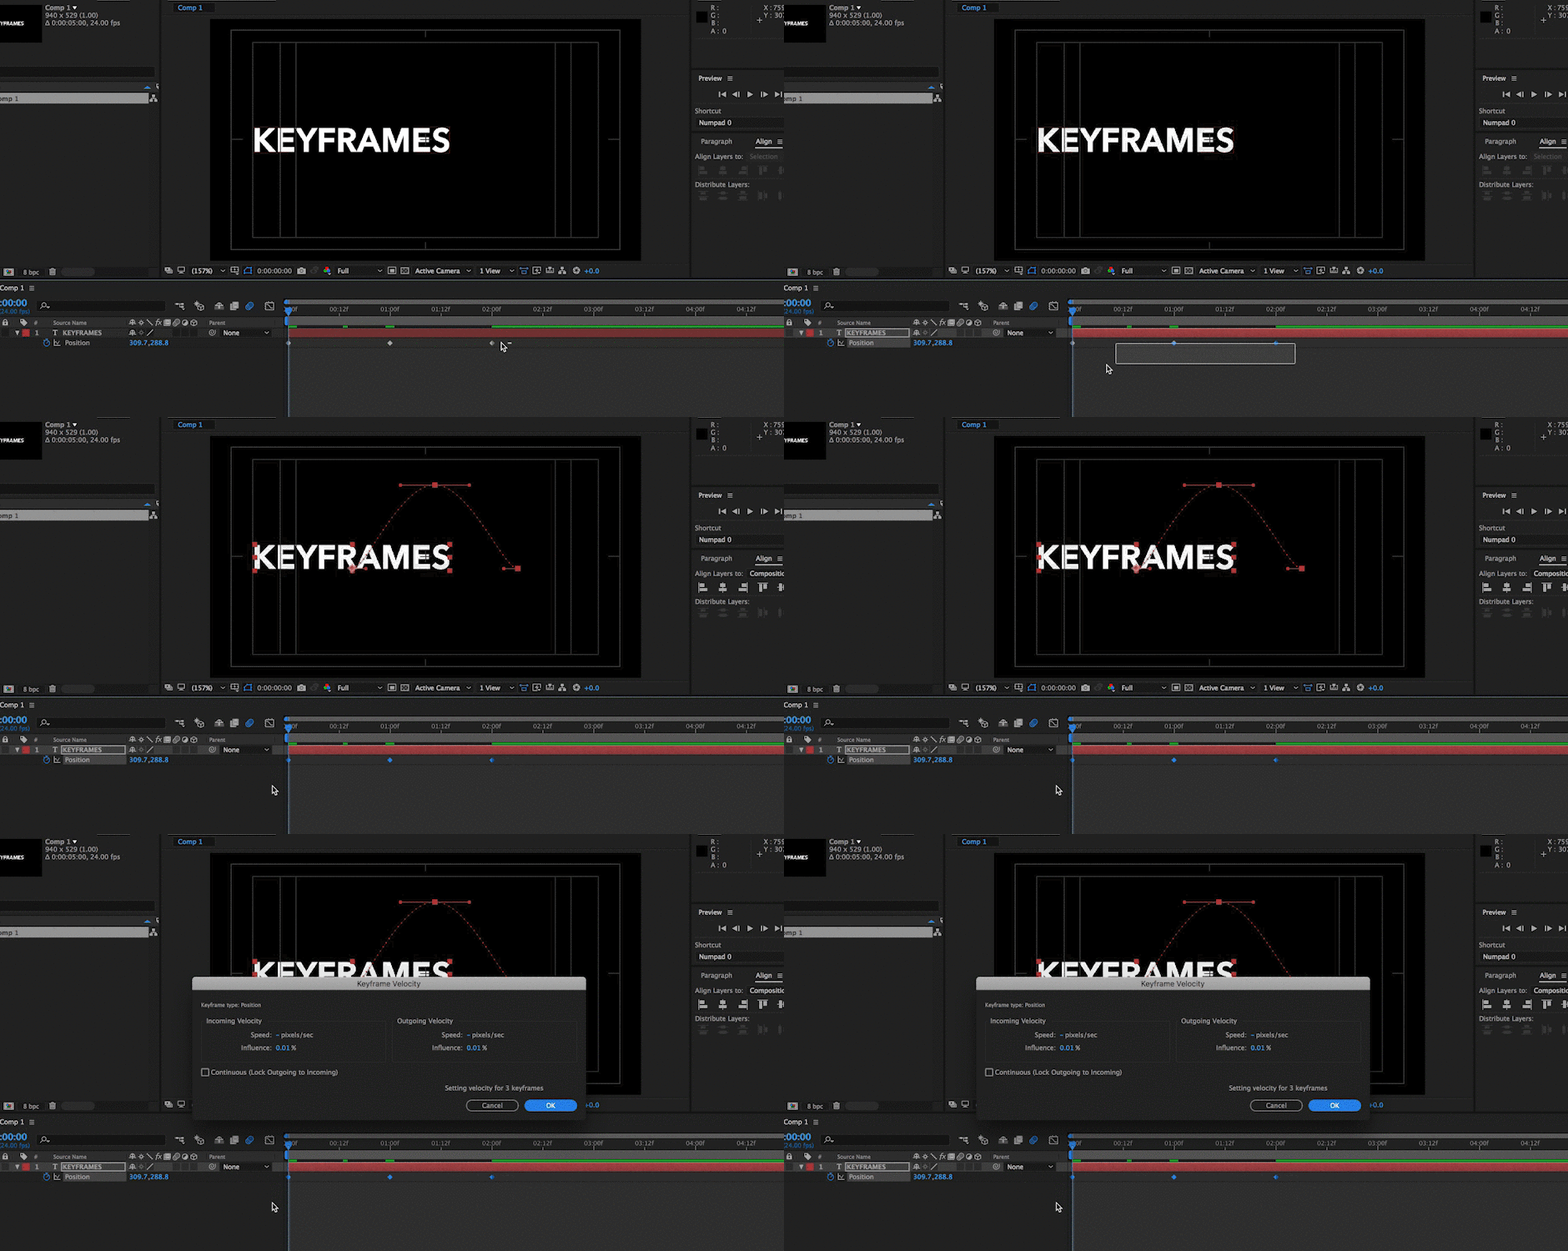
Continuous Bezier interpolation is indicated by an hourglass keyframe. You would see this keyframe type when adding an effects or additive such as the keyframe assistant “Easy Ease” option. This can be added by selecting keyframes in the timeline and then right-clicking on one of those keyframes. Then go to Keyframe Assistant > Easy Ease.
4. BEZIER KEYFRAMES
Bezier is where you have full manual control and functionality over the motion path and or the value graph. In order to adjust this manually you need to access the motion path of your element within the composition panel. Or, you can adjust things by accessing the graph editor, located in the timeline panel.
Creating a bezier doesn’t change the keyframe type or icon, as you are directly adjusting the path between two keyframes. See below for how to access and adjust both the motion path or the graph editor.
5. HOLD KEYFRAMES
A hold keyframe does exactly what the name implies, it holds a the layer on a specific keyframe. This is great for freezing footage.
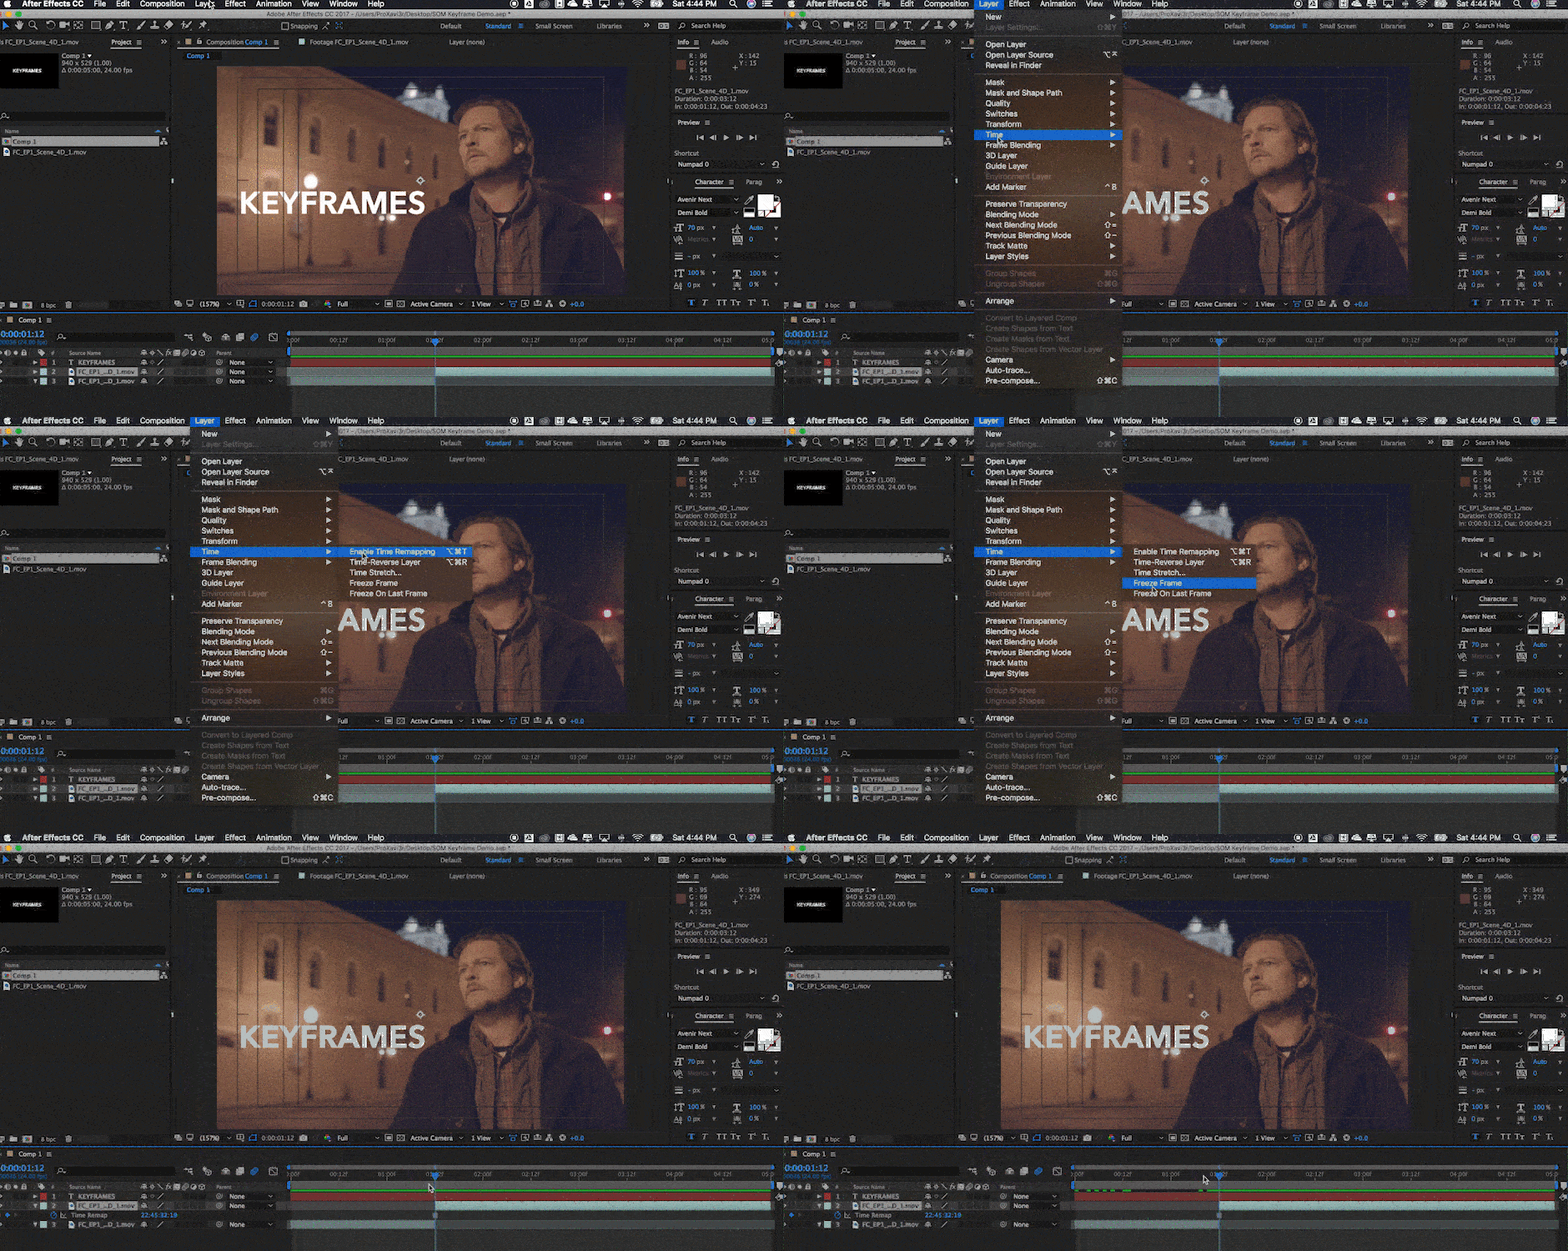
Hold Interpolation is indicated by a square shaped keyframe, you can apply this type of interpolation by selecting your layer and then going to Layer > Time > Freeze Frame.
SO WILL I REALLY USE ALL OF THIS?
I can say without hesitation that you’ll use these various types of interpolation and keyframes very consistently in your work. However, if you want to really get the most out of your animation movements you definitely need to check out our Graph Editor tutorial for After Effects.
ENROLL NOW!
Acidbite ➔
50% off everything

ActionVFX ➔
30% off all plans and credit packs - starts 11/26

Adobe ➔
50% off all apps and plans through 11/29

aescripts ➔
25% off everything through 12/6
Affinity ➔
50% off all products

Battleaxe ➔
30% off from 11/29-12/7
Boom Library ➔
30% off Boom One, their 48,000+ file audio library
BorisFX ➔
25% off everything, 11/25-12/1

Cavalry ➔
33% off pro subscriptions (11/29 - 12/4)

FXFactory ➔
25% off with code BLACKFRIDAY until 12/3

Goodboyninja ➔
20% off everything

Happy Editing ➔
50% off with code BLACKFRIDAY

Huion ➔
Up to 50% off affordable, high-quality pen display tablets

Insydium ➔
50% off through 12/4
JangaFX ➔
30% off an indie annual license
Kitbash 3D ➔
$200 off Cargo Pro, their entire library
Knights of the Editing Table ➔
Up to 20% off Premiere Pro Extensions
Maxon ➔
25% off Maxon One, ZBrush, & Redshift - Annual Subscriptions (11/29 - 12/8)
Mode Designs ➔
Deals on premium keyboards and accessories
Motion Array ➔
10% off the Everything plan
Motion Hatch ➔
Perfect Your Pricing Toolkit - 50% off (11/29 - 12/2)

MotionVFX ➔
30% off Design/CineStudio, and PPro Resolve packs with code: BW30

Rocket Lasso ➔
50% off all plug-ins (11/29 - 12/2)

Rokoko ➔
45% off the indie creator bundle with code: RKK_SchoolOfMotion (revenue must be under $100K a year)

Shapefest ➔
80% off a Shapefest Pro annual subscription for life (11/29 - 12/2)

The Pixel Lab ➔
30% off everything
Toolfarm ➔
Various plugins and tools on sale

True Grit Texture ➔
50-70% off (starts Wednesday, runs for about a week)

Vincent Schwenk ➔
50% discount with code RENDERSALE

Wacom ➔
Up to $120 off new tablets + deals on refurbished items


All-Access Pass

Unlimited access to 50+ courses, unlimited critique, live events, and 24/7 community. Join School of Motion All-Access today.
