All-Access Pass
Unlimited access to 50+ courses, unlimited critique, live events, and 24/7 community. Join School of Motion All-Access today.

Just how well do you know the top menus in Adobe Premiere Pro?
When was the last time you took a tour of Premiere Pro’s top menu? I would bet that whenever you jump into Premiere you’re pretty comfortable in the way you work.
Chris Salters here from Better Editor. You might think you know a lot about Adobe's editing app, but I'll bet there are some hidden gems staring you in the face.
Premiere’s Edit menu is the first place you should look when trying to speed up your editing workflow. Inside the menu you can tweak keyboard shortcuts, change trim tool options, remove unused media, and utilize the paste attributes function. Paste what?
Paste Attributes in Adobe Premiere Pro
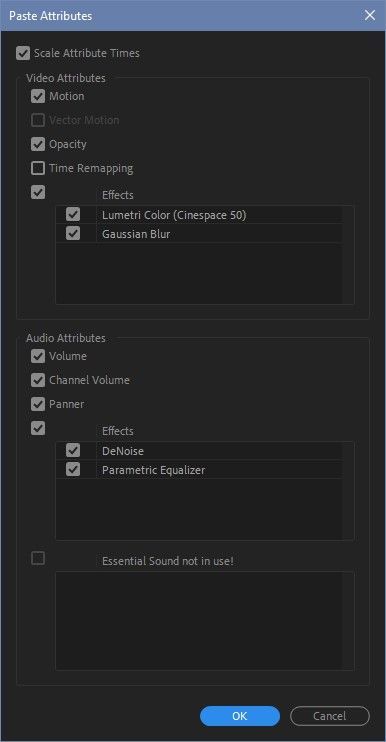
After copying a clip in the timeline, select other clips and use this function to paste the original clip’s attributes. Paste Attributes will copy clip settings, including keyframes, like:
- Motion
- Opacity
- Time Remapping
- Volume
- Channel Volume
- Panner
- Video & Audio Effects
Regarding keyframes, the dialogue box gives the option of scaling attribute times. Unchecked, copied key frames will have the same timing no matter the duration of the clip. With the box checked, keyframe timing will scale based on the pasted clip’s duration.
Remove Unused in Adobe Premiere Pro
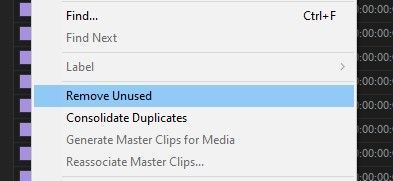
This wonderful feature helps keep your Premiere project tidy. In a single click, Remove Unused will remove all assets within the project that aren’t being used in any sequences. It doesn’t give you a confirmation prompt, but you’ll know it worked when the media vanishes.
Keyboard Shortcuts
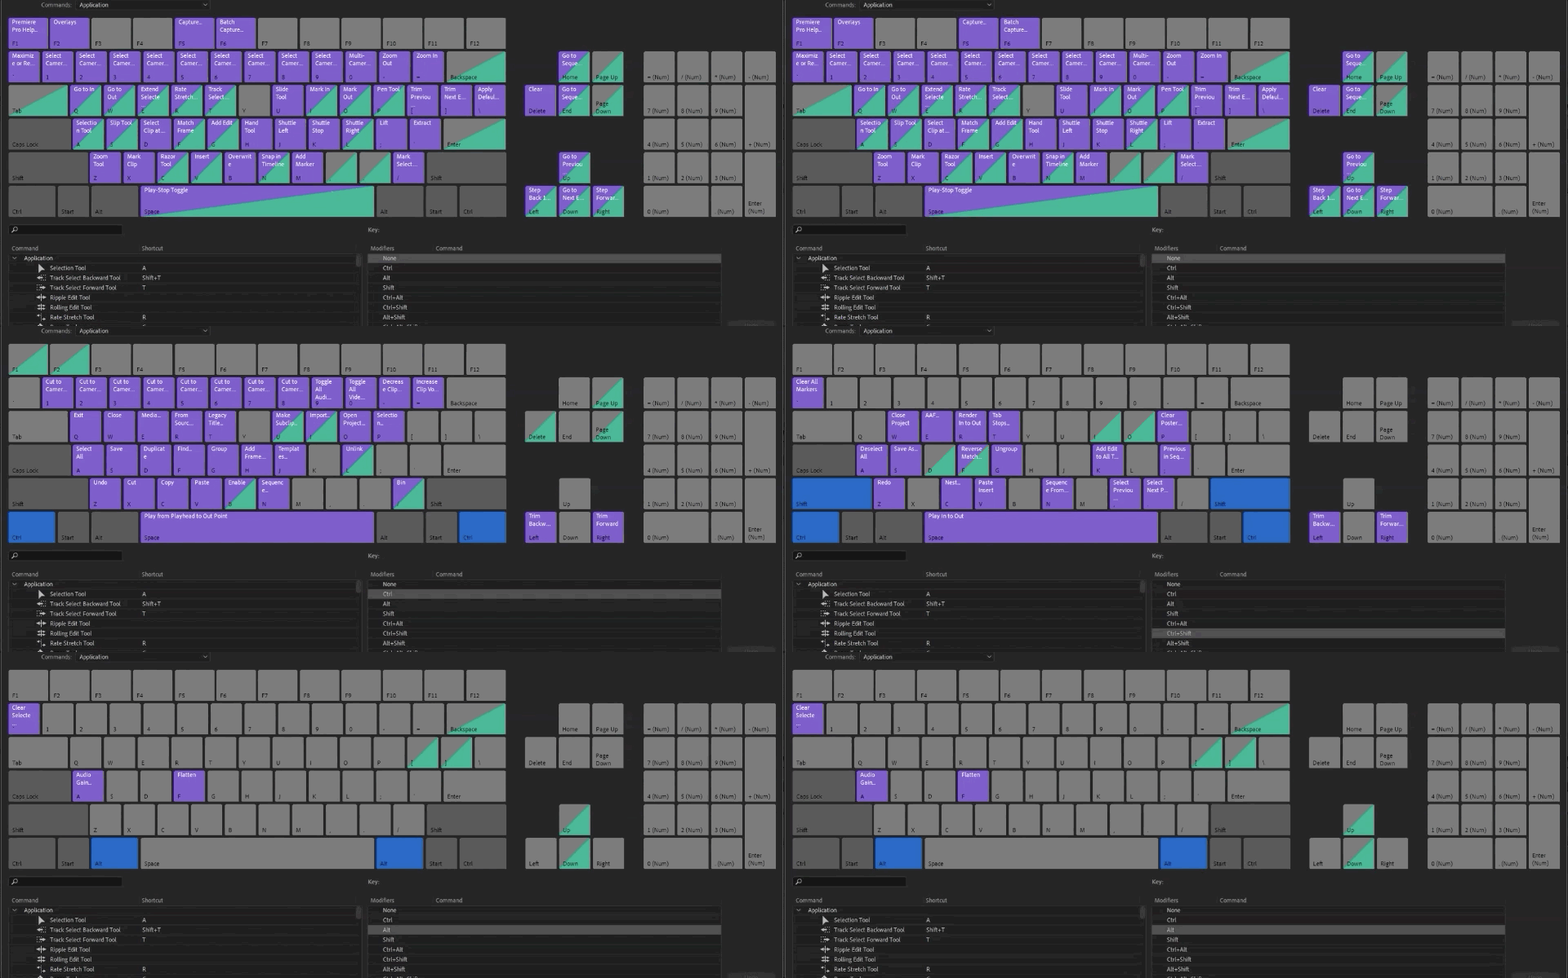
Maybe the most important feature in the Edit menu, Keyboard Shortcuts is where you can tame the Premiere Pro beast and bend it to your will. Premiere’s default hotkeys are fine, but everyone has their own way of working. Using this window you’ll be able to hone your hotkeys into a workflow that will help you fly through edits. Want an in-depth look at setting up Premiere hotkeys? This should help.
Trim in Adobe Premiere Pro
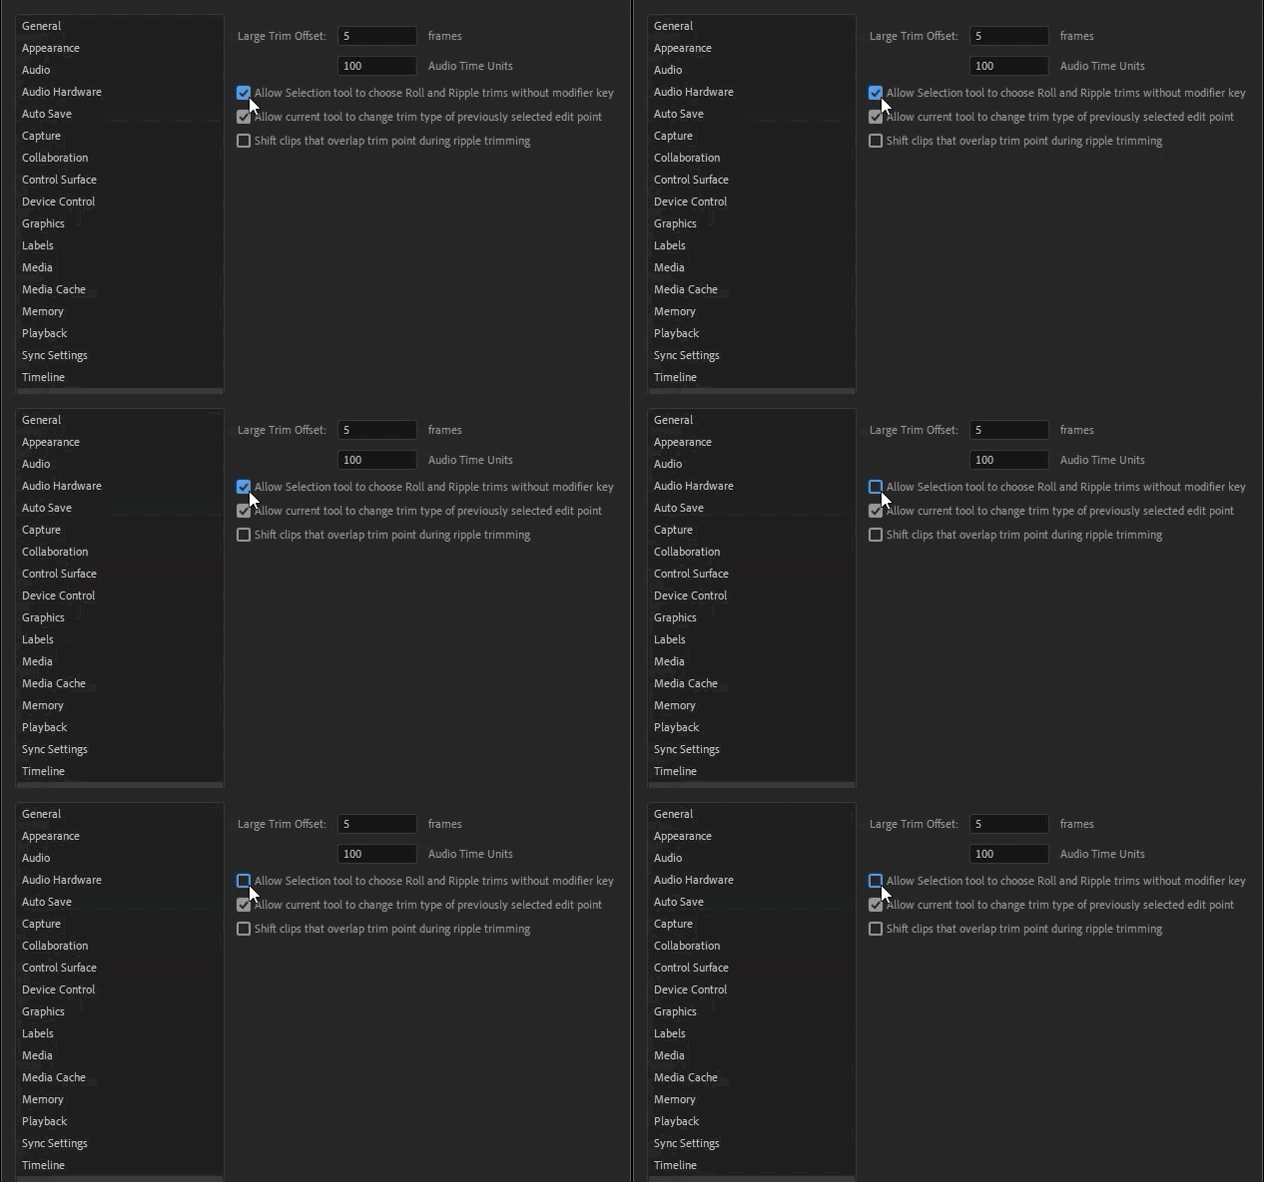
This little checkbox allows the Selection tool to choose Roll and Ripple trims without modifier keys. That’s a lot of words for “edit faster.”
This little checkbox has the power to really rock your editing world. It basically gives Premiere’s Selection tool an Avid-like behavior so that by simply moving your cursor to different positions around an edit, you’re able to use different trim tools—specifically Ripple and Roll. With this box unchecked, to perform these same actions would require you to use modifier keys and that’s an added step nobody has time for. It doesn’t sound like much, but when massaging what could be thousands of edit points in a cut, small increments of time add up quickly.
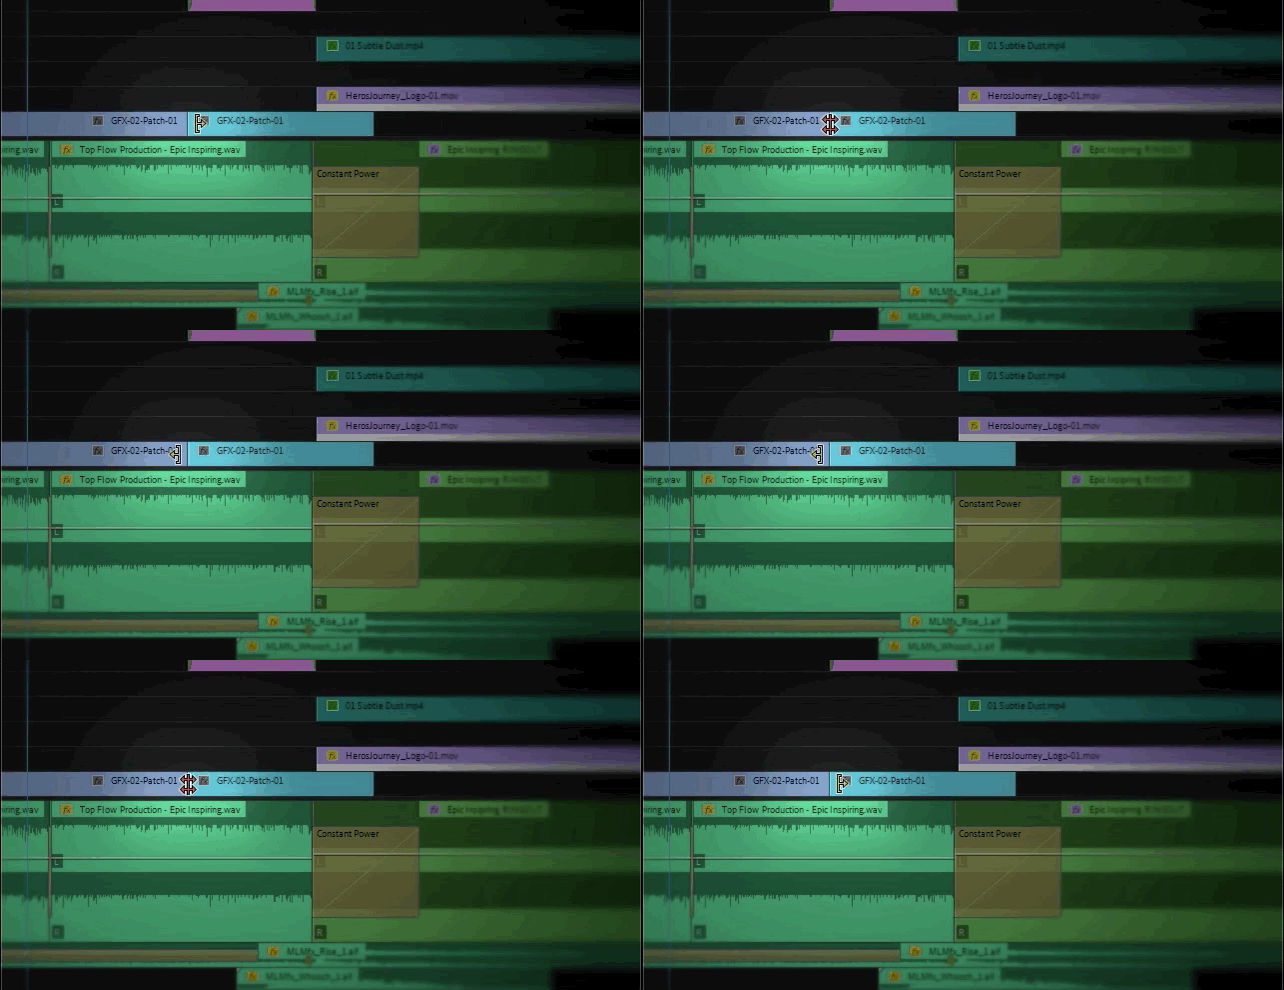
For a quick refresher, Roll trims move an edit point forwards or backwards, and do not affect the timing of the rest of the sequence. Ripple trims will either push or pull edit points forward or backwards in the timeline and the clips before or after the edit come along for the ride (depending on which direction the edit point is moving). Here’s an indepth look into more Premiere Pro trim tools.
We’ll close out the Edit menu with that, but there’s more menu items to come! If you want to see more tips and tricks like these or want to become a smarter, faster, better editor, then be sure to follow the Better Editor blog and YouTube channel.
What can you do with these new editing skills?
If you're eager to take your newfound powers on the road, might we suggest using them to polish up your demo reel? The Demo Reel is one of the most important—and often frustrating—parts of a motion designer's career. We believe this so much we actually put together an entire course about it: Demo Reel Dash!
With Demo Reel Dash, you’ll learn how to make and market your own brand of magic by spotlighting your best work. By the end of the course you’ll have a brand new demo reel, and a campaign custom-built to showcase yourself to an audience aligned to your career goals.
ENROLL NOW!
Acidbite ➔
50% off everything

ActionVFX ➔
30% off all plans and credit packs - starts 11/26

Adobe ➔
50% off all apps and plans through 11/29

aescripts ➔
25% off everything through 12/6
Affinity ➔
50% off all products

Battleaxe ➔
30% off from 11/29-12/7
Boom Library ➔
30% off Boom One, their 48,000+ file audio library
BorisFX ➔
25% off everything, 11/25-12/1

Cavalry ➔
33% off pro subscriptions (11/29 - 12/4)

FXFactory ➔
25% off with code BLACKFRIDAY until 12/3

Goodboyninja ➔
20% off everything

Happy Editing ➔
50% off with code BLACKFRIDAY

Huion ➔
Up to 50% off affordable, high-quality pen display tablets

Insydium ➔
50% off through 12/4
JangaFX ➔
30% off an indie annual license
Kitbash 3D ➔
$200 off Cargo Pro, their entire library
Knights of the Editing Table ➔
Up to 20% off Premiere Pro Extensions
Maxon ➔
25% off Maxon One, ZBrush, & Redshift - Annual Subscriptions (11/29 - 12/8)
Mode Designs ➔
Deals on premium keyboards and accessories
Motion Array ➔
10% off the Everything plan
Motion Hatch ➔
Perfect Your Pricing Toolkit - 50% off (11/29 - 12/2)

MotionVFX ➔
30% off Design/CineStudio, and PPro Resolve packs with code: BW30

Rocket Lasso ➔
50% off all plug-ins (11/29 - 12/2)

Rokoko ➔
45% off the indie creator bundle with code: RKK_SchoolOfMotion (revenue must be under $100K a year)

Shapefest ➔
80% off a Shapefest Pro annual subscription for life (11/29 - 12/2)

The Pixel Lab ➔
30% off everything
Toolfarm ➔
Various plugins and tools on sale

True Grit Texture ➔
50-70% off (starts Wednesday, runs for about a week)

Vincent Schwenk ➔
50% discount with code RENDERSALE

Wacom ➔
Up to $120 off new tablets + deals on refurbished items


All-Access Pass

Unlimited access to 50+ courses, unlimited critique, live events, and 24/7 community. Join School of Motion All-Access today.
