Just how well do you know the top menus in Adobe Premiere Pro?
When was the last time you took a tour of Premiere Pro’s top menu? I would bet that whenever you jump into Premiere you’re pretty comfortable in the way you work. Chris Salters here from Better Editor. You might think you know a lot about Adobe's editing app, but I'll bet there are some hidden gems staring you in the face. We’ve hit the halfway point and there’s more editing goodies to be found in the Sequence menu!
Adobe Premiere’s Sequence menu is a workhorse that carries the load for many editing tasks and helps increase efficiency while editing.
- Get better playback by rendering
- Find clips faster with match frames
- Add edits (cut points) to clips instantly
- And even add and delete multiple video and audio tracks at once
Render in Adobe Premiere Pro
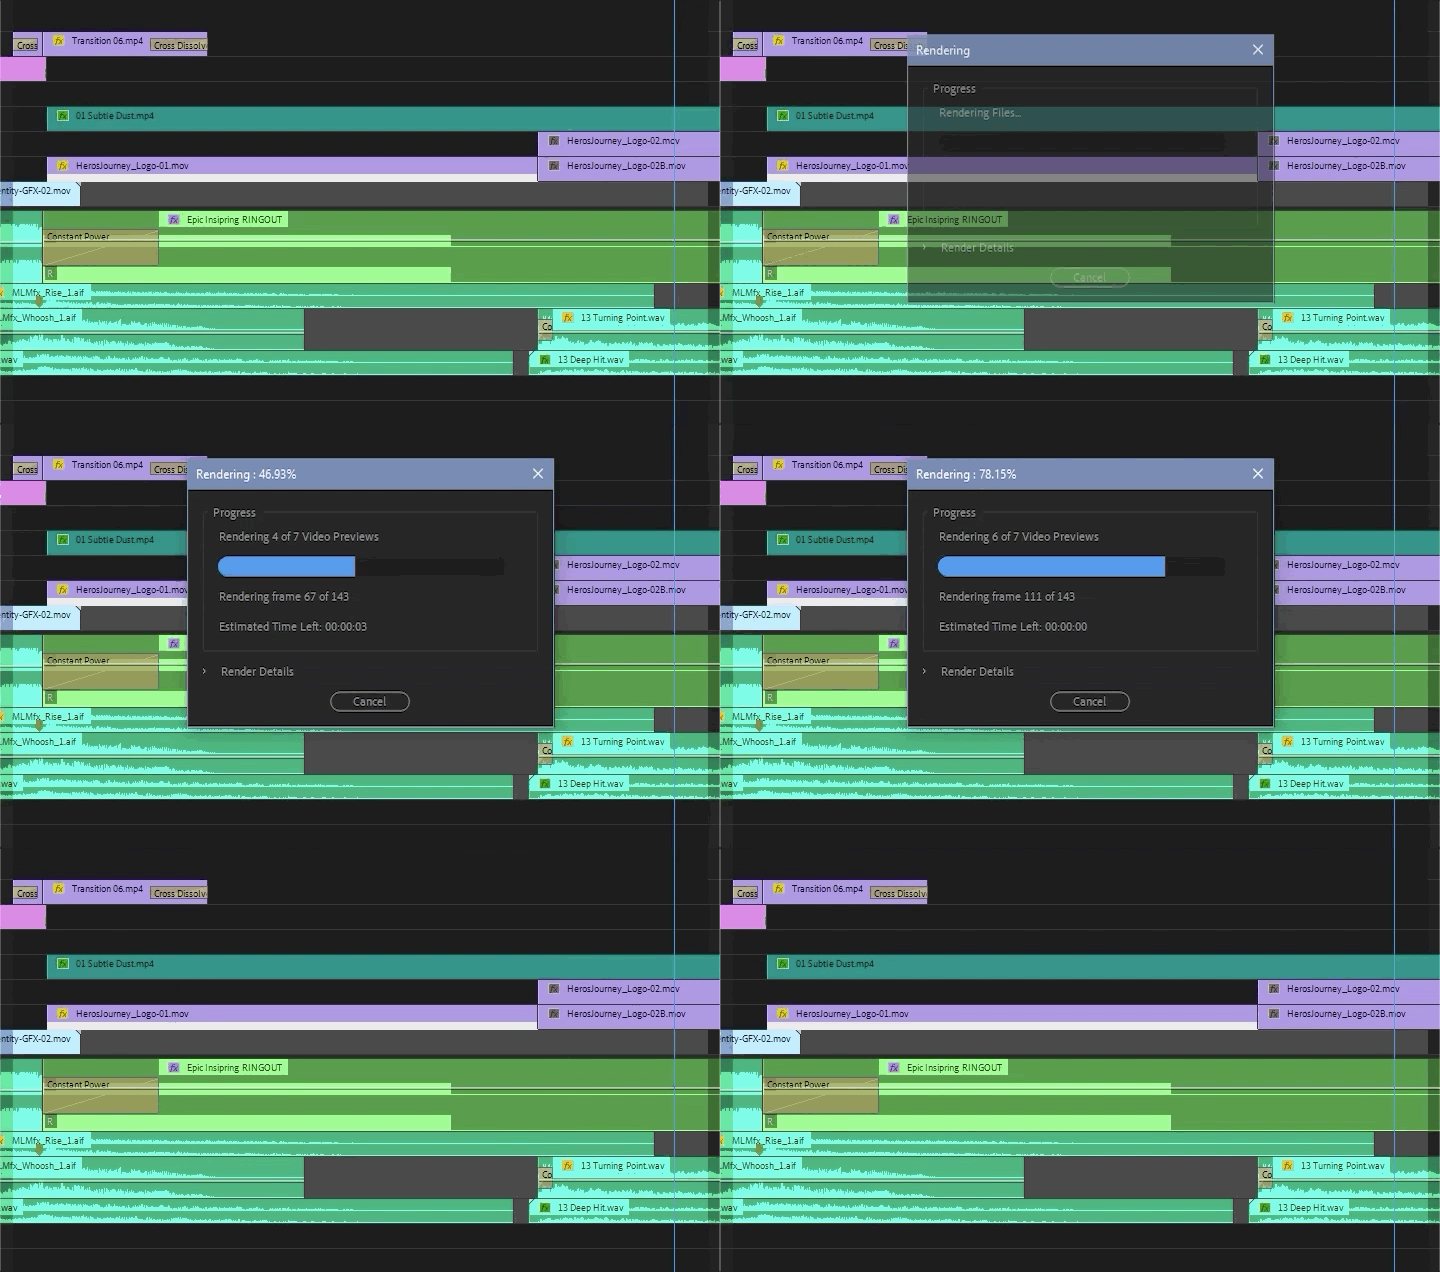
Render In to Out renders the open timeline from In to Out markers. If no markers are in the sequence, it will render the entire sequence. Rendering may take some time, but will almost guarantee smooth playback of a sequence and is great for see how all of your complex stacked effects look in real time.
Delete Renders In to Out is the arch-nemesis to Render In to Out. This option blows away render files for the open timeline from IN to OUT markers or the entire sequence, if there are no markers. Deleting render files can help save space on a scratch disk. More importantly as a troubleshooting step, deleting render files can help Premiere more accurately show edits you’ve made that may not immediately appear in the Program Monitor.
Match Frame in Adobe Premiere Pro

While editing there will come a time when you’ll want to pull up the source to a clip that’s in a timeline. You could search for the filename in the project or just hit Match Frame to have it automatically loaded into the Source Monitor. Nifty. Kick it up a notch by mapping Math Frame to a hotkey. Nifty-er.
Reverse Match Frame in Adobe Premiere Pro
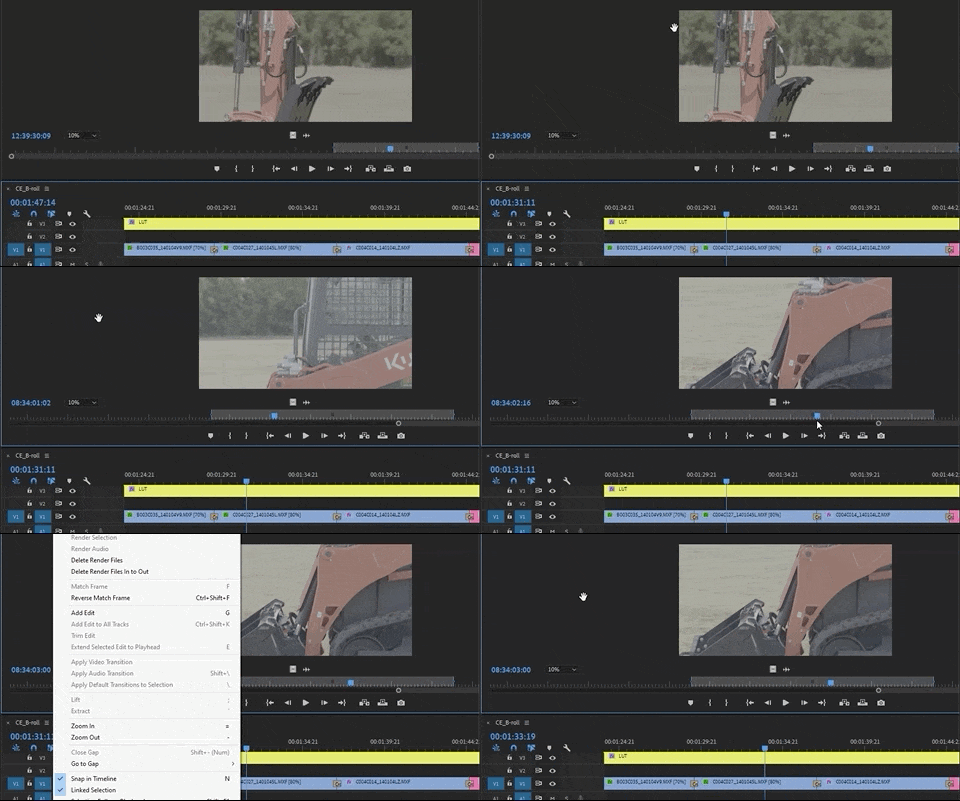
Reverse Match Frame is the forgotten little brother to Match Frame, but is equally as useful and also deserves some of your love. It’s useful because the function will show you where in a timeline the exact frame that’s in the Source Monitor is located.
Use Reverse Match Frame by loading a clip into the Source Monitor, with a sequence open. In the Source Monitor park the play head in a portion of the clip you expect to be in the open timeline, then hit Reverse Match Frame. The sequence’s playhead should jump to the matching frame from the Source Monitor, if it is indeed in the timeline.
Add Edit in Adobe Premiere Pro

Hands down this is my favorite function in Premiere Pro. I use it at least 109487 times a day while editing (slight exaggeration?). Add Edit performs the same function as Premiere’s Razor Blade tool, but is called from the menu so it can be—you guessed it—a hotkey! By default this is ctrl+K or cmd+K.
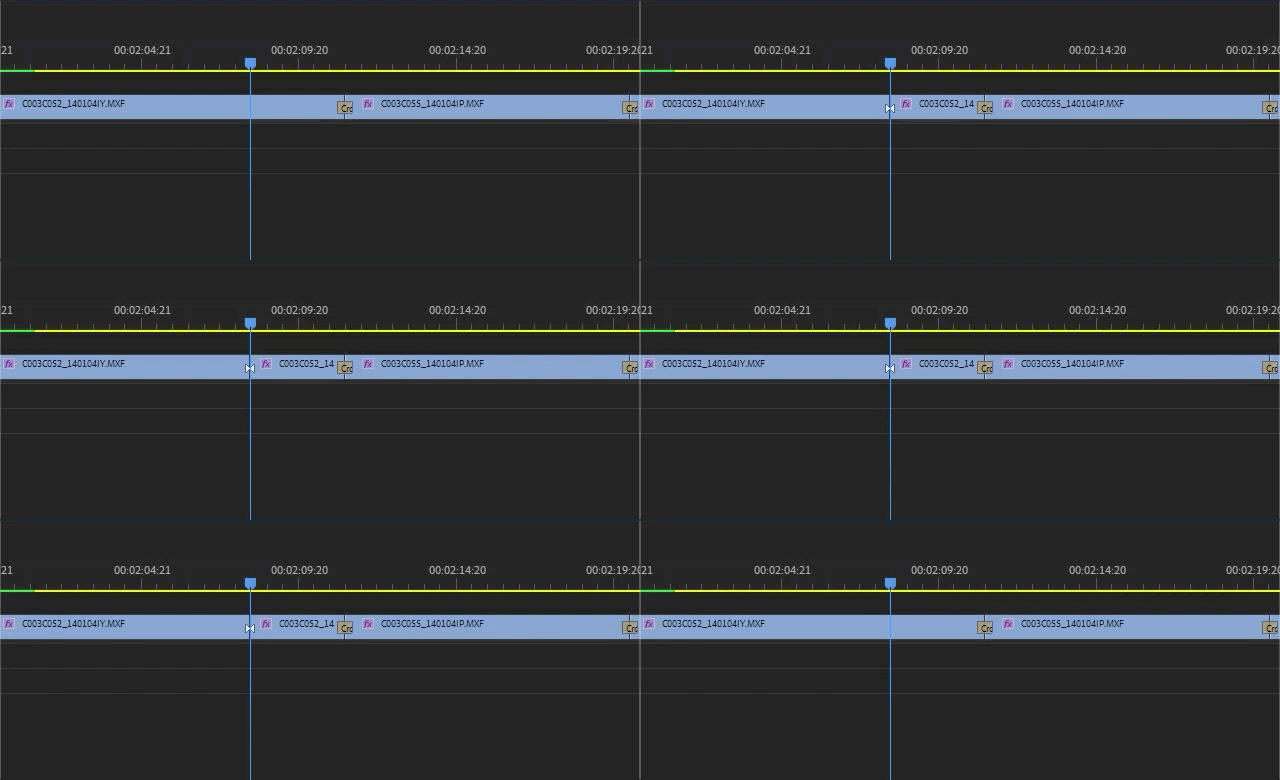
Using Add Edit you’re able to place edits, or cuts, within clips in a timeline even as you playback the timeline. This can be helpful when trying to nail down the perfect cuts to the beat of music. As the playhead moves, every time the Add Edit hotkey is pressed, a new edit appears.
Add Edit places edits selected clips, all clips on targeted tracks, or on all clips if no tracks are targeted.
Add Tracks in Adobe Premiere Pro
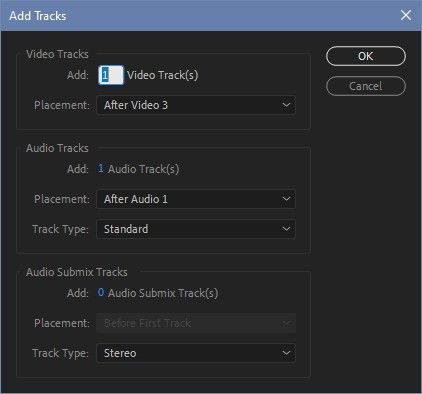
Provides a quick way to add multiple video, audio, or submix tracks at once to a sequence that’s currently being edited. You can add them all at one or as needed, per track type.
Delete Tracks in Adobe Premiere Pro
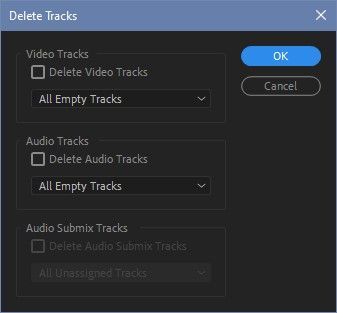
Undoes all of the work that Add Tracks performed by removing all video, audio, or submix tracks in a timeline that do not have any clips on them. Very helpful when cleaning up a sequence while preparing for final delivery.
That’s a good place to end on the Sequence menu, but check back soon as we continue to traverse Premiere’s top menu. If you want to see more tips and tricks like these or want to become a smarter, faster, better editor, then be sure to follow the Better Editor blog and YouTube channel.
What can you do with these new editing skills?
If you're eager to take your newfound powers on the road, might we suggest using them to polish up your demo reel? The Demo Reel is one of the most important—and often frustrating—parts of a motion designer's career. We believe this so much we actually put together an entire course about it: Demo Reel Dash!
With Demo Reel Dash, you’ll learn how to make and market your own brand of magic by spotlighting your best work. By the end of the course you’ll have a brand new demo reel, and a campaign custom-built to showcase yourself to an audience aligned to your career goals.
ENROLL NOW!
Acidbite ➔
50% off everything

ActionVFX ➔
30% off all plans and credit packs - starts 11/26

Adobe ➔
50% off all apps and plans through 11/29

aescripts ➔
25% off everything through 12/6
Affinity ➔
50% off all products

Battleaxe ➔
30% off from 11/29-12/7
Boom Library ➔
30% off Boom One, their 48,000+ file audio library
BorisFX ➔
25% off everything, 11/25-12/1

Cavalry ➔
33% off pro subscriptions (11/29 - 12/4)

FXFactory ➔
25% off with code BLACKFRIDAY until 12/3

Goodboyninja ➔
20% off everything

Happy Editing ➔
50% off with code BLACKFRIDAY

Huion ➔
Up to 50% off affordable, high-quality pen display tablets

Insydium ➔
50% off through 12/4
JangaFX ➔
30% off an indie annual license
Kitbash 3D ➔
$200 off Cargo Pro, their entire library
Knights of the Editing Table ➔
Up to 20% off Premiere Pro Extensions
Maxon ➔
25% off Maxon One, ZBrush, & Redshift - Annual Subscriptions (11/29 - 12/8)
Mode Designs ➔
Deals on premium keyboards and accessories
Motion Array ➔
10% off the Everything plan
Motion Hatch ➔
Perfect Your Pricing Toolkit - 50% off (11/29 - 12/2)

MotionVFX ➔
30% off Design/CineStudio, and PPro Resolve packs with code: BW30

Rocket Lasso ➔
50% off all plug-ins (11/29 - 12/2)

Rokoko ➔
45% off the indie creator bundle with code: RKK_SchoolOfMotion (revenue must be under $100K a year)

Shapefest ➔
80% off a Shapefest Pro annual subscription for life (11/29 - 12/2)

The Pixel Lab ➔
30% off everything
Toolfarm ➔
Various plugins and tools on sale

True Grit Texture ➔
50-70% off (starts Wednesday, runs for about a week)

Vincent Schwenk ➔
50% discount with code RENDERSALE

Wacom ➔
Up to $120 off new tablets + deals on refurbished items


