
Learn After Effects the Right Way
Master the After Effects interface and build a real animation skillset. Enroll in All-Access to unlock AE Kickstart and 50+ other courses.

Create complex stroke effects in After Effects with this powerful — yet simple — preset.
Jake Bartlett (School of Motion Contributor and Skillshare Instructor) is back with another free preset for you. This time he's put together Super Stroker, the tool that makes complex stroke effects easy.
To pull off what this tool does you would normally need a TON of layers, keyframes, and time to set it all up. Now you can use this effect preset to easily pull off everything from complex looking write-ons to easy alpha-matte wipe transitions, and so much more.
BONUS: Because it's built as an effect you can customize it however you please and save it to your Ray Dynamic Texture palette for easy access!
Love this preset?
In case you missed it Jake has another free preset for you that will give you a tapered stroke in one click! Grab the free Tapered Stroke preset here. We want to see what do with Super Stroker. Get creative then Tweet us @schoolofmotion and show us what you've got!
{{lead-magnet}}
Super Stroker: A free After Effects stroke preset that makes your animations pop
Hey there, I'm Jake Bartlett, and I'm thrilled to take you on a journey into the captivating world of Super Stroker — a free stroke preset for After Effects. If you're an After Effects enthusiast, you're in for a treat! Super Stroker is a powerful tool I've crafted to simplify even the most intricate animations. Best of all, it won't cost you a dime. Just grab it as a preset and you’re ready to roll!
Getting Started: Installing Super Stroker
Let's kick things off with installing Super Stroker.
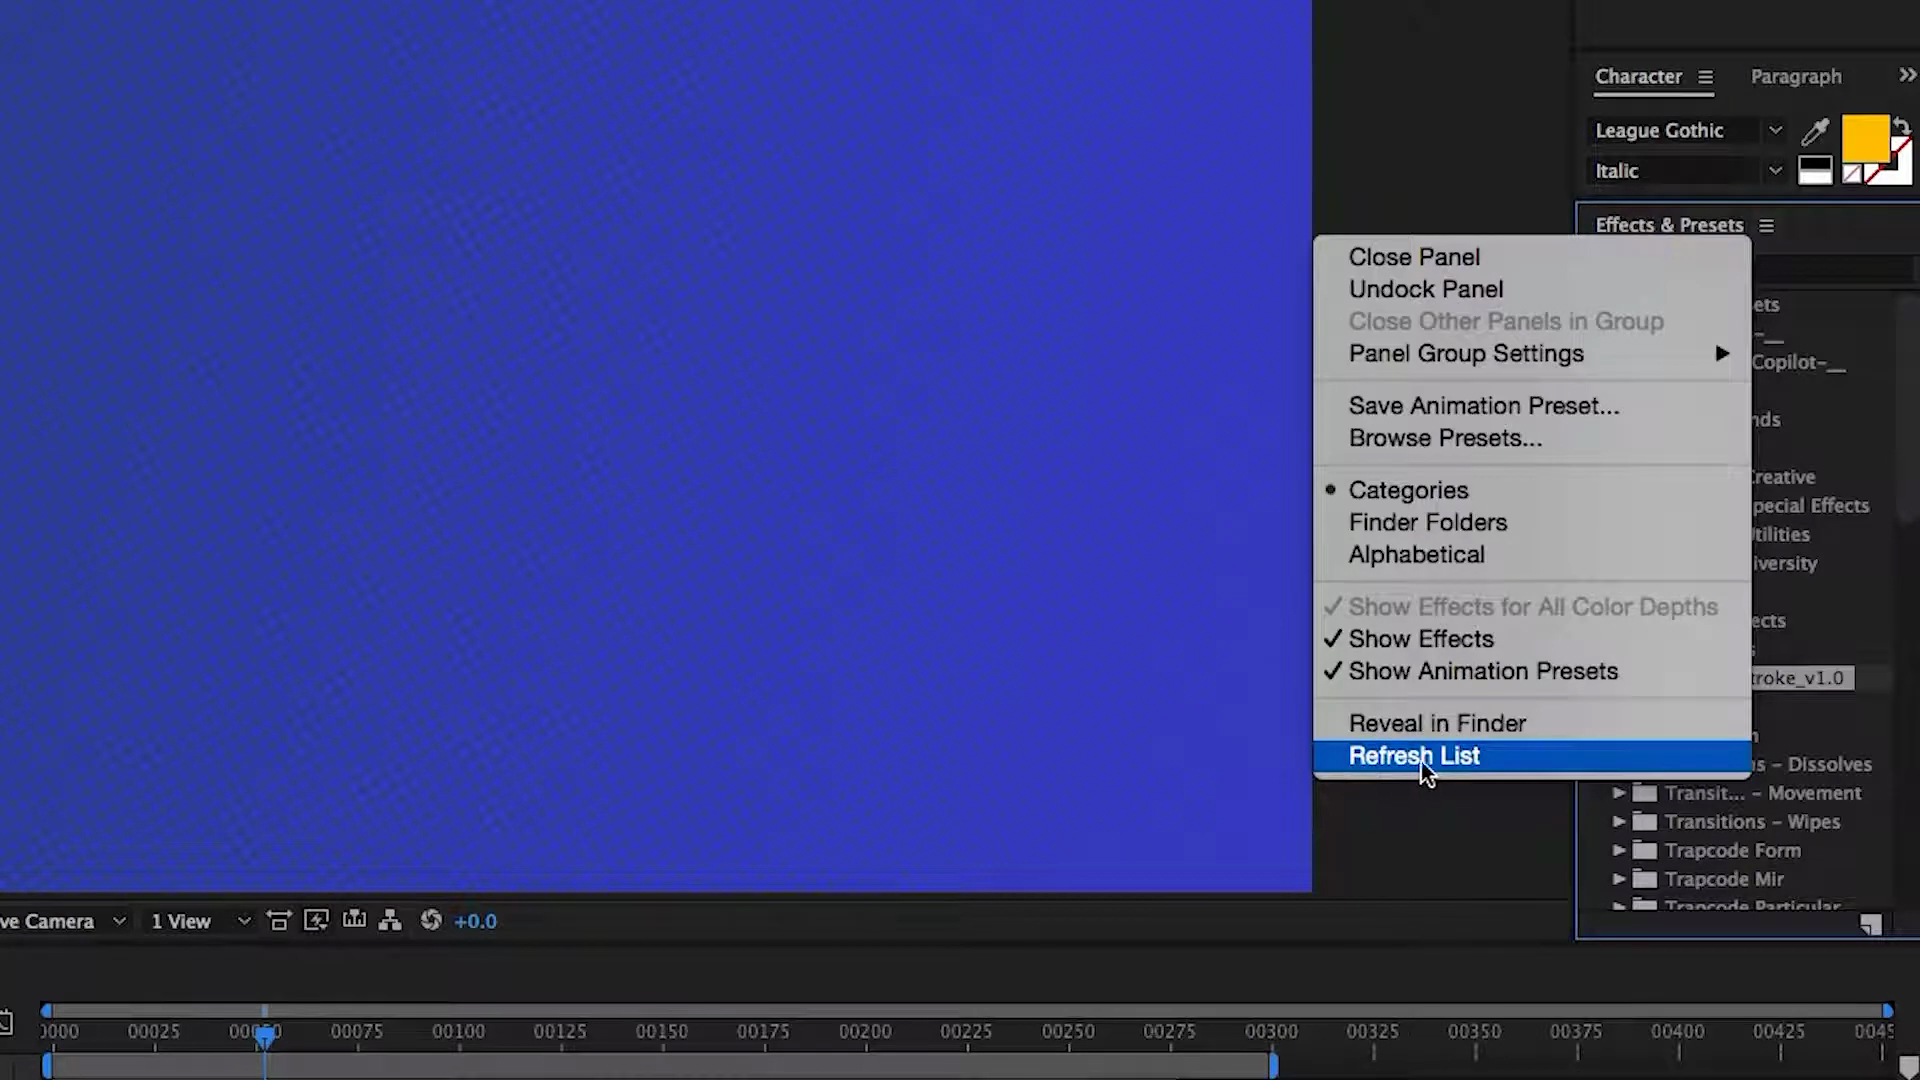
Assuming you've got the preset ready on your desktop, the process is a breeze. First off, we’re going to copy the preset then paste it into the presets folder in After Effects. After that you’ll come back into After Effects and refresh the presets by going to the very bottom of that same menu and clicking “refresh list.”
Once you’ve completed those steps Super Soaker is at your disposal without spending so much as a dime out of pocket.
Using this After Effects stroke preset is a piece of cake. Ensure you have no layers selected, double-click the preset, and watch After Effects do the heavy lifting. It generates a shape layer complete with Super Stroker controls – leaving you primed and ready for animation greatness!
Unleash the Magic: A Quick Demo for Adding Stroke in AE
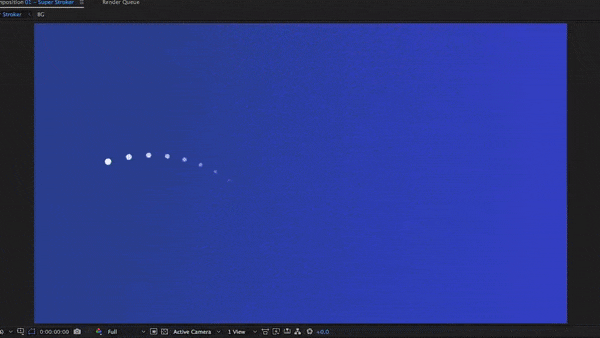
Now, let's see Super Stroker in action. I'll show you how swiftly it transforms a simple circle into an enthralling animation with an example.
Imagine we want to reveal this circle over time. To do that I'll set a keyframe on the "End" value, take it back to the beginning, drop it down to zero, and add some ease to the keyframes. After that it’s as simple as a few minor tweaks here and there to the curves in the graph editor. After that, when we hit preview - voila! The animation springs to life, all without you even breaking a sweat!

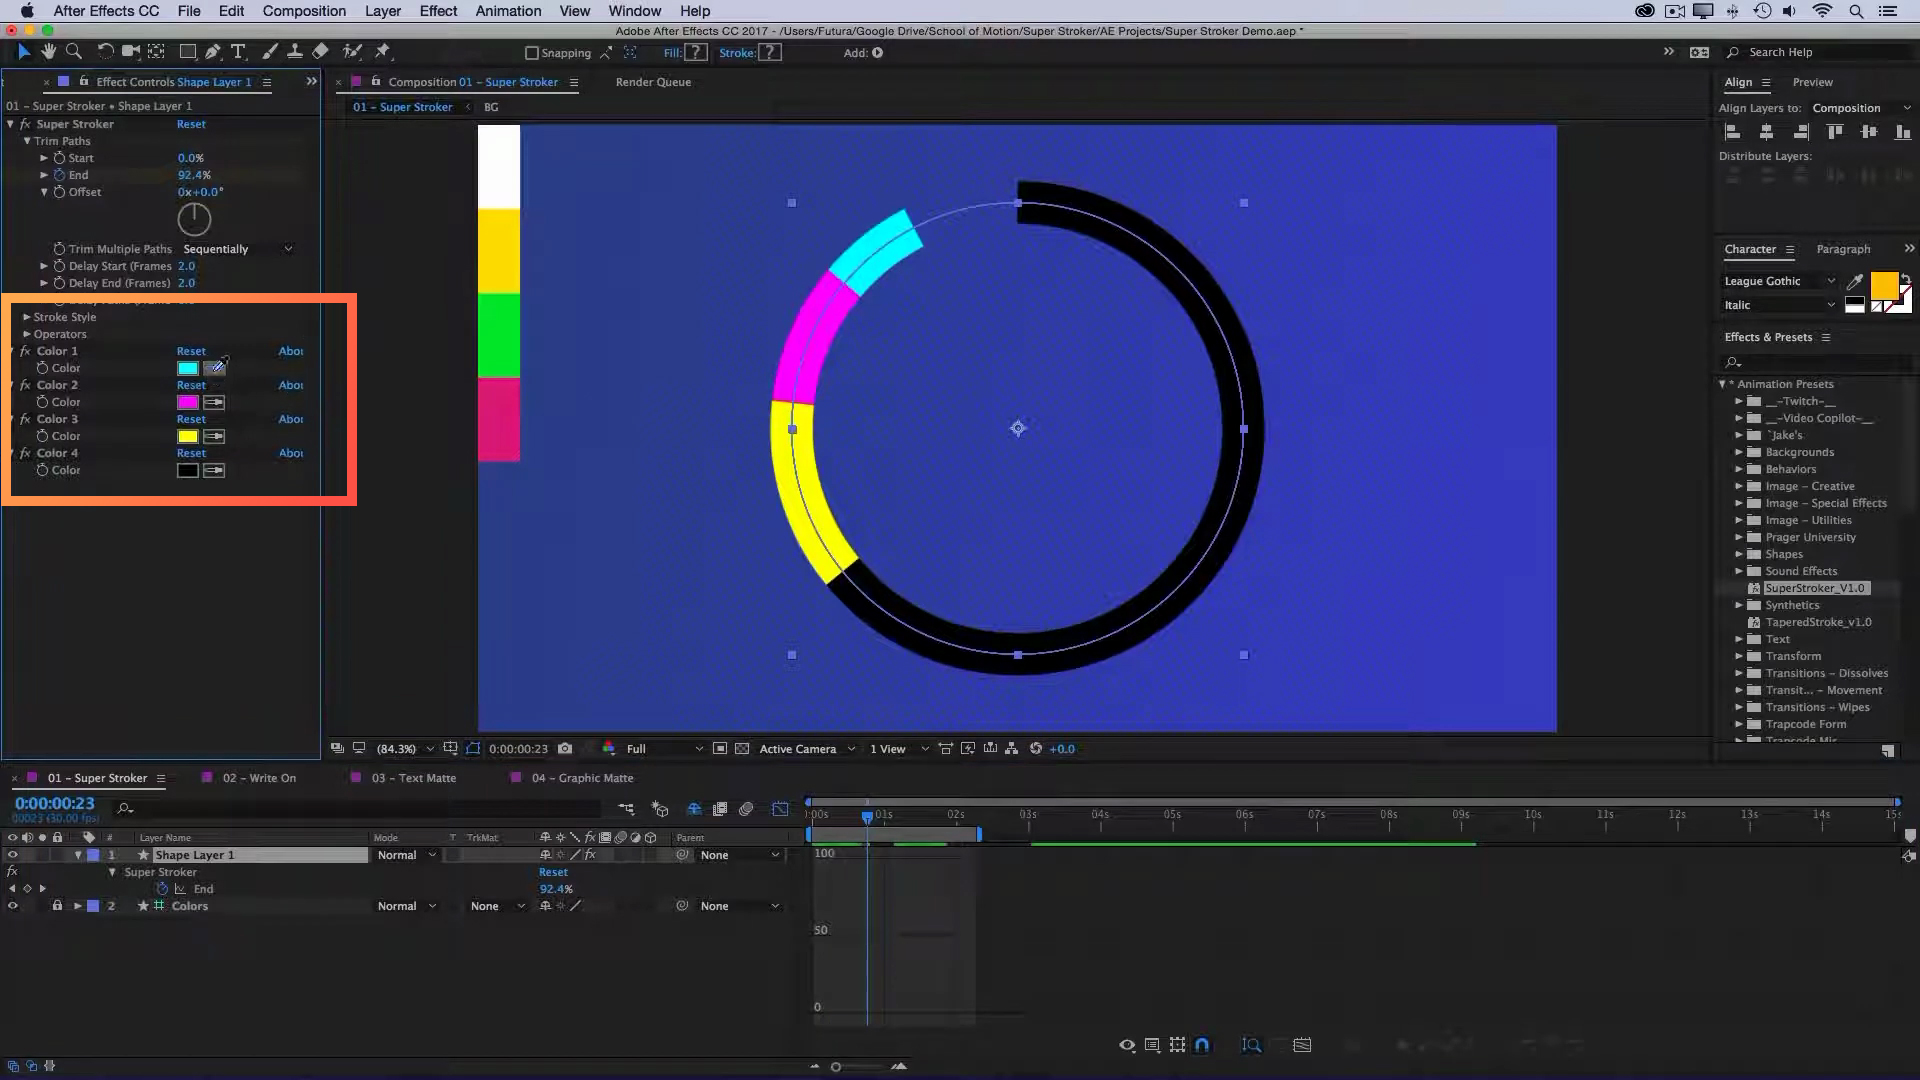
But let's not forget about colors. I've set up a color palette on a shape layer, and all you need to do is adjust your color pickers. Select colors from your palette, and with the flick of your wrist, your animation will update with the new colors. What's fantastic is that the order of the colors in your palette determines the order in which they appear in the Super Stroker layer. So, switching up the colors and their order is a piece of cake.
Diving into Delay Controls: Adding Depth to Your Stroke Animations
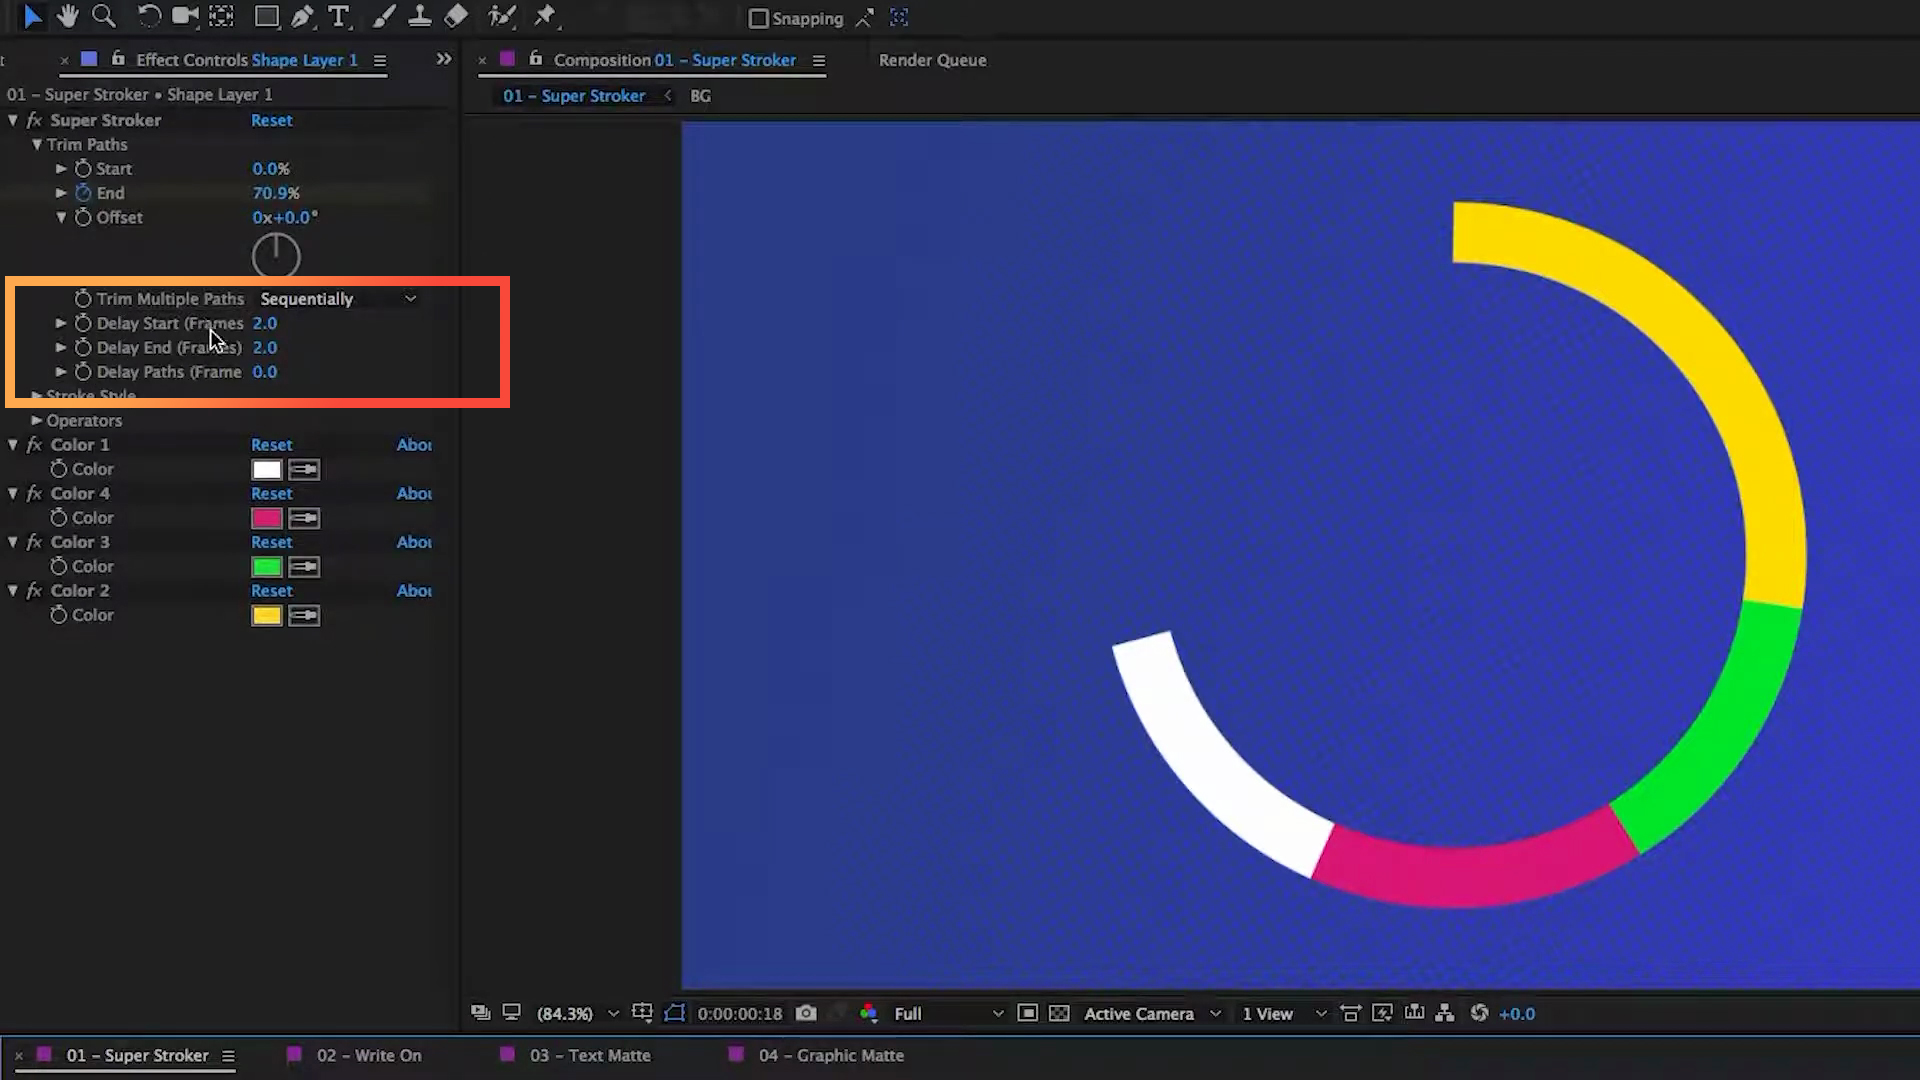
Now, let's delve into the incredible delay controls Super Stroker offers. All measured in frames, these controls allow you to create offsets for each of the duplicates. By default, each duplicate is offset by two frames. But the real magic is that you can keyframe this delay value. So, if you want to start with a 5-frame delay and then gradually reduce it to 1 frame as the animation progresses, it's all at your fingertips.
But what's even cooler is that you can adjust your colors while animating. If you wish to animate the colors simultaneously, you can simply change the trim multiple paths option from sequentially to simultaneously. This allows for a unique, synchronized look that can be especially appealing.
Custom Paths: Expanding Your Creative Horizons
Super Stroker is not just confined to simple circles. Believe it or not, you can use it for more complex animations as well. For instance, imagine you've hand-drawn paths, and you want to bring them to life with Super Stroker. Just like that, you can copy and paste these paths into the Super Stroker layer. What's the result? An intricate and captivating animation.
But it doesn't stop there. You can rearrange these paths as you please, and Super Stroker will adapt accordingly. Want the numbers to animate first and then the frame? Just rearrange the paths, and you're all set. Super Stroker handles it with ease.
Making Shapes and Text Come Alive with Stroke Effects
But Super Stroker isn't limited to custom paths; it can also reveal text and graphics in unique ways. If you're looking for a write-on effect, you can trace paths to match the shape of your letters and numbers and use Super Stroker to animate them on. It's a visually stunning and straightforward process.
Even with longer lines of text or intricate graphics, Super Stroker makes it simple. You can use a basic path to reveal your text or graphic layer, and the results are equally impressive.
Adding Operators to Stroke Effects for Added Creativity
Super Stroker also provides easy access to a range of shape layer operators. These let you fine-tune your animations, whether it's repeating shapes, scaling, changing opacity, or manipulating position and rotation. These operators open the door to limitless possibilities, allowing you to get as creative as you want.
And if you don't find the operator you need in the list, no worries. You can add your own by using the standard After Effects process.
Stroke Plugin for After Effects: A Powerful, Time-Saving Tool
Super Stroker isn't just a time-saver; it's a game-changer. It simplifies complex animations, saves you layers and keyframes, and offers a world of creative possibilities. Whether you're working with simple shapes, custom paths, text, or graphics, Super Stroker has your back.
So, give it a try and let your creativity shine. And when you do, be sure to share your work on social media. Use the hashtag #SuperStroker and tag School of Motion. We'd love to see what you come up with, and your creations could inspire others.
Remember, you can download this fantastic tool for free. So, what are you waiting for? Dive in, experiment, and let your creativity shine. Thanks for reading, and I'll catch you in the next one!
ENROLL NOW!
Acidbite ➔
50% off everything

ActionVFX ➔
30% off all plans and credit packs - starts 11/26

Adobe ➔
50% off all apps and plans through 11/29

aescripts ➔
25% off everything through 12/6
Affinity ➔
50% off all products

Battleaxe ➔
30% off from 11/29-12/7
Boom Library ➔
30% off Boom One, their 48,000+ file audio library
BorisFX ➔
25% off everything, 11/25-12/1

Cavalry ➔
33% off pro subscriptions (11/29 - 12/4)

FXFactory ➔
25% off with code BLACKFRIDAY until 12/3

Goodboyninja ➔
20% off everything

Happy Editing ➔
50% off with code BLACKFRIDAY

Huion ➔
Up to 50% off affordable, high-quality pen display tablets

Insydium ➔
50% off through 12/4
JangaFX ➔
30% off an indie annual license
Kitbash 3D ➔
$200 off Cargo Pro, their entire library
Knights of the Editing Table ➔
Up to 20% off Premiere Pro Extensions
Maxon ➔
25% off Maxon One, ZBrush, & Redshift - Annual Subscriptions (11/29 - 12/8)
Mode Designs ➔
Deals on premium keyboards and accessories
Motion Array ➔
10% off the Everything plan
Motion Hatch ➔
Perfect Your Pricing Toolkit - 50% off (11/29 - 12/2)

MotionVFX ➔
30% off Design/CineStudio, and PPro Resolve packs with code: BW30

Rocket Lasso ➔
50% off all plug-ins (11/29 - 12/2)

Rokoko ➔
45% off the indie creator bundle with code: RKK_SchoolOfMotion (revenue must be under $100K a year)

Shapefest ➔
80% off a Shapefest Pro annual subscription for life (11/29 - 12/2)

The Pixel Lab ➔
30% off everything
Toolfarm ➔
Various plugins and tools on sale

True Grit Texture ➔
50-70% off (starts Wednesday, runs for about a week)

Vincent Schwenk ➔
50% discount with code RENDERSALE

Wacom ➔
Up to $120 off new tablets + deals on refurbished items


Download the project file and dive in!
Learn After Effects the Right Way
Master the After Effects interface and build a real animation skillset. Enroll in All-Access to unlock AE Kickstart and 50+ other courses.