All-Access Pass
Unlimited access to 50+ courses, unlimited critique, live events, and 24/7 community. Join School of Motion All-Access today.

Expand your knowledge of the After Effects Menus with our deep dive into the View Tab!
How often do you use the top menu tabs in After Effects? Chances are, you probably have a handful of tools you use, but what about those random features you haven’t tried yet? We're taking a look at the hidden gems in the top menus, and we're just about halfway through!

In this tutorial, we’ll be doing a deep dive into the View tab in After Effects. View may not sound incredibly exciting, but there are so many tools in here that are essential for navigating your canvas and workspace. We’ll learn how to:
- Speed up your workflow using custom resolution settings
- Manage layout with rulers and guides
- Export and import Guides
- And quickly cycle through view options
View > Resolution
You’ve probably seen the resolution settings built into the lower portion of the preview window in After Effects. But it's worth pointing here for a few reasons. The first is that the View tab gives us the keyboard shortcuts for toggling between resolution states (although it is strange that there’s no shortcut for third resolution).
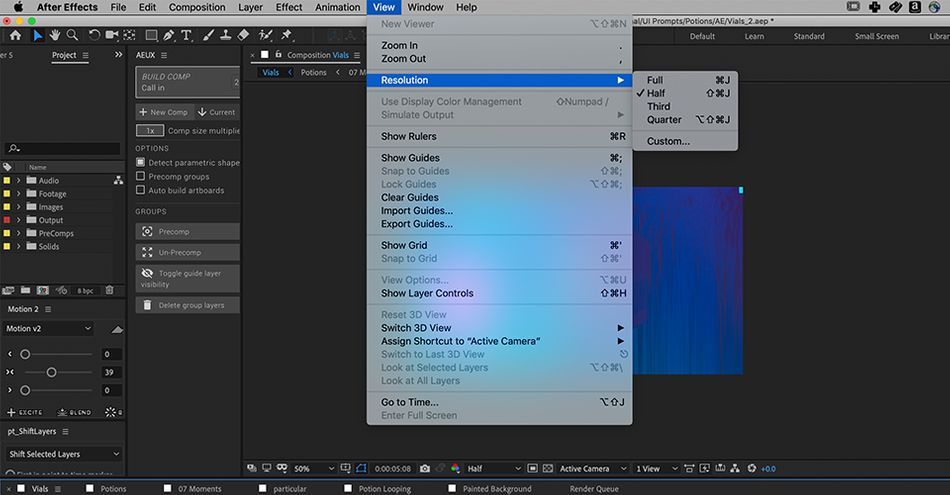
The other reason is because the custom resolution feature is incredibly handy for dealing with large project files. For example, let’s say I have a massive 4K render and I’m having a hard time playing it back (even in quarter res). All I have to do is go to View > Resolution > Custom. If I want to lower the resolution of my preview, I’ll dial up the numbers in this window. Let’s try something like 15.
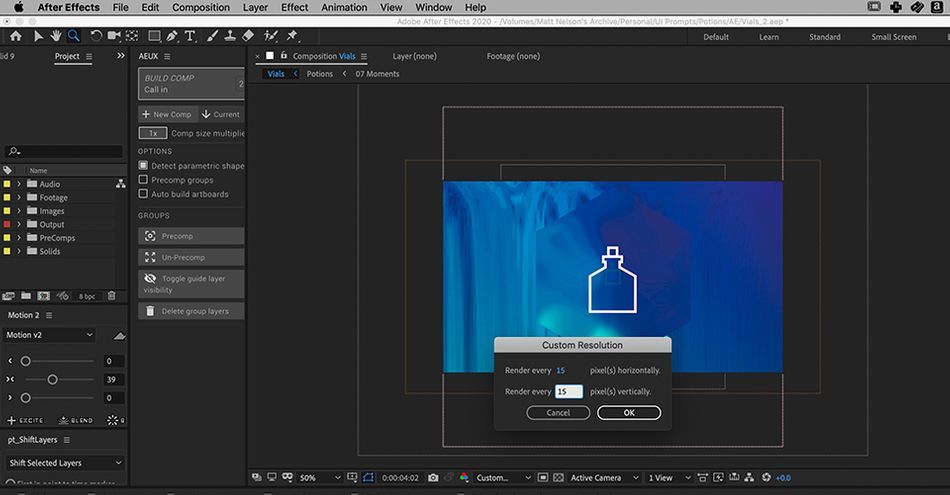
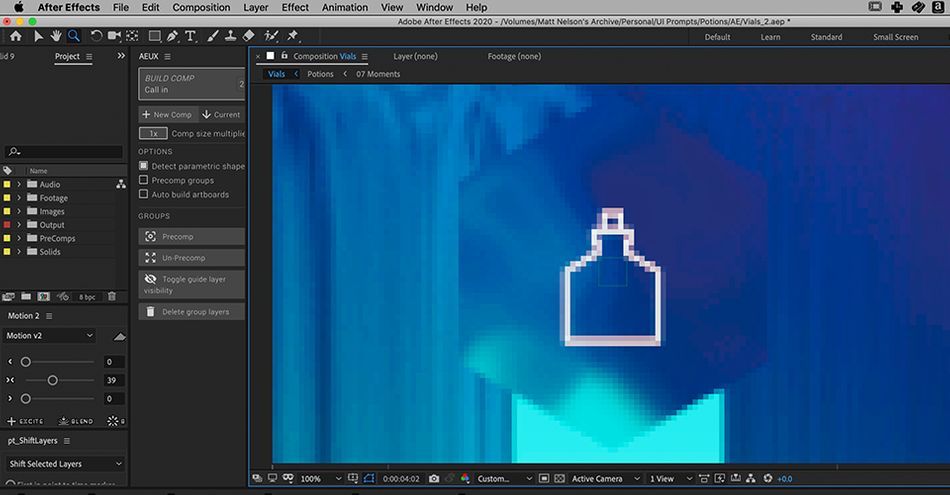
Once I do this, After Effects will drop the resolution substantially, but it will help my video play much faster. This is especially helpful if you need to get a sense of how animation is looking, but don’t need to dig into the details too much. I’ve had many projects where the render was simply too large to playback at a decent speed, and this is my go-to trick.
Show Rulers
Relying on rulers and measurement tools is absolutely essential in design programs such as Photoshop and Illustrator—and they are just as important in After Effects too! Whether I’m double-checking a layout or trying to create a frame of reference, rulers are a must-have feature. To access rulers, go to View > Show Rulers.
You can also hit:
Command+R (Mac OS)
Control+R (Windows)
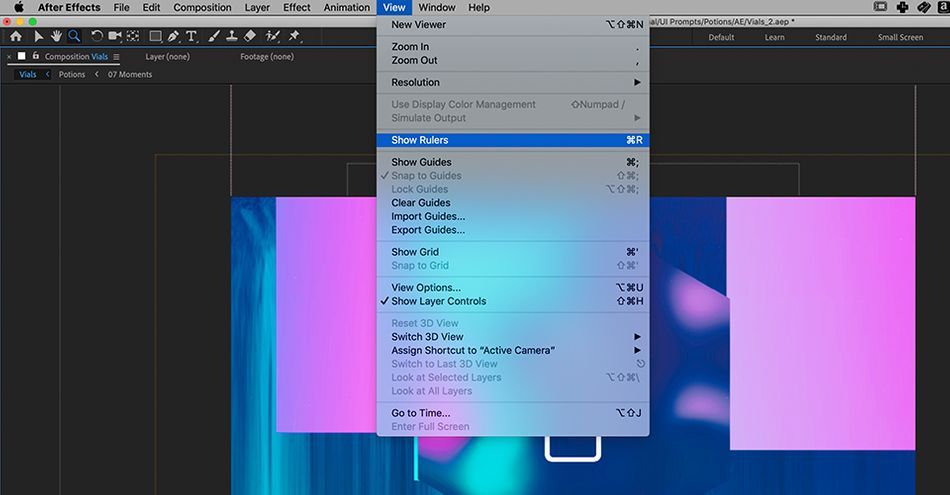
Now, the rulers are visible and ready to use. Simply drag the measurements out from the top or side bar to place along your workspace.
x
Once you’ve pulled out the rulers, simply use Command+; (Mac OS) or Control+; (Windows) to toggle the visibility of your guides.
Export / Import Guides
Sometimes you will need guides at multiple points in a project. Instead of recreating your ruler layout in each new comp, you can rely on this feature to save a bunch of time and templatize your project.
To save guides for later use, simply go into the comp that has the guides you want to save. Go up to View > Export Guides. You can export these to anywhere you like, but I would recommend keeping it in your project folder.
When you need to pull your guides up again, go to View > Import Guides, and select the file you exported.

View Options
Different projects require different view settings. This is where the View Options menu comes into play. For instance, what if you want to see what direction an object is moving in your scene without previewing the animation? Or what if you want to see the exact curvature of your motion path tangents? To view all of these wonderful options and more, go to View > View Options.
You can also hit the keyboard shortcut:
Option + Command + U (Mac OS)
Option + Control + U (Windows OS)
For this example, I’ll go ahead and select all the option boxes, just to test things out.
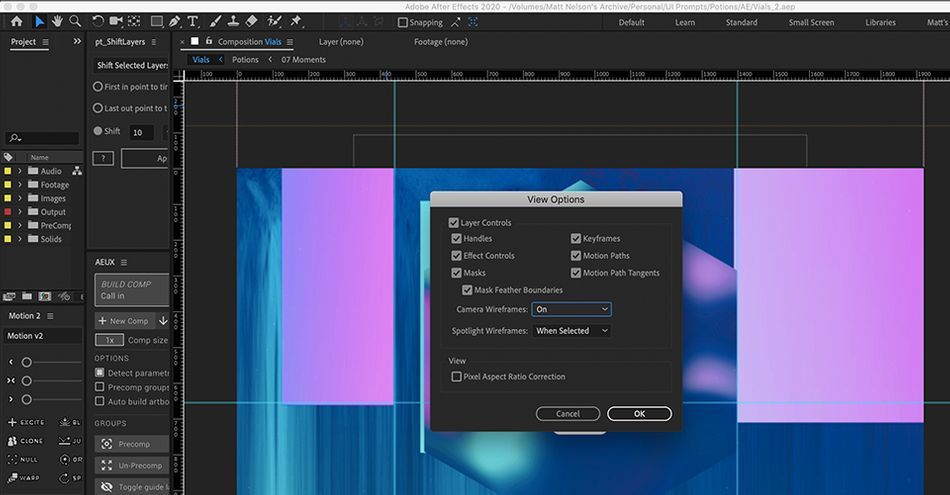
Once I do this, I can now see the motion path, keyframes, and other critical info just by selecting any object in my timeline. This is especially helpful in plotting out complex keyframes, and working with multiple objects in a scene.
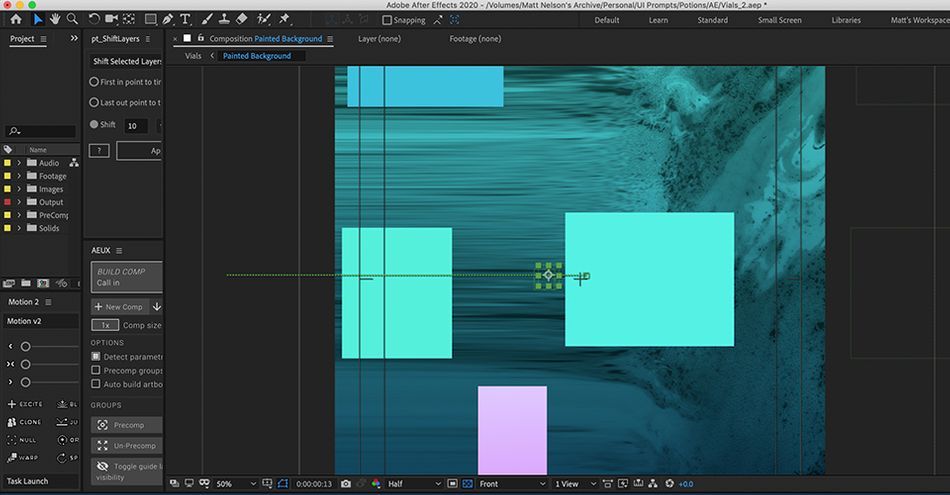
A Tab with a View
As we’ve seen, the View tab has a solid library of tools that can help speed up and organize your workflow immensely. Tweaking the resolution playback in After Effects is absolutely crucial for managing your animation as you work through hefty projects. Relying on grids, guides, and rulers in your comp is critical as well. Be sure to explore and experiment with all of the other tools in the View menu as well.
After Effects Kickstart
If you're looking to get the most out of After Effects, maybe it's time to take a more proactive step in your professional development. That's why we put together After Effects Kickstart, a course designed to give you a strong foundation in this core program.
After Effects Kickstart is the ultimate After Effects intro course for motion designers. In this course, you'll learn the most commonly used tools and best practices for using them while mastering the After Effects interface.
ENROLL NOW!
Acidbite ➔
50% off everything

ActionVFX ➔
30% off all plans and credit packs - starts 11/26

Adobe ➔
50% off all apps and plans through 11/29

aescripts ➔
25% off everything through 12/6
Affinity ➔
50% off all products

Battleaxe ➔
30% off from 11/29-12/7
Boom Library ➔
30% off Boom One, their 48,000+ file audio library
BorisFX ➔
25% off everything, 11/25-12/1

Cavalry ➔
33% off pro subscriptions (11/29 - 12/4)

FXFactory ➔
25% off with code BLACKFRIDAY until 12/3

Goodboyninja ➔
20% off everything

Happy Editing ➔
50% off with code BLACKFRIDAY

Huion ➔
Up to 50% off affordable, high-quality pen display tablets

Insydium ➔
50% off through 12/4
JangaFX ➔
30% off an indie annual license
Kitbash 3D ➔
$200 off Cargo Pro, their entire library
Knights of the Editing Table ➔
Up to 20% off Premiere Pro Extensions
Maxon ➔
25% off Maxon One, ZBrush, & Redshift - Annual Subscriptions (11/29 - 12/8)
Mode Designs ➔
Deals on premium keyboards and accessories
Motion Array ➔
10% off the Everything plan
Motion Hatch ➔
Perfect Your Pricing Toolkit - 50% off (11/29 - 12/2)

MotionVFX ➔
30% off Design/CineStudio, and PPro Resolve packs with code: BW30

Rocket Lasso ➔
50% off all plug-ins (11/29 - 12/2)

Rokoko ➔
45% off the indie creator bundle with code: RKK_SchoolOfMotion (revenue must be under $100K a year)

Shapefest ➔
80% off a Shapefest Pro annual subscription for life (11/29 - 12/2)

The Pixel Lab ➔
30% off everything
Toolfarm ➔
Various plugins and tools on sale

True Grit Texture ➔
50-70% off (starts Wednesday, runs for about a week)

Vincent Schwenk ➔
50% discount with code RENDERSALE

Wacom ➔
Up to $120 off new tablets + deals on refurbished items


All-Access Pass

Unlimited access to 50+ courses, unlimited critique, live events, and 24/7 community. Join School of Motion All-Access today.
