
All-Access Pass
Unlimited access to 50+ courses, unlimited critique, live events, and 24/7 community. Join School of Motion All-Access today.

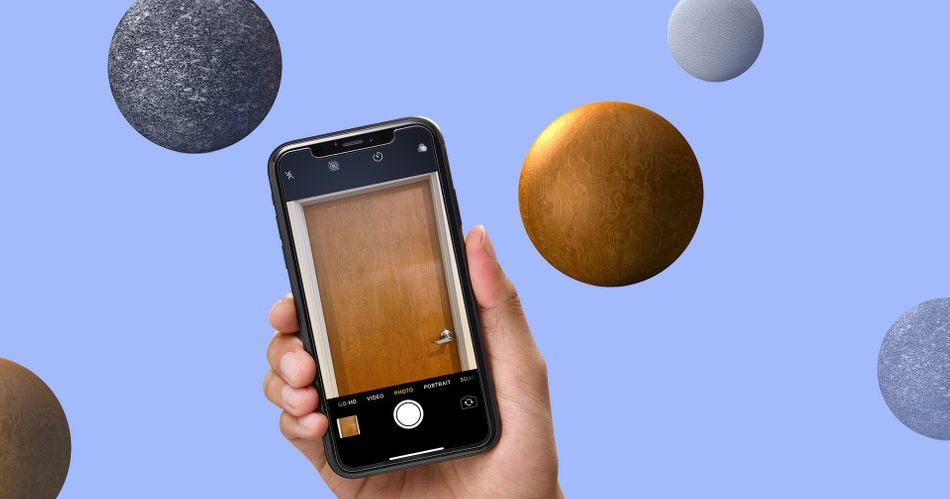
Learn some Photoshop wizardry that will allow you to make seamless textures for Cinema 4D from just about any image, even iPhone photos!
There are countless resources out there for finding textures you can use to build materials in Cinema 4D. Sometimes, though, you need something specific and you have to build your own image asset. You can find a piece of stock or even use your iPhone, but if you don't have the Photoshop chops to make that image seamless, its usefulness will be limited.
In this tutorial, you will learn several techniques (some of them quite advanced) to help you turn almost any image into a seamless texture. Joey will walk you through prepping 3 different images, each one more difficult than the last, as he turns them into seamless 2K and 4K textures. If you're a Cinema 4D artist (or would like to be one soon) this skill will be invaluable to you.
And if you're not ready to make your own textures, check out our Ultimate Guide to Free Textures for Cinema 4D.
Photoshop Tips to Make Seamless Textures for Cinema 4D
{{lead-magnet}}
How to Make Your Textures Seamless in Photoshop
Let's walk through a few examples of textures, starting with an easy one. If you take your own photos to use as textures, try to find surfaces that have very even lighting, as they are far easier to deal with.
CREATE A NEW PHOTOSHOP DOCUMENT AT YOUR TARGET TEXTURE RESOLUTION
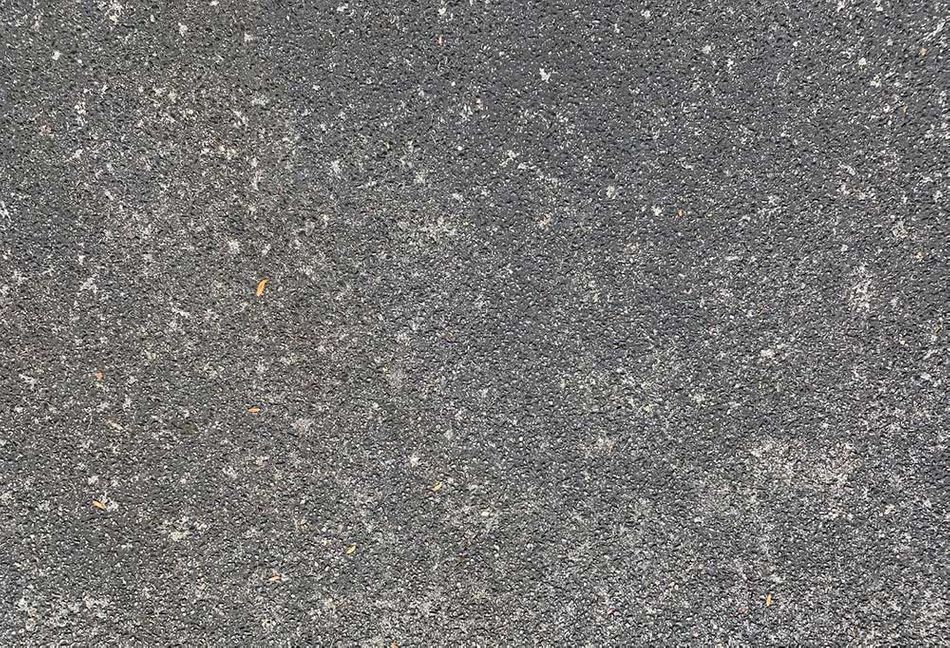
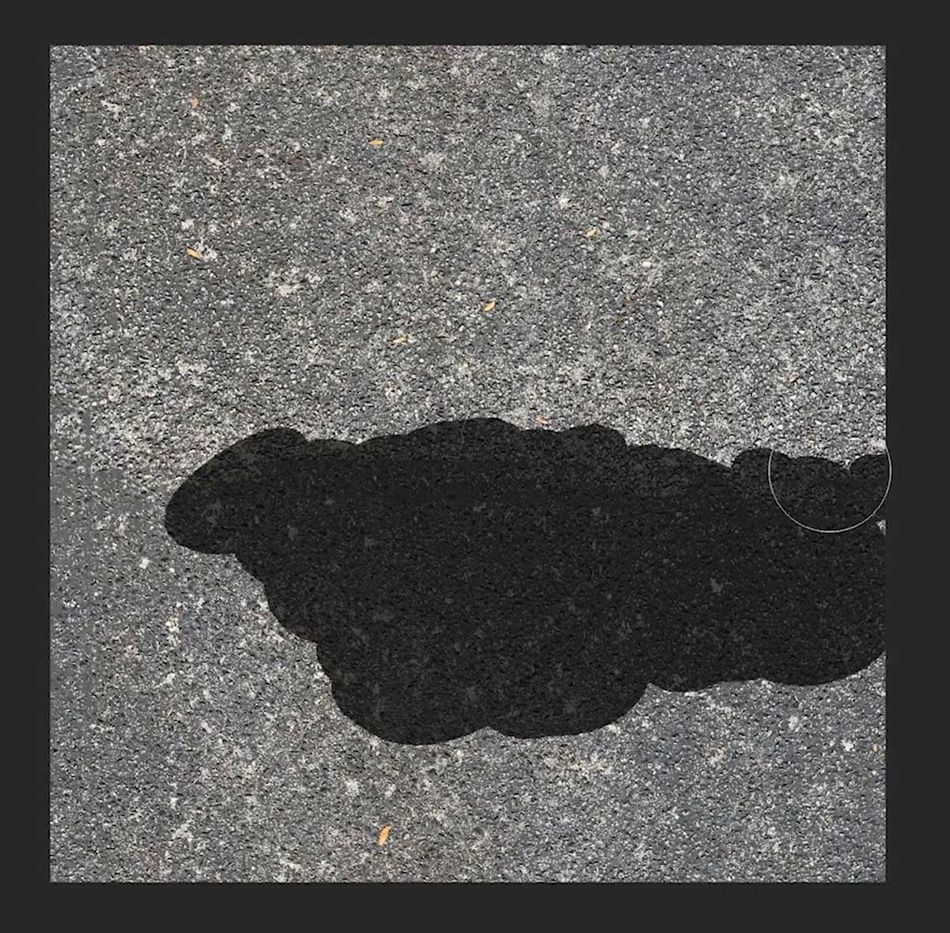
In this first example, we'll use this picture of asphalt to create a 2K texture. In ye—olden days before we had dedicated GPUs and fast, modern algorithms—it was necessary to create textures at resolutions that were based on powers of 2 (6, 32, 64, 128, etc...) While that generally isn't the case anymore, it's still common to use this convention, so let's create a 2048x2048 (2K) comp.
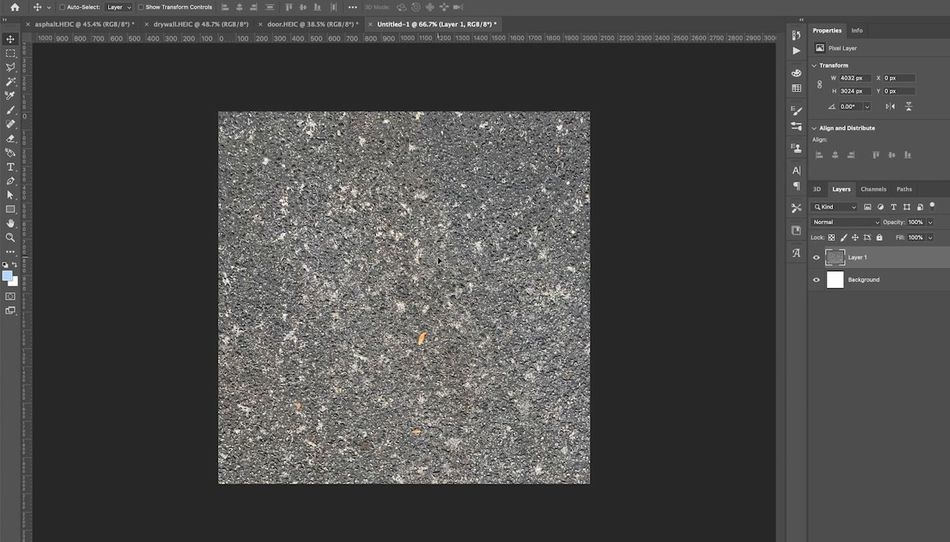
COPY OVER YOUR IMAGE AND CROP OUT ALL EXCESS IMAGE DATA
You don't want extra image data present outside the bounds of your Photoshop document, so here's an easy trick to get rid of it. After scaling down your image inside the 2K comp to preserve as much detail as possible, Select All (Cmd + A) then Copy (Cmd + C) then Paste (Cmd + V). You now have a "clean" version of your texture.
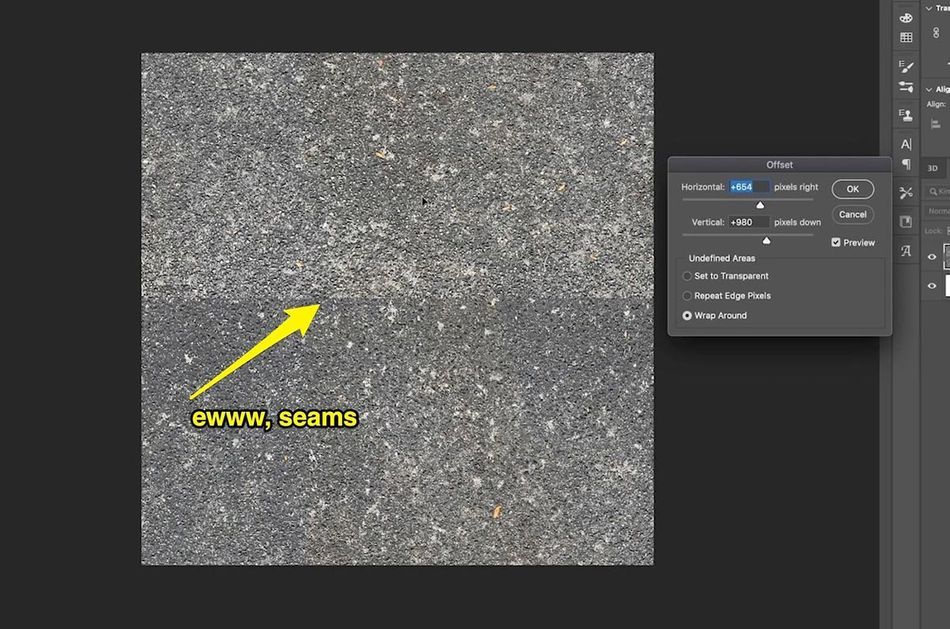
RUN THE OFFSET COMMAND TO TEST FOR SEAMS
With your image layer selected, select Filter > Other > Offset in the top menu. This brings up the offset command which will shift all of the pixels in an image vertically and horizontally depending on your settings. It will also wrap edge pixels around to the opposite side of the image, showing you very clearly where there are seams.
USE THE SPOT HEALING BRUSH AND CLONE STAMP TO REMOVE THE SEAMS
Using the Spot Healing Brush (J) and the Clone Stamp (S) you can make quick work of the seams in your image. In addition to removing the seams, also try to remove any parts of the texture that jump out at you because those areas will stand out once you tile the texture in Cinema 4D.
CHECK THE TEXTURE BY REPEATEDLY RUNNING THE OFFSET COMMAND
Use the keyboard shortcut to Repeat Last Filter (Cmd + Ctrl + F). This will run the offset command again giving you an opportunity to check your handiwork. Still see some seams? Fix 'em and run the command again. Rinse and repeat until your texture is done!
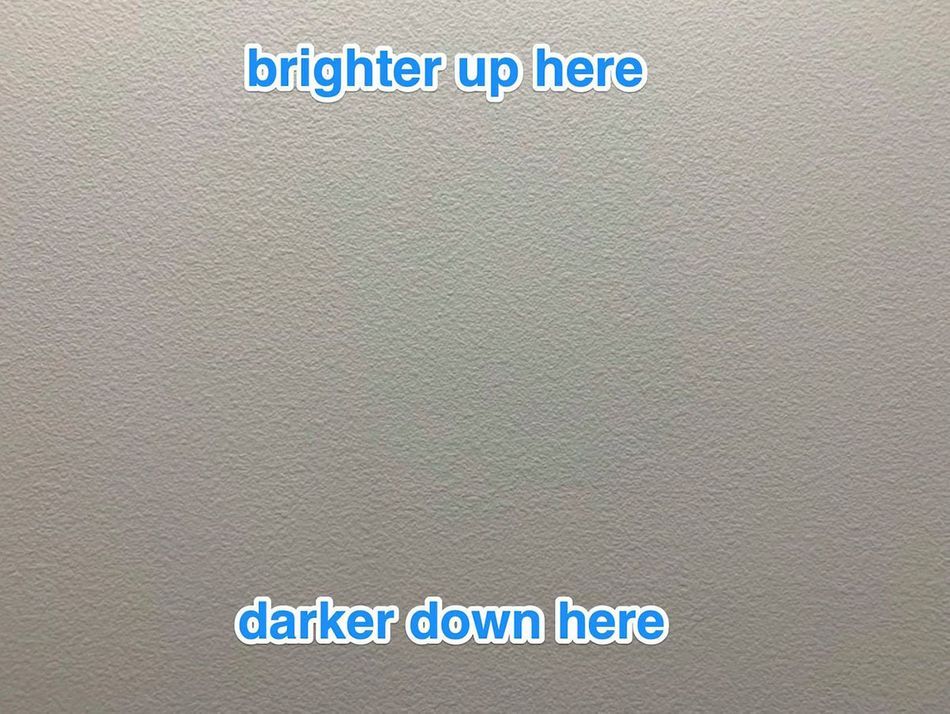
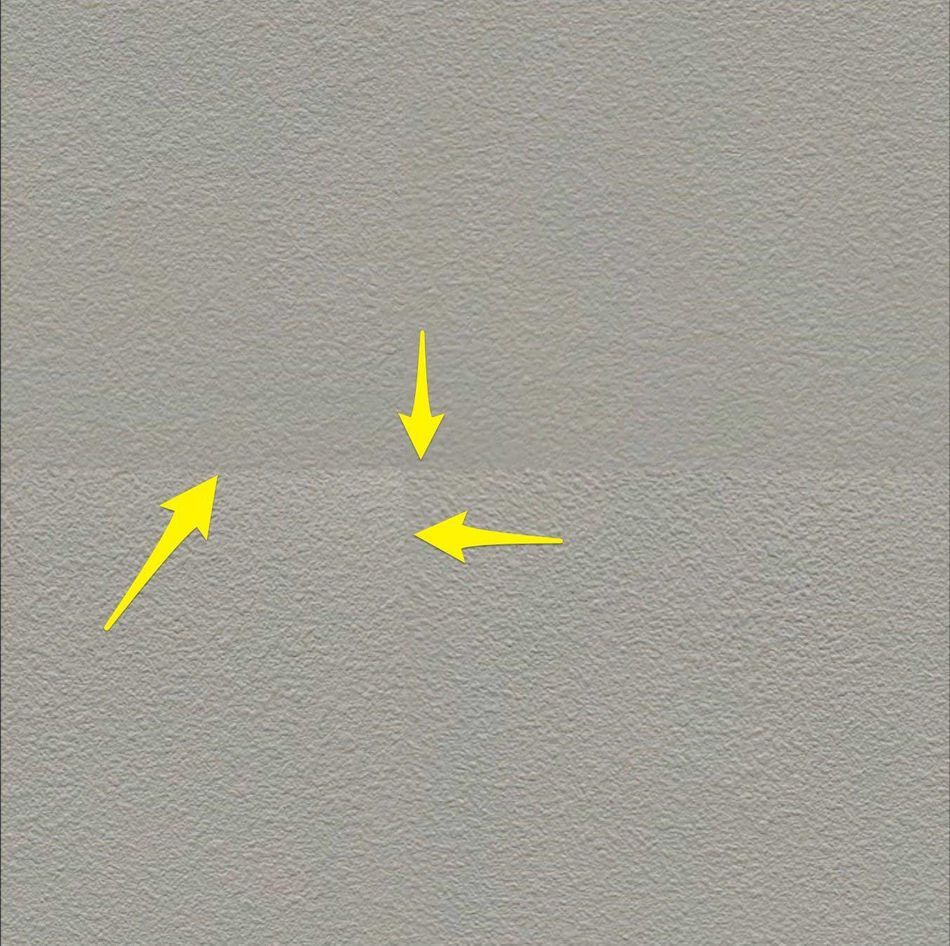
Dealing with Uneven Lighting
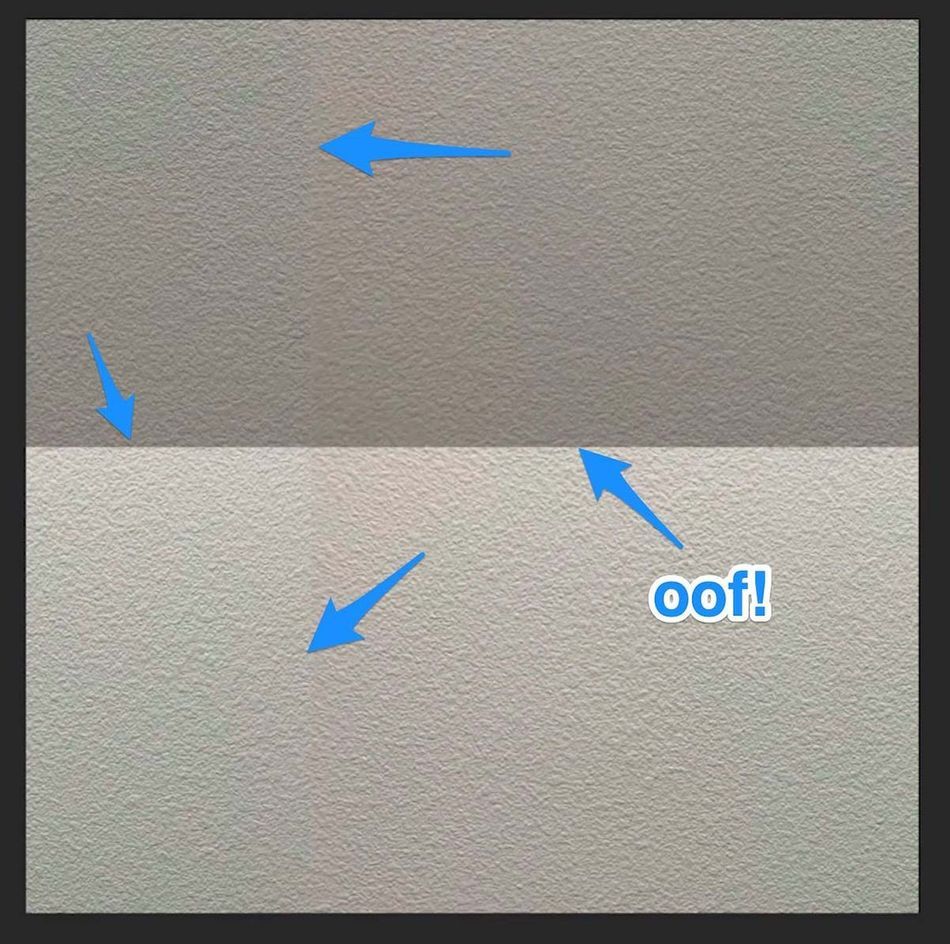
In the example above, the lighting at the top of the texture is much brighter than at the bottom. In many cases this is unavoidable, so you'll need to deal with this in Photoshop in order to make a seamless texture. Look at what happens when you run the Offset command.
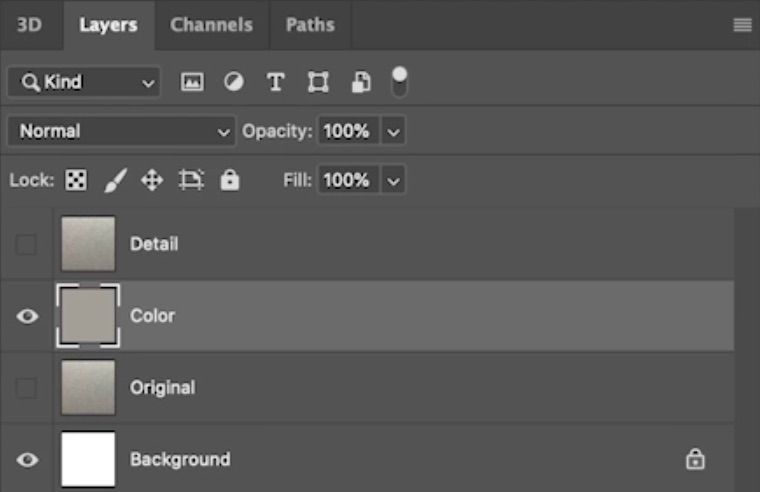
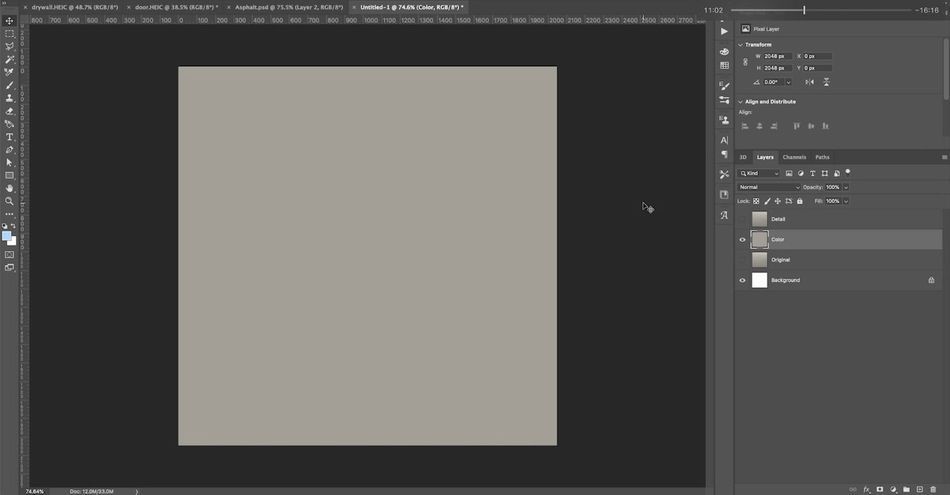
CREATE TWO COPIES OF YOUR IMAGE
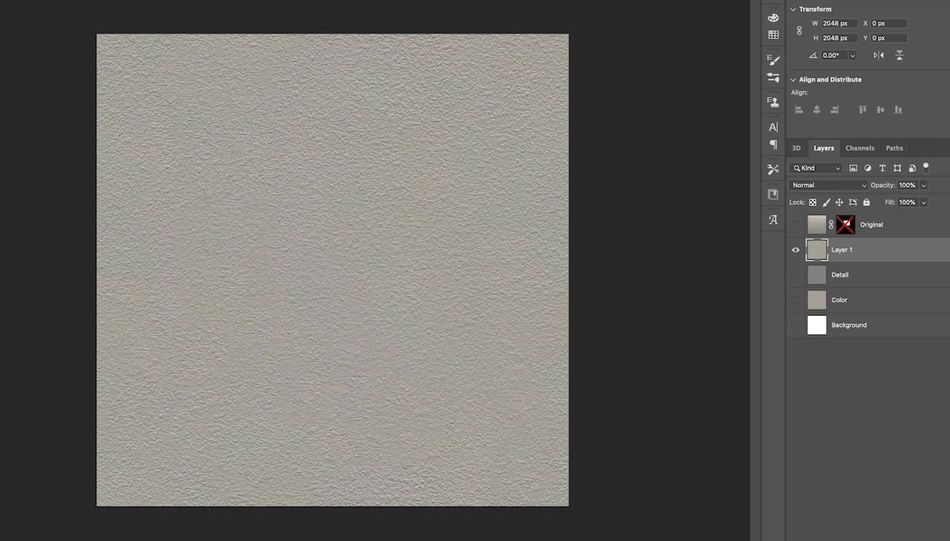
To deal with this lighting issue, first create two copies of your image. Name the bottom layer "Color" and the top layer "Detail." Keep a copy of your original image as a separate layer for reference.
RUN THE BLUR > AVERAGE FILTER ON THE COLOR LAYER
The Average blur looks at your image and finds the average color of every single pixel in it. It then fills your layer with that color. Pretty nifty!
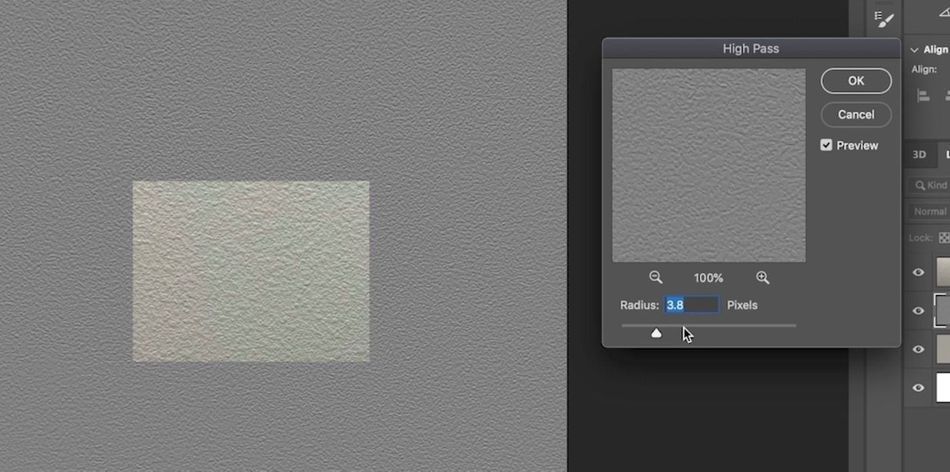
RUN A HIGH PASS FILTER ON THE DETAIL LAYER
Now that you've created the base color for your texture, you can pull out the details on the Detail layer. You want to use a High Pass filter. This very useful filter will fill your layer with 50% grey, then create an embossed version of any high-frequency detail it finds. You can adjust this filter to taste, and you should try to match the original image as much as possible.
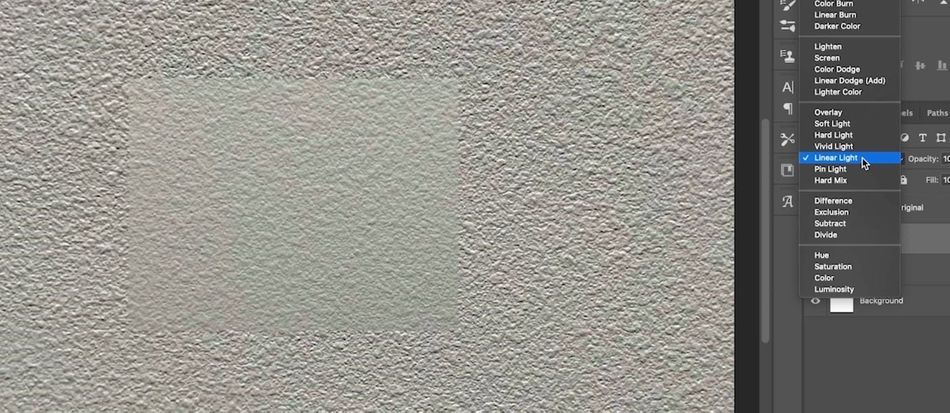
SET THE DETAIL LAYER'S BLENDING MODE TO LINEAR LIGHT
With your Color and Detail layers set up, you can now composite them together. Use either the Hard Light or Linear Light blending modes, trying each one, and sticking with the option that makes your texture match the original image as closely as you can.
ADJUST THE OPACITY OF THE DETAIL LAYER TO TASTE
The High Pass Filter and Linear Light Mode combo is potent, so you may need to dial back the amount of texture you're seeing by lowering the opacity on the Detail layer. It's helpful to overlay the original image while you do this for reference.
MERGE YOUR LAYERS, RUN OFFSET, REMOVE SEAMS, RINSE, REPEAT
Once you've eliminated the lighting difference in your image, you can merge your Color and Detail layers together, and then run the standard SeamBusting™ protocol from the asphalt example above. Voilà! You now have a seamless texture that would be tricky to get any other way.
Dealing with Advanced Challenges in Images
Sometimes you really want to make a texture out of an image that wasn't really intended for this purpose. In these situations, you need to pull out the big guns and use some advanced Photoshop techniques to get the result you're after.
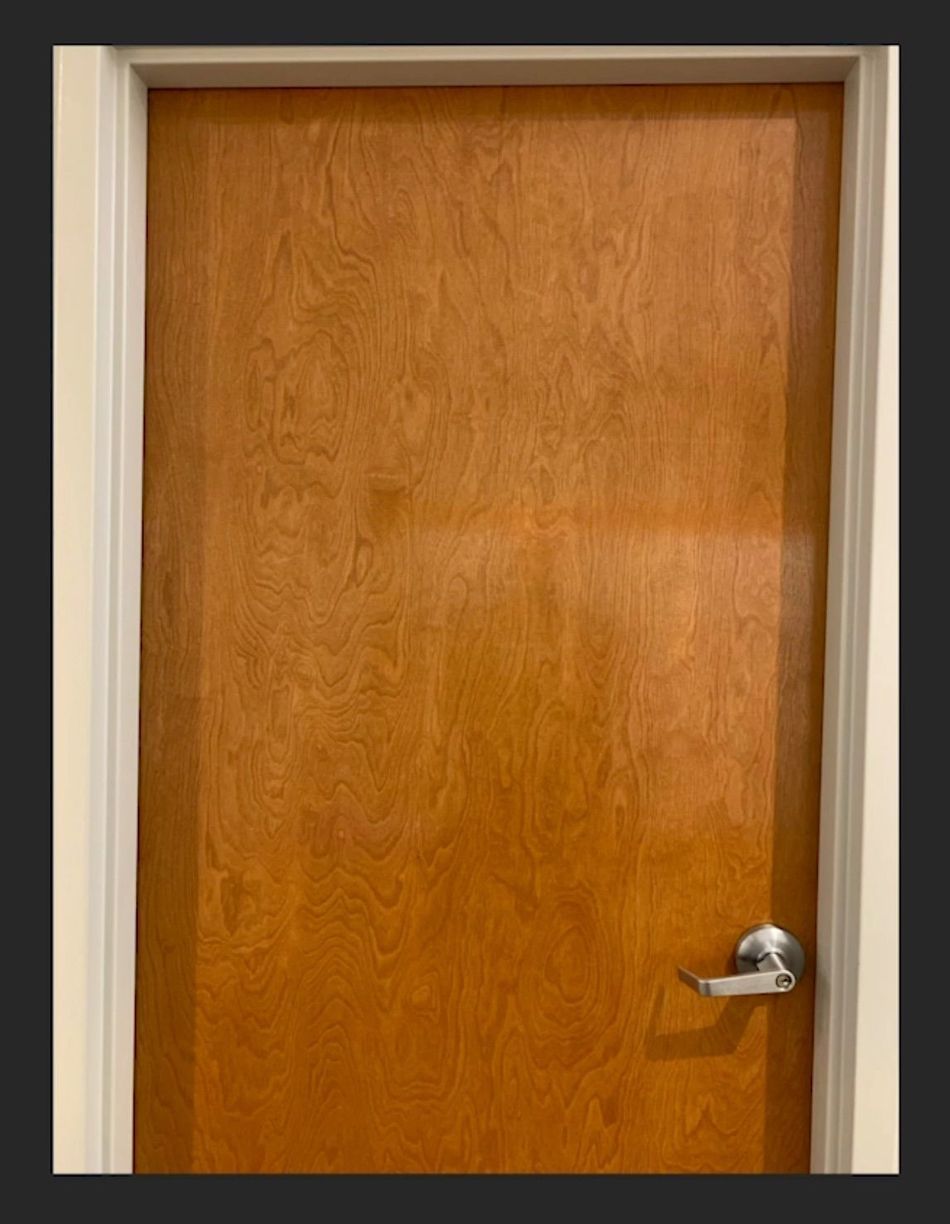
FIRST IDENTIFY THE AREAS YOU'LL NEED TO ADDRESS
The picture above doesn't have many things going for it as far as being usable as a texture. The picture was taken off-axis, creating a perspective distortion. The top of the door is closer to the lights than the bottom, so we have a lighting change. The color of the door is also very uneven, so using our Blur > Average trick won't work. What can we do?
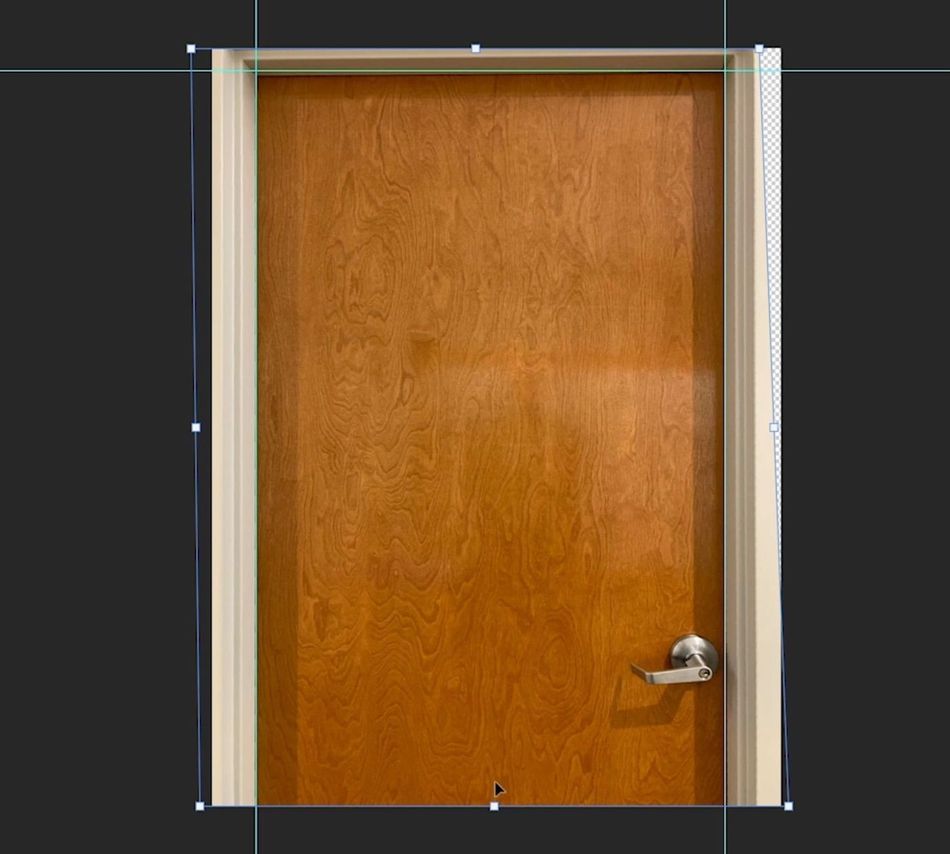
REMOVE PERSPECTIVE DISTORTION WITH THE TRANSFORM TOOL
First, set up some guides to help you line up the edges of the door, and then use the Transform Tool (Cmd + T) in Perspective Mode (Ctrl + Click on the Layer while in Transform Mode) to transform the door layer, lining it up with your guides. This step takes a little practice.
DUPLICATE THE LAYER AND BLUR THE TOP COPY
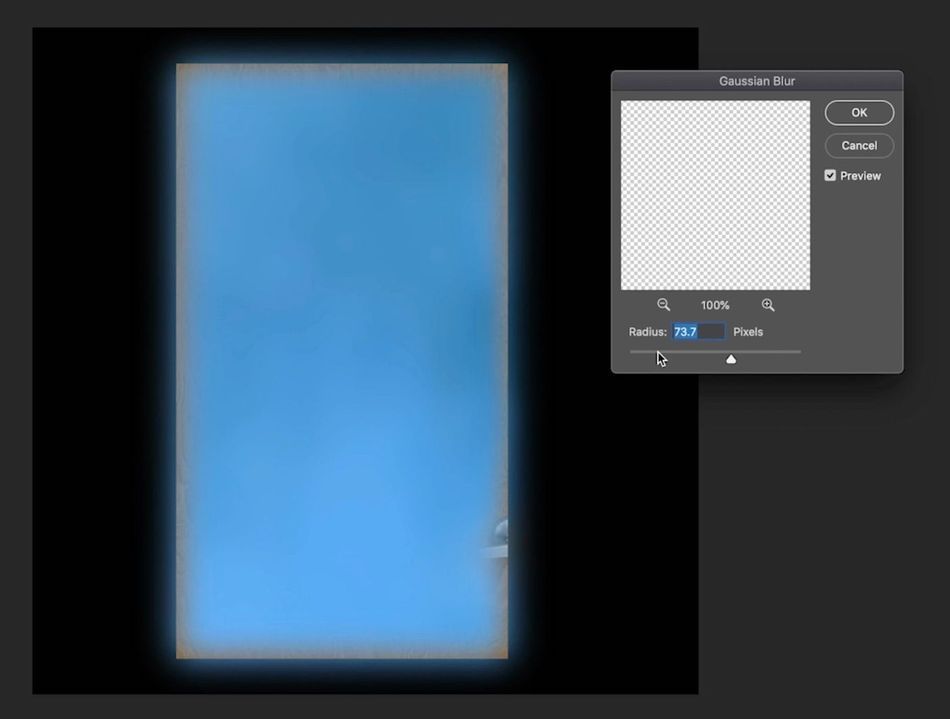
You'll be setting up your layers similarly to the drywall example, with a Color layer on top of a Detail layer. On the color layer, use the Blur > Gaussian Blur filter to blur out all high-frequency detail from your image. You want to retain the color variation, though, so don't go crazy.
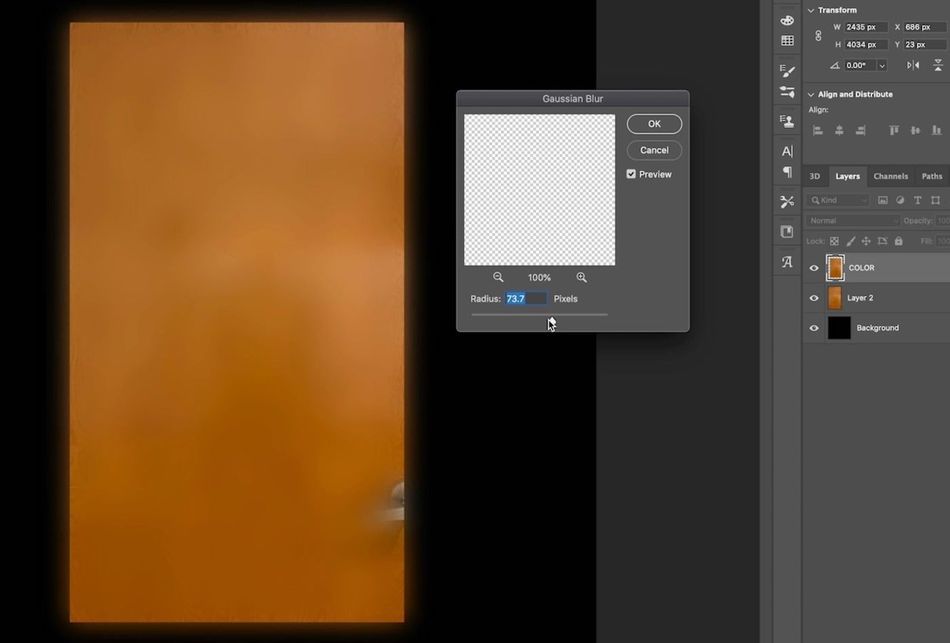
INVERT THE COLORS ON YOUR BLURRED LAYER
Run Invert (Cmd + i) on your blurred layer. This may seem like an odd step, but it will soon become clear why you're doing it. For now, just trust us. I mean, when have we ever led you astray? Well, there was that one time.
CLEAN UP ANY AREAS THAT STICK OUT WITH THE SPOT HEALING BRUSH OR CLONE STAMP
Any areas of color that jump out at you will also stick out when you tile your texture, so clean up what you can now. Use the Spot Healing Brush and Clone Stamp tools to make short work of the problem areas. A Gaussian Blur can also help soften some of the harder areas.
SET THE OPACITY OF THE BLURRED LAYER TO 50%
It might be obvious at this point why you inverted the colors on your blurred layer. By inverting the colors and then overlaying them on top of the original, you've basically neutralized the lighting and minimized color variation while still retaining a bit of the overall coloring.

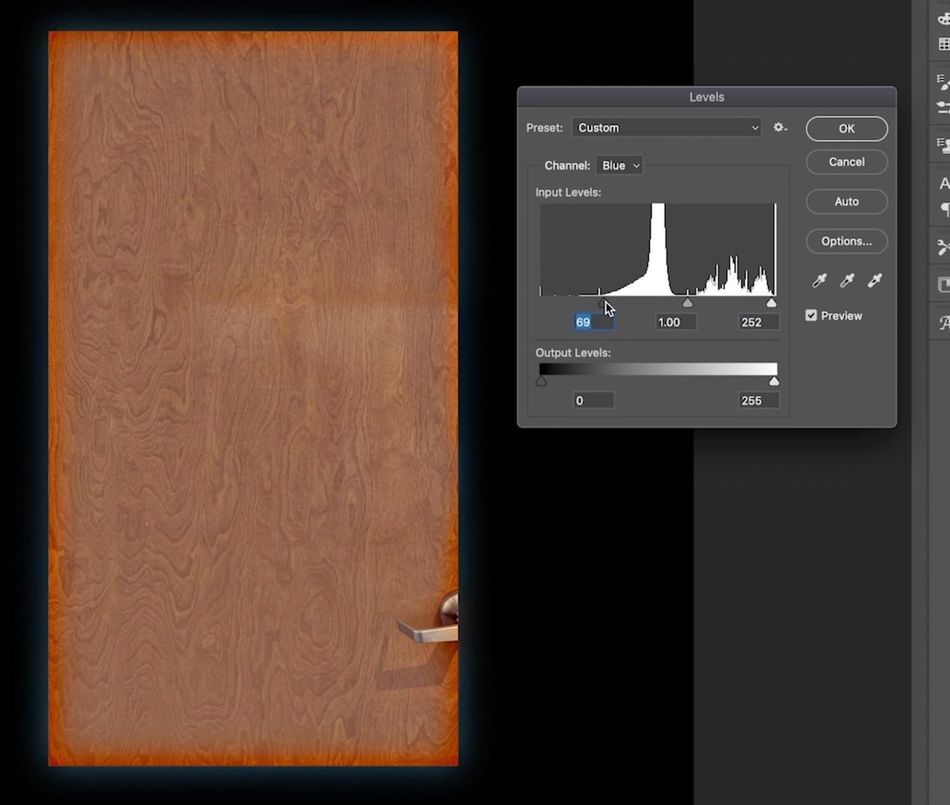
ADJUST EACH CHANNEL'S LEVELS TO BRING BACK CONTRAST
Merge your two layers together (Cmd + E), then apply the Levels adjustment. Adjust each channel individually, moving the white and black input arrows closer together to bracket the darkest and brightest parts of each channel, maximizing contrast.
USE THE SPOT HEALING BRUSH AND CLONE STAMP TO CLEAN UP THE RESULT
There's still a door knob in this image. We don't like door knobs. We also need to get rid of that obnoxious horizontal line towards the top of the door. We'll use our favorite texture cleanup tools to get rid of the offensive parts.
MATCH THE COLOR TO THE ORIGINAL IMAGE
Using the Eyedropper Tool (i) grab a color swatch from the original photo. Create a New Layer (Shift + Cmd + N) and Fill it with your Foreground Color (Option + Delete). Set this layer to use your merged texture as a clipping mask, then set the transfer mode to color. Now the color of your merged later will more closely match the original.
BRING OUT MORE CONTRAST WITH LEVELS
Merge all of your texture layers together, then run the Levels adjustment on the result to bring out more contrast and to match the original image more closely. We're in the home stretch now! Stay the course! Fight the war!

REMOVE ANY VIGNETTED PARTS OF THE IMAGE TO CREATE A PATCH
Clean up any extraneous details in your image, and then use the Marquee Tool (M) to create a selection of the clean part of your texture. Keep this part and remove everything else. Now you're ready to clone this patch to fill your frame.
COPY THIS PATCH AS MANY TIMES AS YOU NEED TO FILL THE CANVAS
In this example we're making a 4K (4096x4096) texture. The patch we've created isn't big enough to fill that space, but we can duplicate it 6 times and then arrange the duplicates randomly to fill the frame. Then we merge all of the laters and remove seams with the Spot Healing Brush and Clone Stamp.
RUN THE OFFSET COMMAND AND CLEAN UP ANY FINAL SEAMS OR DETAILS
You know the next part. Run the Offset command and clean up any additional seams that show up. Also, be on the lookout for details that stick out which might catch your eye when you tile this texture in Cinema 4D.
Presto! Seamless Textures from Any Image
And that, my friends, is how it's done. Using different combinations of the techniques you've learned here, you can turn just about any image into a seamless texture. Now all you need to learn is what to do with your new textures.

Master Modeling, Texturing, and More in Cinema 4D
If you dug this lesson, you might just fall in love with our 12-week Cinema 4D course, Cinema 4D Basecamp. EJ takes you from C4D rookie to experienced pro over the course of several real-world projects and challenges.
Cinema 4D Basecamp is designed for artists who want to add 3D to their toolkit, but who don't know where to start. Check out the information page to find out more about this exciting course. See you in class!
-----------------------------------------------------------------------------------------------------------------------------------
Tutorial Full Transcript Below 👇:
Joey Korenman (00:00): In this video, you'll learn how to take images from anywhere, even an iPhone and turn them into seamless textures you can use right inside of Cinema 4d. Textures are way more useful if they're seamless. So we're going to look at three images taken with my iPhone that have varying levels of difficulty, and we will get them ready for use in cinema 4d. If you're interested in learning cinema 4d, check out our curriculum, which includes cinema 4d base camp, a 12 week interactive course taught by none other than EGA, Hoss and France. Also make sure to download the project files and assets from this video so that you can try these techniques out for yourself. After you're done watching,
Joey Korenman (00:48): When you're applying textures to 3d objects and cinema 4d, it's really helpful if they are seamless. Here's why I've got a very simple scene here. It's just a sphere with a material that has one texture, this sort of asphalt texture, some lights, and it's in a seamless environment. This is what the render looks like. Now, if I wanted that sphere to look a little bit larger, I need the texture itself to scale down right now. We're not seeing enough detail to tell us that this is a large sphere. It looks like a small one. So because this is a seamless texture. What I can do is just come over to the texture tag here, and then I can just adjust the number of tiles in the U and V directions. Now I've used the set driver set driven command so that all I have to do is change tiles, Veep tiles.
Joey Korenman (01:32): You will update. So if I increase tiles V you can see that the texture has appeared to get more detailed everything's shrunk. And so now there are more details for us to look at and I can keep pushing this even further. Now, the reason this is possible is because this is a two K texture that has been made seamless, and I'm going to show you how to do that in Photoshop. I've got some other textures down here that I wanted to show you really quickly. This texture was made from a picture of dry wall in my office. I know very interesting. And because it seamless, I can also scale this up and down. Now you're probably seeing some little banding in there. There were some areas of the drywall that were flatter. And so those do kind of give away that this was a texture that has been made seamless.
Joey Korenman (02:19): Uh, and so with different textures, you have to sort of adapt how large you make them, how small you make them. And if I was going to try to make the texture this small, I might have to go into Photoshop and clean it up a little bit more, but let me show you one more texture. So this wooden texture, it was created from a door in my office and believe it or not, it is seamless. If I scale this back down to around one, you can see that this is what the door looked like, but I was able to create a seamless texture from it, using some tricks. And now I can make this more detailed by scaling it up. And it's totally seamless. So seamless textures, very, very useful. Let's learn how to make them.
Joey Korenman (02:58): There are three images that I'm going to be showing you how to make seamless. There is an asphalt texture. This is the parking lot right outside of my office. This is the wall right outside my office drywall. And, uh, this is a door and this picture is about as awful as a picture could be. I wasn't even holding the camera straight, but I'm going to show you how even this can be turned into a seamless texture. So let's start with the easiest one, the asphalt. So the first thing I'm going to want to do is to create a new Photoshop document at the resolution that I'd like my texture to be textures are K texture, 2048, by 2048. Next, I'm going to go to my asphalt image. I'm just going to hit command a, to select all command C to copy. And I'm going to copy this right into my new texture comp.
Joey Korenman (03:45): Now I'm going to transform this and hold shift to scale it down proportionally. And I'm doing this so that I get all of that nice detail in that two K texture. Now this image actually still has information. That's being cut off, outside the bounds of the Photoshop canvas. So what I need to do is get rid of that and just to show you what I mean, if I scooch this to the left, you can see there's more pixels. So I want to get rid of those. So what I'm going to do is hit command a, to select all command C to copy command V to paste, and then I'm gonna delete the original layer. And so now I have a layer that only has pixels that are within Photoshops campus. So now, how can you tell that this isn't already seamless? Well, there's a really easy trick to do that in Photoshop, go up to filter other offset.
Joey Korenman (04:33): The offset effect will shift the pixels in an image horizontally, vertically. However you set it and just to show you what it does, I'm going to adjust the vertical property. Okay? So it's pushed every pixel in this image, 290 pixels down. And when it got to the bottom, it wrapped around and put them at the top. And so now you can see that this was the top of the image, and this was the bottom, and now there's a seam there. So let me adjust this. So that scene is right in the middle. Perfect. Now let's look at horizontal. So I'm shifting this to the right. And the crazy thing is I'm not actually seeing a seam. Sometimes you get lucky and you'll get an image where there's not an obvious seam, uh, but we're still gonna want to deal with this. So I'm gonna hit, okay. And I'm going to zoom in here.
Joey Korenman (05:20): So this is obviously the scene where the top and the bottom meet. And now if you look really closely, you can see that this is the horizontal seam right here. So now that we've identified that we can clean all of that up with an image like this, you can probably get away with going the easy route using the spot healing brush and the clone stamp. So let's start with the spot healing brush, the spot healing brush works sort of like a clone stamp, except instead of you having to tell Photoshop where to clone from it sort of figures it out itself. It's pretty cool. So the first thing we want to do is make this brush a little bit bigger by using the right bracket key. And then I'm going to just paint a line right across that scene.
Joey Korenman (06:02): And you can see that Photoshop has erased the seam. If we zoom in there, it's still obvious that there is some difference between this part of the asphalt and this part, but there is no hard edge. So now let's go to the vertical seam. I know it's hard to see, but here is the vertical seam right there. And actually to make this even easier, this is actually crazy how seamless this image is. Even without doing much to it, I'm going to put a ruler there, just so I don't lose it. Then I'm going to grab my spot healing brush, and I'm just going to paint a stroke down like this.
Joey Korenman (06:36): Okay? So now there are no seams, but this is still a very uneven texture to prove that I'm going to go back up to filter and run the offset command again. Now there's a hot key for this. And since you're going to be doing this a lot, you're going to want to learn it, control command F, which we'll just rerun the last filter that you used. So I'm just hitting control command F a few times, and you can see that there's no obvious hard edge or anything like that, but it is pretty obvious that this isn't going to be very seamless because you have this area here that doesn't really match anything around it. So I can try using the spot healing brush to just sort of paint a big blob like this. And sometimes that actually works. Uh, and it'll at least get you started.
Joey Korenman (07:20): So let's see what Photoshop does here. And it actually did a pretty decent job. I'm telling you the tools and Photoshops get better and better. And so now you can see pretty clearly where there's some Schmitz we need to clean up. So I want to do that now, still using the spot healing brush. So this area here, this is giving the spot healing, brush some troubles. So now I'm gonna switch to the clone stamp, which is in the same menu, but S is the hot key. So I need to make my clone stamp brush bigger by using the right bracket key. Then I'm going to hold option. And I'm going to pick a point on the image that I think it would be nice to clone from maybe up here. Now, as I move my brush over the area, that's offensive to me. I am going to get a little bit of a preview of how this is going to look, and then I'm just going to start painting.
Joey Korenman (08:02): And you don't want to clone giant areas. Whole, you want to sort of grab another part of the image and mix it up so that your eye isn't going to detect any patterns. Once this thing is being used as a texture. So I'm just sort of going around and picking random spots and cloning and trying to get rid of anything that's very distinct. And that I think is going to give the texture away. Now I'm going to hit control command F and run the offset command a few more times. And as I'm doing this, I'm noticing that it is looking a lot more seamless, but there is still something that's catching my eye, which is this vertical detail right here. So what I'm going to do is use the clone stamp, and I'm going to grab a piece over here and then paint a little bit, grab a different piece, paint a little bit, grab a different piece, paint a little bit. And so by doing it this way, I can make sure that I'm not going to detect any patterns. Once this thing is tiled. There's still a few areas that I think are going to jump out when it's tiled. So I'm fixing those and just like that in really just a couple of minutes, this thing is good to go. We have a [inaudible] asphalt textures. There's even some little leaves in there. Some little bonus leaves. All right. So this one was pretty easy. Let's move on to a harder one.
Joey Korenman (09:13): So the next texture is a picture I took of my hallway right outside my office. And there was some dry wall that I don't know, just that it had some nice detail. It was kind of an interesting texture. And I took a picture of it and I thought, oh, this is going to be easy. So I've copied the photo into a two K Photoshop canvas, and I've already gotten rid of the extra pixels so that we can just start working on making the seamless. Now you might think that this would be pretty easy to make seamless, but there's one issue that you're probably not spotting yet. If I go to filter and run that offset command again, you can see here's the scene vertically. That seems like it wouldn't be too hard to clean up, but oh my goodness, what's going on here? Well, what's going on here is that my hallway much like almost every hallway on earth has lights in the ceiling above you.
Joey Korenman (09:59): And so the top of the wall is always going to be a little bit brighter than the bottom. How do we deal with that? So this is where I'm going to show you my first trick for doing this. And I did not invent this trick. This has been used by 3d artists since the Bible. So what we're going to do is first to make a copy of this layer, and I'm going to name the bottom one original, just so we have something to compare back to, then I can turn that off next. I'm going to need two layers. I'm going to need a color layer. I'm going to copy that. And I'm going to need a detail layer. So let's turn off detail for a minute. Now, essentially, what we need to do is keep all of this nice detail that's in this image, but get rid of the overall light cast that's on it.
Joey Korenman (10:41): And so let's first deal with that light cast. What we want to do is basically get an average color for the lighting in the shot. And luckily there is a handy filter to do that. So we'll go to filter blur, average average just spits out a solid color. That is the average of every pixel in your image. Great. Now I can turn on this detail layer. What I'm going to do is run a command on it, called a high pass filter it's found in filter other high pass. What a high pass filter does is turns the image completely gray, but then it tries to find a detail in it. And it basically creates an embossed version of that detail. So as I adjust the radius up or down, you'll see that it's sort of finding bigger details in the image as I raise the radius.
Joey Korenman (11:32): And if I scale down and find smaller ones, what I'm trying to do here is get this to look like the drywall actually looked, and it's kind of hard to do that without seeing it. So I'm gonna hit cancel. I'm going to take this original version here, move it up to the top. And then I'm just going to put a mask on this. I'm using my marquee tool. I hit M draw a little rectangle here, and I'm going to click this button way down here to create a layer mask. So that now on my detail layer, I can run that high pass filter, but I can see it in the context of the original image. And so now I can see that that is not enough big detail. And if I go too far, it gets a little chunky. So I may want it sort of somewhere, somewhere in this range here, maybe.
Joey Korenman (12:21): Great. So now I'll hit. Okay. And I'll turn off the original. Now, what have we done? We've basically split this image into two components. We've got the overall color, and then we've got the detail. So now I'm going to take this layer and I'm going to set it to linear light mode. Now linear light mode works a lot like hard light mode. It's essentially making the pixels that are brighter than 50% gray, bright and everything below it. And if the pixels are darker than 50% gray, it darkens everything below it. But linear light does that in a little bit more of an extreme way, more like a color Dodge or a color burn. And I kinda liked that result, uh, but you can play around with different transfer modes if you want. Now remember the goal here is I want to match the original wall texture.
Joey Korenman (13:07): So we zoom in here. You can see there's this little square here where I've got the actual original image showing through everything else is being created by these two layers here. And so now I can maybe try some different modes. I could try hard light mode, which in this case looks like it's going to get us a little bit closer to the original wall texture, although we're losing some of these bright highlights. So I think what's going to do it here is just playing with the opacity of this detail layer. I like to use the keyboard to do that. You can always come up here and use this slider, but a handy shortcut is make sure that you are on the move tool, which is V for the hot key, and then using your number pad on the right side of your keyboard. You can use the numbers as a shortcut, make sure your layer is selected and then just hit save five.
Joey Korenman (13:51): And it will drop the opacity to 50%. One is 10%. Nine is 90% and around 50% here, it starts to match pretty darn good. So let's zoom out and I'm going to disable this layer mask by hitting shift and clicking on this thumbnail. So this is the original shot, and this is the texture that we've created pretty slick. So now we need to make it seamless. So what I'm going to do is hit command a I'm going to run the copy, merged command, edit, copy merged. And the hot key is shift command seat. And what that does is it copies everything that you can see, not just the layer that's selected so that when I hit paste, I basically have a copy of everything I just did on one layer. I'm going to turn everything else off, cause I don't need it right now. And then I'm going to run the offset command.
Joey Korenman (14:38): So let's shift these over a little bit sideways and you can see the scene there. And then we'll shift everything down a little bit and you can see the scene there. And now this is going to be much, much, much easier to clean up then with all of this lighting in there. All right. So I'm going to do this really quickly using the spot healing brush and the clone stamp. You may notice with the spot healing brush, I am being very sloppy and it doesn't really matter. It does a great job of blending the edges. So you generally don't have to worry about that, but I did soften the brush just to see if that would give me a better result. And it seems like it is. So that may be something that you want to try to. So now I'm going to hit control command F and I'm just going to run that offset command a few more times and see if anything jumps out.
Joey Korenman (15:20): Now, one thing that does jump out is you've got some areas of the drywall that are really, really sharp and detailed. And then you've got other parts like here where it's less sharp and detailed. And that may be something that you notice when this tiles onto a 3d object. And so if you're worried about that, you can use the clone stamp or the spot healing brush to try and fill some of this in. So I hit S to select the clone stamp and I'm picking some areas that have more detail in them. And I'm just going to try to sort of fill in these fuzzy mushy areas with areas that have more detail to them. And I'm being very careful not to clone an area that's really big because again, I don't want my eye to detect a pattern and I'm constantly checking by running the offset command again so that I can see if there's any new areas that I spot. All right. So this could use a little bit more work, but overall that's pretty good. We now have a seamless two K drywall texture, and we had to remove the lighting from it, which was kind of tricky. So now you know how to do that. All right, we got one more.
Joey Korenman (16:20): All right. So this is going to be like the boss battle. This one's going to get wacky. So the first thing we need to do is try to get rid of this perspective on the shot, the camera's tilted, and it's not flat to the door. This is going to make this harder. So what I'm gonna do is first hold option, and double-click this layer. So it becomes a layer I can mess around with, and I'm gonna use the transform command command T in transform mode. I want to hold control, click the layer. And I want to go into perspective mode. Now, perspective mode is really cool. So watch this. If I grabbed the bottom right edge of this, and I pull out, it also pulls the left edge out, and you can see how that sort of removes the perspective, uh, that was present in the image of the image is also tilted.
Joey Korenman (17:02): So I could rotate this or I could skew this image. So I'm going to hold command and grab this top handle here and just skew this so that it's straight up and down. And I might grab a ruler over here so that I can really try to get this as close to perfect as possible. And that is pretty good. It's certainly a lot better than what we were starting with. So I'll hit enter to accept that. And now that step is done. Now, of course, we are not going to be able to use all of this image. We can't, you know, have a doorknob that would make sense, and we don't want the molding around the door. So all I'm going to do is use the best part of the image, which just sort of this interior part of the door. And I'm going to sort of clone that around.
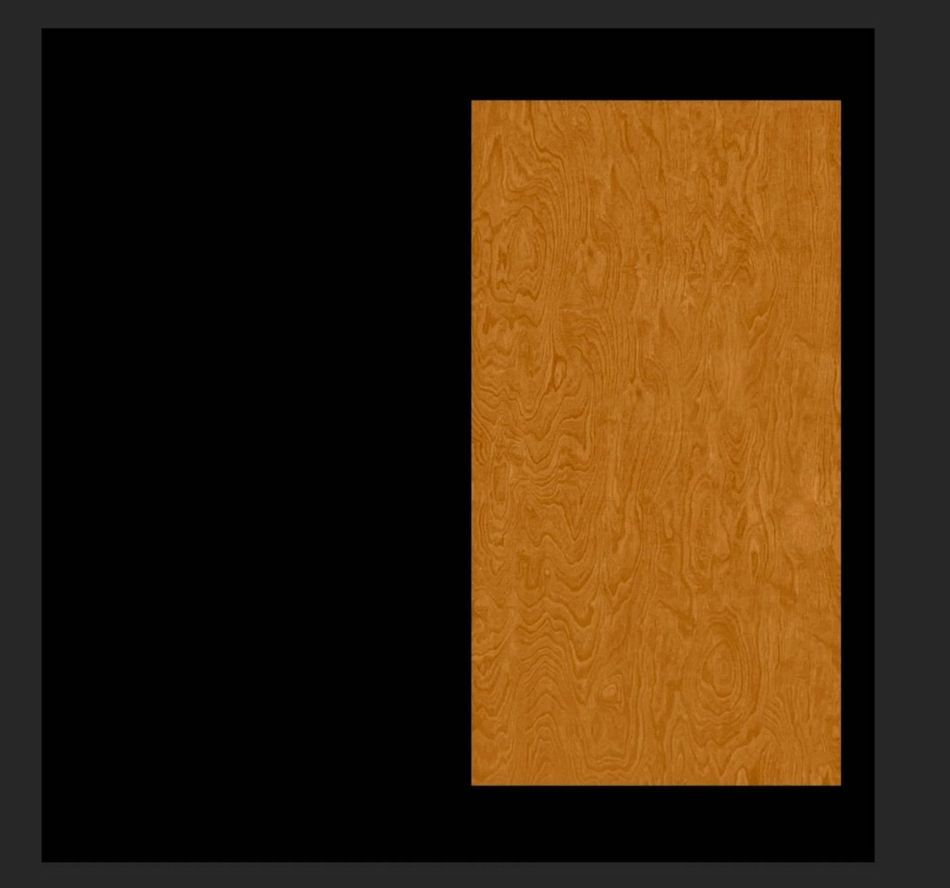
Joey Korenman (17:44): Uh, and we've got a lot of work to do now, let's make this a 4k texture. So that's going to be 4,096 by 4,096. All right. So I have pasted this image into a 4k canvas in Photoshop, and we can't use all of this. It's not going to work. So here's what we need to do. I am just going to use my marquee tool M and I'm just going to grab this part right there. I'm going to copy it and paste it and turn off this other layer. Okay. And I don't need this anymore. I can just get rid of it. So this is what we're working with right here. Now we could try to do the same trick that we did on the previous image. We could split this into a color layer and a detail layer. And in fact, I can do that really quickly to show you why it won't work in this case.
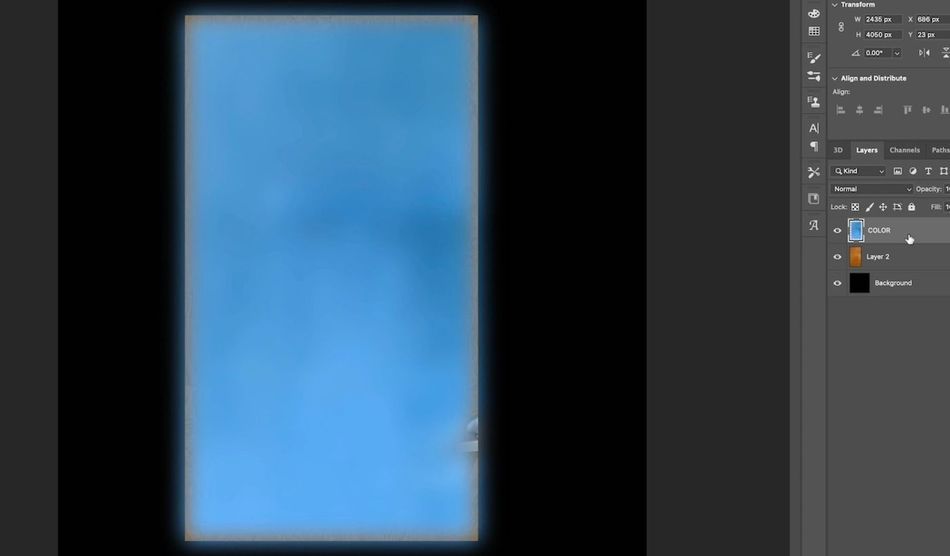
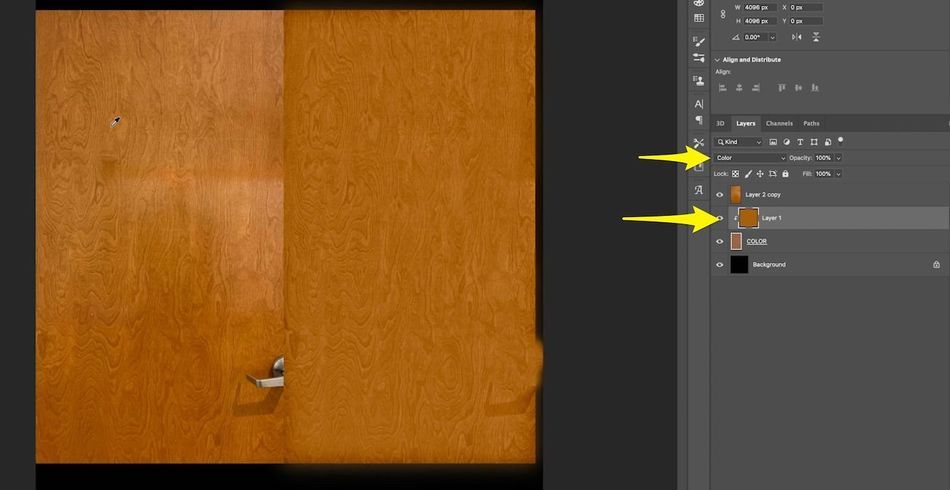
Joey Korenman (18:31): All right. So I've set this up the same way that I did for the dry wall shot. And you can see it doesn't work as well. I ran the average blur on the color layer, and this was the average color of the door. And then the detail passes coming up with this at why you could color correct this and try to get it to look more like the original door. The real problem is the original door had all of this nice color variation to it. And it'd be kind of nice to keep some of that. So how do we do that? All right. So I hit undo a bunch of times and we're back to where we started. So I'm going to turn it the background black for a moment. It will become clear why in a minute, and then I'm going to make a copy of this layer. And we are going to still sort of have a detailed layer and sort of have a color labor. We're going to do this a little bit differently. So I'm just going to name this top layer color, and I'm going to run a gosh and blur on it.
Joey Korenman (19:21): Now here's what I'm looking for. I want to basically get rid of all high-frequency detail. High-frequency detail are things like wood, grain, and really fine textures. I want to try to get rid of all of that, but not go too far, because you can see that by getting rid of that, I still keep a lot of this nice color variation, and I could make a seamless version of that color variation, and it's gonna be a lot easier blurring it this way. So our color layer is blurred. The next thing we need to do is hit command. I to invert the color of this layer. Now that seems pretty weird, but the next step will make it clear why I now need to set the opacity of this layer to 50%.
Joey Korenman (20:06): Hopefully now you can sort of see where this is going because we blurred the original image we got rid of all those high contrast details. And by inverting the colors and layering it back on top of itself, we've basically neutralized everything. We flattened out most of the color. Now this looks pretty awful, but we can fix it. But before we go to the next step, I want you to notice that there is a pretty clear horizontal line here that I think is going to stand out when this is tiled. So let's fix that now, rather than later. So let's make the opacity of this layer at 100% again. And if we zoom out, you can sort of see where that line is. Okay. So what I'm going to do is sort of zoomed out like this because it's a little bit easier to see, uh, going to start with my spot healing brush.
Joey Korenman (20:50): And I'm just going to try to paint this side of the frame and that little spot there and see if it'll even it out. That's not too bad. Now there's a little bit of a weird scene here, but I bet I can just paint those things out too. I'm going to switch to the clone stamp and try and get some of these other little areas a little bit more cleaned up, and then I can also go in and just blur it a little bit more. So I'll go back to gauzy and blur and a blur that's about 30 is going to do it. Now, if I set the opacity back to 50%, you can see that there still is a little bit of a line there. It's been minimized a little bit and we'll probably have to do a little bit more clean up later.
Joey Korenman (21:24): So now what I want to do is merge these two layers together. Now I'm going to want to keep a copy of this. So I'm going to make a copy, turn it off, select these two layers and hit command E to merge them. Now you can see that the color is all washed out here that won't do. So let's fix that up. I'm gonna apply a of effect command L and I'm going to go channel by channel and adjust these levels. So I want to take the white input and move it right to where this skinny little line ends. And then on the black input, I'm going to move it right over to where it looks like the black information begins. I'll then do the same on green and blue. And there we go. Now it doesn't exactly match the original door. Let me pull that layer above and move it off to the side so we can compare.
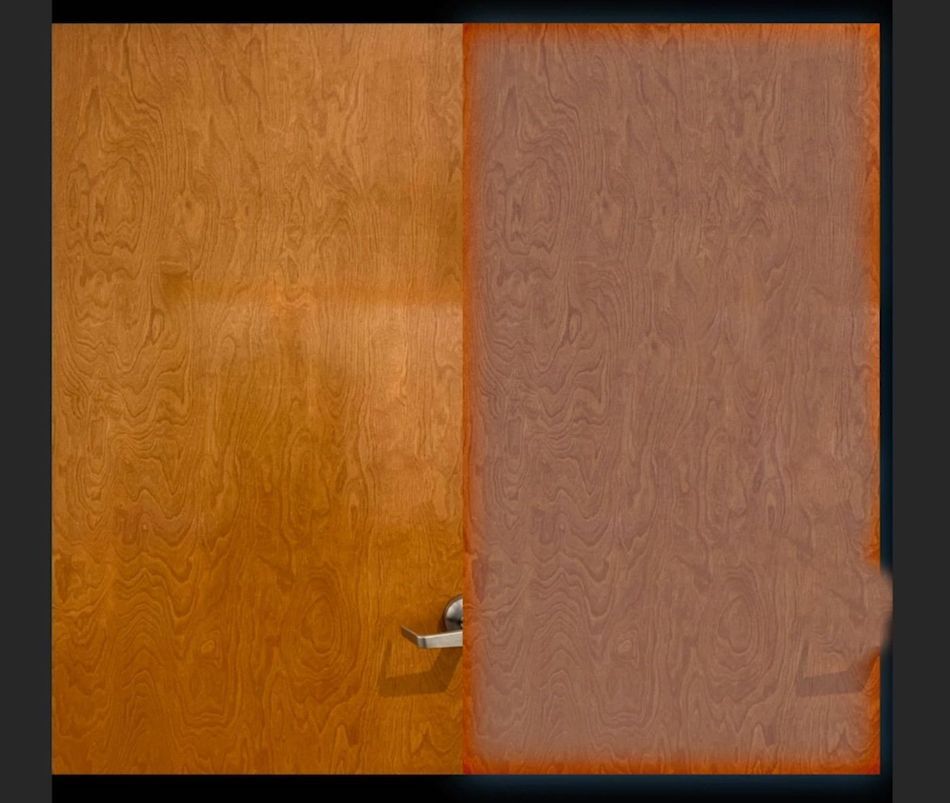
Joey Korenman (22:07): So this is the original door, and this is the door that we have manipulated. And you can see this area here is definitely gonna create some issues. So let's first just go ahead and clean that up. So I'm just using the clone stamp tool with a big soft brush, and I'm going to pick a couple of spots and just come in here and paint out that area. And while I'm at it, I might as well grab a spot and get rid of the door handle. All right? So with just a few minutes of work, this is what we have. Now. It doesn't match the color of this, but if you look at the overall woodgrain and the way this feels pretty darn close. Now I do like the color of this door. It's like a, like a rich mahogany. So what I'm going to do is grab my color picker with the I hot key, and I'm going to grab a color that feels pretty rich.
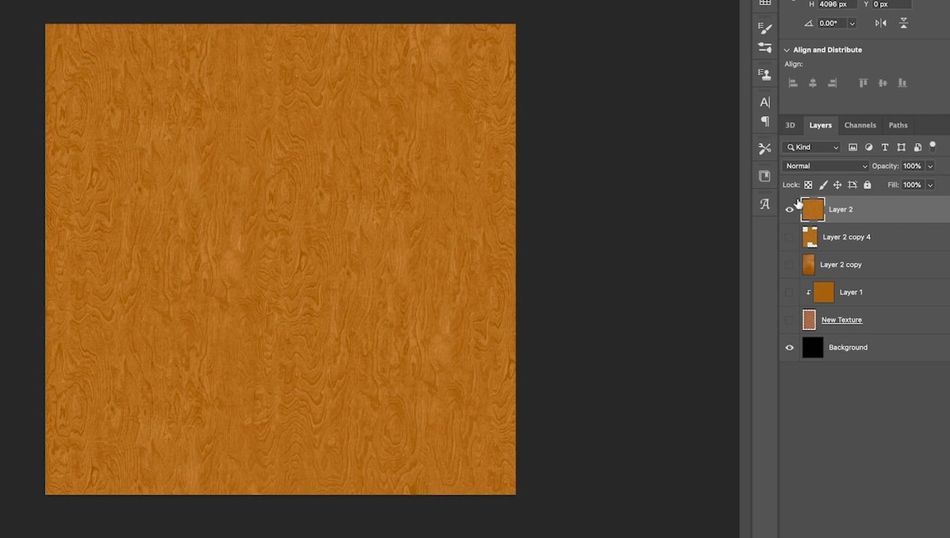
Joey Korenman (22:53): And then what I'm gonna do is make a new layer shift command N and then option delete to fill that layer with my foreground color. I'm going to hold option right over this, uh, manipulated color layer so that I can use it as a clipping mask. And then I can set this new solid layer to color blending mode. Now we are getting closer. Let me rename this layer here, color, cause that's not what it is anymore. This is actually our new texture and I'll run a levels effect on it to try and bring a little bit more contrast to it. And there we go. This feels a lot closer to the original door. So I'm going to say good to go. Let me turn off the original. Now we still have a problem. This is a 4k texture, and we don't have 4k of texture dewy.
Joey Korenman (23:37): No problem. Here's what I'm going to do. I'm going to grab my marquee tool with em, and I'm just going to grab section here. And in doing that, I noticed there is still a shadow there. So let's fix that. Let's try these spot healing brush like magic. So with my marquee tool, I can just grab a big chunk of this door. I was noticing that there was a little vignetting down here at the bottom, and I want to make sure I avoid that. So that's why I've only selected the interior part of the door shift, command C. So I can copy everything that I'm seeing in my canvas and then paste. And I'll move this layer to the top and turn everything else off. So now what I'll do is move this over to the top left corner, hold option and shift and click and drag a copy, maybe somewhere there.
Joey Korenman (24:23): Now you can see there's a big seam there, but that should be pretty easy to take care of. If I just take an eraser with a nice big soft brush and just erase the edge of it. There we go. Now, because this layer is blending into this next one. I might want to sort of work on this edge a little bit with the eraser, but when you're zoomed out, that looks pretty good. Now I'm going to select both of these layers and merge them with command E then I'm going to move this layer over with shift and option to make a copy. And I'm going to shift this up a little bit so that it's a little bit more random. Now I have a seam there that I need to deal with, but I might as well just go ahead and finish the sauce. So I'm going to shift option, click drag, and then move this one down.
Joey Korenman (25:05): So let's deal with these seams. I'm going to merge all three of these layers together, command E and then I'm going to use my spot healing brush to try and just quickly get rid of these seams. All right. No more obvious seams. So now, if you look in the layer browser, you can see that this image has a lot of extra information around here, and we don't want that. We only want what we can see. So command a shift command C copy, merged command V paste. And now here we have our texture. Now it's not seamless yet. We still need to run the offset command on it to see if we need to adjust.
Joey Korenman (25:43): All right, so we can see the seams. There is a vertical one right here, and there's a horizontal one right there, and this ruler can go away. So those are the seams. And now by this point, you should know how to take care of those. All right. And now we control command F and we run the offset command a few times to see if anything jumps out. Are there any obvious patterns or seems there are some little areas that are just a little bit brighter. And so when you see stuff like that, you can just quickly use the clone stamp tool and just paint them over then control command F, and just keep doing this until you're happy. And that my friends is good enough for government. And there you haven't, you've just learned a lot of techniques to help you turn just about any image into a seamless texture, make sure to hit subscribe. If you want more tips like this one and check the description so you can download the project files and photos from this video to practice with on your own. And if you're ready to learn cinema 4d from the ground, up with a one of a kind interactive online class, check out cinema 4d base camp on school motion till next time
ENROLL NOW!
Acidbite ➔
50% off everything

ActionVFX ➔
30% off all plans and credit packs - starts 11/26

Adobe ➔
50% off all apps and plans through 11/29

aescripts ➔
25% off everything through 12/6
Affinity ➔
50% off all products

Battleaxe ➔
30% off from 11/29-12/7
Boom Library ➔
30% off Boom One, their 48,000+ file audio library
BorisFX ➔
25% off everything, 11/25-12/1

Cavalry ➔
33% off pro subscriptions (11/29 - 12/4)

FXFactory ➔
25% off with code BLACKFRIDAY until 12/3

Goodboyninja ➔
20% off everything

Happy Editing ➔
50% off with code BLACKFRIDAY

Huion ➔
Up to 50% off affordable, high-quality pen display tablets

Insydium ➔
50% off through 12/4
JangaFX ➔
30% off an indie annual license
Kitbash 3D ➔
$200 off Cargo Pro, their entire library
Knights of the Editing Table ➔
Up to 20% off Premiere Pro Extensions
Maxon ➔
25% off Maxon One, ZBrush, & Redshift - Annual Subscriptions (11/29 - 12/8)
Mode Designs ➔
Deals on premium keyboards and accessories
Motion Array ➔
10% off the Everything plan
Motion Hatch ➔
Perfect Your Pricing Toolkit - 50% off (11/29 - 12/2)

MotionVFX ➔
30% off Design/CineStudio, and PPro Resolve packs with code: BW30

Rocket Lasso ➔
50% off all plug-ins (11/29 - 12/2)

Rokoko ➔
45% off the indie creator bundle with code: RKK_SchoolOfMotion (revenue must be under $100K a year)

Shapefest ➔
80% off a Shapefest Pro annual subscription for life (11/29 - 12/2)

The Pixel Lab ➔
30% off everything
Toolfarm ➔
Various plugins and tools on sale

True Grit Texture ➔
50-70% off (starts Wednesday, runs for about a week)

Vincent Schwenk ➔
50% discount with code RENDERSALE

Wacom ➔
Up to $120 off new tablets + deals on refurbished items


All-Access Pass
Unlimited access to 50+ courses, unlimited critique, live events, and 24/7 community. Join School of Motion All-Access today.