

All-Access Pass
Unlimited access to 50+ courses, unlimited critique, live events, and 24/7 community. Join School of Motion All-Access today.

You need to know how to resize images in Photoshop. Luckily, we have just the guide for you.
Working in Photoshop often means resizing your images to fit into a specific canvas. Depending on the image format, the project design, or a dozen different variables, the way you go about resizing can vary. Fortunately, we have a few ways to accomplish this goal.
In this video, we’ll show you six different ways to resize images in Photoshop, and which ones work better for different design and animation situations. We'll talk about algorithms, dots per inch, and how to get the most detail in your images. The newest option even uses artificial intelligence!
{{lead-magnet}}
1. Image > Image Size
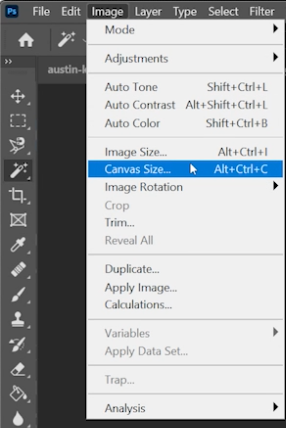
Photoshop has a lot of options for resizing images! Let’s start off by going to the top menus with Image > Image Size.

Right away, you can see plenty of options to change your image. Ever wondered what all these things in the "image size" options dialog mean? Well, let’s take a look.
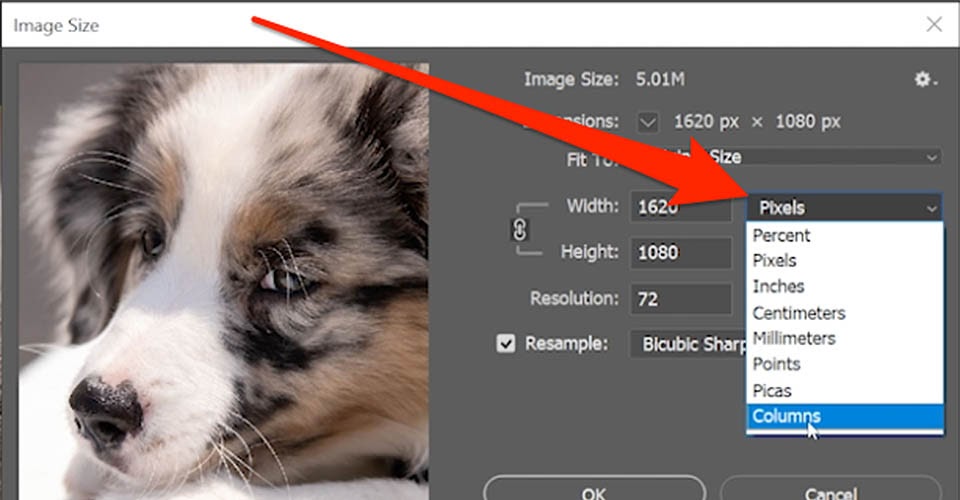
Resize
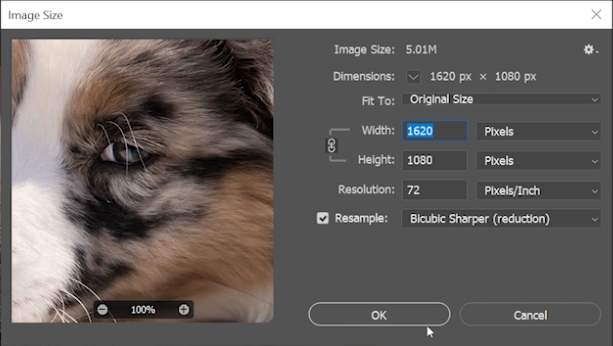
You can resize your image in a few different ways by clicking on the drop-down menus. We normally work in pixels, but you can also resize by inches, centimeters, picas, percentages, and more.
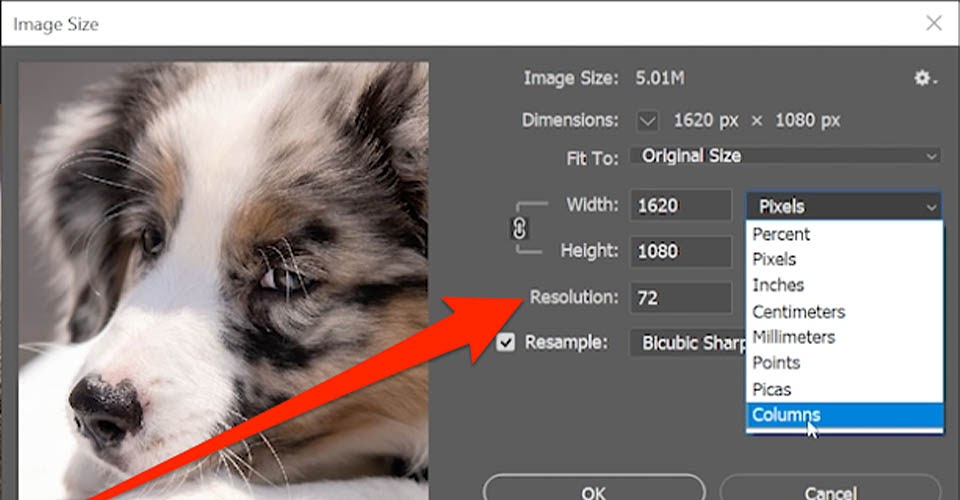
Resolution
You can also adjust your resolution here. Normally we work in 72 PPI, but if you were planning on printing out the image you’d want to increase to 300. Your Resolution uses PPI, or Pixels Per Inch to measure the image quality. In general, the higher the PPI, the higher the quality of the image. If you were printing out a hard copy, PPI becomes DPI (Dots Per Inch) once ink hits paper, and the same principle applies.
Resampling
Next you have Resampling, in which Photoshop analyzes the image and either adds pixels or subtracts pixels to resize the image. If you uncheck this box, your image is either going to be squashed or stretched without any pixel compensation, which can affect your overall image quality.
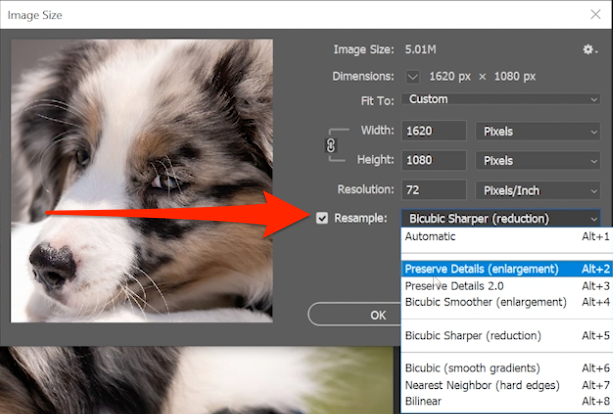
More often than not, we recommend Automatic. If you don’t get the image you had wanted, CTRL/CMD+Z and pick a specific option. In general, this is what you’ll get:
- Enlarge - Preserve Details
- Enlarge - Preserve Details 2.0
- Enlarge - Bicubic smoother
- Reduce - Bicubic sharper
- Bicubic (smooth gradients)
- Nearest Neighbor (hard edges)
- Bilinear
- Automatic - but how much do you trust Photoshop to make your decisions?
Presets
Resize also comes with a bevy of presets, and you can even customize your own if you find a mix of options that suits your needs.

OK now let's see how we can resize without changing our source file.
2. Changing the Canvas Size in Photoshop
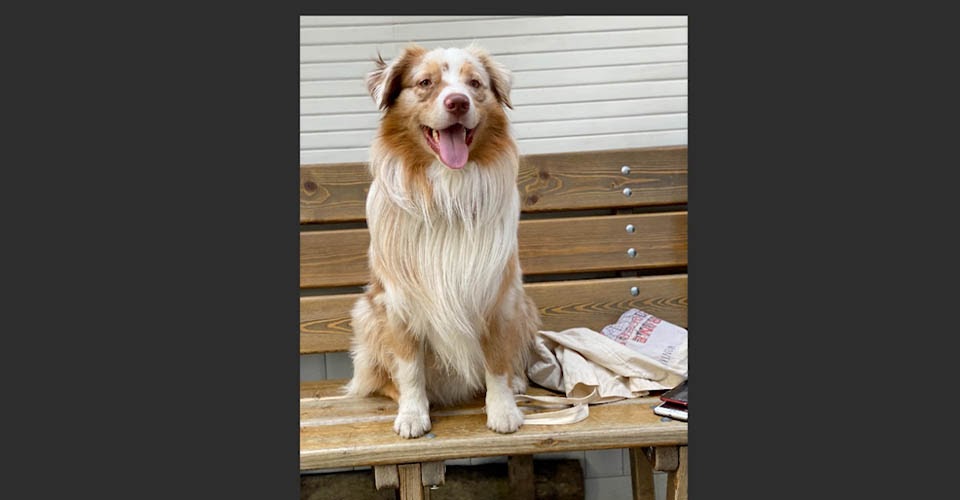
What if you want to resize the image without resizing the content of the image? Say you just need a bit more empty space around this puppy to add your amazing background? Let’s go to Image > Canvas Size.
This will open our Canvas Size dialogue, which opens up options for affecting our canvas. Let’s take a look.
Adjusting dimensions
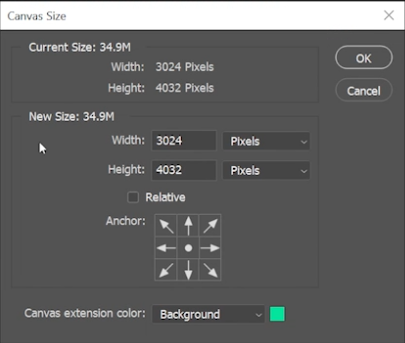
You’ll have the same options for width and height adjustments, as well as the same dropdown menu to choose from either pixels, percentages, inches, etc. Let’s say we want to add an inch on either side of our image. We can switch the measurement to inch, then add 2 to each number, which will increase our canvas size without affecting the image.
Anchor
Now we have the option of deciding where those extra inches will go. See this box at the bottom of the window?
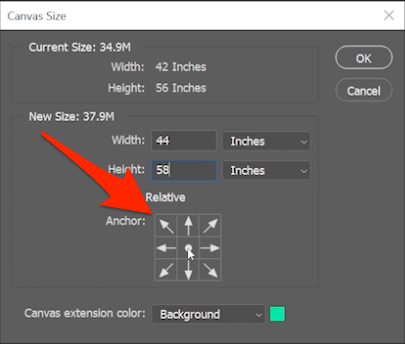
This is our Anchor. The dot in the center represents your image, with the arrows showing the added area based on your input. If we move that dot around, the canvas will grow out in different directions.
Canvas Extensions
Finally, we need to decide what color the new canvas extensions will be. That’s selected right at the bottom.
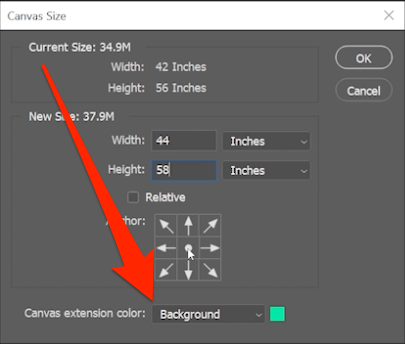
We usually use white, but feel free to throw out whichever color works best for your project.
3. Resizing with the Crop Tool
Sometimes we might want to cut our canvas down to a specific size, which is when we can turn to the Crop Tool.
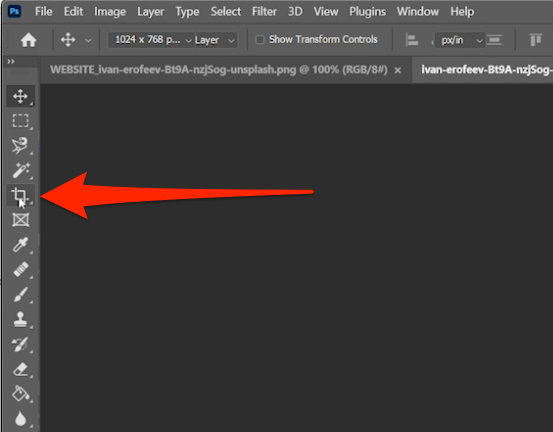
Either select from the Tool Bar or hit C, then check out the new options at the top of the window.
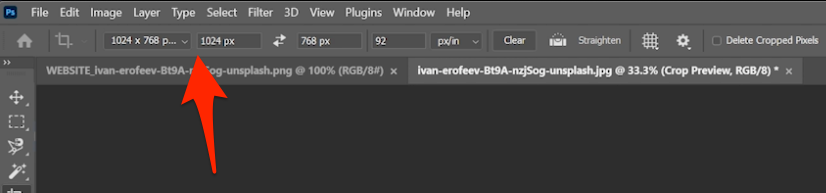
We can select a desired aspect ratio, and now our tool will automatically adjust as we scroll around the image so that this ratio is met.
If we drag the corners, it will change the size of the crop without affecting the ratio. Be sure to check the information for the ratio you select, as some will affect the PPI of the final image.
4. Export Resize Options in Photoshop
Export As
What if you just want to kick out an image to share with a friend (or for the ‘Gram?). Export As allows us to share the image without affecting the psd. Simply go to File > Export.
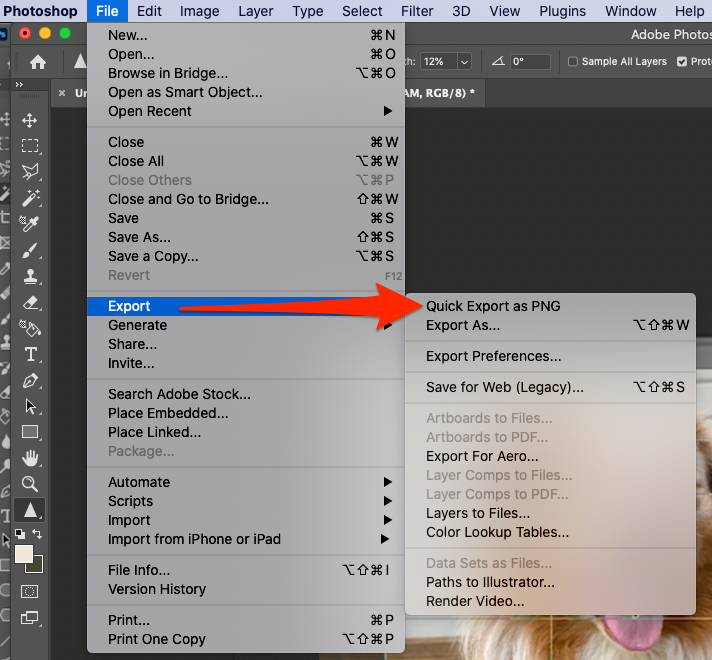
Quick Export as PNG
Quick Export as PNG will do exactly what you think. It exports your image as a PNG file…quickly.

Export As
Export As affords us more options for our file. Once selected, you’ll see this dialogue pop up.
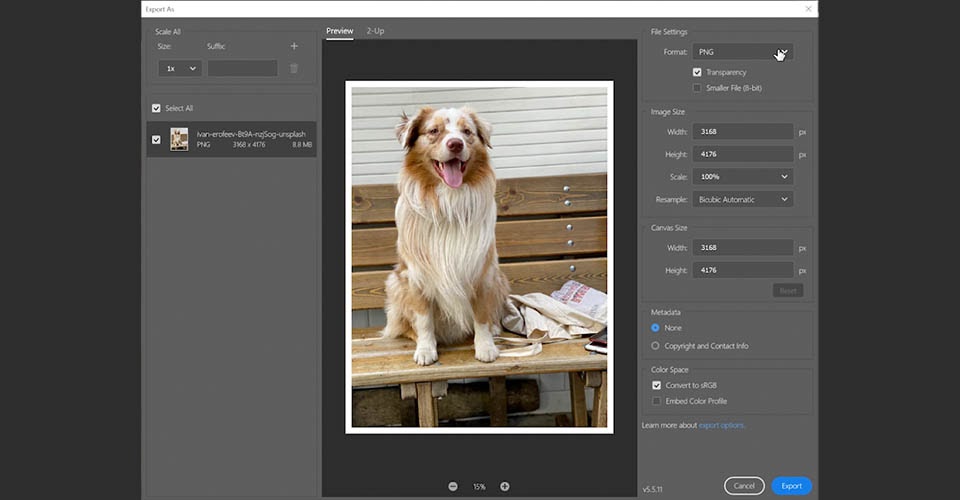
We can change the file type, between PNG, JPEG, and GIF. We can adjust image size, canvas size, and resampling.
We can also change the metadata here. If you downloaded an image from Unsplash, for example, it has metadata you might not want in your exported image, so you can select None to remove it.
When you hit Export you’ll be asked to select a destination.
5. Save for Web in Photoshop
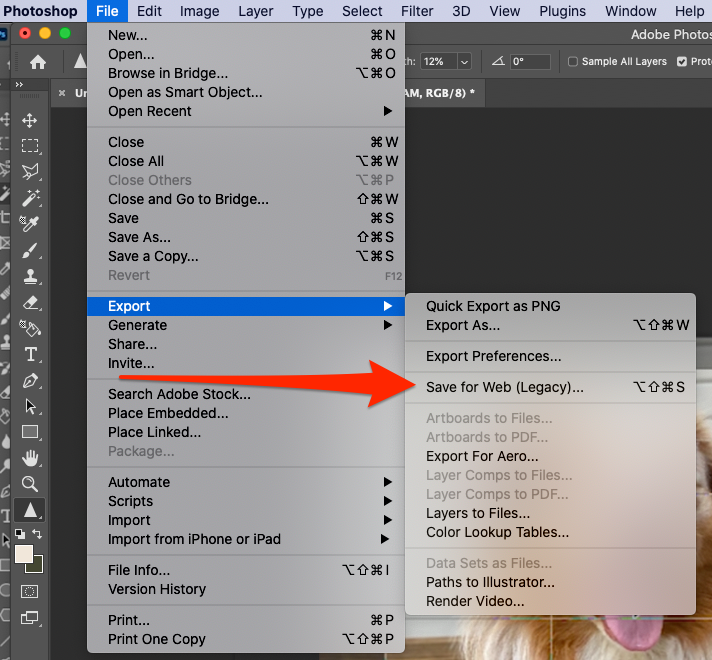
When you hit File > Export > Save for Web, you’ll see this dialogue box pop up. It might take a moment, depending on the size of your image, so feel free to grab a book (or feed your Tamagotchi).
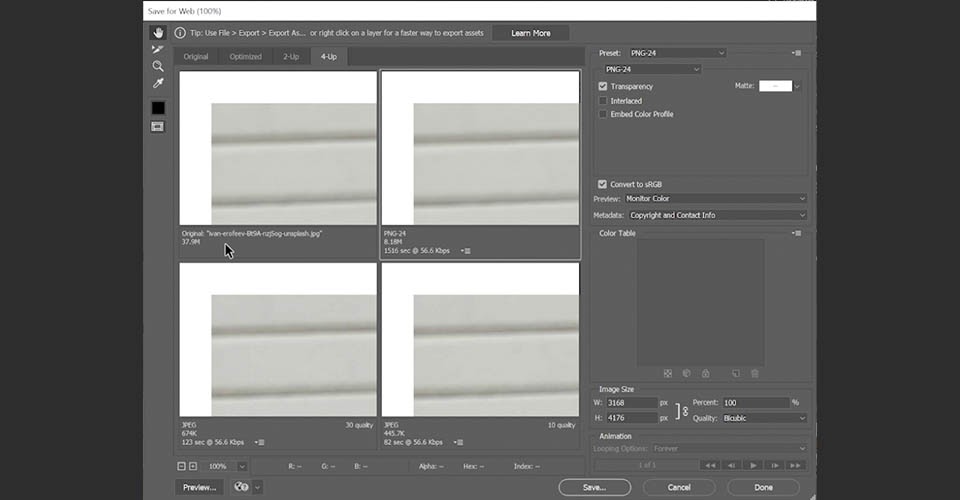
With this box open, we can quickly see how the various file types and compression methods will affect our final image. This can be useful if you’re unsure about how a lower file size will affect your image quality.

Go ahead and play around with the different options and you’ll have an idea of what the final product will be. Select your file type and click Save, choose a location, and you’re all set!
6. Neural Filter - Super Zoom in Photoshop
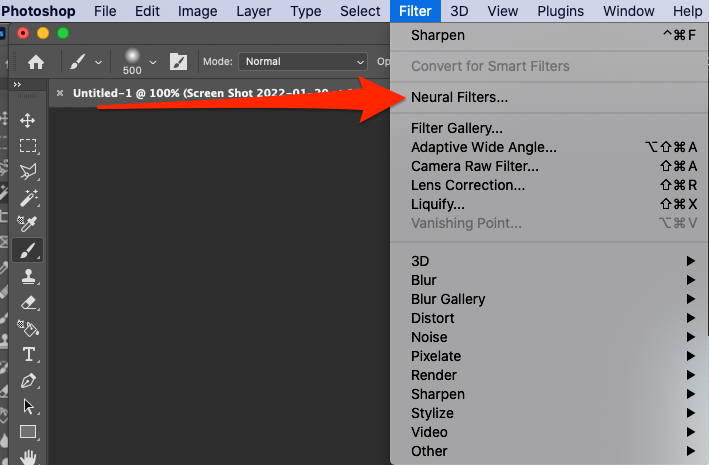
It’s time to learn how to resize with magical artificially intelligent beings. Head to Filter > Neural Filters.
Adobe’s Sensei AI is a powerful additional to Creative Cloud applications, and Photoshop has some of the best tricks to use. Once you hit Neural Filters you’ll see a new window pop up on the right.

If you don’t have Super Zoom installed, you can download it by clicking the cloud icon. You’ll also see the other available Neural Filters. These are pretty great tools (I call them Auto-Magic), and if you haven’t played around with Colorize you need to right away. For now, let’s stick with Super Zoom.
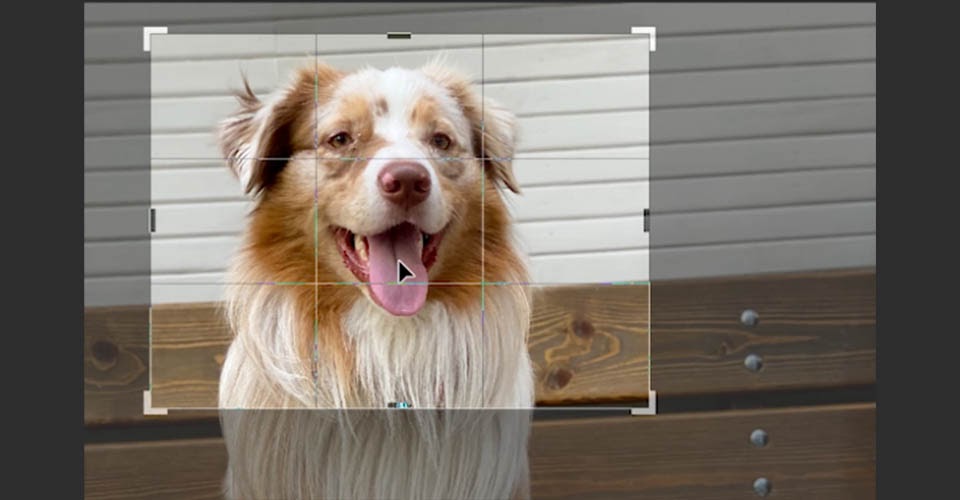
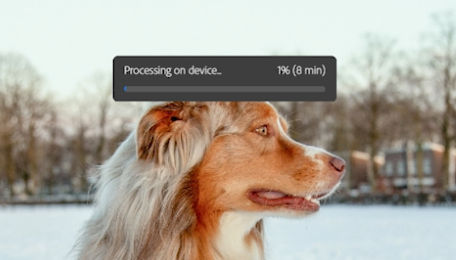
Let’s say we want to resize the image just around the dog’s face. We can click the + or - zoom controls and the image will adjust on the right. If you look at your main window, you’ll notice a new pop up as the image processes in the background. Every time you make a change, this processing starts over.
You’ll also see some options in the window to make additional changes to your image. If you’re working with a JPEG, the compression can create artifacts that you wouldn’t otherwise want. Selecting Remove JPEG Artifacts will instruct the AI to attempt to clear these issues wherever possible.
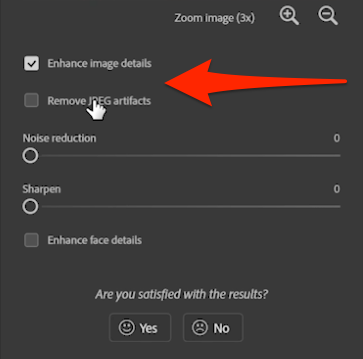
You will also see Enhance Face Details. Now, Sensei was trained on human faces, so we’re not sure how well this will improve your four-legged friend, but you can check this box to touch up areas on profile pics that ran into issues during the resizing.

Finally, you can decide where you want this processed image to go, either as a New Document or a New Layer. Again, we’re not affecting our source image, just resizing into a new location. Let’s check out a comparison between a normal resize and a Super Zoom!
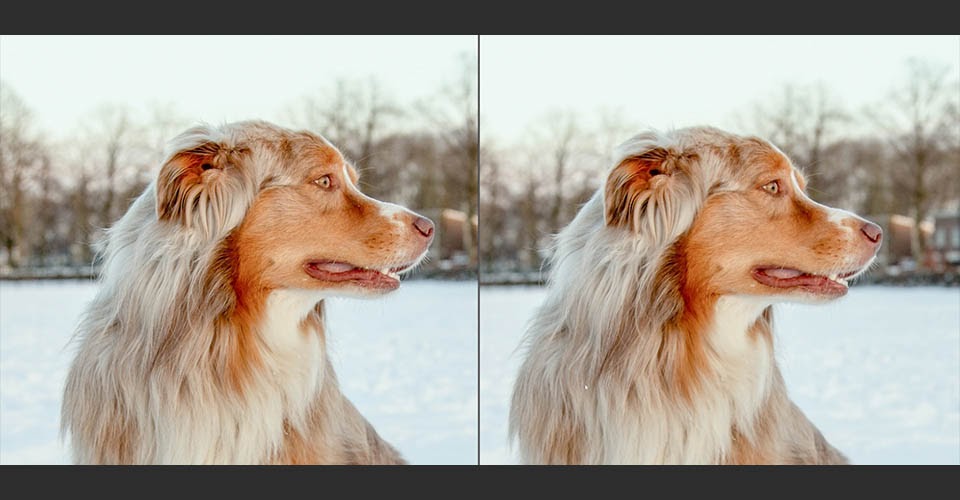
As you can see, the image on the left (the regular resize) isn’t too bad, but it does get a little messy around the mouth. The Super Zoom on the right is just a hair crisper. The power of Sensei is pretty amazing!
And that’s it! Six ways you can resize your images in Photoshop without breaking a sweat.
Keep learning Photoshop and level up
I hope you've learned a lot so far. And if you really wanna really learn Photoshop, you should check out Photoshop and Illustrator Unleashed, part of the School of Motion core curriculum.
Photoshop and Illustrator are two very essential programs that every Motion Designer needs to know. By the end of this course, you'll be able to create your own artwork from scratch with tools and workflows used by professional designers every day.
ENROLL NOW!
Acidbite ➔
50% off everything

ActionVFX ➔
30% off all plans and credit packs - starts 11/26

Adobe ➔
50% off all apps and plans through 11/29

aescripts ➔
25% off everything through 12/6
Affinity ➔
50% off all products

Battleaxe ➔
30% off from 11/29-12/7
Boom Library ➔
30% off Boom One, their 48,000+ file audio library
BorisFX ➔
25% off everything, 11/25-12/1

Cavalry ➔
33% off pro subscriptions (11/29 - 12/4)

FXFactory ➔
25% off with code BLACKFRIDAY until 12/3

Goodboyninja ➔
20% off everything

Happy Editing ➔
50% off with code BLACKFRIDAY

Huion ➔
Up to 50% off affordable, high-quality pen display tablets

Insydium ➔
50% off through 12/4
JangaFX ➔
30% off an indie annual license
Kitbash 3D ➔
$200 off Cargo Pro, their entire library
Knights of the Editing Table ➔
Up to 20% off Premiere Pro Extensions
Maxon ➔
25% off Maxon One, ZBrush, & Redshift - Annual Subscriptions (11/29 - 12/8)
Mode Designs ➔
Deals on premium keyboards and accessories
Motion Array ➔
10% off the Everything plan
Motion Hatch ➔
Perfect Your Pricing Toolkit - 50% off (11/29 - 12/2)

MotionVFX ➔
30% off Design/CineStudio, and PPro Resolve packs with code: BW30

Rocket Lasso ➔
50% off all plug-ins (11/29 - 12/2)

Rokoko ➔
45% off the indie creator bundle with code: RKK_SchoolOfMotion (revenue must be under $100K a year)

Shapefest ➔
80% off a Shapefest Pro annual subscription for life (11/29 - 12/2)

The Pixel Lab ➔
30% off everything
Toolfarm ➔
Various plugins and tools on sale

True Grit Texture ➔
50-70% off (starts Wednesday, runs for about a week)

Vincent Schwenk ➔
50% discount with code RENDERSALE

Wacom ➔
Up to $120 off new tablets + deals on refurbished items


All-Access Pass
Unlimited access to 50+ courses, unlimited critique, live events, and 24/7 community. Join School of Motion All-Access today.


