In this article you will learn why Snapping can be useful for setting up your 3D scene, where to find the Snapping tools, and the differences between the various Snapping options.
So you’re new to the wild and wonderful world of 3D, and you might have realized that that extra dimension (or extra .5 dimension…?) is making it way harder to set up your scene just the way you’d like. Well, there is no better time to get familiar with Cinema4D’s excellent Snapping features than right now.
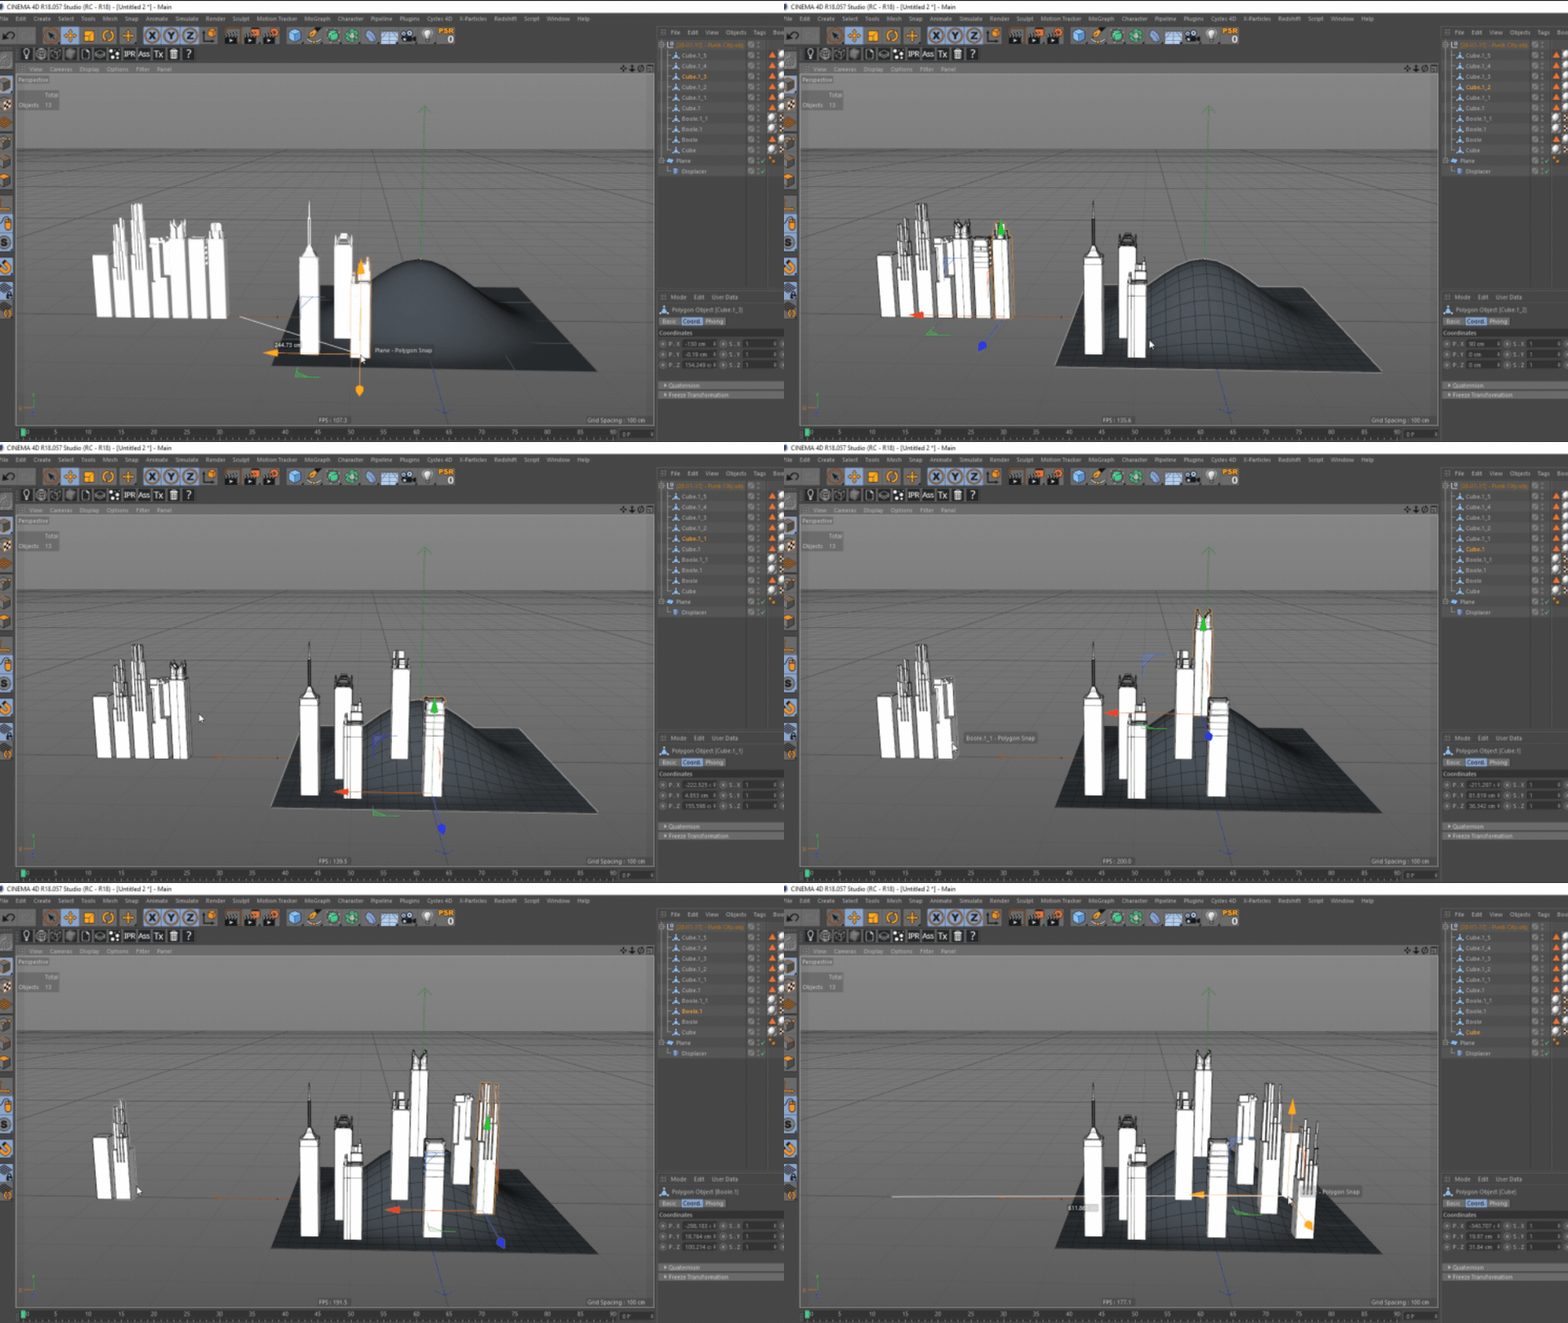
So what is Snapping, and why should I care?
Like in many other design programs (like Photoshop, Illustrator, or After Effects to name a few) Snapping is meant to allow the user to precisely arrange objects or elements by aligning them to existing elements in their scene in a freeform interactive way that doesn’t rely on entering coordinates one by one. This has the benefit of making scene composition faster while keeping your focus in the viewport.
Pro-Tip: Many of the models used in this article are from the amazing (and free!) asset pack from renowned C4D artist Constantin Paschou, a.k.a The French Monkey. Grab it and start making cool stuff right away!
Where do I go to Enable Snapping ?
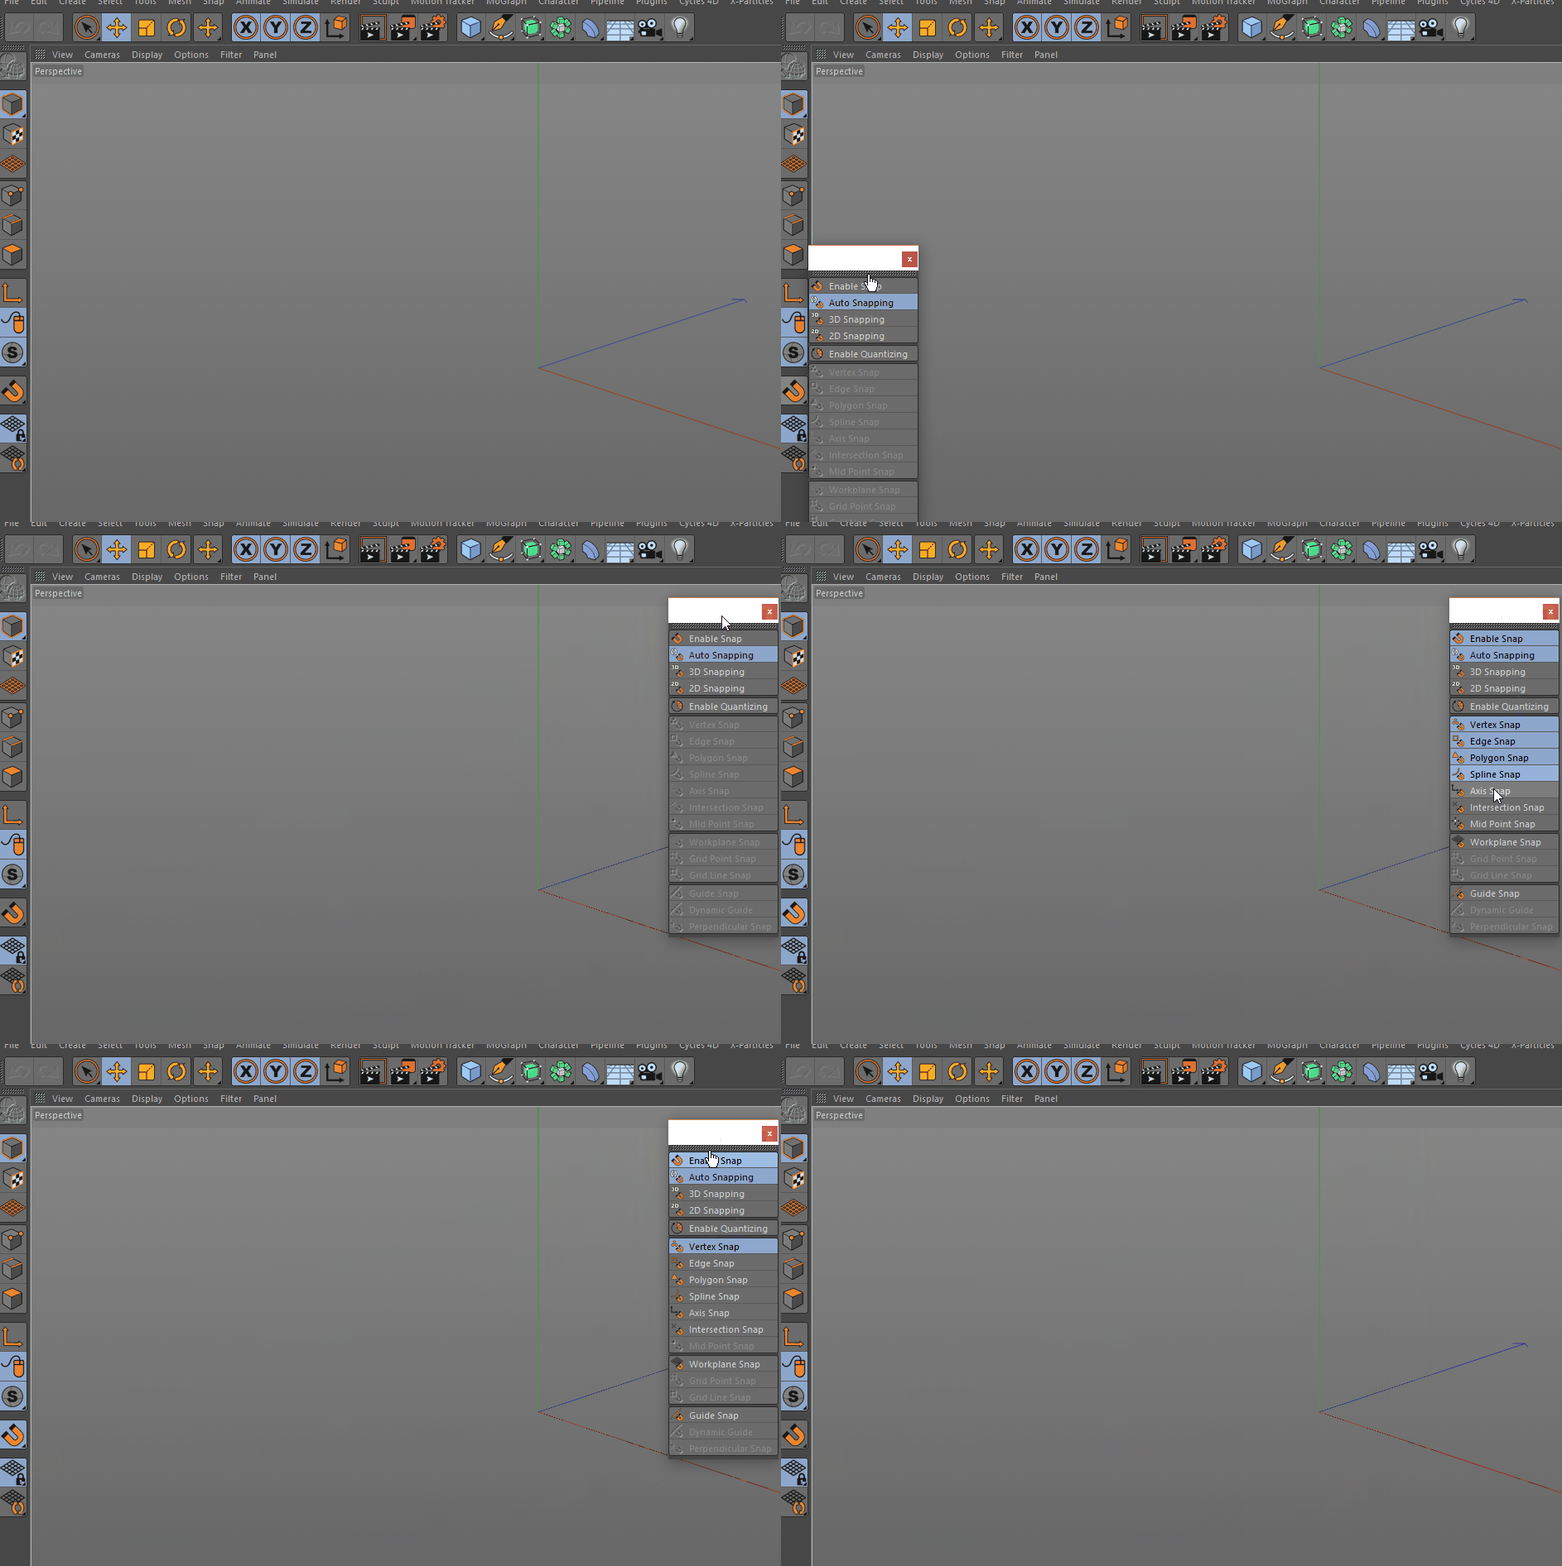
The Snapping Palette can be found in not one, but two places in the Standard Cinema4D Layout (hint: this should be a strong indication of how important this stuff is). The first is in the Menu Bar at the very top of your window, clicking on Snap here will open a sub-menu containing the rest of the Snapping tools, including Enable Snap which will activate snapping in your scene.

For your convenience, the Snapping Palette can also be found directly to the side of the viewport, just think of all the precious minutes you’ll save at the end of the day by mousing over there rather than to the top of the window!
A single LMB-Click will toggle Snapping on or off in your scene. A LMB-Hold will unfold the Snapping Palette to reveal more options. You can easily tear-away the Snapping Palette and dock it anywhere in your layout for quicker access.
Which Snapping Tool should I be using?
Yes, the Snapping Palette is full of different tools, but with just one rule of thumb and a couple examples you’ll be able to figure out the rest pretty quickly.
RULE OF THUMB: STICK TO AUTO-SNAPPING
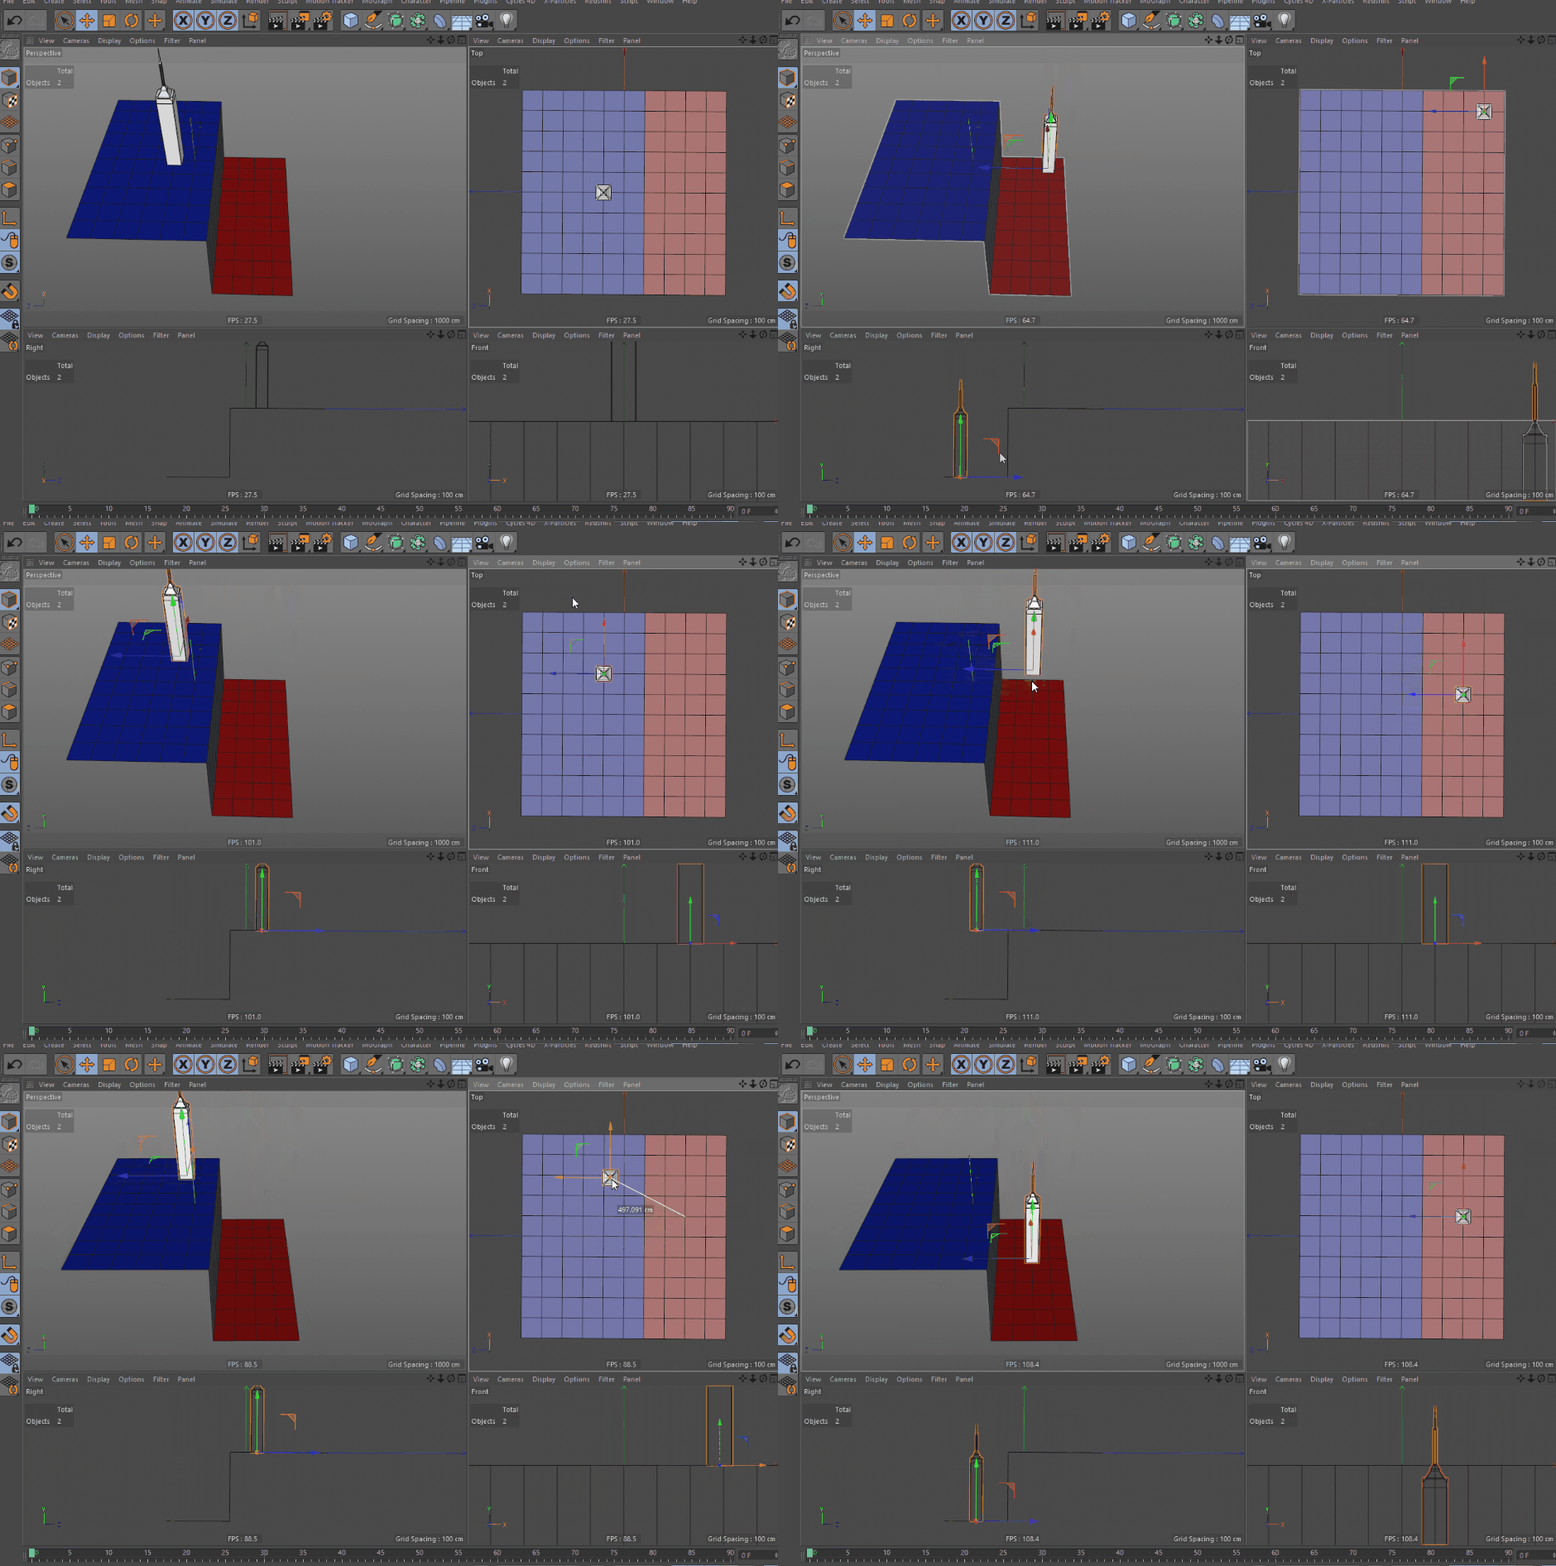
You most likely want to always stay in Auto-Snapping mode. This sets your scene to automatically work in 3D Snapping while in a perspective viewport, and work in 2D Snapping while in an orthographic view. Where 3D snapping will align your object to the target’s absolute position (in XYZ) 2D Snapping will only align them in screen space. This is one of those times when a gif can come in handy…
Vertex, Edge, and Polygon Snapping
Vertex Snap is the default type that will be activated when you Enable Snap. This will snap the axis of whatever object you are moving to nearby vertices of any geometry in your scene. You can turn on as many additional Snapping modes as you like from the Snapping Palette. You’ll also notice a small display tag in your viewport to indicate which target your object is snapping to at any given point.
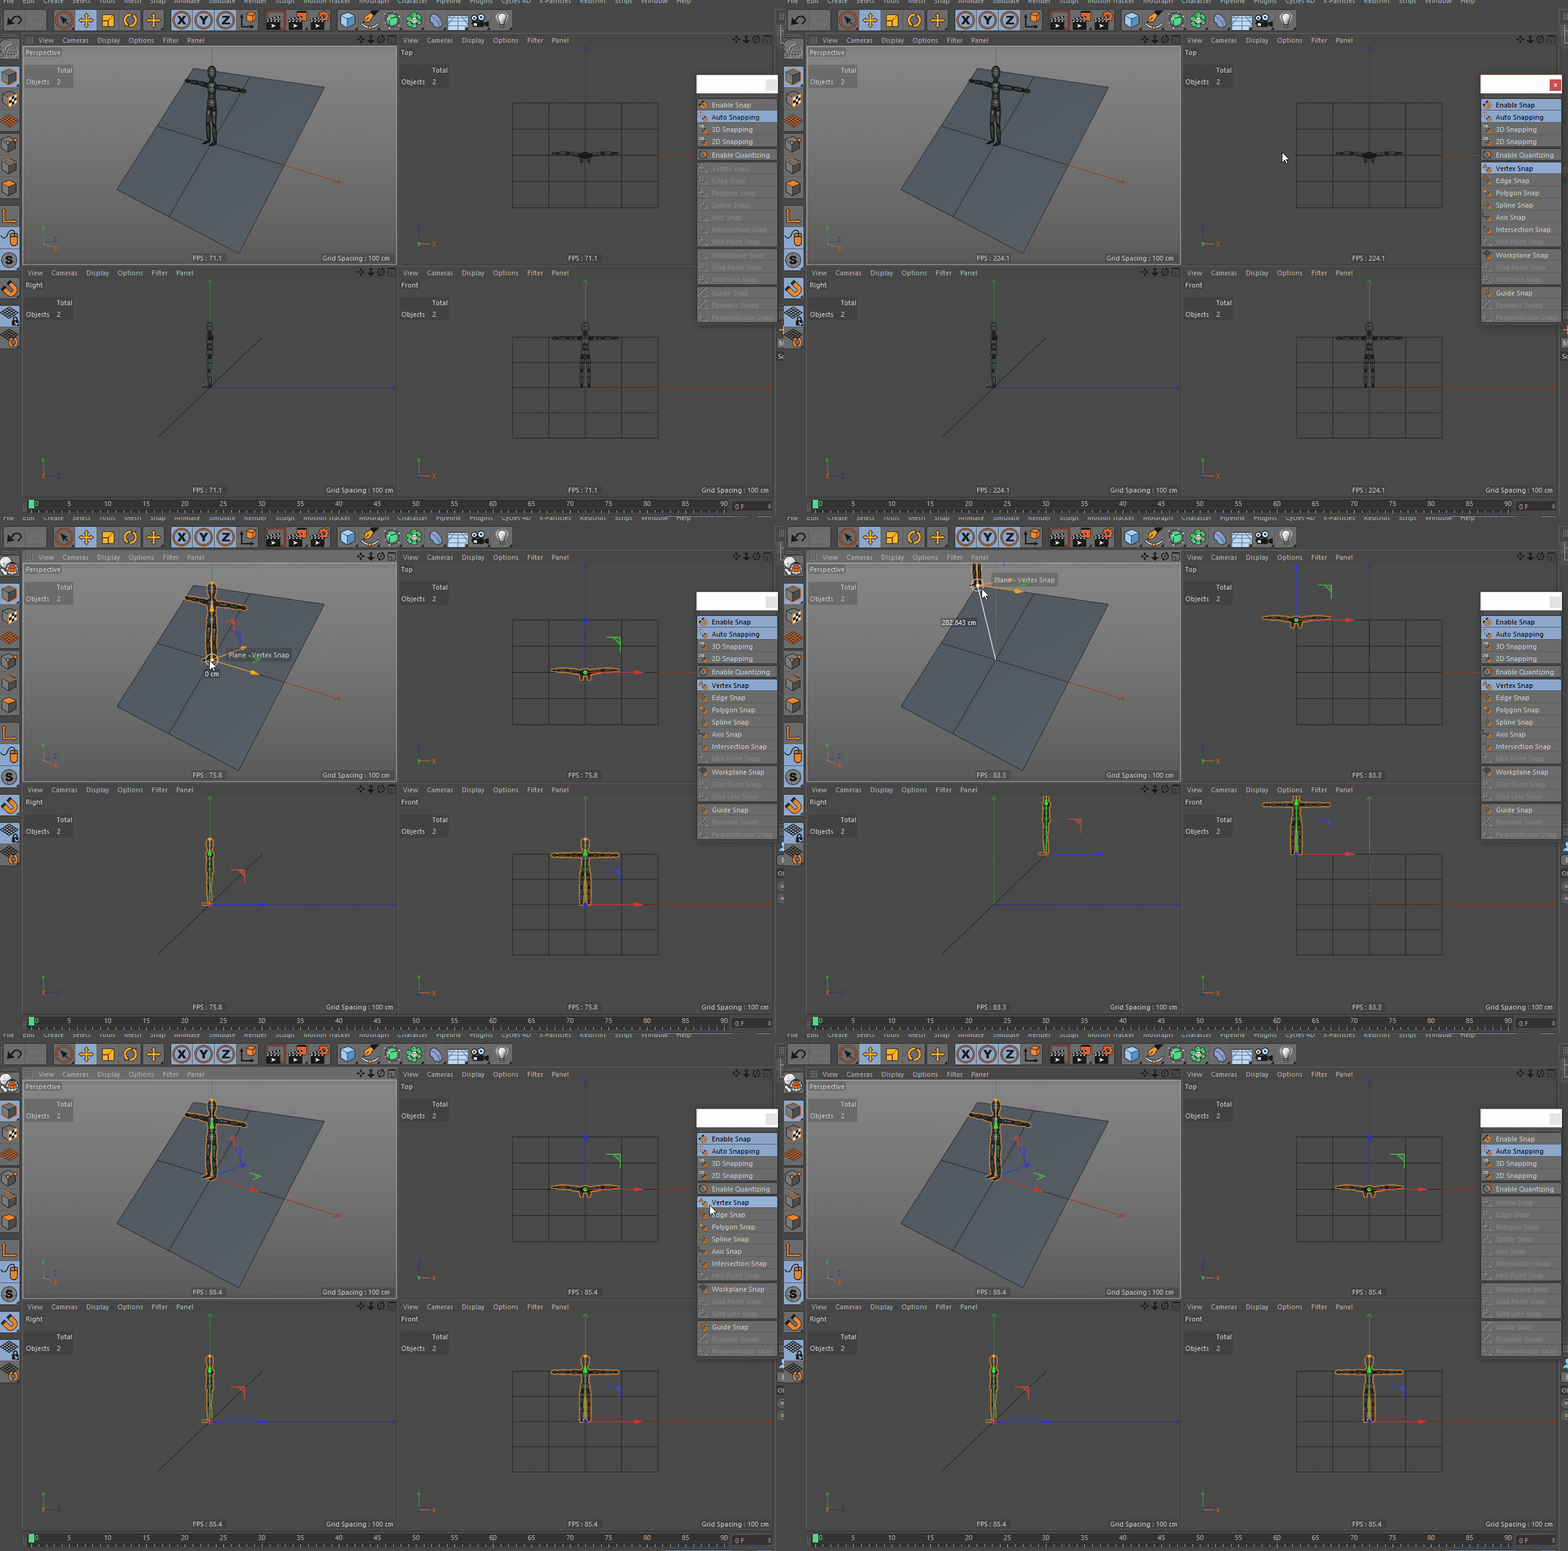
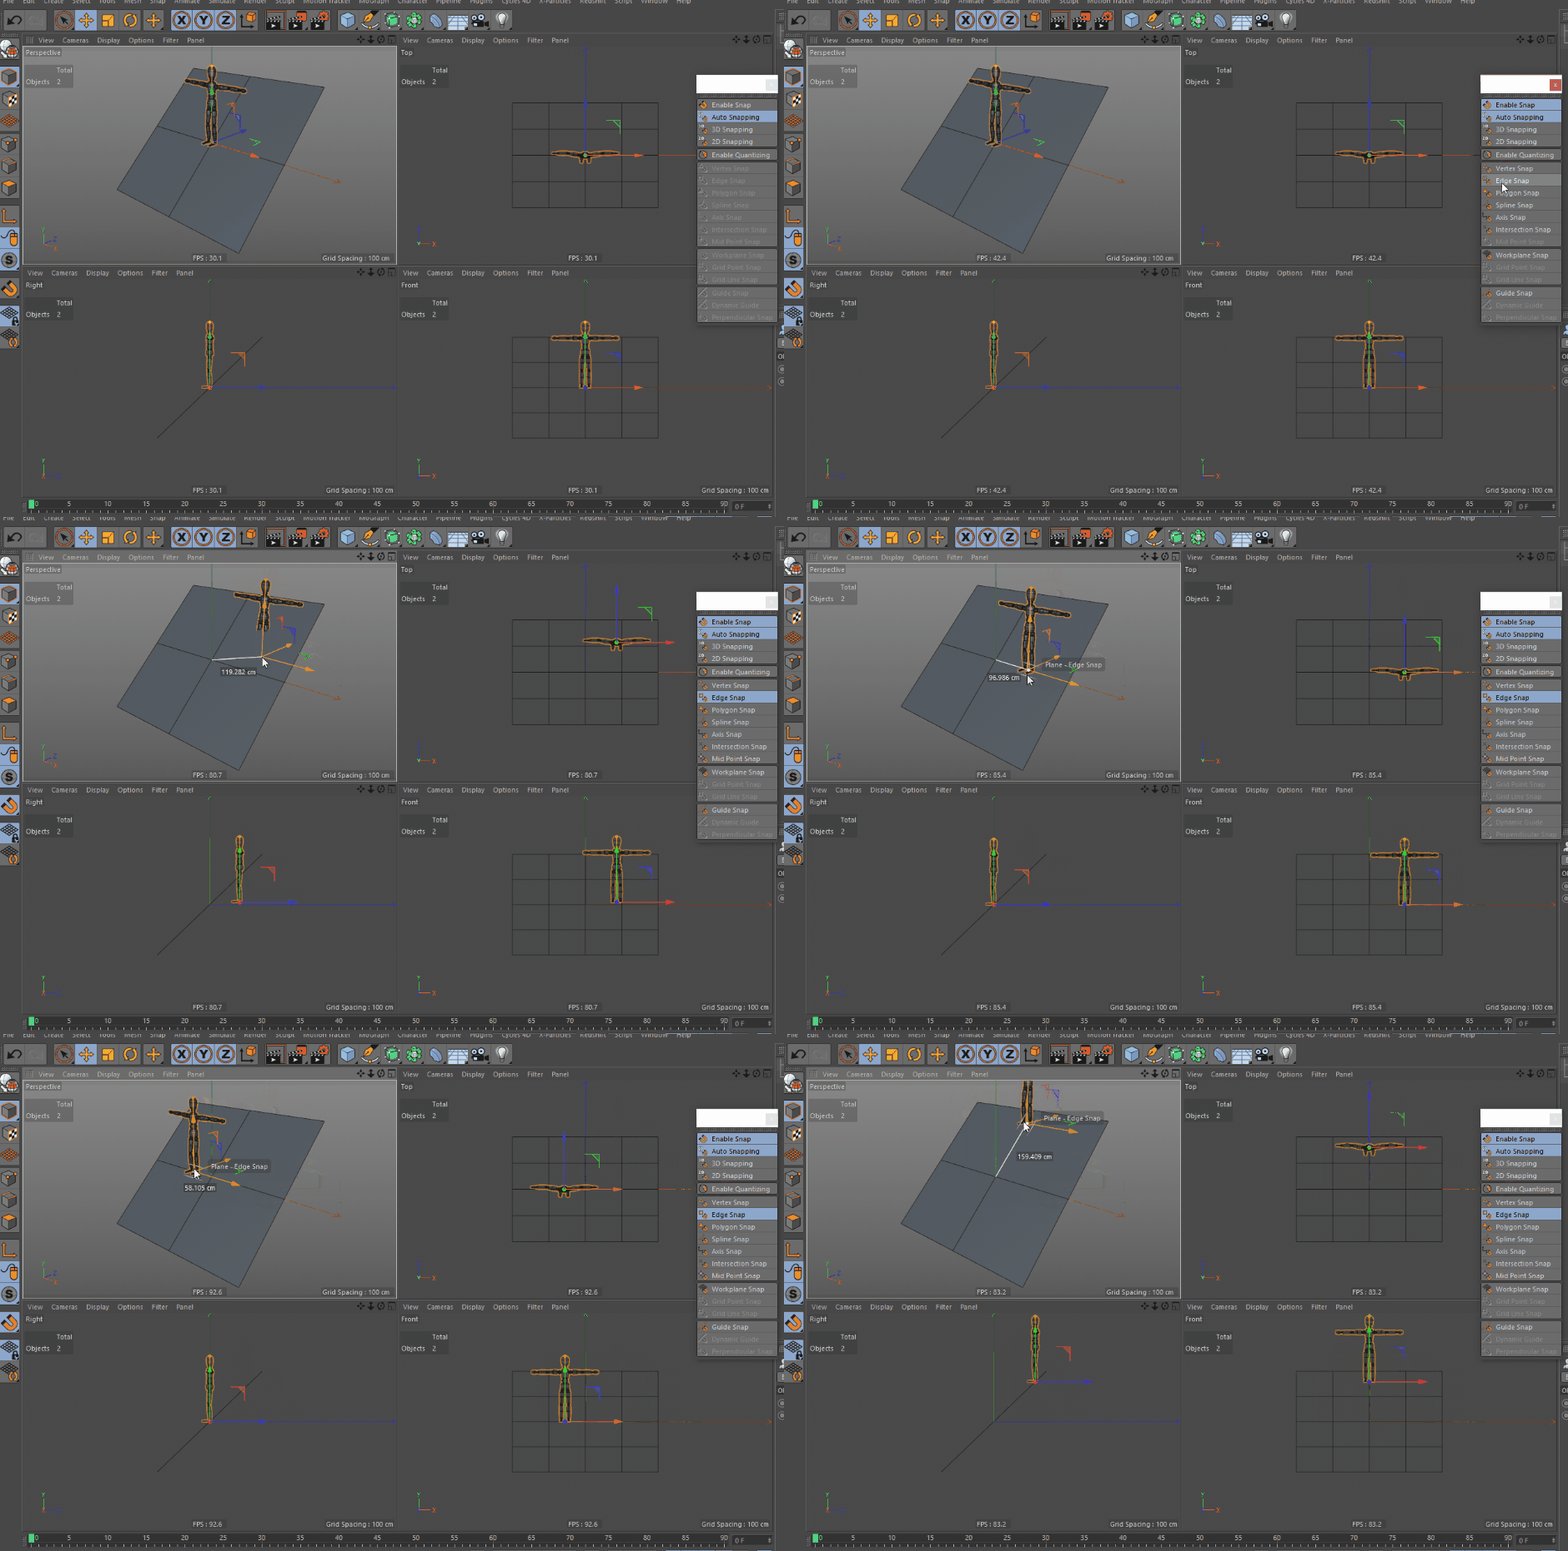
Edge Snap will snap the axis along nearby polygon edges (which are distinct from other types of edges like Splines) of any geometry in your scene.
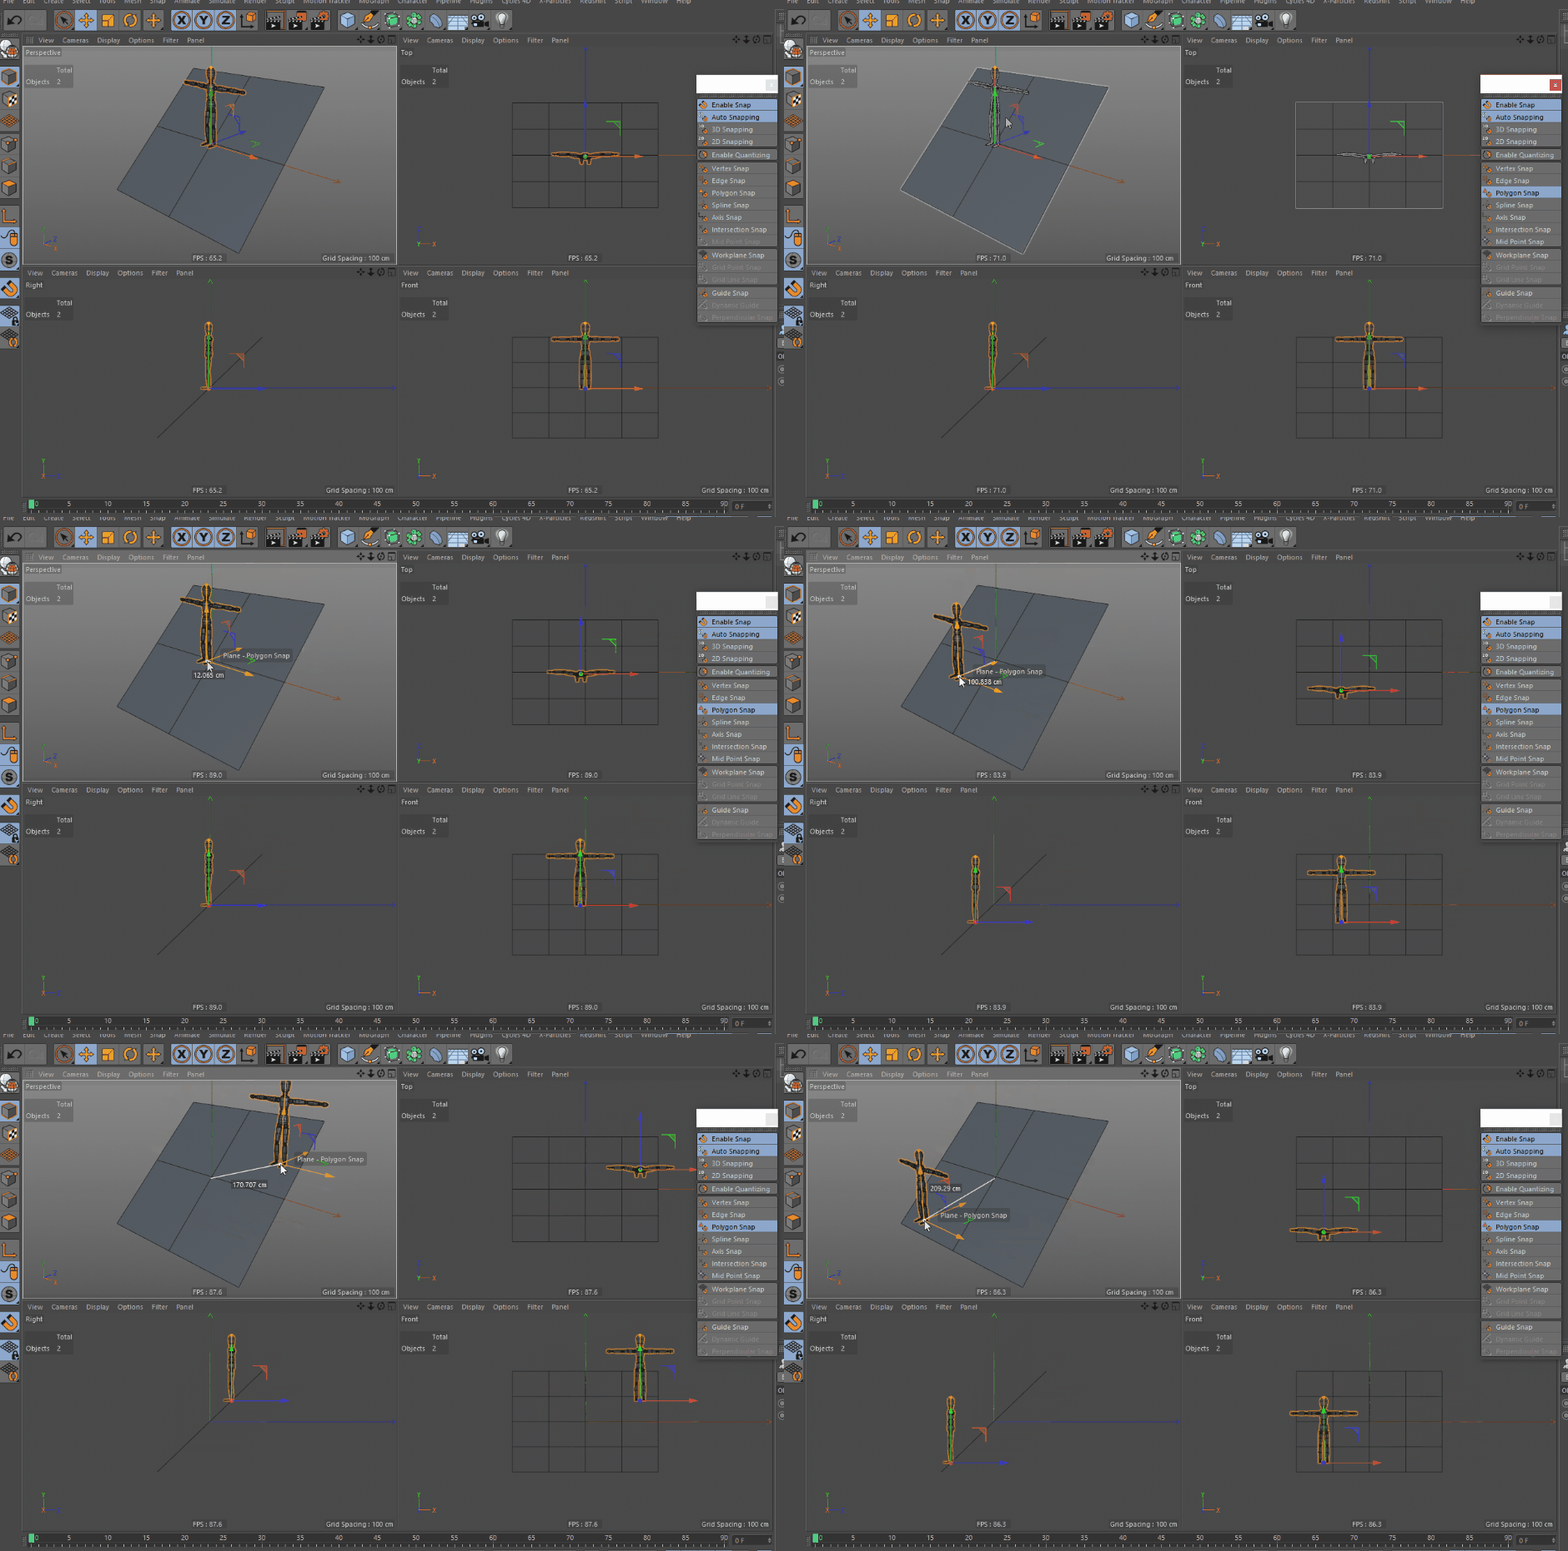
Polygon Snap will snap your axis to lay within the plane of any polygon in your scene.
And the Rest of Them…
Don’t forget to check out the other snapping options in the palette. You’re sure to come across a need for each of them at one point or another. If you ever come across a tool you're unsure how to use, Maxon's documentation is an incredible resource, check it out here.
Hopefully this has given you a good sense for what Snapping in a 3D environment can do for your workflow, where to find the Snapping Palette, and how to activate the various modes. The uses for the different Snap modes are vast, and you’ll find yourself coming back to them over and over while modeling, animating, and rigging in Cinema 4D.
{{lead-magnet}}
ENROLL NOW!
Acidbite ➔
50% off everything

ActionVFX ➔
30% off all plans and credit packs - starts 11/26

Adobe ➔
50% off all apps and plans through 11/29

aescripts ➔
25% off everything through 12/6
Affinity ➔
50% off all products

Battleaxe ➔
30% off from 11/29-12/7
Boom Library ➔
30% off Boom One, their 48,000+ file audio library
BorisFX ➔
25% off everything, 11/25-12/1

Cavalry ➔
33% off pro subscriptions (11/29 - 12/4)

FXFactory ➔
25% off with code BLACKFRIDAY until 12/3

Goodboyninja ➔
20% off everything

Happy Editing ➔
50% off with code BLACKFRIDAY

Huion ➔
Up to 50% off affordable, high-quality pen display tablets

Insydium ➔
50% off through 12/4
JangaFX ➔
30% off an indie annual license
Kitbash 3D ➔
$200 off Cargo Pro, their entire library
Knights of the Editing Table ➔
Up to 20% off Premiere Pro Extensions
Maxon ➔
25% off Maxon One, ZBrush, & Redshift - Annual Subscriptions (11/29 - 12/8)
Mode Designs ➔
Deals on premium keyboards and accessories
Motion Array ➔
10% off the Everything plan
Motion Hatch ➔
Perfect Your Pricing Toolkit - 50% off (11/29 - 12/2)

MotionVFX ➔
30% off Design/CineStudio, and PPro Resolve packs with code: BW30

Rocket Lasso ➔
50% off all plug-ins (11/29 - 12/2)

Rokoko ➔
45% off the indie creator bundle with code: RKK_SchoolOfMotion (revenue must be under $100K a year)

Shapefest ➔
80% off a Shapefest Pro annual subscription for life (11/29 - 12/2)

The Pixel Lab ➔
30% off everything
Toolfarm ➔
Various plugins and tools on sale

True Grit Texture ➔
50-70% off (starts Wednesday, runs for about a week)

Vincent Schwenk ➔
50% discount with code RENDERSALE

Wacom ➔
Up to $120 off new tablets + deals on refurbished items


