
All-Access Pass
Unlimited access to 50+ courses, unlimited critique, live events, and 24/7 community. Join School of Motion All-Access today.

Get the most out of your Loom recordings and presentations by using these professional recording techniques
When it comes to remote work, meetings need to be kept to a minimum. Pitching ideas through Slack and email can come across confusing, written communication often loses your intended tone, and your how-to company documentation needs some help.
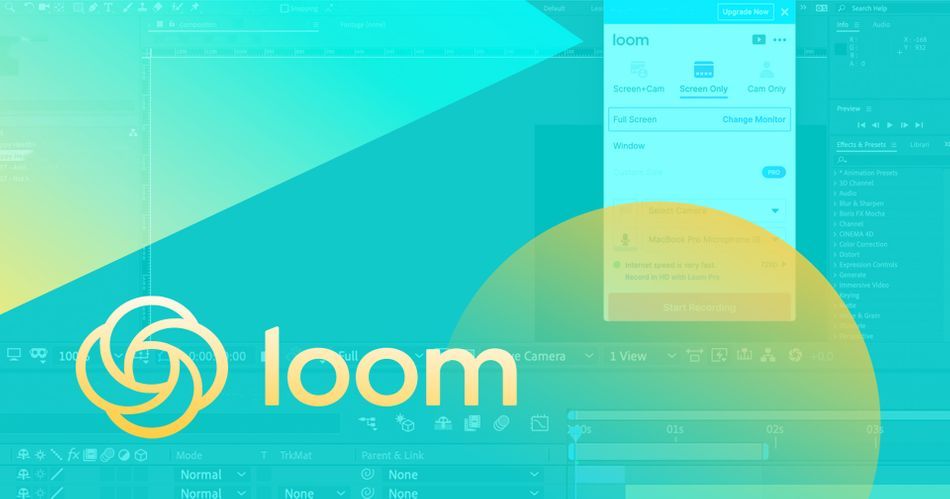
Introducing, Loom: A screen capturing program that can either run as a browser extension or launch as a desktop app.
How Does Loom Work?
Loom can capture your whole screen, specific application windows, or just a tab in your browser. It can also record audio sources that playback on your computer. Pretty freaking cool, right?
On top of that, it’s very easy to set up and run, and there's no need to worry about files or storage space. When you finish recording your screen, the file can be viewed online almost instantly from your Loom account. From there you can copy a link and share it to whomever you’d like, soliciting feedback and much more.
Reasons to Use Loom
Here at School of Motion, we’ve fallen in love with Loom. How we use it varies from person to person, but it has effectively replaced meetings, supplemented boring and hard to read process documentation, and offered a whole new way to ask questions.
You see, working remotely has one huge disadvantage compared to sharing an office. You can't just call over a peer so they can give instant feedback on your work.
Now, you may be thinking, “Well I can just ask someone to hop on a video chat and share my screen? Isn't that the same as ‘popping over?’” But what if they’re busy? What if both of your schedules won’t line up until 2 days from now?
With Loom, you can just capture your thoughts, create training videos for new hires, and so much more. I’ve replaced many meetings with a five-minute Loom recording and in return have gained a lot more time to focus on the task at hand.
If you’re a productivity junkie, Loom should definitely be on your list of everyday apps.
Now, let’s dig into how to effectively use Loom, making sure your content is clear, easy to watch and makes you look as good as possible.
What we’re going to learn?
There are many how-to articles on giving a professional presentation and effectively communicating your points. That is not what I’ll be covering.
These are instructions leaning into the technical side; screen recording etiquette that will help keep the distractions to a minimum and give your recordings a more professional quality.
I’ll cover five ways to improve your Loom screen recordings:
- How to use the webcam to build confidence
- How to get clearer audio
- Easy design tips that will increase audience retention
- Using tab audio for better presentation
- Elevated mouse cursor mindset, a battle for the subconscious
Following these simple ideas will certainly help increase the value and effectiveness of your screen recordings.
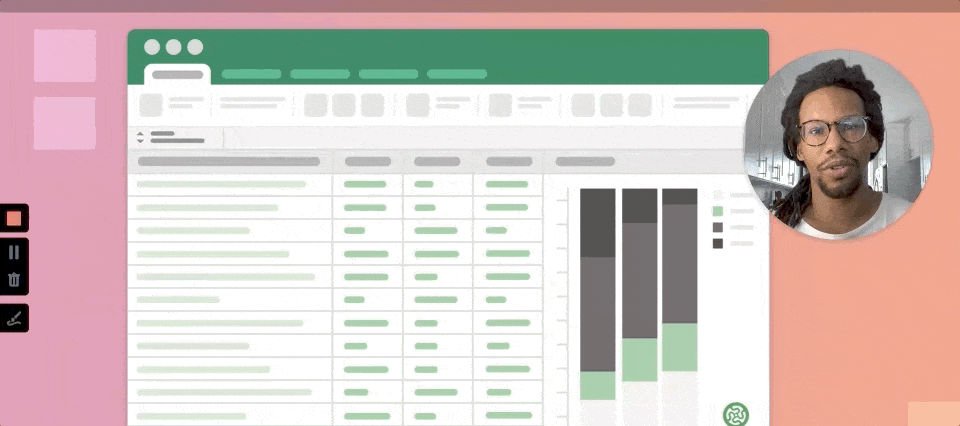
1. Use the Webcam to Build Confidence
It can be very difficult to sound natural and focused when you're shouting at an empty screen. We've found that it's very helpful to have a face on the computer...even if it's just your own. Yes, you are talking to yourself, but there is a reason people practice their presentations in front of mirrors.
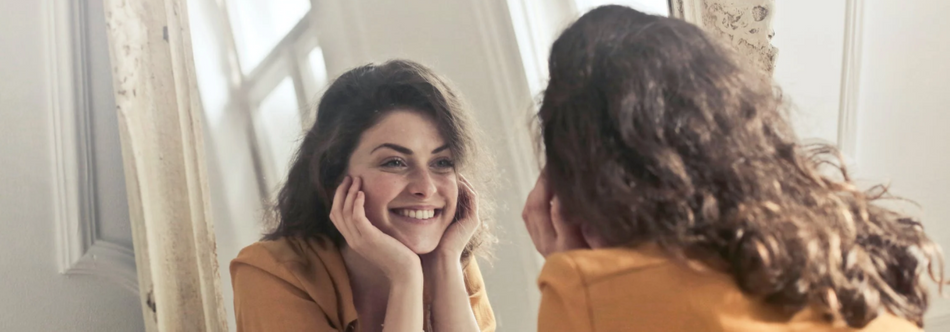
Talking into the void can cause anxious mental games, and the end result may not feel as naturally communicative as you’d hoped. I’ve noticed many times that my pace is off, I'm monotone, or that I'm slouching.
Your reflection becomes a bouncing board, provides eye-contact, and offers instant critique. A major benefit is you now get the opportunity to break out your hands!
Most people talk with their hands, and a lot of people receive information better when visual cues are used to note important points. Not only that, but it takes your hands off of your mouse so you’ll stop wiggling it back and forth, annoying and confusing whomever is trying to keep up with you (More on that later).
I know that this tip may seem obscure, but give it a try. I’d be interested to know what it does to your videos and if you notice a difference in quality.
2. Place the Microphone Close to Your Mouth
When you’re creating a film, you work hard to hide the microphone. Dropping a boom into frame breaks the immersion and can pull your audience right out of the moment.
Now, I know that I just covered using your camera to boost confidence, but I want to set the record straight: This is not a feature film. Get the microphone really close to your mouth.
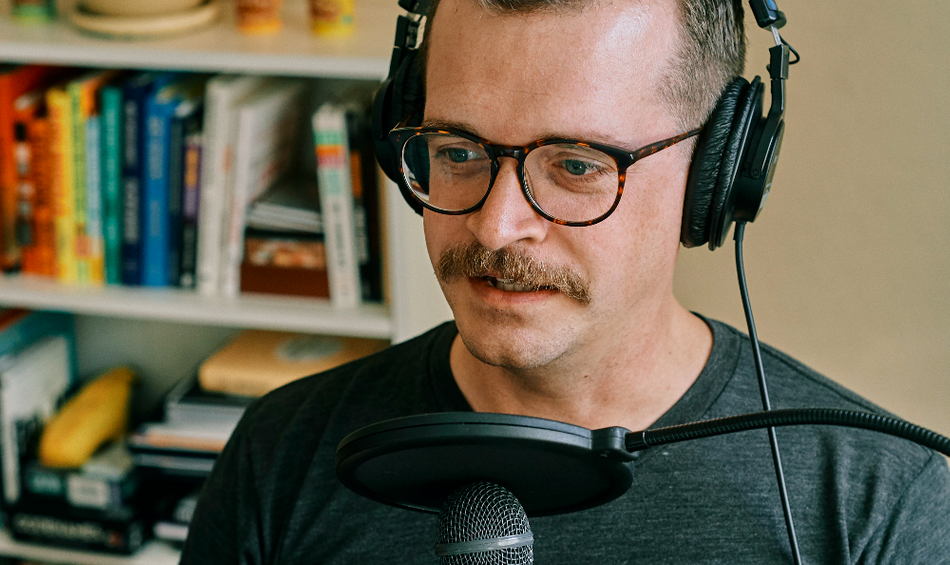
I promise that whoever is listening will be very thankful that your audio is clear and is not being drowned out by the echo and reverb of your room.
If you haven’t dabbled in audio, you might not know why your audio sounds so muddy. Most of the time this has to do with the room you’re recording in. A big, modern, nearly empty room will undoubtedly produce a lot of echo and reverb, causing each spoken syllable to stick around a lot longer than you’d like it to.
Now, place the mic a few feet away from you—say your laptop's mic on your desk—and you’re voice is now competing with every thing else.
The proximity of the output (your mouth) to the input (your microphone) is everything when getting a clean audio recording.
Using the simple microphone that sits inline with your headphone cable can do a fairly decent job. Of course, you can always purchase a USB Microphone like we use, but those can get a little pricey. Here's a video with a few neat options!
Here’s a quick tip: If you’d like to eliminate the room problems, try DIY sound dampening techniques to kill the reverb and echo.
Find a smaller room and add pillows in the corners and on the floors, preferably out of your shot. Echo and Reverb are created from the sound waves bouncing off of flat and hard surfaces. Adding soft and dense objects help break up and kill those bounces. Science!
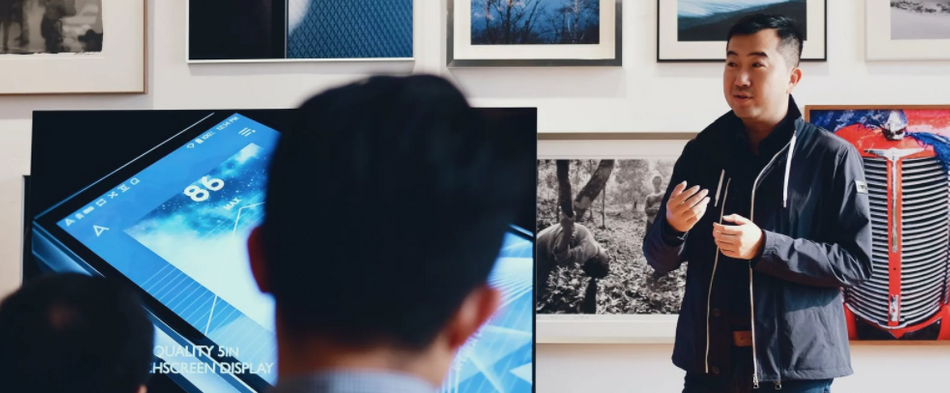
3. Keep Your Screen Clean

Keeping your audience engaged is all about directing their attention. You’ll want to keep your presentation tidy. Loom is a software built to capture your computer screen, and many of our desktops are...a tad messy.
Here are a few things to consider before starting your recording:
- Use the Current-Tab only feature
- Less on your screen means more information retained
- Move your script outline to another monitor
CURRENT-TAB ONLY
Loom has a wonderful feature for those of us that kill our computers with lots of browser tabs. We don’t want to exit out of any of them, and Loom has got our back.
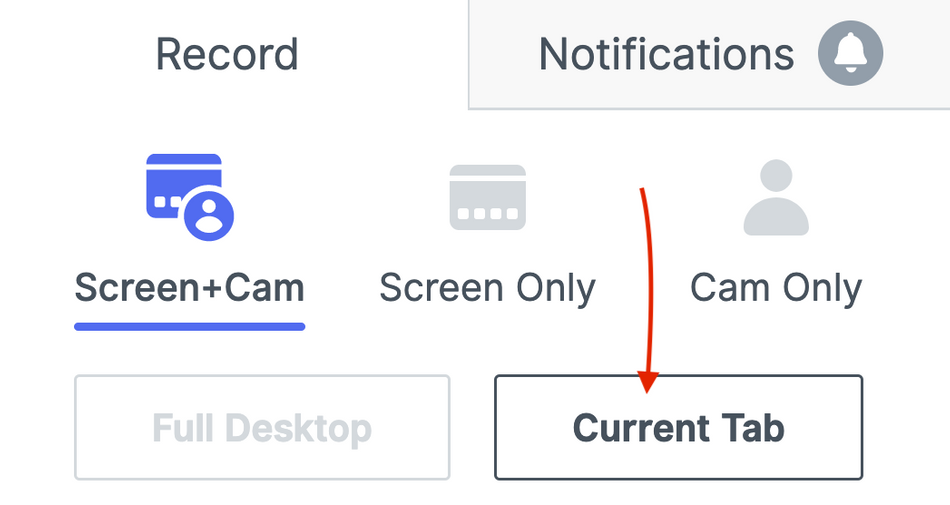
When you’re setting up your recordings and you just want to show a specific tab on your browser, make sure to use the Loom browser extension. You can choose between showing your entire desktop or just individual tabs. Also worth noting is that the desktop version of the app lets you show specific app windows, but not tabs.
This can cut down on the explosion of information your desktop has to offer. All those open windows can steal attention away from nosey viewers, or really just any human. This leads me to my next point, less is more!
LESS IS MORE
As humans, we love to know it all, and we’re super nosey! But that curiosity can distract us when someone is trying to lecture from a dirty screen. So, as a presenter, you’ll want to keep human nature in mind.
Work to show only what’s needed for your screen recording. Place desktop files in folders, hide windows that aren’t useful and really work hard to show just the main subject of your recording. All of this is a subtle help to your audience and will ultimately work in your favor.
MOVE YOUR SCRIPT OUT OF THE WAY
Lastly, just please make sure your script/outline is on another screen or printed out. That is all.
4. Using tab audio, wisely
If you’re showing off a video, or working through a browser-based presentation, you can include audio from the tab you’re focused on. There is a world of possibilities for including audio in your loom video, but what you may not be thinking about initially is the audio mix.

If you’re going to be talking while the audio in your browser is playing, you may find yourself competing for the audio space. If the source video has the capability for adjusting audio—think YouTube’s audio slider in the video player—I’d suggest turning that down before recording. The audio may record into the video much louder than your voice.
Try doing a scratch recording before you commit to the final recording. Test how loud your microphone is in comparison to the video’s audio that you’ll be showing. I’ve found that some videos need to be turned down to nearly a tenth of the possible volume!
It’s important to note, just in case it’s not understood, the volume for the computer is different than the volume slider for YouTube or other sources of audio used for playback.
5. Tame the Mouse

Something that may be overlooked is the use of your mouse icon. Our eyes naturally react to movement, and we've spent our lives training our peepers to seek out that dancing arrow. We are addicted to following the cursor all across the screen.
It stands to reason the audience will be following the mouse as you are recording your computer screen. But, why am I bringing this up?
When we present, we have a tendency to wiggle the mouse cursor around. Using the mouse in a video recording is like making hand gestures or using a laser pointer. Where ever the mouse cursor goes, so do our eyes. If your cursor becomes erratic, the audience will start getting confused. Instead of paying attention, they'll just follow where the mouse goes and try to figure out how it fits in with your explanation.
You can see the problem. The audience quickly gets overwhelmed with information. This subconscious behavior is hurting your presentation.
Try thinking about your mouse as a laser pointer: only to be used when you’re pointing something out on the screen or executing steps.
Twirling the cursor around in circles, or shaking it back in forth while you’re making a point, is not helpful and most likely is hurting your video.
Check You Out
Now you should have a few extra tools in your pocket when you set out to record a Loom. And if your champing at the bit (it's slightly better terminology, don't @ me) to learn more freelance tips and tricks, might we suggest the words of a few experts?
ENROLL NOW!
Acidbite ➔
50% off everything

ActionVFX ➔
30% off all plans and credit packs - starts 11/26

Adobe ➔
50% off all apps and plans through 11/29

aescripts ➔
25% off everything through 12/6
Affinity ➔
50% off all products

Battleaxe ➔
30% off from 11/29-12/7
Boom Library ➔
30% off Boom One, their 48,000+ file audio library
BorisFX ➔
25% off everything, 11/25-12/1

Cavalry ➔
33% off pro subscriptions (11/29 - 12/4)

FXFactory ➔
25% off with code BLACKFRIDAY until 12/3

Goodboyninja ➔
20% off everything

Happy Editing ➔
50% off with code BLACKFRIDAY

Huion ➔
Up to 50% off affordable, high-quality pen display tablets

Insydium ➔
50% off through 12/4
JangaFX ➔
30% off an indie annual license
Kitbash 3D ➔
$200 off Cargo Pro, their entire library
Knights of the Editing Table ➔
Up to 20% off Premiere Pro Extensions
Maxon ➔
25% off Maxon One, ZBrush, & Redshift - Annual Subscriptions (11/29 - 12/8)
Mode Designs ➔
Deals on premium keyboards and accessories
Motion Array ➔
10% off the Everything plan
Motion Hatch ➔
Perfect Your Pricing Toolkit - 50% off (11/29 - 12/2)

MotionVFX ➔
30% off Design/CineStudio, and PPro Resolve packs with code: BW30

Rocket Lasso ➔
50% off all plug-ins (11/29 - 12/2)

Rokoko ➔
45% off the indie creator bundle with code: RKK_SchoolOfMotion (revenue must be under $100K a year)

Shapefest ➔
80% off a Shapefest Pro annual subscription for life (11/29 - 12/2)

The Pixel Lab ➔
30% off everything
Toolfarm ➔
Various plugins and tools on sale

True Grit Texture ➔
50-70% off (starts Wednesday, runs for about a week)

Vincent Schwenk ➔
50% discount with code RENDERSALE

Wacom ➔
Up to $120 off new tablets + deals on refurbished items


All-Access Pass
Unlimited access to 50+ courses, unlimited critique, live events, and 24/7 community. Join School of Motion All-Access today.