
Learn After Effects the Right Way
Master the After Effects interface and build a real animation skillset. Enroll in All-Access to unlock AE Kickstart and 50+ other courses.

Adobe MAX 2020 may be over, but we've got videos from some amazing speakers to keep that inspiration going through the holidays
The first ever virtual, global Adobe MAX is over, and we were fortunate to play a small role in sharing stories and inspiration with the Motion Design Community. Since we're all about sharing the best info for free, we've got a few videos from the conference to drop right here.
Are you looking to animate your own designs? It may seem daunting at first, but the process can be very simple if broken down into digestible steps. Two of our fabulous School of Motion course instructors teamed up for an awesome 4-part lab aimed at introducing designers to Motion Design in After Effects! In parts 1 and 2, director/illustrator Sarah Beth Morgan introduces you to different possible approaches to animating your designs, then dives into Photoshop to create a digital illustration. She’ll talk through the proper workflows and considerations when creating a piece for animation, getting the file ready to hand off to motion designer Nol Honig for parts 3 & 4. Make sure to get in a good stretch, then settle in for the first half of this incredible series.
So You Want to Animate - Part 1
So You Want to Animate - Part 2
Can you take your illustrations to the next level?
If you want to take your illustrations and bring them to life, we have a course designed to give you the skills you need. Illustration for Motion.
In Illustration for Motion, you'll learn the foundations of modern illustration from Sarah Beth Morgan. By the end of the course, you'll be equipped to create incredible illustrated works of art that you can use in your animation projects right away.
-----------------------------------------------------------------------------------------------------------------------------------
Tutorial Full Transcript Below 👇:
So You Want to Animate - Part 1
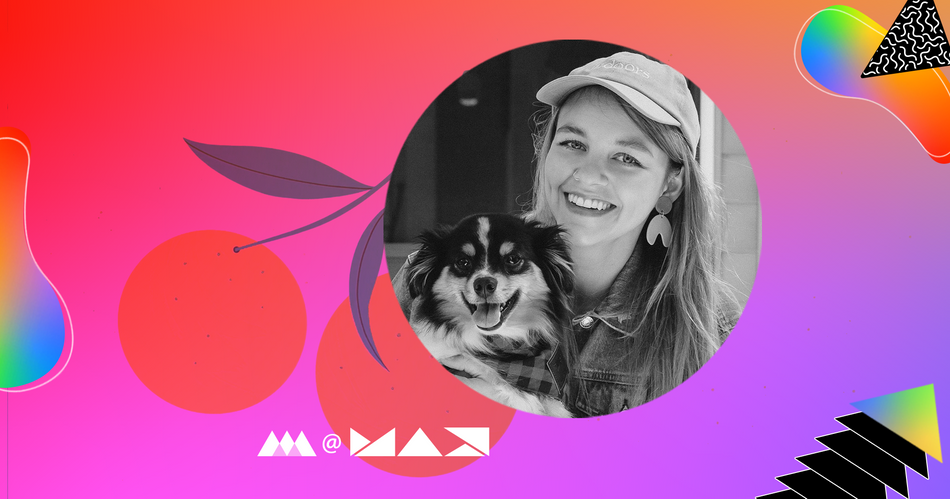
Sarah Beth Morgan (00:07): Hey everyone. I'm Sarah Beth Morgan, and I'm a freelance illustrator and art director from Portland, Oregon. I'm also an instructor for Skillshare and school of motion. And I am super excited that you've joined us today for this Adobe lab. Nol Honig. And I will go into detail about animating your designs from scratch. Really focusing on teaching technique to those of y'all, who haven't really dove into after effects yet to those of you who might be really into design and illustration, but you want to add some more emotion to your work. So you've definitely come to the right place. That's what this four-part lab series is all about. And to give you some context here is what our final product will look like at the end of the four parts. After I talk about design and Nol designs into some motion and after effects today, in part one, we'll focus in on the beginning stages, researching and concepting. Um, I'll kind of go into a little bit of backstory about what different levels of motion there are and how you can implement those into your future work. And then we'll also start in Photoshop and we'll learn how to create a Photoshop file from scratch that actually will work really well to bring into after effects later, feel free to ask questions in the chat pod. I'll do my best to answer them. And again, we're just so happy that you're here. Thank you so much for joining us. Let's get started.
Sarah Beth Morgan (01:28): All right. Y'all so before we get into the nitty-gritty of designing for animation, I want to pull back the curtain a bit on the different levels of motion design we encounter in the world here in this lab, we'll be honing in on level one, which involves very subtle movement, often added for a little extra pizazz on editorial illustrations or on websites, or sometimes in social media posts. Is there typically looping gifs, mostly created with simple key frame animation and after effects, which no, we'll go into a bit more later. I'd say level one is most suited to visual designers or illustrators who are just getting their feet wet with after effects and motion design or animation. I'd say it's a great first step to take. And here's some examples of what I mean. So this first animation I have here is by Lynn Fritz. Um, she's a colleague of mine in the industry.
Sarah Beth Morgan (02:19): She's an amazing freelancer, but I love this like subtle bug animation. She's got going on. Just a couple of things, moving around the frame it's looping, so it can kind of just be stared at forever. And then we have this other gift by Morgan Romberg. The great thing about this one is that it's, it doesn't even use much ease, which I know we'll talk about later. It just kind of like a steppy animation of this wave passing over the glasses. So it's pretty simple and it all happens very quickly. This is all very subtle and this is the kind of animation we'll be focusing on here in this lab. Level two is what I would call Instagram post level. Maybe there's a little transition or a big sweeping movement involved. These are more complex than level one animations, but not as intense as creating a full-on short film or a narrative story, arc character animation, 3d animation.
Sarah Beth Morgan (03:13): It doesn't involve that just quite yet. A lot of times these are tidbits taken from larger animations. Like, you know, if an animator wants to show their process on Instagram, they might take a piece of that and just post that. But these are just usually created as loops for social media. And here are some examples. So this first one is animated by Tyler Morgan, uh, designed by Yukia Mata at Oddfellows. And I just love how we have one object to transforming into another. And I would say this is a great example of a low looping social media GIF that we have this gift by a Jamie Jones, uh, a really beautiful, simple linework illustration of a can crushing. This would probably be done more in cell than after effects. We have this smiling parallel teeth animation, and we also have this other character animation by Jackie Wong.
Sarah Beth Morgan (04:04): I would say that level two animation doesn't really involve character animation, but you can have characters with subtle animated movement, perhaps, you know, they're just looking at something above like in jockeys illustration, or it's just a face making one expression. I would say that's level two level three opens us up to an entire world of animation and motion. I would say we could label about 10 levels of motion if I were to get really specific here, but for time sake, let's just say level three is a full on Vimeo video. It's like a short film or passion project. Um, it could even be a feature length animation. These level three animations can feature evolving styles out of 2d animation, 3d animation, or even stop motion. It can incorporate film or experimental techniques. So it can go a lot of ways. If we look into the world of motion as a whole, there's just so much you can do with it.
Sarah Beth Morgan (05:02): Most videos you'll find in level three are not usually created by one individual. Most of these are designed and animated by a large team of creatives. And in most cases, the designers will pass off their Photoshop or illustration files to animators to be completed in my professional career at this level is what I focus on most, but I actually don't animate a lot of my own illustrations, hence why I have no goal here to bring one of my illustrations to life. So I think in emotion minded way, but I don't necessarily have the skill to go into after effects and do it all for myself. I prefer to stay in Photoshop and make things look beautiful and create story arcs and all of that. So that's kind of where I met and we'll look at some examples of level three videos. Now this first one I'm showing you is actually created by myself and my husband, Tyler Morgan.
Sarah Beth Morgan (05:57): I actually showed you one of his gifts earlier, but this is an example of a project that was almost completely done in after effects. So if you're an illustrator who works in Photoshop or, or illustrator, and you want to aspire to do a longer passion project video, this might be a place to start. I mean, there's a lot that's involved here. It took us two years to make it, um, and there is some cell animation like this bird here that my husband did, but a lot of it is done in after effects using key frame animation, shape layer animation, and some there's some 2d effects in there, but this is a really fun one that took us forever to make. But if you're looking for something harder to push yourself into, this could be an example of that. Now here's an example of a completely different direction.
Sarah Beth Morgan (06:42): You could go in. If you're someone who really likes stop motion or you like photography, or you're really into graphic design, and you can take images and pull them through a scanner, or you can keep bring them frame by frame and after effects to create this more tactile feel in level three animation, we really get into the extent of the possibilities that you can play with an after effects. Like for example, here we see a much more graphic oriented design focused animation. That's purely animated using mostly shape layers and animated Bezy AEs and the after effects. I also wanted to include this piece because it just really shows the extreme extent of the motion world, where you can go from style to style using match cuts and transitions to create a really fluid animation. It's really great to see a lot more 3d lately in this industry.
Sarah Beth Morgan (07:33): Of course, we can't really do that using after effects. And we're not even going to touch on that in this course, but I thought it might be a nice, inspiring thing to see. And finally, I wanted to show you this beautiful piece. My moon, of course, I can't show you the whole thing. It's pretty long, but I just love how involved character animation has become in the motion graphics world lately. This is something that you would have to do in either Photoshop or Adobe animate, or you can even use procreate. Um, but this is a good example of a combination of after effects, backgrounds and after effects animation, combined with character animation. I love the stylization of everything and how seamlessly everything fits together. This is something that I aspire towards. It's a very high level of animation and concept. So just something to look up to, to look forward to possibly maybe doing the future.
Sarah Beth Morgan (08:26): Woo. Okay. So I know that was a lot of information and a lot of visuals thrown at you at once, but I really just wanted to dive in there and show you the extent of possibilities that you can achieve with Adobe after effects, but also with Adobe animate, if you decide to pursue something like that, but here we're really going to be going into the simple, basic beginnings of after effects, those level one styles that I was showing you earlier. And I think that's a great place to start. And once you kind of get a knack for the key framing and everything that know, we'll explain to you in parts three and four, you'll really open a bunch of doors to start working in, you know, different levels. So from there, let's get started breaking down my process from the beginning, I will kind of go over, you know, story-boarding on the most basic level to kind of show you how the animation process typically works.
Sarah Beth Morgan (09:15): And then we'll actually open up Photoshop and kind of get in there and start looking at all the settings that we need to use in order to start working in after effects. Let's actually learn about some process. Now, of course, you're not coming to this Adobe lab to learn how to create a short film from scratch, but I figured it would be nice to give you a little behind the scenes, look at what goes into a more complex animation, IE, that level three animation. And if you are looking to go into a career in motion, this is a great kind of behind the scenes. Look at how the process works everyday for designers in motion or animators. If you also want to go that route as well. But speaking from my perspective, we're going to look at the design side. My typical day of work usually involves designing for commercial animation.
Sarah Beth Morgan (10:01): I E we're working on 32nd animated commercials for companies like Hulu or Amazon or Google, or perhaps we're doing little PSA's for healthcare. It just really depends on the client. A lot of that involves concept thing and brainstorming narrative based on a script or a story that the client has provided for me or a team of designers or an art director just depends. Like sometimes I will get hired by a studio who wants to bring me on as a designer or I will be leading a project myself and creating my own team after we've concept, did some ideas and created some mood boards. I typically get into the storyboarding phase. The storyboarding phase is where you really visually sketch out a narrative over multiple frames, aligning to the script or story here is where we really hone in on what the story is. What story do you want to tell if your animation from here after the storyboard is approved by the client?
Sarah Beth Morgan (10:56): I begin to actually design out each style frame in much more detail. And once those are approved, I pass my design files off to be animated by an animation team. Sometimes these teams are small with just me as a designer and one animator or there's other times where there's a team of five designers and 10 to 15 animators. It really just depends on the project budget and timeline. So since I just kind of told you about that whole animation process from a designer's perspective, I kind of want to show you some behind the scenes of my projects that I worked on now, y'all just saw me show a little tidbit of that cocoon project that I worked on with my husband. Here's kind of where we started. You can definitely see where we got some of her style influence and it really shows through in the end, we always kind of start with mood boards after reading the script.
Sarah Beth Morgan (11:45): And then from there we see how that script really makes us feel. What kind of emotion are we trying to evoke? And what is the message the client wants to tell in this case, the producer, Dan steamers, the man who hired us, he really wanted to portray a sense of deep grief and loss. So that was kind of the look we were going for here wanted to feel dark, but then in the end hopeful, from there, we move on to the storyboarding phase. Now this is just one page of about 10 pages of storyboards. So there was a long process involving that, but you can see here that if I jumped to the next slide, this was my design frame. It looks very different from the storyboard I'm in frame 11. That's essentially what we see here in this image. So the storyboarding phase is more about, you know, figuring out the layout and the content, not necessarily what the design will look like.
Sarah Beth Morgan (12:40): So you can be a lot more loose in the storyboarding phase, just like you are with concept designs and everything. So here's that frame. And then here's kind of what it looked like once it was animated, once Tyler put his magic on it, but of course this is just one chunk of the overall piece. Um, but just a little snippet here for you to see. I also worked on this social media post with my friend, Justin laws, the concept behind this was just spring allergies. We wanted to make something cute and fun for people to relate to. This was just a quick little animation thing we decided to do for fun. So this was my process behind the story. I really liked this kind of retro style dog. And I wanted him to kind of just explode into pieces as he sneezed. And that's what the illustration ended up looking like, because it was not a client project.
Sarah Beth Morgan (13:33): I could be a little bit more free and loose with it. And then here's the final animation. Justin actually brought it into 3d. So you can see how 2d design can really inform 3d animation. He also used a combination of after effects, which was really nice and it's really cute that it loops too. So it's really great for Instagram, but going back to the design phase, I typically illustrate in Photoshop, a lot of other designers in the motion industry due to why Photoshop you ask, why not illustrator? Well, that's a great question. I'm not very fluent in illustrator personally. So all the techniques I teach here will be for Photoshop, but illustrator is actually really great for animation. And I'll show you why. If you create a vector illustration, it's much more scalable for animation and vector shapes import into after effects as shape layers, which are easy to manipulate using Bezos and points and side note to keep in mind after effects is actually a raster program, but it can handle vector shapes pretty well.
Sarah Beth Morgan (14:34): So that's why those vector shapes that I imported it into after effects turn more into shapes because they already use those Bezier that we have available to us in illustrator. And here's a Photoshop file that I imported it's the same shape, but it's just on a flat layer, therefore it's rasterized. And, um, as you can see, when you zoom in, it's a lot more pixelated and we're not able to play with the Beziers it's finicky, but sometimes shape layers from Photoshop will import as shapes into after effects, but it's kind of tricky and it doesn't always work. So again, why would I use Photoshop? Well, a lot of it is personal preference. I personally love using my welcomes antique to illustrate. It feels a lot more like drawing on paper then illustrating using Beziers like you would an illustrator. In addition, I really love adding fun texture and lighting to my illustrations.
Sarah Beth Morgan (15:25): It's much more difficult to do that. Using illustrator as vector textures can get really heavy and way down the file. So if you're going to use a Photoshop file to animate here, there's a few key things we need to take into account before we dive in. But P S if you have an illustrator or a vector file that you already want to use, that you've created already for this lab, that's totally fine. You can also use that. Uh, the techniques I teach you just might not be as relevant. So here's the actual project we'll begin working on. I wanted to provide a little client brief for you. So if you want, you can follow along and create your own design for motion. Or like I said earlier, you can use a file you already have, or you can actually download my project file if you want to examine that and then bring that into after effects and animate that yourself.
Sarah Beth Morgan (16:15): All right, well, let's check out the client brief. All right. So we've got this company called fruits of the trade, and they say, as a company, we're looking to promote our diverse produce selection through simple Instagram animations. We're teaming up with multiple designers and animators to create a unique look for each post, feel free to bring the fruit of your choosing to life. And then they have some specifications here, 1500 by 1500 pixels. Uh, they want it to be a subtle, looping animation. They also want it to be the fruit of your choosing. So I got some free reign there, and then it also must include the name of the fruit. So we have a pretty, you know, specific thing we're going for. They've also very kindly provided some, um, reference, and it seems like they're pretty loose on what it looks like. We've got, you know, line work illustration there.
Sarah Beth Morgan (17:05): We also have something that looks more like vector Bezier is, and then we have more, like, Matisse-esque just kind of, um, cut out looking illustration. So it seems like they're really open to style, which is great because, um, I might be working in a different style here. So if you want to follow along with this brief and do your own illustrations, please feel free to upload it when you're done with this four-part lab and tag Adobe myself at wonderful and Instagram and at Nol Honig on Instagram. We'd love to see what you come up with. All right. So finally, we're in Photoshop. You can see I've got my Santiq set up here and I'm going to be kind of, you know, facing the screen so I can work on everything, but I'm actually going to create a new document from scratch the right for animation. Um, and obviously, you know, if you're a print designer already, I'm sure your inclination is to create something in CNYK something and 300 DPI.
Sarah Beth Morgan (17:59): So it's all set up for print, but if we're working with animation after effects really only recognizes 72 DPI. So one trick I like to do is create my illustration in 300 DPI from the start. And then before we actually bring it into animation, I'll go ahead and adjust the resolution. So before I actually bring it into after effects, I'll make a copy of my print file and I'll save it as a new animation file and change the resolution to 70, to adjust the layers. However, I need to, to make it better for animation. We'll get into that more thoroughly after I'm actually done with my design, but for right now, I'm going to work in 300 DPI so that I can have it as a print image later on. Um, but I will use RGB color because it's a lot more accurate and I can see it on the screen.
Sarah Beth Morgan (18:45): I want to know how it's going to look on the actual Instagram animation. So we're going to start with 1500 by 1500 pixels, like they mentioned in their specifications. And then I'm actually going to make my resolution 300 DPI because I really want to be able to actually print it later. You know, if I want to sell this illustration on my website or something. So that's kind of where I'm going to start and, you know, always saved your work. So I'm just going to name it. Fruits of the trade design. Oh one. So we have our RGB file set up 300 DPI, 1500 by 1500 pixels. And also, you know, if you're looking at the mode and you look at the eight bits per channel versus 16 bits per channel, eight bits is probably preferable for animation. But if you are thinking about using gradients in your animation or illustration, it might be better to use 16 bits.
Sarah Beth Morgan (19:47): It's just going to be a little bit better and more cleaner looking for a gradient. You won't get as much banding when you export from after effects, which is kind of just like a steppy look to the illustration, which you don't want it. You want it to look very smooth if you're using gradients. So for me, I really love clementines. So I'm actually going to illustrate a pair of clementines and I'll start by just sketching out and Photoshop. And the sketch part doesn't really matter. You know, you can flatten that all you want, but once we actually get into adding color, which we'll go into into part two of the lab, you're going to want to make sure all your layers are separate. You're going to want to make sure you don't flatten anything. If you add textures, those should be separate from the base layer. So just keep that in mind, but we'll address that in the next lab right now. I'm just going to sketch out my illustration. We'll go through a little time lapse of that. And then we can start thinking more about the actual color and everything. No, and sometimes I still use shape layers because it makes them more perfect circle. Uh, so that's what I'm going to do here for these clementines. Always start with my rough sketch and then I bring it to a more complete sketch.
Sarah Beth Morgan (21:49): All right. So there's where I got with my sketch for today. I know we didn't really get into any of the actual animation part. Um, if you are going to go ahead and, you know, work on your sketch tonight, that's great. I just want you to keep a couple things in mind before we move into the next part of the lab. Uh, I will go into this in more detail, but essentially if you're going to start coloring it in, just make sure you don't flatten any of your layers and I'll go into why that's important next time. Don't crop anything out of the frame, because it's going to be a little bit more difficult to animate at this time. And if you're planning on adding textures, why don't you save that for after the next lab? Because I'll actually go into some detail about how textures work in animation and you know, and you know, best practices for that.
Sarah Beth Morgan (22:34): So, yeah, here's kind of where we ended up for today. I know it was a lot of introduction to the animation world and we didn't really get too far into the actual designing for animation, but I assure you part two will be full of that information and we'll get really into the actual designing phase. So to recap today, we went over, you know, the different varying levels of animation. And we talked about how we're going to be focusing on level one animation, which is basic key frame animation, adding some subtle movement to our illustrations and our artwork that we've already created. We also went over the animation process and the commercial world, like what I do on a day to day kind of gives you some insight into what you could potentially pursue. We also talked about storyboarding and creating a narrative from scratch. And then finally I opened up my Photoshop file to kind of give you some tips on how to create those illustrations from scratch, making sure we know the difference
Sarah Beth Morgan (23:32): We know between 372 DPI also working in RGB color versus CMY K color, and then kind of got started sketching based on a client brief, thank you so much for joining part of this four-part lab series. I'm really excited to meet you in part two of the lab where we finish up this illustration and then we create a duplicate file to make it ready for after effects. And we'll hand that file over to Knoll where he'll teach you to actually animate in after effects, which is really exciting. And don't forget if you want to learn more on this topic, check out my school emotion course called illustration for motion. It's a full fledged 12 week animation course where we have assignments similar to this one. Um, we go into a lot more detail about client work and animation briefs and working with an animator and also creating storyboards from scratch, looking at transitions and ways to manipulate images and animations. So there's a lot there. Um, and I can't really wrap it all up and you know, a four-part lab serious. So I really hope you check it out. All right, well, I'll see you soon. Bye.
-----------------------------------------------------------------------------------------------------------------------------------
So You Want to Animate - Part 2
Sarah Beth Morgan (00:07): Welcome back to the four-part lab series. So you want to animate, where Nol Honig and I break down the process of animating your designs from scratch. And this here is my buddy Bandit. He helps me do a lot of the work I do by just sitting and napping in the corner. We're now in part two of the lab series. And if you miss the first part, let me reintroduce myself. My name is Sarah Beth Morgan, and I am a director and illustrator based in Portland, Oregon. I'm also an instructor for Skillshare and school of motion, where I break down this process. Even further, the process of designing for animation from scratch. There's a lot of intricacies I can go over in the hour that we have together here. And part one of this Adobe lab series, I touched on the very beginning stages of animating your designs from scratch.
Sarah Beth Morgan (00:56): And that's really starting with the design process. We discussed the different levels of motion and how we're really going to be focusing in on that level. One type of motion, where we take simple designs and adds subtle looping movement to them. I also expanded on what an illustrator in the motion industry does on a day-to-day basis, including sketching and storyboarding and planning for motion from the very first brush stroke right now, in part two of this lab series, we're going to open up that Photoshop file. I began in the last part in part one, we'll finish up that design and then we'll make sure the file is ready to pass off to Nol Honig who was going to be taking this design and actually bringing it into after effects and showing y'all how to animate. Like I mentioned, last time you were more than welcome to take this file that I have here and bring that into after effects and animate it and parts three and four, you can also follow along with the client brief from fruits of the trade, or you can take a design that you already have that kind of meets the simple criteria for animating here.
Sarah Beth Morgan (01:57): You probably don't want to choose something too complicated. And here's the brief that we had last time. Um, just to give you a little refresh it's fruits of the trade. They have some specifications here on what they need for their Instagram posts. They want you to illustrate a fruit, um, kind of using whatever style you like. And then they also say that you need to have a little label on the bottom. So we're going to learn how to animate type, but yeah, feel free to create your own design from scratch. And while you're doing that, also feel free to ask questions in the chat pod. I'll do my best to answer them. All right. Well, let's get started. Thanks so much for joining today. All right. So here I am in Photoshop, you can see I've got my son teak all set up and here's the sketch I started on in part one, I obviously chose to sketch clementines.
Sarah Beth Morgan (02:45): I decided to go with that for my fruit of choice. One thing I didn't really touch on in part one was a storyboarding and concept phase for this design. And the reason I didn't really go into depth here was that this is for of a subtle and symbol animation. And we don't really need to think too hard about transitions or big sweeping movements. This is more just like a subtle thing that's happening. If we look back on this level one animation style, it's really great because it feels like a level of animation. We can apply to any design that already exists. So if any of you have designs, you've already made, say a logo or a simple Instagram posts that you've already posted, or, or a flat GRA clean graphic on your website that you want to bring to life. You should really be able to apply these level one animations to any of that.
Sarah Beth Morgan (03:35): Now compare those level one images to these examples. You'll see that these don't really originate from one single image. These are multiple images strung together in clever ways through transitions. So if we look at this pep rally animation here, we really see that we're going from a closeup of the fire to pulling out and seeing a character kind of speaking or yelling into the microphone, which is also on fire. Um, out of context, I don't really know what it relates to, but you can tell there's a couple of steps that went into planning. The shot. If we look at this piece here by you guys, do we can see there's a lot of thought put into the way that the imageable loop and animates over time. There's a lot of extra moving elements that you would have to plan out that wouldn't necessarily just be in one image.
Sarah Beth Morgan (04:26): Same with this we've Oak show, real intro. They've got a little, mock-up a little vignette for each letter, which is really cool. And I love how they've played with this, but it's like, you'd have to design maybe, you know, I haven't really counted, but maybe like eight frames to make this come to life. So there's a lot more than just one symbol image. It would be like, say I drew 10 different fruits for fruits of the trade. And then I cut between each of them and each of them animated, that would be a whole different level of project, right? So for something like this, it's a bit more complex and we'd have to think more about the progression of images and how everything works together in tandem. If I were going to make my clementines and make them grow into a tree, or if I were to make them spin around and transform into a pair of apples, I'd have to apply more thought to the storyboarding phase to really think about how things were going to move, but working in level one, animation is so great because it essentially opens up a ton of doors for you to go back and apply motion to work you've already done.
Sarah Beth Morgan (05:30): I also really think there's a lot of beauty and simplicity and adding little bits of animation to everything can really level up your design work. But back to this design here, my clementines, I imagine there's plenty of opportunity for movement here. Perhaps we imagine that the clementines are still attached to a tree and they're swinging gently in a breeze. I can see the fruit moving, subtly you back and forth. Maybe offset believes a bit. They're moving at a different pace than the branches are. Maybe there's slight rotation of the fruit. There's a lot of things that could happen that don't necessarily require storyboarding or transitions. And of course, once we have the type on here, it can also animate that. So there's a lot of little things that we can add motion too. All right. So let's begin color blocking here. This is actually how I began almost all of my illustrations after I'm done with the sketch phase.
Sarah Beth Morgan (06:23): This is where your file actually has to become organized and you have to follow some rules so that you don't affect the animator's ability to manipulate those layers. Later on, I start by laying all of the main colors out in the main shapes and then add textures in detail. Afterwards. A key thing to keep in mind is organization, as you're working an animator that you hand your file off to, or you as the animator are going to have a lot of trouble sifting through a file. And after effects, everything is named layer five or layer 253 and so on. And of course, I'm sure you know this, but it's really important for animation because you can't really preview the image of what's in the layer. Like you can in Photoshop. It's a lot harder to kind of like figure out where things are.
Sarah Beth Morgan (07:08): So as I'm working, I like to make sure everything stays pretty organized from the start. So they don't have to go back and do guesswork later on. So name everything as you go do, not flatten your layers together, unless you want things to be animated as one unit, when we're done with our design, we will also make sure to delete any unnecessary or hidden or empty layers. But don't worry about that just yet. We're gonna, you know, duplicate our file, like I said, and make it animation friendly, but just keep these in mind as you're working, if you're coloring in a sketch that you created in the last part of this lab, before I fully, you know, show you my color blocking phase, I kind of want to just expand on what I just said about not flattening layers. If you have the circle of the Clementine here, and then you have a separate layer with the stem, and obviously those are separate layers right now.
Sarah Beth Morgan (08:06): So if I went into after effects, I could move the stem separately, or I could have the Clementine rotate or something like that. But if I flatten them, obviously they're just going to move as one unit. So you don't really want to do that because if the animator isn't recreating your file, if they're just using the assets that you already have in your layers, then it's going to be really awkward for them. They're going to have to, you know, cut things up, mask things, break things apart to have to make it animation friendly. Of course, animators do this kind of work all the time, but you know, if we can do our best as illustration or design folks to help that along and it'll make it easier on ourselves, if we're animating our own work, then we might as well just keep everything separate. It doesn't really hurt.
Sarah Beth Morgan (08:50): Right. All right. So as you can see right here, I have already chosen some colors to work with. I'm not going to go into detail on how to choose color palettes or how to use Photoshop itself because this lab is really focusing on animation and after effects. Primarily, like I said earlier, sometimes after effects will recognize shape layers. So I'm going to start by using just the circles for the clementines. First, I'm going to change the background color, and I'm going to use this nice light beige color, because I think it'll be really nice with the contrast of the orange fruits. So that started, I always turned my sketch layer down to like 10% and put it on top on multiply mode so I can see it as I'm working. And here's kind of where I'm going to start separating out my layers as I'm working, I'm going to use a shape layer to create these clementines.
Sarah Beth Morgan (09:46): I'll start with the back Clementine first, because it's going to be underneath layer wise and I will just name that Clementine behind. And then I'm going to duplicate that. So the same size command J and name that one Clementine front and drag that over to where it is in the sketch. I've obviously got my two clementines. I'm going to actually start grouping things. Cause that's just how I keep things organized. You'll see later on that, I'm going to do some manipulation with the file for the animator, but for right now, this is going to be really helpful. Um, I might put like a little black circle for the stem is supposed to enter and I will name that layer stem hole because why not? This is like where I get really creative when I use the name things, I just use the weirdest terms and then I'm going to make a separate group for the stem. And because I want the stem to kind of have an organic feel. I'm just going to use a clean sketch brush that I have saved in my brush groups. And I'm going to make sure to keep the two parts of the stem separate so that if NOLA needs to use that to animate later on, he has that capability.
Sarah Beth Morgan (11:18): All right. And then as far as color blocking goes, I really just need to do the leaves now.
Sarah Beth Morgan (11:26): And of course, like I said, I'm not super adept at illustrator myself, but if it's easier for you to make these shapes and illustrator, rather than draw them by hand, like if you're using a mouse or a tablet, instead of a Wacom, Santiq feel free to do that because everyone has their own process. Personally, I just like how the edges feel when they're drawn by hand for my own capability. Um, and then also of course, I'm going to be adding texture. So it'll help a lot for me, just have all of this in Photoshop already. But if you want to use illustrator shapes, go for it.
Sarah Beth Morgan (12:06): Now I'm also going to add my type and so that we can all use it. I'm going to use an Adobe type kit font. So that should be available to everyone who has creative cloud. Um, I'm going to kind of space things fun to give it a little bit of personality. I also am thinking about hierarchy here, especially if we're adding some animation, we want everyone to pay more attention to the illustration itself, not the type. So I'm keeping the type pretty subtle. So without a doubt, most animators will probably end up recreating your assets with shape layers and after effects. Recreation is unfortunately something that animators have to do a lot in the motion industry. Sometimes this is unavoidable, especially if you've designed your file and raster with no shape layers, but I just want you to be aware of this. So you understand how after effects, animators work, but, you know, just experiment here with the rest of this lab series and we'll see what works best for you and your own process.
Sarah Beth Morgan (13:08): So the next thing to do here would be to add textures and details to my color block shapes. And I want to take you on a little segue here to talk a little bit about the different texturing methods we can use for animation in our design file here. Textures are definitely one of the biggest roadblocks for animators. They can be a real hassle be conscious of this when either diving into after effects or handing off your file to another animator. What I would personally define as a texture could be any of the following could be, this could be a lighting layer that you add to shapes. It could be shading that you add. It could be an overall rough texture, like maybe a pattern or something. So obviously I already said don't flatten any layers, but especially don't flood in any texture layers. And I want to show you why you should keep those layers separate don't crop them, et cetera.
Sarah Beth Morgan (14:00): So if I'm going to add a texture to this layer right here to my Clementine layer, say, say, I was just going to add like a, a fun graphic texture like this or something. If this layer is separate, the animator has the capability to like move it back and forth. So say they want to create the illusion of the Clementine turning or something. They could actually use the texture to emulate that. But if these two layers are flattened together by pressing command E um, there's no way I can separate that texture. The animator's going to have to go in and recreate it or something, or they're just going to have to mess with it, how it is, which sometimes it's okay to do that if it's really subtle and small, but most of the time it's much nicer to have the, to move it around separately.
Sarah Beth Morgan (14:53): So I also want to go into some different types of textures. So I've come up with some terms connected, independent and moving textures. And as it says here, these are just terms I made up, but I think they define the texture types pretty well. You can see with these images here, especially in this Wonderlust image, you can see that the polka dots are mapped to the bed as if it was actually a polka dot pattern on the comforter. I would say that a connected texture is basically as if the texture is glued to the surface it's on. And you can see that also in the Sebastian, Carrie romaine lubricant, the line pattern is moving with the shapes and the shadows are connected kind of glued to the edges of those shapes. So that would be a connected texture. And that's, you know, that's probably the most typical kind of texture you would see with an animator.
Sarah Beth Morgan (15:46): I also have here, what we call independent textures. These will be textures that are separated from the object that's being animated. So that means either a, the textures don't move with the object at all. And they're just kind of pasted behind the object or B they move independent of the objects. So maybe the object is staying still and there's a pattern moving across it. So you can kind of see that in these examples here in this ordinary folk example, we have the fish moving up and down, but you can see the texture is kind of just being revealed behind it. Especially you can see that really clearly in this bottom half of the fish, then we also have moving textures. Another term I made up, but I would just say these are essentially animated textures. They're actually moving themselves, not just moving with the motion of an object.
Sarah Beth Morgan (16:40): These can be either connected or independent. So with this one, by Ian Sigman, he animated the texture with the motion of the object. Basically he probably went into Photoshop and animated each frame by hand, and then same with this one by Daniel Savage, we have this nice flowing motion of the waves behind the car, but then you could see the blue and pink texture is actually has a wave of its own. So lots of different types of textures, lots of things I didn't think about as I was illustrating things when I first started in this industry, I think it's really good to know because there's a lot of different options for using textures in motion design. So really quickly here, I'm just going to do a little time lapse of me working on adding textures in details to these clementines. Most of this will be done through clipping masks. I'm going to keep everything in there, correct layers and folders. I'm going to label everything as I go. And then afterwards, I'm going to meet you at the end. We are going to actually make a duplicate file for after effects. Finally, we're almost there.
Sarah Beth Morgan (18:00): So obviously here I was working in my normal way, which is grouping everything together, adding masks. Um, but it'll be better for animation to remove some of these elements to make it easier on whoever's animating the file and that's probably you. So these steps will help a lot. Let's walk through what prepping your file for animation looks like one, save your file, create a duplicate file labeled file name, underscore animation, PSD. Obviously you can name this whatever you want, but this usually works pretty well. So let's go ahead and do that. So I've got my file here. Gonna save it as animation fruits of the trade animation dot PSD next up is to delete any of your sketch layers or your color palette layers. Or if you have a mood board in there, you can delete that too. So this is a good time to go in and pick apart your file. Just make sure there's nothing in there that you don't want animated. I'm just going to open up everything. I realized I didn't label something. So I'm going to go back and do that. And then everything seems fine in the stem section.
Sarah Beth Morgan (19:10): Oops, I've got a layer in here that I have turned off that I'm not going to use. So I'm just going to delete that I will delete my color palette and my sketch layer because I have that saved in my other file. So I don't have to worry about losing it completely if I needed it again, the next step would be to ungroup any unnecessary groups or folders. Now I want to show you what I mean by that. No, we'll go into this in a lot more detail, but essentially if you open up your file in after effects your Photoshop file, there's a couple of steps needed to get there, but essentially once it's in there in there, you can see that everything that I had labeled as a group. So this stem group right here in Photoshop, it was literally just a group of called stem, but an after effects, those groups are called pre comps and a pre-com is like an animation file inside of an animation file.
Sarah Beth Morgan (20:04): So you've got your main file, which has all of your groups, and then you press stem and then it'll just take you to a group that only has the stem layers in it. But this is pretty annoying. If you want to animate things in tandem, say you want the stem to move separately, but also move with the orange circles. The clementines it's really nice to actually have all of these elements, but if they're all grouped like, so it makes it a little difficult. So here's where we actually go into our Photoshop file before we get into, after effects and remove any of those groups. That's just going to look like right? Clicking any groups you may have and just saying ungrouped layers. And so I think Nol is probably going to want to move the leaves around, um, separately. So the leaves shouldn't be in one group, same with the stem pieces, but the type can be animated on its own.
Sarah Beth Morgan (20:56): And then I feel like the clementines, since their textures will probably not be moving too much, they can stay within one of those pre comps or groups. So it's looks a little bit messier expanded like this, but it'll help a lot in the longterm in animation. Now that I brought that into after effects, you can see that we actually have all those elements labeled now top stem, bottom stem leaf, top leaf, right leaf bottom. They're all in the same composition now and after effects, which will be a lot easier to move things in tandem together. Um, obviously no we'll show you actually how to properly import your files. I just wanted to give you a little preview of how it all works and why you should not be using as many groups as you think you should. So up next, we have getting rid of nonessential masks and I haven't used a lot of masks in here, but if we look here, I did kind of mask this highlight, um, by just masking it out with another bit of that texture to give it a little bit more of a shape, but Nol's not really going to be using that mask for any purposes.
Sarah Beth Morgan (22:06): So I'm just going to right, click the mask and say, apply layer mask. And so now it's just that same texture, but there's just no mask to have that extra information there anymore, which is fine for this, this case. The next thing is to check for animation roadblocks. Now this one's a little bit trickier because there's no set rules for this. It's not really a technical thing, but something that I want to point out here is that with this Clementine in the front, you know, if I move it around, this shadow is probably going to have to change, which might get a little bit complicated for animation purposes. If we're trying to go for that level one animation. So maybe it's better if we don't worry about the overlap of the fruits and we actually separate the fruit. So that it's just a little bit easier to animate everything.
Sarah Beth Morgan (22:56): We don't have to worry about the shadow appearing and then disappearing. And it just gets a little bit complicated when we have that overlap, especially if things are going to be kind of moving in the breeze, it's going to change your design a little bit, but it might actually help make your animations feel a little bit more finished. So I'm just going to separate the stems and move the clementines around a little bit to get rid of that overlap. So it looks a little different, but I'm still really happy with it. And I think it'll be a little bit easier for Noel to animate within the hour that he has with Gill. Essentially, the final step we have left is to change that 300 DPI resolution to 72 DPI so that Nol can use it properly in after effects. The easiest way to do that is to go to image, image size, and that'll bring up the dimensions and your DPI that you already have, make sure you uncheck re sample and then change the resolution to 72.
Sarah Beth Morgan (23:51): And obviously that will change the size of the canvas. So the pixels are still the same. If we go and look at the actual dimensions, but the inch size is different. So now we've got it in 72 DPI, still 1500 by 1500 pixels. If we look back at the client brief, it seems like we hit all their specifications and yeah, just save it from here. Save. So if we look back on all of this, we did everything. We saved it. We're ready to animate. We've done everything we need to do to hand that file off to Nol. And if you're going to be actually animating yourself, give yourself a pat on the back because we did it. We're there and we're ready to jump into after effects. We're finally done prepping our file for after effects and you've made it to the end of part two of this four-part lab series.
Sarah Beth Morgan (24:43): I'm so excited that you stuck with me and that you're ready to move on to parts three and four with Knoll. Who's going to take my Clementine design file and actually turn it into that level one animation that subtle looping animation. Okay. I think it's okay. You can sit down now. I know. So just to recap what we learned in part one, I went over the beginning stages of planning for motion, creating that design file from scratch. Story-boarding learning about the different levels of animation. Then we created a sketch using a client brief, moving on to part two. I took that sketch and I started color blocking. We talked a bit about textures in motion. I also gave you some insight into prepping your files for motion, all the steps it takes to make it ready for after effects. So really excited to see what everyone comes up with. Just a reminder. If you have anything from this lab that you want to share, please post it on your Instagram and tag out. Wonderful. That's me at Nol Honig. And then finally, of course, at Adobe, I'm really looking forward to potentially connecting with you over social media and also maybe in my illustration for motion course. Thank you again for joining. It's been a real pleasure. I'll see you all later. Bye.
ENROLL NOW!
Acidbite ➔
50% off everything

ActionVFX ➔
30% off all plans and credit packs - starts 11/26

Adobe ➔
50% off all apps and plans through 11/29

aescripts ➔
25% off everything through 12/6
Affinity ➔
50% off all products

Battleaxe ➔
30% off from 11/29-12/7
Boom Library ➔
30% off Boom One, their 48,000+ file audio library
BorisFX ➔
25% off everything, 11/25-12/1

Cavalry ➔
33% off pro subscriptions (11/29 - 12/4)

FXFactory ➔
25% off with code BLACKFRIDAY until 12/3

Goodboyninja ➔
20% off everything

Happy Editing ➔
50% off with code BLACKFRIDAY

Huion ➔
Up to 50% off affordable, high-quality pen display tablets

Insydium ➔
50% off through 12/4
JangaFX ➔
30% off an indie annual license
Kitbash 3D ➔
$200 off Cargo Pro, their entire library
Knights of the Editing Table ➔
Up to 20% off Premiere Pro Extensions
Maxon ➔
25% off Maxon One, ZBrush, & Redshift - Annual Subscriptions (11/29 - 12/8)
Mode Designs ➔
Deals on premium keyboards and accessories
Motion Array ➔
10% off the Everything plan
Motion Hatch ➔
Perfect Your Pricing Toolkit - 50% off (11/29 - 12/2)

MotionVFX ➔
30% off Design/CineStudio, and PPro Resolve packs with code: BW30

Rocket Lasso ➔
50% off all plug-ins (11/29 - 12/2)

Rokoko ➔
45% off the indie creator bundle with code: RKK_SchoolOfMotion (revenue must be under $100K a year)

Shapefest ➔
80% off a Shapefest Pro annual subscription for life (11/29 - 12/2)

The Pixel Lab ➔
30% off everything
Toolfarm ➔
Various plugins and tools on sale

True Grit Texture ➔
50-70% off (starts Wednesday, runs for about a week)

Vincent Schwenk ➔
50% discount with code RENDERSALE

Wacom ➔
Up to $120 off new tablets + deals on refurbished items


Learn After Effects the Right Way
Master the After Effects interface and build a real animation skillset. Enroll in All-Access to unlock AE Kickstart and 50+ other courses.