
All-Access Pass
Unlimited access to 50+ courses, unlimited critique, live events, and 24/7 community. Join School of Motion All-Access today.

Learn the how to master symbols in Adobe Animate with Taylor Jon Peters.
The principles of animation are way more important than the software. However, sometimes you may find yourself wasting too much time in your workflow if you'd not aware of the tools at your disposal. Adobe Animate is one of those tools. Adobe Animate is an incredible tool for doing hand-drawn style animation and it's used in some of the biggest Motion Design studios in the world.
Now if only there was a world-class animator to show us this tool...
In an incredible stroke of good luck, Taylor Jon Peters is here to bring us an in-depth tutorial showing how to work smarter in Adobe Animate. In the vid, Taylor breaks down the various types of symbol options available in Adobe Animate and when to use each specific one.
Got you thinking cap on? This is going to be a very useful lesson! Let's get started...
{{lead-magnet}}
Use Cases for Adobe Animate Symbols
Here's a quick breakdown of the importance of using symbols in your Adobe Animate workflow
1. LOOPING ANIMATIONS
Imagine if you need to create a flag on a windy day. You're not going to want it to ripple once and then stop. No, you're going to want it to loop until it's out of frame, or until you've decided there is no more wind.

In Adobe Animate you can set your symbols to loop! This is amazingly useful if you're needing a lot of little things, like swaying grass, to keep repeating over and over again. This can also be useful if you don't want to animate the end and beginning of each cycle.
2. SINGLE FRAME PLAYBACK
What do you use if you don't want a loop? Well, if you need an animation to play and then stop when all the frames have been shown, use the Single Frame playback option. For example, if you have an explosion or dust flying away you'll only need it to play through once.

3. SINGLE FRAME
Need to set specific mouth movements for vowels or a closed mouth smirk? Use the Frame Picker panel as you're scrubbing through your timeline. Just choose which frame you want by clicking the representative graphic. Once clicked it will automatically create a keyframe on your layer so that you mouth state changes.
How to make symbols in Adobe Animate
To convert an animation to symbol in Adobe Animate simply click Modify > Convert to Symbol. Once clicked you'll have an opportunity to name your symbol and choose from various setting. For this tutorial go ahead and set it to graphic and not movie.
When you're creating your symbols try to add them to folder of groups that pair well together. Try to use good logic when creating symbols, for example create a 'head' folder for symbols related to the head, and if you're creating elements for the arms, well... make an arms folder. This will save you a lot of trouble once you've built up several different animated symbols for your library.

ADVANTAGES OF USING SYMBOLS
Symbols are like compositions in After Effects. Symbols are super dynamic and can save a lot of time with nuanced animations. Not only that, but you don't want to have to redraw certain assets if you can just duplicate them using Symbols. They're especially helpful if you're looking to get better at character animation.
Why would you want to do this instead of straight ahead drawing every frame? Well, here are some benefits of using symbols in Adobe Animate:
- Easily duplicate pre-built animations
- Symbols have transform properties on pre-built animations
- Symbols can loop animations
- Symbols can create a library of poses
- Symbols can replace poses for a frame using frame picker
- Symbols can reduce the need to redraw common elements
- Symbols change the starting frame
LOOKING TO LEARN MORE?
That's all for this lesson. Taylor will be back with a follow-up tutorial very soon!
In the meantime, check out our courses to find your next learning adventure. The world of animation is exciting, but learning it doesn't have to be frustrating. If you're ready to really up your animation skills check out Animation Bootcamp or Advanced Motion Methods. See ya next time!
-----------------------------------------------------------------------------------------------------------------------------------
Tutorial Full Transcript Below 👇:
Joey Korenman (00:00): Hey everybody. This is Joey and I am super excited to introduce a new tutorial creator here on school of motion. Taylor, John Peters is a motion designer who has worked for some of the biggest studios in the world, including giant ant. You may have heard that in this tutorial, Taylor is going to show you how he works in Adobe animate. And he'll start by introducing you to symbols, a powerful tool for creating traditional animation. Taylor is awesome, and you're going to learn a ton. So if you're ready to dive into a program that you may not be very familiar with, go download the project file at the link below and let's get started.
Music (00:36): [intro music]
Taylor Jon Peters (00:45): What's up, everybody let's get into this. First of all, I'm just going to show you a couple of demos, what symbols can be used for in flash. And then we can go into making symbols, and then I'm going to open up a project file that I have with a character. And we're going to start moving towards making a little bit of a rig for a person's head using frame selector option or frame picker rather. But first of all, let's just take a look. What these things do. I think a really good way to look at symbols in flash are just, just consider them like compositions in after effects. You can away from your main timeline and flash make sub comps that contain animation in them. And then from there, move around these parent comps and you can just layer a bunch of animation. You can loop things.
Taylor Jon Peters (01:40): You can, um, hide a bunch of different angles of objects and stuff and use frame picker and select those objects and not have to draw as much. And as much as I'm an advocate for forget about the software, learn the fundamentals, blah, blah, blah, blah, blah. This, you know, sometimes you just don't want to have to like be like a pure traditionalist and like draw everything. This saves you time. And there's been times where I'll be like cleaning up someone's work. And they did these refs and they copy and pasted a bunch of things like say, you draw a ball or something. That's like really good on model. And like, you just, you killed it. And then you needed to move it across 80 frames, just like a linear movement across the screen. And you copy and pasted every single thing. Now, when you need to go clean that up, you're going to have to go clean that thing up 80 times.
Taylor Jon Peters (02:32): Whereas if you use a symbol, you can, as long as you're proactive with what you're doing, you can make sure that, you know, you're going to be using a duplicate object, start with a symbol, and then only have to clean up that thing once. And that's a super useful thing, but we're going to get into that more later. First of all, I'm just going to show you, um, some of, some of its features. So the first option under graphic, you have options to different looping options. You have loop play once in single frame. So I'll show you what the benefits of loop are. I'll just play these two lovely gifts. I mean, they're not gifts, but looping animations. I have a flag that loops and then I have a Bush that gets blown over and then comes back and loops. So, I mean, right off the bat, you can see that this would be useful if you were trying to populate an environment with a bunch of bushes.
Taylor Jon Peters (03:26): Wow. Um, and so basically the way this is working is you have a symbol and that symbol is filled with an animation. Um, you can have as many layers, you can do everything that you can do in the normal timeline, just in, um, just in, in the symbol. And then when you move that symbol, now, all of a sudden you have, you have this, this composition. If you think about it, that way that, uh, you can move around scale and kind of do anything you want with, you can actually animate it outside of that comp if you wanted, um, it's incredibly useful. And with these loops, you can, um, of course change the start frame. So if we have that one started to, and then like, we'll move on to start a four. And now we have a nice bit of offset animation in there.
Taylor Jon Peters (04:17): And like, you can really, you can really build up off of this really easily. And then yeah, the, the loop has just, uh, of the flag is just a 10 frame loop. It loops perfectly. Yeah. And you can animate it. You can animate the symbol, you can scale the symbol, you can do everything, skew it, whatever, whatever you want to do with it. That's great. And we'll, and I'll get into more depth on like what the benefits of all these things are in a second, besides looping, there's a single frame playback where, um, this is, this is really good for things that are like responsive. If you, and then what I'll show you are two explosions and a dust cloud. If you, if you have something that needs to react, um, and you just want it to play once and then be done, that's what this does.
Taylor Jon Peters (05:09): It'll play your frame and it stops. It just won't loop again. So that's good if you have, I don't know, something fall. Oh, oops. If you had something fall and you just wanted a dust cloud at the bottom of it, you can just boom, and you can move them around again, duplicate them. You can transform them, flip them just super useful because here, if we have this explosion, look at that. Cool. So play once we'll go through your animation and your frame. So this is a 10 frame animation. It'll play the 10 frames and then it'll, it'll stick on the last one. So if, if I went into this and on my last frame, you can see it's blank. If I drew a squiggly, it's going to stick on that squiggly line. So just be aware of that. Cool. And then the last one is called single frame. So it was kind of hard for me to figure out how I wanted to do a demo with this. Um, single frame is exactly what it sounds like. So inside of this, I have four mouth shapes.
Taylor Jon Peters (06:16): And, um, if this was set to loop or set to anything else, it would kind of just spam through these, but right now it's stuck to nothing. And so the benefit of this is, I mean, the best use case I could think of is a mouth. And we're going to go in with the face rig. I think I'm going to primarily focus using the single frame, uh, option, because it's just, it's just what we're going to do. And so with the single frame option, you actually have this lovely window under windows. It's called frame picker right here. And, and you can, you can see all your frames that are within the symbol and you can pick the frame. And it's, it's really great because if at 10 frames, I want him to open his mouth. You can do that. And there's this little checkbox here that says create frame.
Taylor Jon Peters (07:00):And, uh, that'll, that'll make sure that whenever you click on a new frame, it's, it's gonna, it'll make a new frame for you automatically, which is nice. So this is really good for lip sinking or whatever. There you go. Beautiful. You could have an endless amount of frames in here and you could select through if you had, if you had hands that had different poses, if you had eyes that had different poses, all great things for that case. So that's a really quick brief intro. And now let's see if we can get a little bit more complicated. Alrighty. And so to start that off, let's start making some symbols and start taking advantage of what they do. So I'm going to make an eyeball blink loop. I recommend using symbols, anytime, you know, you have something that you're going to have to animate, but you don't want to have to animate a bajillion times.
Taylor Jon Peters (07:57): And I mean, I think an eye is a really good example because if he's just blinking, you don't want to have to make sure that his blinking eyes in the right position, every time that's blinking at the right time, you just like to have an eye that's blinking, you know, and just leave it and not have to think about it. So what I'm doing right now, just drawing my assets out. I'm using the pen tool or pencil tool, I suppose, in his eyes. And now what we're going to do, select that asset. And then we're going to go to modify, convert to assemble or FH. Okay, now we are face-to-face with, uh, this beautiful menu. This is the convert to symbol menu. This is where you can start being as organized as you want, or, um, just leave things unnamed and make other animators angry at you.
Taylor Jon Peters (08:46): Um, so I'm just going to name this I, and then I'll just name it blink. Uh, I often find myself making multiple symbols of the same asset because they achieve different things. And so if I needed to make the eye look left or right, I would make a new symbol with the same asset that looks left or right. And then I would switch symbols back and forth and I'll show you how to do that in a second. Then you can also choose the root folder. It's probably a good practice to just have this in here under head assets, make a new folder under your, uh, library. This is going to be your favorite place. Once you start working with a lot of symbols as your library, all the symbols that you make will live in here and this place will get the, or the library will get super messy if you don't pay attention to it.
Taylor Jon Peters (09:30): So make sure you're keeping track of that. I'll just keep it over in the corner over here. Okay. So now we've made our first symbol. This is an eyeball, what I'm going to do because of the advantages of symbols. Usually when you blink, you blink with both eyes at the same time. So what I'm going to do is click and drag while holding alt and duplicate this eyeball, then I'm going to right click and go down to transform and flip horizontal. And I'll just reposition that. And there we have the exact same eyeball, uh, same, same, uh, symbol, one eyeball. And now we only have to animate one eyeball blinking, which is great. Let's zoom in on here. I'm going to go to, uh, make 24 frames.
Taylor Jon Peters (10:19): If you're not familiar with flash, I just pressed F five there to extend my frames all the way out. So 24 that's one second. At 10 seconds, I'm going to press F six, make a new frame. I'm going to have him blink. I don't want to keep his stroke with that big, just because it looks chunky. It doesn't look like a blink that much. I mean, it kind of does, but why would his close eye look like the same size as his open dye? Okay. So I'll just half stroke that there you go. Lovely blink. And then I'm going to drag this frame over here, and then I'm going to press F six again, to set up my easing blink. I have this almost fully open.
Taylor Jon Peters (11:10): So there you go. And so when we press play here, it should just be a super simple blink. Nice. I'm just going to go and make sure. Well here, this is good practice to, um, make a new layer. I'm going to cut that eyebrow and put it onto this new layer because in your symbols, you can have new layers. You can, you can have as many layers as you want. It's it's just a whole other scene within a symbol. I'll just go delete all those other eyebrows on those frames. Now here's your eyebrow six again? Oops, drop that.
Taylor Jon Peters (12:00): I'm actually just going to move this up so that there was a bit more of that. And then f6 the eyebrow starts to come up and then I'm just going to drag again, to get that final position. Actually, I'll just move this over and we'll ease back into that final position, the finest animation you've ever seen. Okay. So with looping, if you want, I mean, you don't want your person to be blinking like crazy. So what you'll see I've done here is I've left a little bit of a, a pre-roll and a post role. And so it's not going to loop. It's not going to loop until you go through all these frames. So if you want them to blink less frequently than just extend a one or both of these, and now he's going to only blink every like 15 frames. And so when we go out, since these are set to loop, you will see blink and he's not going to blink again because we don't have enough time.
Taylor Jon Peters (13:11): Um, so I'll actually just go in just for sake of showing you we'll make them blink every, I don't know, five seconds give or take lovely. So now he's a blink and monster just blink so much. It's crazy. Um, and you'll see here, uh, the interval of the, the, uh, the loop is off from the, um, the amount of frames we have within that symbol. So it's just going to stop on a half frame. Um, and so you can, you can either, you kind of have to do a little bit of math to make sure that you're setting enough intervals. If you want to make a perfect loop just for quick math sake. You know, if you have a 12 frame cycle and you want to do a 24 frame looping GIF, you're going to make sure all of your loops like your eyeball blinks and stuff are going to be either 12 or six or three, right.
Taylor Jon Peters (14:07): Uh, and that that'll make sure that it will it'll it'll loop perfectly. So that's just a nice tip if you're planning on making internet gifts. So, and I mean, in our scenario here, let's make this, uh, let's stop at 15, and then we can just make this, uh, stop at 30 and now it should loop perfectly. Um, another tip, if you want, uh, you can go under control and you can go loop playback, and that'll actually just loop your, your scenes playback, not your it's not going to affect your, um, symbol or anything. So there you go so far, this is our beautiful gift.
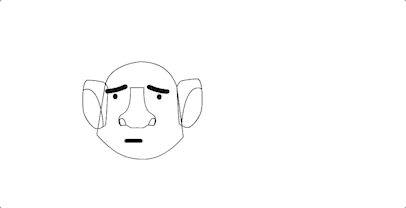
Taylor Jon Peters (14:48): I'll just name that layer just for the sake of it. Now we are going to use the single frame setting to start making some angles of this head. There are two ways you could go about doing this. I'm going to do this, not really considering super smooth motion yet. I'm going to, I'm going to go over that a little bit more in the next video. When we start talking about tweens, which is a really cool thing, and that's really going to blow up, blow your mind up, so blow your mind up. So let's start by making, uh, some assets for this head here. Actually, I'm just going to go through and I'm going to make a bunch of these assets, then I'll come back. So you don't have to watch me do this. All right. Alrighty. So I have gone in, and I've made a bunch of assets for this head.
Taylor Jon Peters (15:36): Um, everything is a symbol. Uh, so the, I made, I made a head symbol and then within that head symbol, I have all the other assets. So you can, you can kind of stack all your, your symbols. So I have the ears, or those are eyes. I have the eyes. Um, I have the ears of two years, whereas the other year, what layer is that on? Oh, there's the two years. Oh, that's why I'm crazy. Um, everything's on their own layers except for the eyes apparently, which are now on their own layers. And let me see if I can find this guy. So everything's its own symbol. And now what we're going to do, I've done a really beautiful animation. I'm actually going to add one more ease frame here so that it's not so quick or maybe I'll do an Antech. Okay. So now we have the super quick head turn.
Taylor Jon Peters (16:26): Um, but unfortunately his head doesn't turn. And so what we're going to do is we're going to go in and make all of the frames we need for his head to turn. So I'm going to do a, just a left facing pose here, a left facing head. And, um, we're going to do that all within the symbol and we're only gonna need, uh, we're only going to make the frames we really need right now. So right now this is our front facing pose. I'm going to press F sex, uh, or I'll actually, I'll drag down the line here and then press F six and then press F five to extend those for each of these symbols, we're going to give them, um, two frames and I'll show you why that is later. Okay. So this is our front facing pose. This is going to be our right facing posts. So we're going to just start shifting things over. I don't need this right ear left, left. There you go. Move his face. Okay. So we can do better than that. I'm going to, I'll just quickly using onion, skin, draw a new head shape. Nice, nice and quick. I actually have a style frame behind, but I don't, I can't see it right now. So I'll just wing it. Um,
Taylor Jon Peters (17:50): Do lost. Okay. Beautiful. Best, best drawing I've ever done. Said that to black. Next thing we're going to do shift these eyes over. I actually have this no set to single frame. So what I'm going to do is within that, I'm going to go over to a new symbol or a new frame within the no symbol. And I'm just going to draw out what the nose should look like too. Um, and what's nice about symbols is you can go in and you can do all this rough drawing. And then it's very easy after, after the fact to go back in and just clean up the one nose, because now I have this nose for the front and the, this notice for the right angle. And I'm going to go to my, um, frame picker here and I'll just set it to my right angle nose. And, you know, anytime I use this right angle or the symbol, I only have to clean up this right angle nose once, which is, which is great. It'll save so much time. Okay. So now we have our right angle. Um, I'm actually going to do the same for the ear. Just go F six, delete it. Um, and I'm just going to make, make it open up.
Taylor Jon Peters (19:19): Cool. So now that's give or take what that year would look like. Rotated. Again, this is more of a software tutorial than it is a animation tutorial. So you can, you're going to go learn how to draw somewhere else. Cause I'm not gonna do a good job of teaching you frame picker, choose a right angle ear. Oh goodness. I can do a better job than that. Cool. Um, turn off onion skin. Great. Okay. Very simple. Turns his head left and then, you know, what, if we want to turn his head right. Just in case we can duplicate these select them. All right. Click transform, flip horizontal, which is, oh, sorry. Out of my, out of my recording screen.
Taylor Jon Peters (20:15): Transform, flip, horizontal. Great. Okay. Try and keep everything centered when you're doing that, which mine is give or take. Um, now you will see in a second here that my, my symbol is set to loop. So when I play this, he's just going to be going all over the place. But, um, here's a, here's a quick way to fix that. There's an option here at the very bottom called, um, see if the tool tip will open up. I think it's just edit multiple frames. If you select that you get the same brackets that you get from onion skinning, and you can just drag that over, go command a and then under your looping set it to a single frame. And then, um, I would just go under first, just put one. And so now they're all set to the first frame. Okay, great. That was pretty easy.
Taylor Jon Peters (21:08): So now we still have that same ugly animation of him, his face not changing at all and he just moves to the left. So now we're going to go in, I think it would be nice to have him antique the left and then go down. I'm going to make a blink frame and then he's going to settle to the right. And so you're going to see why I left those two frames right now. So here's our initial frame. I'm going to go over to the right. Um, I'm going to de-select create key frame cause I don't want to keep, make any key frames outside of these, this nice timing that I have set. I am going to click five where he looks to the left and then I'm going to go forward forward. And then for these last two, let's select three and that's like four.
Taylor Jon Peters (21:57): So now great super snappy. A little bit too snappy. I think, I think it's pushed too much. So the reason why I left these extra frames is for easing you. So there's a, as I said earlier, there are, there are a couple of ways that you can do this and I'm going to go into using synchronized symbols in the next video. Synchronized symbols is going to be where you actually animate your full action within a symbol and then move that symbol. This, the way that we're doing, this is more like a rig where, uh, inside of the symbol, you don't actually have any finished animation. You just have a bunch of keys that you can kind of pick and choose from. Like a, I dunno, I don't know what a good example of is. This way is more like you get to choose from a toolbox of angles and, and, and keys and everything.
Taylor Jon Peters (22:47): And then the other way is where you actually have to do a full set of animation. And so, you know, there's benefits to both and we'll, we'll, we'll see that in the next video, but for now, what I'm going to do is I'm going to take this, this right turned face, and I'm going to set another key frame here going, gonna press F six. And then I'm going to go back to the one key frame and I'm going to move everything over a couple of pixels. And so what this is going to do is create our easing. And what you'll see is if I switch to the next frame, you can see that everything kind of settles in. We could do the same. We can do the same with the base of the head. I'll actually, I'll just, I'll squish the face over using Q for free transform. And now there, he kind of settles his face in, oh, actually here, I pushed it too far. I'll bring it back. So there you go. If that makes sense, we can move back over. What I'm going to do first though, is I'm going to actually just grab this and do the same for the left facing post, a couple of pixels over a couple of pixels, over a couple of pixels over cetera, grab base like that.
Taylor Jon Peters (24:06): I mean, if you play that, it's kind of fun. What was this head back and forth, but it's not real animation. You're just using those frames as a part of it. So now what we can do is we have him go to the left instead of grabbing that full left frame. I'm going to go back, find my friend picker, which wants to keep hiding on me. I'm going to go pick, whoops, say I'll pick five, which is less far over. And then, um, go down instead of picking six, we're going to pick, oh, sorry, we're going to pick three. And then the next one is going to be four and it's really subtle. And now I'm wondering if I should push it.
Taylor Jon Peters (24:53): Yeah. So from three to four, it's pretty subtle, especially with such a broad movement. So what I'm going to do is I'm just going to, I'm just going to push it even further so that we can actually really see that happening. Okay. So now there you go. Now you can see that a lot better and it's actually easing into that final position. And then, then the next thing I'm going to do well, actually, so I guess, I guess the lesson from here is now when you start building a rig like this, I know that this antique is too, too aggressive. I want, I want a more subtle ones. So now I can go back into this comp where I have all these poses grab a good base pose like this first one, duplicated all the way to the far, right. Um, you can kind of move it around. I think it is. It's a good practice to, to keep things organized. So having blank frames like this can just like create separation because again, like you're never going to do the playback within this, like this isn't going to matter. You're just taking the frames from this symbol. And so now I'm going to, from here, I'm just gonna make a really subtle antic phrase where I'm just very framed, sorry, where I just shove his eyes up. And so you just start making these frames with the animation in mind. So this is kind of funny.
Taylor Jon Peters (26:10): He's gonna shift his head over in his mouth and now we can go back out on this antique frame instead of choosing that full left, you kinda, you can see here in the frame picker, you have this really big list of choices you can choose. And so now he's actually just doing a nice, subtle look up and now we're going to make a new frame for his look down. Um, again, actually, you know, uh, because I gave myself extra frames here. I'm just going to go F six here. I'm going to squish his nose down, squishes mouth down, squishes the ears down a bit. And then actually the, this, this eye symbol I have is, um, just the eye graphic. I'm going to go in, make sure that this, so this, these eyes are actually set to loop right now. I'm going to do that same edit multiple frames, make sure everything's set to a single frame. So I don't have any funny glitches. Now I'm going to go into this eye and I can actually, well, we already animated that eye, uh, loop earlier. And so I'm just going to use the loop from earlier and we'll, but we'll just do single frame and go frame pick out of it. And I'm just going to go and select the closed eye. This is a classic Enrique Barone blink in turn, except he doesn't better.
Taylor Jon Peters (27:34): But with, oh, that you can now see, we have a way to aggressive head, turn Antech squish. We'll just keep this all a little bit more real than, oh, you know what? And then we can also make sure that this is on the blink too. Okay. Now it's an animation tutorial. Make sure your spacing's good folks because it makes you a better animator. Hey, this should animate better. And then we'll just give it a little bit more time to this. And what's nice about this as each one of these cells are frames here is going to keep the data about which frame you've stored or chosen under your single frame. So you can, you can select these, whoops. You can select all of these and shift them around and your animation won't read time itself. So now you've got that. And now, because that framing is so tight, this actually needs to be a little bit more subtle, which is fine, but you can just go in and make these adjustments. And then at the end of the day, the best part is even if we wanted to. So he turns that way, say, let's just keep animating. If he now, um, blinks again and now looks, looks the other direction.
Taylor Jon Peters (29:13): We are still only using the frames from the original symbol. So you're not actually going to have to clean up any more frames. So if we go in, I'll see that if we go in, it's hard to say I'm not doing an animation tutorial, but I care so much about making stuff look like it's animated nicely. So now I'm spending way too much time. Um, but okay, so now we have 40 frames of animation, 45 frames of animation, but in reality, we only have to go in and clean up 10, obviously so much information. Um, and it's, uh, lots of quips and quirks. Uh, please go download the project files. I will, I will leave all this in your I'll actually probably go clean this up and leave the, uh, the rough in the bottom. And you can kind of see what I was doing. And then also include the examples from earlier in the video.
Joey Korenman (30:10): If you want to learn more about using symbols in Adobe animate, you can do so by visiting the link in the description of this video. And of course, if you really want to take your animation skills to the next level, go check out our courses page at schoolofmotion.com. We've partnered up with some incredible artists to teach you the skills that pay the bills as a motion designer. And that's it. We'll see you next time.
ENROLL NOW!
Acidbite ➔
50% off everything

ActionVFX ➔
30% off all plans and credit packs - starts 11/26

Adobe ➔
50% off all apps and plans through 11/29

aescripts ➔
25% off everything through 12/6
Affinity ➔
50% off all products

Battleaxe ➔
30% off from 11/29-12/7
Boom Library ➔
30% off Boom One, their 48,000+ file audio library
BorisFX ➔
25% off everything, 11/25-12/1

Cavalry ➔
33% off pro subscriptions (11/29 - 12/4)

FXFactory ➔
25% off with code BLACKFRIDAY until 12/3

Goodboyninja ➔
20% off everything

Happy Editing ➔
50% off with code BLACKFRIDAY

Huion ➔
Up to 50% off affordable, high-quality pen display tablets

Insydium ➔
50% off through 12/4
JangaFX ➔
30% off an indie annual license
Kitbash 3D ➔
$200 off Cargo Pro, their entire library
Knights of the Editing Table ➔
Up to 20% off Premiere Pro Extensions
Maxon ➔
25% off Maxon One, ZBrush, & Redshift - Annual Subscriptions (11/29 - 12/8)
Mode Designs ➔
Deals on premium keyboards and accessories
Motion Array ➔
10% off the Everything plan
Motion Hatch ➔
Perfect Your Pricing Toolkit - 50% off (11/29 - 12/2)

MotionVFX ➔
30% off Design/CineStudio, and PPro Resolve packs with code: BW30

Rocket Lasso ➔
50% off all plug-ins (11/29 - 12/2)

Rokoko ➔
45% off the indie creator bundle with code: RKK_SchoolOfMotion (revenue must be under $100K a year)

Shapefest ➔
80% off a Shapefest Pro annual subscription for life (11/29 - 12/2)

The Pixel Lab ➔
30% off everything
Toolfarm ➔
Various plugins and tools on sale

True Grit Texture ➔
50-70% off (starts Wednesday, runs for about a week)

Vincent Schwenk ➔
50% discount with code RENDERSALE

Wacom ➔
Up to $120 off new tablets + deals on refurbished items


All-Access Pass
Unlimited access to 50+ courses, unlimited critique, live events, and 24/7 community. Join School of Motion All-Access today.