
All-Access Pass
Unlimited access to 50+ courses, unlimited critique, live events, and 24/7 community. Join School of Motion All-Access today.

How to Animate a GIF in Procreate in 5 minutes or less
If you want your social media posts to stand out, you need to add a little motion. Did you know you can make an animated GIF in Procreate in just 5 minutes? Seems too good to be true, but we’ve put it to the test. Let’s get to work!
Animated stickers grab your audience’s attention, stopping them mid-scroll to look at your channel. If you want to create stronger marketing emails or stand out on social media, adding motion is a quick and easy way to do so. Procreate, a fabulous iPad app, comes with all the tools you need to create a quick GIF sticker for your feed.
Follow along and try these techniques out for yourself to make your own animated social sticker.
{{lead-magnet}}
How do you use Procreate?
If you’re unfamiliar, Procreate is an iPad-based design and animation app that uses an intuitive interface and Photoshop-friendly formats. With just an Apple Pencil and a bit of battery life, you can create gorgeous digital artwork, or even an animated video.
We’ve talked about Procreate a few times already, but they just keep adding new features! If you’re looking for software to hone your artwork on the go, there are few better.
Even if you’ve never used Procreate before, we’ll get you up and running quickly. To start a new project, open the program. You’ll see the Gallery including sample images. Click the (+) in the top right to open a new canvas, and select Square.
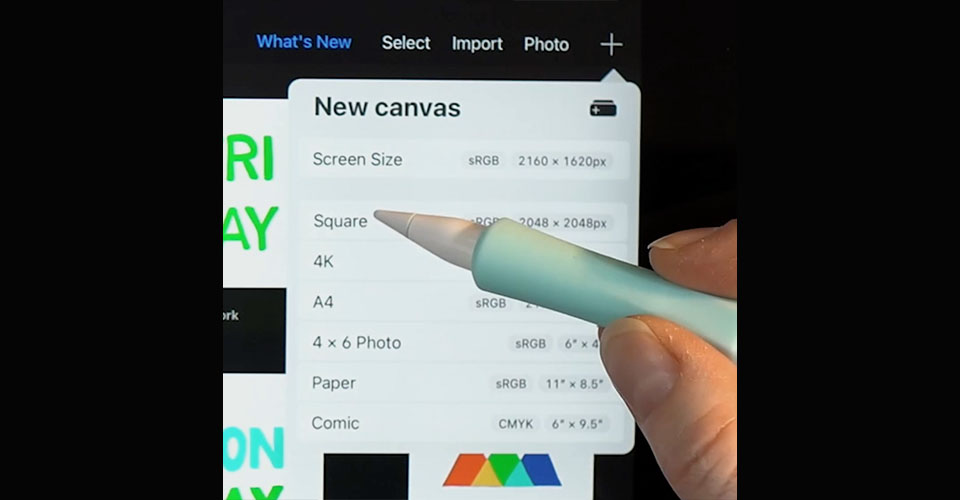
Since we’re designing a GIF for social media, a square makes the most sense. If you want to animate something else, choose the canvas size that matches your overall project. Next, we need to turn on the Animation Assistance. Go to Settings (the wrench in the top left) > Canvas > Animation Assist and Drawing Guide.
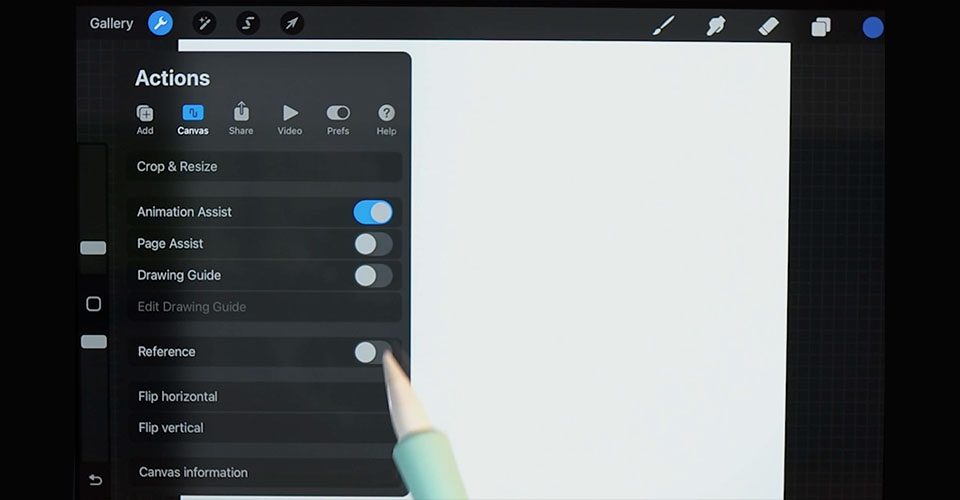
You can edit the Drawing Guide to change the size of the grid, which can make the next part easier. Now hit Done and let’s get to work.
Drawing for animation in Procreate
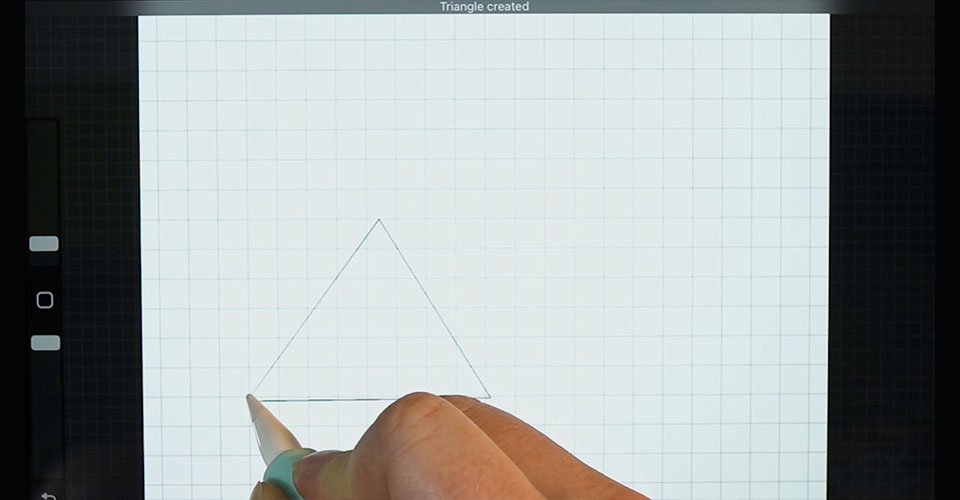
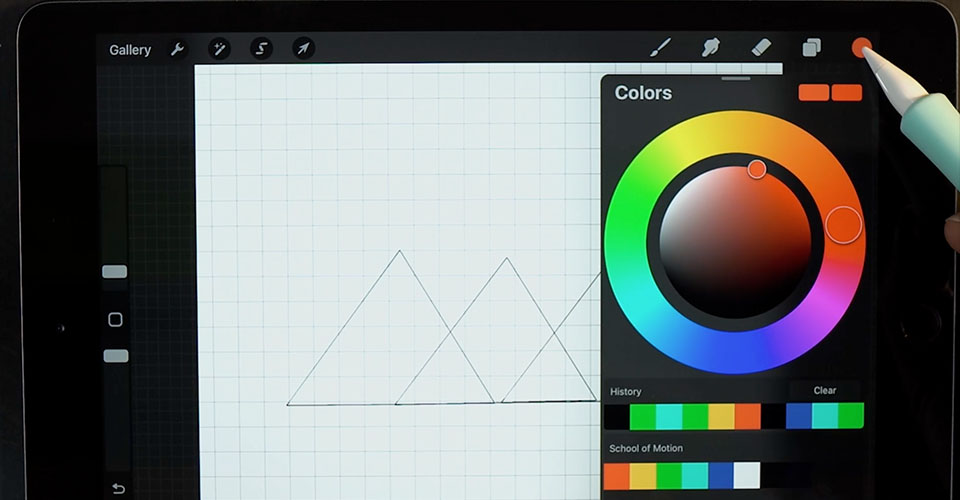
Procreate has a few tricks for drawing that will make the next step a little smoother. We’ve decided to draw a familiar shape, so first we’ll create three triangles. Once we’ve completed the general line, we HOLD THE PEN until Procreate automatically smooths and locks the shape.
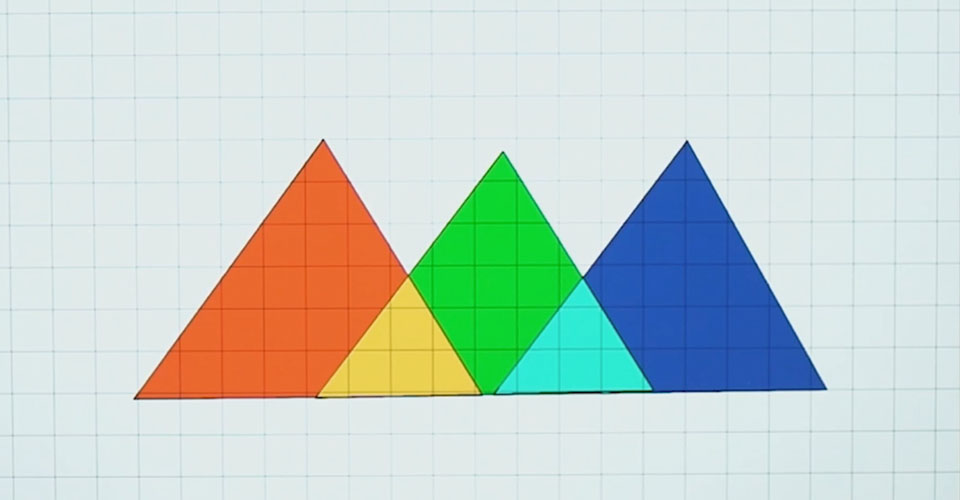
Once you have your shapes drawn, select the color wheel in the top right and pick your colors. If you have completely closed lines, you can just drag and drop the color right in.
Once you’ve finished your color selection, it’s time to start the next frame.
Click Add Frame at the bottom of the screen in the Animation Assistant and you’ll see the onion skin from your previous layer. This will help you guide your animation from frame to frame. Since we’re going for a jittery hand-drawn look, we can simply draw over the lines and repeat the last few steps.

If you make any mistakes along the way, the Undo button is always on the left side of the screen. Tap the curved arrow and watch your errors disappear.
Previewing the animation and making adjustments in Procreate
Now it’s time to have a look at our animation and see if it meets our expectations.
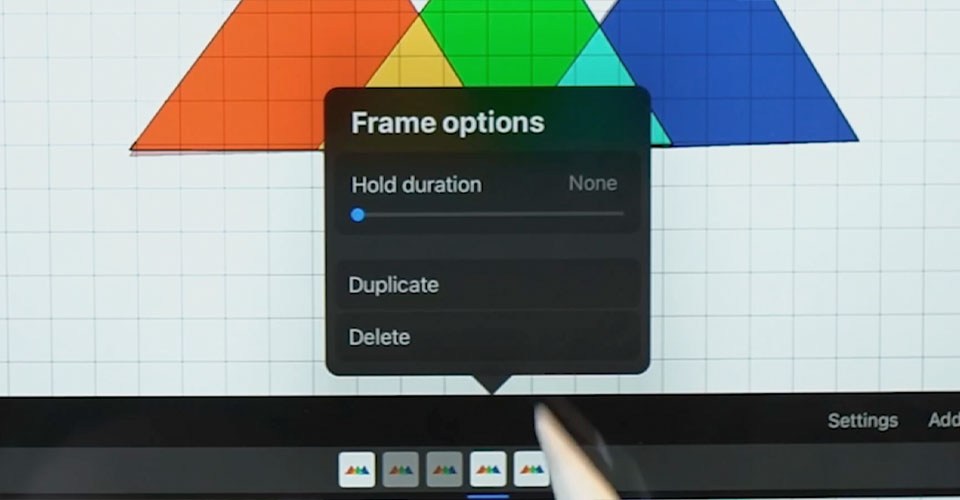
Click on a frame and you’ll see the option to adjust the Hold Duration. Animation is generally done at 12 frames per second, so use that to guide how long each frame should be held. For now, we recommend two frames.
In Settings (for Animation, at the bottom), lower your onion skin opacity to 0%, then hit Play in the bottom left. Now look, we’re not Dolly Parton, so we can’t be perfect all the time. Turns out we don’t like how this animation flows, so we need to retry our drawing on the offending frame.
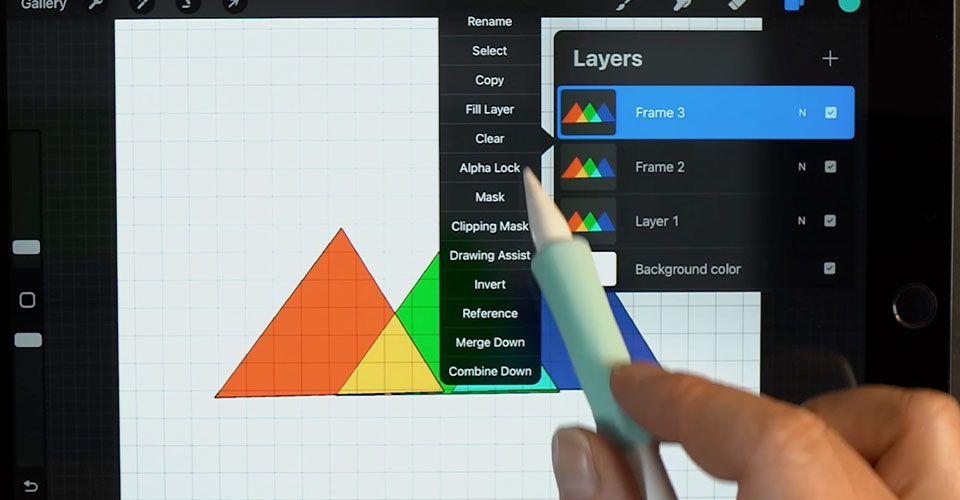
Click in your layers, select the bad frame, and hit Clear.
Now head back down to Settings in the animation window and bring your onion skin opacity back to 100%. Redraw the shape, add the color (you remember those steps?) and let’s try again. Sure enough, we just needed a second chance to make this first impression. Looks great…so now how do we show people our work?
We could run up to strangers on the street and shake our iPads in their face, but that is NOT the School of Motion way…or something you should ever do for like a million reasons. Instead, why don’t we export this GIF?
Export
All you need to do is go up to Settings in the top left, select Share, and check out all the options available to you.
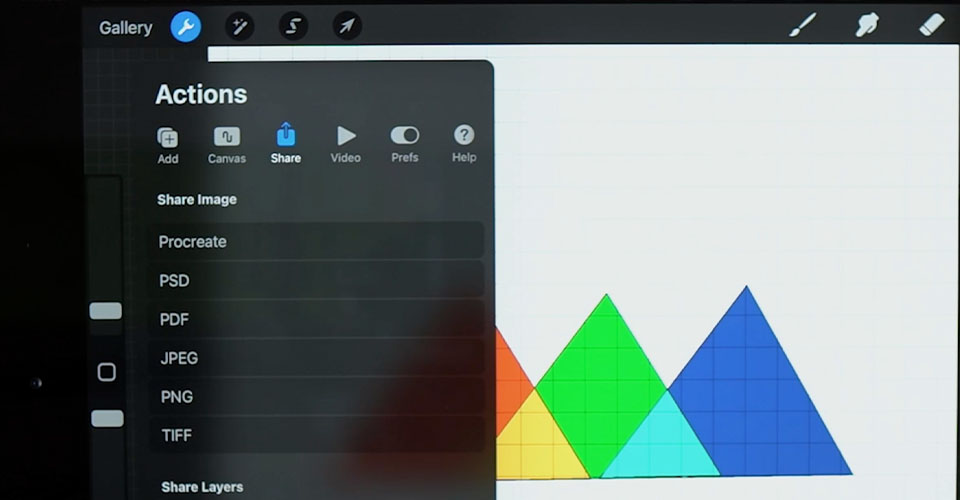
If you want to export a full video (background and all), then an animated MP4 will do the trick. We want to use this as a sticker on our feed, so select Animated GIF. If you’ve designed this GIF as a sticker for social, you’ll want to lose the background before you export
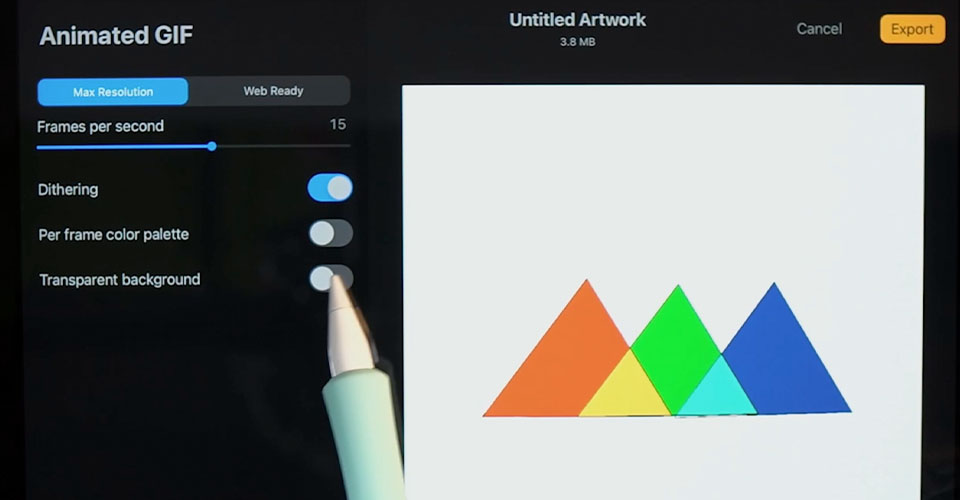
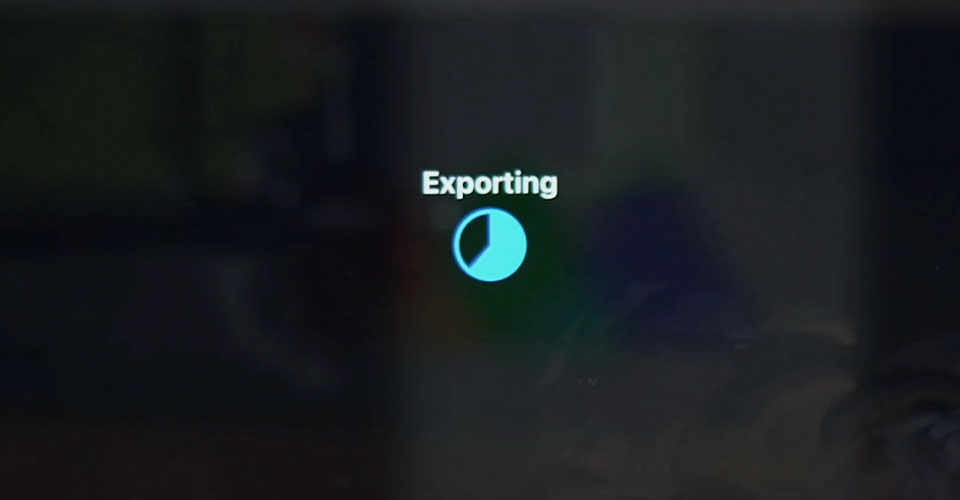
Now click Export.
And select where you want to send this GIF.
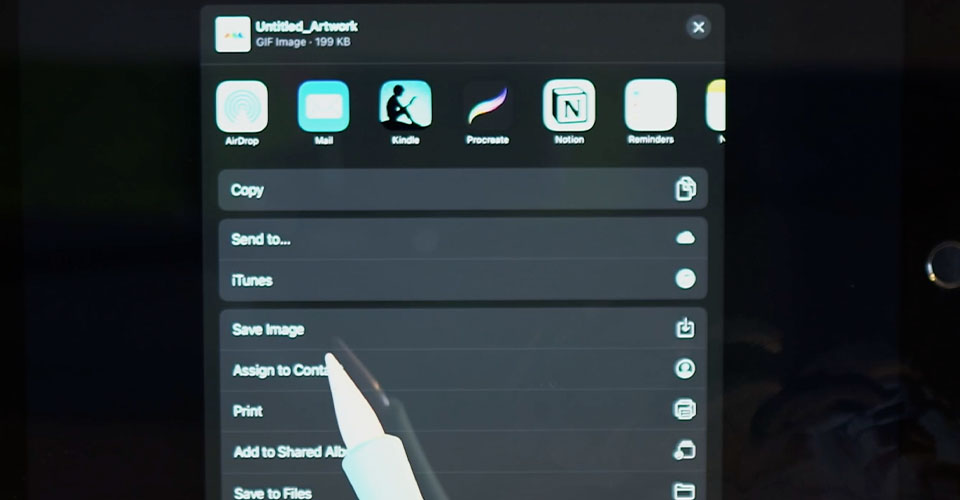
And if you select Save Image, it will save to your device and you can add it to your Instagram feed right away.
And that’s it! See how simple it can be? You just created your own custom sticker in about 5 minutes. Now think about what you could do with 10.
Take your animation to the next level
Are you enjoying drawing in procreate? If you're hooked and want to take your illustration skills to the next level, check out Illustration for Motion.
In Illustration for Motion you'll learn the foundations of modern illustration from Sarah Beth Morgan. By the end of the course, you'll be equipped to create incredible illustrated works of art that you can use in your animation projects right away.
ENROLL NOW!
Acidbite ➔
50% off everything

ActionVFX ➔
30% off all plans and credit packs - starts 11/26

Adobe ➔
50% off all apps and plans through 11/29

aescripts ➔
25% off everything through 12/6
Affinity ➔
50% off all products

Battleaxe ➔
30% off from 11/29-12/7
Boom Library ➔
30% off Boom One, their 48,000+ file audio library
BorisFX ➔
25% off everything, 11/25-12/1

Cavalry ➔
33% off pro subscriptions (11/29 - 12/4)

FXFactory ➔
25% off with code BLACKFRIDAY until 12/3

Goodboyninja ➔
20% off everything

Happy Editing ➔
50% off with code BLACKFRIDAY

Huion ➔
Up to 50% off affordable, high-quality pen display tablets

Insydium ➔
50% off through 12/4
JangaFX ➔
30% off an indie annual license
Kitbash 3D ➔
$200 off Cargo Pro, their entire library
Knights of the Editing Table ➔
Up to 20% off Premiere Pro Extensions
Maxon ➔
25% off Maxon One, ZBrush, & Redshift - Annual Subscriptions (11/29 - 12/8)
Mode Designs ➔
Deals on premium keyboards and accessories
Motion Array ➔
10% off the Everything plan
Motion Hatch ➔
Perfect Your Pricing Toolkit - 50% off (11/29 - 12/2)

MotionVFX ➔
30% off Design/CineStudio, and PPro Resolve packs with code: BW30

Rocket Lasso ➔
50% off all plug-ins (11/29 - 12/2)

Rokoko ➔
45% off the indie creator bundle with code: RKK_SchoolOfMotion (revenue must be under $100K a year)

Shapefest ➔
80% off a Shapefest Pro annual subscription for life (11/29 - 12/2)

The Pixel Lab ➔
30% off everything
Toolfarm ➔
Various plugins and tools on sale

True Grit Texture ➔
50-70% off (starts Wednesday, runs for about a week)

Vincent Schwenk ➔
50% discount with code RENDERSALE

Wacom ➔
Up to $120 off new tablets + deals on refurbished items


All-Access Pass
Unlimited access to 50+ courses, unlimited critique, live events, and 24/7 community. Join School of Motion All-Access today.

