:quality(86))
Tutorial: Create Cyriak Style Hands in After Effects
Learn some compositing tips in tricks as Joey recreates an animation by Cyriak in After Effects. It's a weird one, but you'll learn a lot.
Ready to get strange?
Of course you are or you wouldn't be here. In this lesson you're going to be breaking down an animation by Cyriak. He makes some very strange stuff that makes you take a second to scratch you head wondering "how the hell did he do that?" Sometimes the best way to learn about something is to try and re-create it yourself, and that's exactly what you'll be doing in this lesson.
Along the way you'll pick up a ton of new tricks for your After Effects arsenal. You'll learn a bunch of keying tips, tracking techniques, workflows for trying to blend images together in a natural way.
Free download
Tutorial Create Cyriak Style Hands in After Effects
Enter your email and we will send the download link right to your inbox.
Check your email! Your files await...

-----------------------------------------------------------------------------------------------------------------------------------
Tutorial Full Transcript Below 👇:
Joey Korenman (00:28):
Hey there, Joey here for School of Motion. Now in this lesson, things are going to get a little bit weird. I love the work done by Cyriak. And if you don't know who he is, you're going to want to pause this video right now and go check out his stuff. It's weird, right? His stuff is very unique and I wanted to figure out just how the hell he does it. One of the best ways to figure out how something was made is to try and make it yourself. So that's exactly what we're going to do in this lesson. We are going to take one of Cyriak animations and try to rebuild it from scratch. Don't forget, sign up for a free student accounts. You can grab the project files from this lesson, as well as assets from any other lesson on the site. Now let's hop into after effects and see if we can figure this out. So let's, let's hop on YouTube and I'm going to show you guys something that if you haven't seen it before, it's going to give you nightmares. And then we're going to try and figure out how Cyriak actually made this. So check this out.
Joey Korenman (01:26):
I mean, how creepy is that?
Music (01:28):
[creepy music]
Joey Korenman (01:41):
All right. That's enough. So a lot of Cyriak's work deals with repetition and things that kind of build on in this infinite loop, almost like fractals, you know, and spiral growth and all of these sort of natural phenomenon. And he, and he takes that and he applies it to manmade things or to, you know, hands and cows and sheep. And really he's a sick twisted genius. And he does all this in after effects. And I've always wondered how in the world he does it. Um, so I decided to try to figure it out and it was actually a lot harder than I thought it would be. So let's hop into after effects and I'm going to walk you guys through a lot of the steps that it took to recreate this animation. So very handy for me, Ringling has a full green screen studio.
Joey Korenman (02:31):
So I went in there after class one day and I took my iPhone in one hand and I just stuck my other hand out in front of me and just kind of tried to mimic that hand opening that I saw in Siri X video. So I tried it a bunch of different times because it's, you know, it's actually pretty hard to hold an iPhone and videotape your hand and keep things in focus. And you can see that, you know, on the few takes, my thumb got clipped off, things like that. So I did this a bunch of different times. I'm not sure what camera Cyriak used when he did his version. Um, but all I had handy was an iPhone. And so, um, you know, you use what you have. So really all I needed to do was find one good hand opening. Okay. That one's okay.
Joey Korenman (03:23):
That one's pretty good. And the key that I noticed on, um, on Siri X animation is that he would basically replace the tips of the fingers with a fist. So I wanted to find a tape that had a nice roundness to this area. And as the hand opens that round is gradually turns into the finger. So that's actually a pretty good take right there. Okay. So what I'm going to do is I'm just going to kind of clip that out. I'm going to duplicate this layer. So I'm going to duplicate this and then I'm going to clip this layer just so I have the in and the outright where I want it. Um, and a good hot key for that is option left bracket. All right. And then I'm going to move forward.
Joey Korenman (04:14):
Okay. Now I actually want to make that even a little bit tighter because what I'm going to do is as soon as the hand is in the position I want, I'm going to freeze frame it and I'm going to do the same thing at the beginning. So let's, let's play forward until the hand just starts to turn. And then let's just step back frame by frame. And let's say, that's the first frame. So we're going to clip to there, and now I'm going to go to the end by hitting, oh, it takes you to the end of a layer and I'm going to step backwards. Okay. Now the hand is finishing its turn. So I'm stepping forward.
Joey Korenman (04:53):
Let's say that's the last frame. Excellent. Okay. So now I'm going to copy this. All right. And you know, before I started the tutorial, I imported my footage as an image sequence. The only reason I did that was because the video format that an iPhone shoots in, uh, I was finding it actually tends to crash after effects. So I converted it to a TIF sequence so I could bring it in key it and work with it. And so I dragged it to the, uh, to this button here to make a new comp. So I'm going to do that again. So I have a new, another comp and I'm going to rename this green screen hand. All right, I'm going to erase the footage that's in there. And now I'm going to paste in my clipped version. I'm going to hit the left bracket to bring it to my play head, and I'm going to hit oh. And to set an out point, and then I'm going to trim comp to work area.
Joey Korenman (05:58):
All right. And this would be a good time to a good time to save my project as well. Okay. So I want to talk a little bit about some strategies for getting a good key. This is much less than ideal lighting for a key. Um, you know, it was just me in a green screen studio, turning some lights on and trying to get some thing approximating what Cyriak had done. Okay. So you can see that things aren't exactly exposed perfectly. Um, however, you know, the green screen actually isn't bad, like, especially on the right side of my arm, there's a lot of contrast. So I know that that's going to keep pretty well the left side. I'm not so sure about, because especially over here by my thumb, you can see that now the value, the brightness of my thumb is not that far off from the green screen.
Joey Korenman (06:50):
So that could be an issue. All right. Now, when you guys key things, one of the first things that you should always do is give yourself a garbage mat. And if you don't know what a garbage mat is, it means, um, you need to draw a mask around the part of that image that you want to key. And the reason you'd want to do that is, you know, there's, uh, you know, the green screen is not one consistent color green. It's brighter up here. It's darker down here. Um, you know, but it's kind of mid range in here. So there's a lot of different green values and you really only need to deal with the green that is directly around your subject. Right? So if I, if I were to draw a mask here and it can be very rough,
Joey Korenman (07:40):
Right, draw a mask like that. Now I don't care what happens to this screen. Right? So when I start keying, my key can be a lot tighter because I'm dealing with a much smaller range of green values. Now, um, one way to do that is to draw a mask and, you know, sort of add some key frames to it and try to get it, you know, as close as you can to your subject. And then that's when you Chrome a key that's when you use key light or, um, you know, or any other type of color key, there's actually a really cool trick. I learned to kind of automatically give you a garbage mask without having to draw a mask. All right. So this is how it works with your layer selected, go up to effect king and you want a color key. All right.
Joey Korenman (08:29):
And then you're just going to pick any sort of green that's close to the hand. All right. And we are going to increase that color tolerance till we get rid of all the junk. Right. And you can see that it's, this looks terrible, right? This doesn't look good at all. What all we're trying to do is make a completely clean background and it's okay if there's holes in the, and all that kind of stuff for the purposes of this, all I want to do is make sure that I have completely cleared the background out. So I'm going to overdo it a little bit. All right. Then I'm going to add, if you go to Matt, use a simple choker and, and choke that mat out with negative values, it's actually going to expand the mat out. Okay. What that's doing is it's bringing the image back, you know, your, your key got rid of parts of the image, and it actually took away way too much.
Joey Korenman (09:31):
You can see the fingers look funky and the edges are bad. So the choker brings some of that back. And you can see that if you, if you keep pulling it out, pulling it out, it brings some of the green back into. And if I play this now, you'll see, I have the most perfect garbage mat ever. Right. So now what's great is when I, when I use my Kier, there's very little variation in the green now because I've managed to get, you know, only keep the parts of the green that are right around that hand. So this is now what I want to key. Um, so because this layer has affects on it. Now I'm going to pre compose it and I'll call this hand pre key.
Joey Korenman (10:15):
And now we can use a cure on it. Now, a good trick, um, when you're keying things, uh, is to always have something behind whatever it is, you're keying. So you can check the quality of your key. So a trick I like to use is to create a new solid command, why, and try to pick a color that's going to contrast with my subject. So, you know, I've got kind of a, you know, a, a pinkish hand, um, but I've got a green background. So, you know, maybe what I want to do is try and find some sort of blue color or a kind of a warm red color. And I'm going to put that behind my hand. Right? So now when I key it, if there's any green showing up that I need to key out, you know, I didn't do a good job of getting rid of the green. I'll see it right away. And, uh, and then if I've keyed too much, in parts of my hand are transparent, I should be able to see through the hand to the purple and if not, I'll change the color.
Joey Korenman (11:17):
All right. And, uh, you can see here that I messed up when I pre composed this. Um, I probably picked, yes, I picked this option, leave all attributes in the current comp, which is not what I wanted. So I'm just going to command X, cut these, go into my pre comp and paste them onto that layer. So what we want is for this pre composed layer to have no effects on it, all of the effects are inside the pre comp. Now we're going to go to king and we're going to grab key light. And key light is amazing. And I've used a lot different key years. And for some reason, this seems to be the quickest, easiest one. If you want to really dive in and fine tune your keys, it's actually a lot better to do that in a program like nuke, where you can really easily isolate different parts of the key combined different mats, and do a lot of things to get a perfect result.
Joey Korenman (12:15):
But for quick and easy, I really have never found anything better than key light for after effects. So I'm just going to use the pick, the color picker, and I'm going to just grab a green, I mean, right off the bat, you can see that, you know, we've got pretty decent result. Um, if you look closely, you can see these dark areas here right around the fingers. So that's areas that still have, um, a passage that we don't want. Um, I also think that I'm seeing some purple through the hand over here. So parts of my arm might be being keyed out that I don't want. So the first thing I always do when I use key light is I switch this to screen mat. Um, and it lets you see a lot better. Um, and then another thing you can do is there's this exposure control down here.
Joey Korenman (13:05):
And if you crank this up, you'll start to see things that you can't normally see when, when you're looking at the exposure on zero, if I click this, it goes back to zero. So you see how all that stuff on the right side, it's very difficult to see a vice versa. If I lower the exposure, you know, it kind of helps you see parts of the mat that are going to black, that you don't want, but it's really useful to see parts of the mat that are still white, that you don't want. Um, this just so you guys know this does not affect the final render or the final image at all. This is just letting you see things a little differently to help you when you're keying. Um, so I know that I need to get rid of all of this junk, right. Um, and so what I'm going to do is I'm going to go to the screen mat and the two controls that I generally touch are clip black and clip white clip white.
Joey Korenman (14:01):
If you lower that it brightens white things. If you raise clip black, it darkens white things. Okay. So it's, it's almost like using a levels effect and crushing the blacks. So I'm just going to crush it a little bit. Now that stuff's gone, right. We have a nice, you know, I mean, if you really look at the edges of this mat, they're not great. The reason for that has I shot this on an iPhone. So I don't really know what, um, what I could possibly expect. I don't know if that's, you know, if there's any way to make that nicer. Um, so we'll try a few tricks and see what we get. All right. So now I'll go to final result and make sure I reset this. Okay. Um, okay. So, you know, if I just kind of come back and look at this, it's not too bad, right?
Joey Korenman (14:47):
I mean, the edges are clean. Um, key light does a pretty good job of suppressing green spill. And if you're not sure what green spill is, let me show you. Um, if I turn key, light off, you see how green the side of my hand is. That's because I'm on a green screen and the light bounces off the green screen and hits my arm and turns my arm partially green. That's something that always happens with green screen footage. So what you end up having to do is color correct that to get the green out and return that to a normal skin tone. So if I turn key light back on, you can see that it key light attempts to automatically, um, suppress that color. And the way it does that is, is determined by this replace method. And so right now, it's at the soft color and these all do different things.
Joey Korenman (15:40):
None. Um, you can see the edges poofed out a little bit. If I change it to source, it looks a little different. If I changed it to hard color, it looks a little different. Um, what I like to do, um, you know, I soft color usually works pretty well. It's kind of dependent on the, uh, on the green screen. Um, so I'm going to leave it like that for now. It's looking a little bit purple-ish to me. So what I want to do is change the color of this background. Let's just make it, I don't know, let's make it bright orange or something. I just want to see what happens. Okay. So now I'm actually seeing orange where I was seeing some kind of purple color. So what I'm worried about, I'm worried that I'm actually seeing through this layer and it's kind of hard to tell.
Joey Korenman (16:30):
Um, so maybe another thing I could do is, um, put some kind of texture on this color. So maybe I can go to generate and generate. Um, she's a checkerboard. Okay. Now it's very clear what's going on. Um, the levels of my key are not working right, because I'm seeing right through the hand. Um, so that would be the clip white. So clip black sort of gets rid of parts of the green screen. You don't want clip white brings parts back that you do want, all right. So I'm just hitting the down arrow, right? And now this is, um, this is actually quite a bit to have to bring things back right, to, to go all the way from 100 to 60, that's a pretty drastic change. And there's going to be artifacts from that. Um, and you can probably already see the edges of the hand are starting to turn dark.
Joey Korenman (17:27):
All right. So let's turn this checkerboard off and you'll really see it. You see that, that edge, that edge was brought back because I had to, um, hit this, this white clip value so hard. So now this is where you can use some of these other controls. Um, we can look at the replace method and see if, uh, changing that makes any difference. Source brings a lot of that green back, right. Which we don't want, um, hard color gives us a cleaner value than soft color. Right? You see that? So let's use hard color. And then the other thing we can do is we can actually shrink the screen, right? So this shrink screen shrink slash grow. If I increase that value, it grows. Right. So if I decrease that value, I can just choke that in just like even one pixel and my edges are a lot cleaner.
Joey Korenman (18:25):
All right. And you know, some of these edges, um, we're zoomed in at a hundred percent here. Um, and for what we're using this for this may actually be just fine. Um, but you can also soften the screen kind of blur the edges a little bit. So if I just gave that a one pixel blur, it might help blend that in with the background a little bit more. Okay. Um, and then the last thing I might do is try to color correct a little bit. So you see how, um, it's getting very cool, like the color of my hands getting very cool up here. It's warmer here. We may actually like that, that might be kind of cool, but if we didn't, all we need to do is go into a color correction and there's a lot of ways to do it in after effects. I like to use hue and saturation and then for channel control, just set that to blues and you can use the hue control to warm it up. Maybe de-saturated a little bit, all right. So you can kind of even out your colors. Okay. So that's before that's after.
Joey Korenman (19:32):
Okay. So now from an iPhone that was handheld, we've got a pretty decent, usable key. Now, the way that, um, I, you know, I, I'm gonna, I'm not going to take you guys through the entire process of me fumbling around and trying to figure out the best way to do this. Um, what I learned through trial and error was that the best way to set up this project is make a really large comp and create one kind of master comp that has the hand turning opening. And then each of these fingers turns into its own hand. And then I'm just going to copy and replace at the right point in time on my master comp. So I'll show you guys how I did that. So, uh, I'm going to set my orange solid here to a guide layer so that I can just bring in this green screen hand pre comp and start using it.
Joey Korenman (20:29):
But this orange solid will not show up. Okay. Um, so let's take the screen hand. That's Brandon here. And there's one more thing that we're going to need to do, um, before we start using this. So if you think about, we're going to end with this hand open, and these fingers are going to be completely still, and I'm essentially going to replace my arm with a finger. So there's going to be a hand on the end of each finger. Well, the problem is, look at what my arm is doing. My arm is moving it and you know, there's really no way to keep my arm from moving because I tried to keep it as still as I could. But when you open your hand up, your elbow kind of moves in word, okay, that's going to make it very hard to line things up. I need to stabilize this somehow.
Joey Korenman (21:24):
Um, now obviously there's really not a good tracking point. You know, it's, it's a hand everything's moving. Every part of that arm is turning and moving. So how in the world could I possibly stabilize this? Well, I'm going to show you a trick. And I can't even remember where I learned this trick. I think it may have been a class. I took on Autodesk flame, like 10 years ago, and I ended up applying it to this. And that just shows you how important it is to just constantly keep feeding your brain new stuff, because you really never know when something you learned 10 years ago is actually gonna come in handy. Um, so what I really, what I want to do is try and take as much of the rotation out of my arm as possible. So here's the way I did that. And this is going to seem a little strange.
Joey Korenman (22:12):
I'm going to make two lines and I'm going to make sure they're white lines. I'm going to make one line and I want them to be perfectly straight one line there, and then I'm gonna make another line down here. So we got two lines, okay. And I want to kind of play this back and forth and what I want, I, I basically want my arm to be vertical in the frame right here. It's kind of an angle here. It's vertical. So why did I make those lines? Well, because after effects, tracker is not going to be able to track any part of my arm. However, it could definitely track the intersection of my arm and this white line. So if I pre compose this, all this whole thing and I say pre track, um, and then I have my tracker window open. So what I want to do is stabilize motion.
Joey Korenman (23:10):
All right. So now when you stabilize or when you track, you have to do it in a layer view or not a comp viewer. It's one of the, one of the silly things about after effects. So, um, I want to, uh, stabilize rotation. Okay. I don't even really care about position. So what I'm going to do is I'm going to grab this track 0.2, and I'm going to line it up right here. Okay. Now you probably can see why I added that white line, because that is going to make a perfect track, that intersection. All right. And I'll do the same thing on the other side right there. Okay. Now that's not as good of a track point, but hopefully after effects can deal with it. And I'm at the last frame, so I'm going to track backwards. Okay. And you could see that it tracked the intersection of my arm with those white lines and it did it perfectly. So now we can close this hit apply.
Joey Korenman (24:14):
Okay. And you can see that it, it sort of stabilized it, but it actually kept it, um, at an angle. So I'm going to have to straighten that out and it's not perfect. So I may want to try tracking it again. Or in this case, I can probably just add a Knoll and try and smooth it out myself. Um, so because this is stabilized now, um, I can go in and turn these shape, layers off. All right. I'm going to add a new Knoll so I can move this. Okay. And I'll just call this adjust.
Joey Korenman (24:53):
And now I just want to straighten this out. Maybe I'll scoot it down a little bit. So there's this little hitch in the movement, you know, that we get, and it happens and you can see the frame, it starts on this frame. So I'm going to put a rotation key frame here, and then it starts to come back around here. So put another key frame there. So what I'm going to try and do is just, just get rid of that little hitch. Okay. So now, um, let me, let me just sort of crop this. So this is really the part of the video that we're going to be using. Right. I'm not going to use the bottom part of my arm. All right. So this is really what I'm concerned with, and it's a little bit wobbly. So I may just try a little harder, you know, I might, I might just spend a little more time trying to keep it straight and make it feel a little smoother.
Joey Korenman (26:18):
Okay. Now, for the purposes of, you know, of this Cyriak tutorial, that's probably gonna work. Okay. It's, you know, and, and we're going to have to, there's a lot of manual labor involved in getting this to look right. That's what I learned. Um, but we've managed to help stabilize it a little bit. And then we manually went in and kind of tweaked. So, you know, it's, it looks a little funky down here, but we're only going to see it probably from about here up. All right. So now we've got our assets. So now let's actually build one of these hands. So this is green screen hand to this comps. I'm going to call this final stabilized hand and let me start cleaning up my project a little bit, because I'm kind of a stickler for that. So I want to take all of my comps, put them in a pre-con folder, and now I want to take final stabilized hand and I'm going to put it in its own comp, and we're going to call this hand build.
Joey Korenman (27:28):
Okay. And I need, um, what I want to do is have this hand open up and then I want to have hands come out of each of these fingers. And all I need to do is build one good looking sequence of that. And then I'm just duplicating it and cloning it and sort of lining it up with itself and putting a camera on it. That's really the trick. So I need to make this count bigger right now it's seven 20 by 1280. Um, so I'm going to, I'm just going to double that. So we'll do 1440 on the width. Um, and then the height, I guess we don't really need to double the height. Let's just make it 2000.
Joey Korenman (28:09):
Okay. And let's move this hand down here. So we have room and I need to make this comp longer right now. It's only, um, one second 20 frames. Let's just make it five seconds just so we have plenty of time. So that hand opens that last frame. I want that to free. So I want to hold that. So what I just did was I hit command option T to enable time remapping. And this is a, an annoying thing that happens with time remapping. It puts a key frame on the last frame, except it actually puts it at the end, like right after the last frame. So that's why the hand disappears once we get to this key frame. So what you have to do is go back one key frame, add the key frame there and get rid of the original one. All right. So now our hand opens up and freeze frames. Cool. All right. Now what I need to do is line up the first-hand finger. So let's duplicate this, scale it down. Okay. And, um, let's figure out our timing. So as soon as that stops, we'll wait one frame and then we'll have the hand open up.
Joey Korenman (29:33):
Now, of course, we're going to have to do some masking and things like that. But first I just want to kind of see how this even, so I'm going to rotate this layer and I'm going to try to line it up with the finger and I'm going to stick it underneath just to make it easier to line up for a minute. Um, and it's very important that we name these so we know what's going on. So I'm going to call this index. Oh one, cause this is the index finger. All right. And I'm lining up the arm.
Joey Korenman (30:09):
Okay. And I'm just going to do a quick mask on this hand. I'm just going to kind of clip the finger off a little bit here, just the tip of the finger. Um, so I need to switch that mask to subtract mode. So I'm gonna hit M set it to subtract feather that a little bit. Okay. And then on my index, I'm going to chop off most of this arm because they don't need that. So I'm just gonna draw a mask here, set that, to subtract feather, that 10 pixels. Okay. So you can see that we're starting to get things lined up a little bit. Um, but obviously, even though we stabilized it, it's still not perfect. Hey, but it's, it definitely is starting to feel creepy already. So that's good. Um, so what I ended up having to do, um, is a lot of manual tweaking, right?
Joey Korenman (31:10):
So if, um, I want to basically position this hand and rotate it and have control frame-by-frame so I can totally line it up to the finger. And what I knew was that once I lined it up to one finger, it would line up to all the rest. So, um, I didn't want to actually animate the position property in the rotation property. I kind of wanted a separate set of controls. So I used the distort transform effect. If you've seen some of my other tutorials, you know, that I use this a lot because it's almost like having, um, a Knoll built into your layer so you can get some extra, extra control. So let's go to the last frame and line that hand up where we want it, the index layer. Um, so once again, I put the effect on the wrong layer. So I'm gonna cut that pasted on index one, and I'm going to make a position key frame, and I'm going to go to the first frame. Okay. And you can see that it's quite a bit off. I'm going to have to rotate it as well. So let me go to that last frame, add a rotation, key frame, go to the first frame and line it up.
Joey Korenman (32:25):
Okay. And then a good strategy is just go halfway, line it up. All right. Go halfway and not perfect yet, but you can see it's starting to get better. And it's really just this, this really tedious process of pushing it, lining it up a little bit. I can see that this mask is going to need a little work too. And actually the hand might need to be a little bit bigger, um, or wha what I ended up doing, which, which it's kind of like the long way of doing things. Um, but it's sort of the brute force method. And if all else fails you can do it is you can use a mesh war, which I'll show you guys once. This is a little bit closer. Um, so let's go halfway between these key frames, scoot it over a little bit, just nudging this thing all the way through the movement. And when you see big errors like that can fix them.
Joey Korenman (33:45):
Okay. So it's not perfect. Um, but it's, it's actually going to be okay because in the end, um, you know, we're going to have to come up with some kind of transition from the finger into the hand, and that's going to hide a lot of these sins. All right. So let's say that that's good for now. Uh, the next thing I want to do is just sort of help that re help my wrist blend into the shape of the finger. Um, and I think I'm going to turn the feather down a little bit on this and maybe move that mask up a little bit.
Joey Korenman (34:25):
Okay. So here's my mesh warp trick. So what I do is on index one at a distort mesh warp and mesh warp is pretty processor intensive effect. It literally lets you drag a M and I actually need to do it on part of the image that you're seeing. Somebody reset that, um, it will let you push and pull an image and reshape it to literally anything you want and you can, um, increase the grid. So you have more resolution to use your mess, your mesh warp. Um, and this is really, really handy when you want to blend two things together that aren't supposed to go together like a hand and a fingertip. Okay. So, um, if I go to the first frame here, um, and you put a key frame on this distortion mesh property, that's how it saves the, uh, the information. So if I just kind of just pull this out just a little bit, you know, just to help that wrist blend right into the finger, right. What we want is that smooth transition. And then we can go to the end and the end of actually looks pretty good. So I'm going to, um, I'm going to hit E open up meshwork, put a key frame there at the end.
Joey Korenman (35:52):
I'm going to go halfway and here I'm seeing a problem, right? This wrist, because this my wrist, uh, when it's turned to the side, it's thinner. So I may just want to grab some of these points and they all have Bezier handles too. So you can kind of just shape them like this. And the, and this is, this is just so tedious. Okay. But see, now that side, it's a little bit, it's a little bit smoother. There's still, there's still a little bump here. So you may actually find that you're, you're making the, the Palm of the hand, a little thicker at certain points. Um, you're pulling the wrist out. Okay. So that feels pretty good. Now let's look at that side. That side is probably okay. Especially when we're zoomed out.
Joey Korenman (36:45):
All right. So now around here, we need to fix that. So I would guess that when I did this, uh, for the test render that you guys saw at the beginning of this tutorial, I probably spent four or five hours setting up this piece of the hand. And I normally don't have that type of patience. So what this tells me is that Cyriak is truly a mad scientist because he didn't even have a reference to look at it. He just came up with this and he must've spent hours lining everything up. Okay. So there's a little bit of a glitch right in here. You can see the, the wrist kind of poking out. So let's tuck that in.
Joey Korenman (37:44):
Okay. Cool. All right. So let's take a step back and let's, let's play this few times. Okay. Now that wrist is actually stuck on that finger. Pretty good. And I really just love how twisted this is. Maybe that says something about me. So, um, so now we need to figure out how are we going to transition from the fingertip to the fist? Uh, so I stared at Siri ax clip over and over and over again. And to me it looked almost like he used, um, there's, there's a plugin, I believe it's called R E flex. And it's a morphing plugin. And it almost looked like he may have used that. Um, I don't have that plugin and I didn't want to get into, um, that level of work cause, cause using that plugin and making more work is, is a whole lot of work. So I wanted to try and fake it, which I know is kind of the easy way out.
Joey Korenman (38:43):
Um, so what the, so first off two things, um, you can see that the lighting on this finger doesn't totally match, uh, the finger right now, right? The, the, sorry, the lighting on the fist. It doesn't match the lighting on the finger. Um, just because the lighting was a little different on, you know, when I turned my hand over, um, and you saw the Palm, you know, my skin's a little different color. It was maybe angled a different way. So the light hits it differently. Um, so when we get, even when we get to here, I think the color needs to be just at a little bit so that it matches and it blends in better. So I'm going to put a levels of fact onto the hand. Um, and you know, like a lot of times, if you're not, if you don't quite yet have the hang of looking at two images and saying, this one is a little cooler than this one, I need to add some red to this one to make it match.
Joey Korenman (39:42):
If you haven't built up that ability yet an easy way to do it is to just look at your comp one channel at a time. So down here where you see this red, green, blue icon, you can come in here and click red, green, and blue, and it will show you one at a time each channel. So here's the red channel. And you can see that, um, as a black and white image, there's a lot more contrast in the hand than there is in this finger right here. So if I switch levels to the red channel, maybe I want to bring the black level up a little bit, you know, and then maybe I want to bring the white level down a little bit and try to blend that a little bit more. If I, if I turn levels off now and do before and after, you'll see, now it matches a little bit better. We can do the same thing, go to the green channel, switch, switch levels to green, and you can see the same kind of problem. We may. We just want to increase the black output just a little bit, maybe play with the gamma, just a tiny bit. These tiny little adjustments really do add up and make a big difference. All right. And then we'll switch to the blue channel. All right. And the blue channel, the hand looks a lot darker. So I'm going to push the gamma up a little bit.
Joey Korenman (40:53):
All right. Now we'll switch back to RGB on both levels in this. All right. And you can see that, um, even though those all looked good in black and white, now that we're looking at it, there's, there's way too much blue in there. Okay. So, um, we can go back into blue and we can adjust. I try to figure out where the right control is. And if you're seeing something that looks too blue or too green, and when you adjust that channel, it's not actually making the change you want most likely you have subtracted too much red. So let's, let's reset the red channel. Okay, here we go. So now I'm just adjusting the red channel a little bit.
Joey Korenman (41:37):
So you can see when I, uh, when I set the white output of the red channel too low, it starts to turn that blue screen color. So that was probably the adjustment that was doing that vice versa. If I, if I increase the black output, um, then it makes things more red. And then if I adjust everything else, it's sort of, it does these subtle adjustments. So I'm adjusting the gamma. Now this middle arrow is the gamma. All right. So now let's look at it before and after. Okay. So when, when I had this levels effect on and we zoom out to me, that looks a lot closer lighting wise, you know, and, and it just is going to make it blend in a little bit more smoothly. Now let's look at the beginning. All right. So at the beginning it feels a little bit too bright. So what I want to do is put a key frame on the levels too. So starting, probably here, it feels, okay. So I'll put a key frame there and then here, it just feels a little bright overall. So I'm going to go, I'm going to set levels back to RGB. So it's an overall levels. I'm just going to darken it just a little bit and that doesn't feel right. So maybe what I need to do is just decrease, contrast and mess with the GAM a little bit.
Joey Korenman (42:59):
Okay. So here's a before and after. So it's just a subtle little adjustment, but it's going to help. It's going to help it, especially when everything's moving, it's really going to blend in. Nice. And you guys can probably see there's little, you know, there's still some little problems we may want to come in here and put a meshwork key, framed to tuck that part of the wrist in. And you know, it's really a long process to get this to feel perfect, but you know, for way under an hour, we've got a nice kind of blend there. So then the next step is how do we get from a finger to a hand? So there's two parts, one. Um, I want to have the hand, uh, almost extend out from the finger a little bit. So, um, what I'm going to do is I have a mask on the fingertip. I'm going to turn that off right now. Okay. So here's the fingertip, here's where the fist is going to end up. So what I want to do is decide, okay, how long is it going to take for that hand to come up? So I'm, I'm just thinking that as that hand turns and opens up like this, it's going to sort of extend outwards. Okay. And maybe it's done extending outwards about here. So let's put a position, key frame, um, on this hand.
Joey Korenman (44:24):
Alright. And I'm going to separate the dimension, so I have more control. Um, and then I'm going to go to the beginning here
Joey Korenman (44:31):
And I'm going to bring this down like this. Okay. Um, now you can see that, uh, the fist is too wide here. And so when it comes up, right, that will work, except you're going to see the fist outside the finger before you're supposed to see the fist. So there's two things that I did to kind of fix this. Um, one, let me tore all these down. Um, I'm going to use the bulge effect on this fist. So that's distort bulge, right. And I'm going to extend this bulge out so that it covers the hand like this. And you can actually bulge things in a little bit.
Joey Korenman (45:27):
Right. So you can use, um, a negative bulge height. Okay. So I'm going to tuck that in so that it's actually, um, it's actually hidden behind the finger. I'm going to put a key frame on bulge height, and then I'm going to go forward and I'm going to set that to zero. And you also have to make sure that the, um, the bold center moves with the hand. Otherwise you'll get some weird artifacts. Okay. So now it's sort of scaling the hand up as it comes out, but it's doing it in a slightly more interesting way. It's bulging it. So it's going to feel a little bit more organic. The other thing I want to do is I'm a couple of frames before I'm going to add a bulge onto the finger. So the finger sort of bulges, and then the fist comes out. So let's add a bulge on this. I'm going to set the bulge center to that fingertip, and you can see what it's doing. Right. It's sort of making that finger look like it's swelling. So I'm going to set the height to zero. I'm going to go forward so that the fist has started to come up. And I'm just going to increase this a little bit.
Joey Korenman (46:50):
All right. So now that FIS is coming up and now we just need to mask that finger out. Okay. So what I'm gonna do now is I'm gonna take this mask that I've already kind of put on the fingertip. I'm gonna turn it back on. So that's a subtract. And what I'm going to do is, um, I'm going to have it animate into position. So let me hit option M and let's come forward and let's say right around here, that's where that mask should end up in this position. So let's put another key frame there. So at this first key frame, I'm going to move this up.
Joey Korenman (47:32):
Okay. And you can see what it's doing. And because the hand is, um, is spinning into position. That mask is actually in a bad spot at the beginning. So I'm going to, I'm going to go to the first frame here, and I'm just going to move that mask way over here. And I'm going to set that to a whole key frame. So that mask will stay there. Now, the way I did that, I held option command and clicked it. It will turn a key frame to a hold key frame, so will not change when it gets to the next key frame. It will just pop into place. Okay. So let's just preview this a few times.
Joey Korenman (48:15):
Okay. So we're not quite yet getting a perfect, um, a perfect match between the finger and the wrist. But I think what we could do to help that is animate D bold center. So it starts here and as it, and then as it, as it finishes, we could move that bulge down. Right. So that it, it almost feels like the fist is coming up through the finger like that. Okay. Um, and we do need to make sure, let me hit you on this so I can see all my key frames. We need to make sure that the bulge height does go back to zero at the end.
Joey Korenman (49:00):
Okay. So now this is kind of an interesting transition. The finger bulge is a little bit, and it might bulge too much. We may actually want to decrease that a little bit. We don't want it to be like Popeye arm or something. Right. And so then the next step is really just, just getting in there and putting key frames and lining up the hand on all of these frames and trying to, um, trying to get a seamless transition when this hand comes on. Um, and this is the part that takes the most time. And, but this is also the part that's going to give you the best result when you're done, if you take the time to do it. Um, right. And now that looks like a weird frame where the hand is like all stretched out and bulgy, but if you took the time to kind of animate it, you know, the problem that I'm having is that I've got a lot of key frames close together now on my mesh warp.
Joey Korenman (50:04):
And so you may have to kind of just be very careful, go through, you know, on this key frame here, I need to fix, um, the wrist, which is kind of popping out, okay, we're Snell. We're starting to get a pretty good result. And especially if you were watching this and you weren't expecting this to happen, you're not going to notice all of the little imperfections. Okay. So what we have is a pretty good, fairly seamless transition from a finger to a hand, let's play this whole animation. Cool. It's just really gross looking. Alright. So the next step would be apply that exact same procedure to every finger. Now, the good thing is your transform effect, which is sort of, um, helping stabilize the hand a little better, your mesh warp, which is helping to blend the hand and the wrist with the finger. And you're bulging new levels. All of those things are right on this layer. So when you duplicate this, right, you just duplicate this layer and, you know, you need to, um, you're going to need to just adjust your position in your rotation a little bit. But if, um, you know, let's say we move this hand over here and we need to rotate it a little bit.
Joey Korenman (51:43):
Right. And we're going to have to adjust the Y position a little bit so that it's lined up correctly, but all of those properties are still on it. So if I now apply the same mask to this fingertip, it's just going to take a little bit of adjusting to get a good result, right. Apply a bulge to that fingertip. Um, maybe adjust the mesh warp a little bit, cause this finger might be shaped a little bit differently. All right. And just do that for each of the fingers. And I know it's tedious, but you know, the sad fact is when you want to do something really cool, super creative, no one's ever seen before. Chances are, it's going to take a really long time and it's going to take a lot of manual labor and tweaking and endless noodling to get it right. So once you've got this built, so what I'm going to do now is I'm actually going to open up, I'm going to open up one, that's already kind of done, right?
Joey Korenman (52:43):
So here's, here's this hand. And you've probably noticed that the one we just built is actually animates a little bit cleaner than this one. Um, and that's because after spending hours doing this, I've gotten better at it. So the version that we just did in the two in the tutorial actually looks a little better than this one, especially the thumb. I'm not very happy about the way that thumb bulge is. Um, but I have lined up all of the hands, all the, you know, lineup with the wrists and the fingers, and you've got this creepy, creepy, creepy animation. Um, and then what I did, and I'm going to walk you through this because this is really tedious. And this is sort of, um, what makes this type of project is, you know, trying to recreate the feeling that the original piece gave you. Um, so what I did have a layer here, right?
Joey Korenman (53:37):
And I'm going to solo this layer. This layer is just that, that pre comp that we just made the hand opening up and then each finger turns into a hand, okay. Now very important for hit F for, to show the switches. This layer has continuously rasterize on what that means is in this comp all of these hands are very small. They're scaled down to pretty small size. Um, so even though we're at full quality, 100%, if I zoom into these hands, you can see they're very pixelated. But if I use this comp this pre comp, if I use this in a new comp and I turn on continuous rasterize, we can zoom into those hands. And all of a sudden, all of that quality comes back. So this is the trick, because now you can just nest all of these things together. Okay. Now you see how there's three layers here.
Joey Korenman (54:34):
That all start at the same time. So let's turn those on. This is the trick. Okay. And if I go frame by frame, you'll see. Watch when I go to the next frame, you see how there's a little outline that just appeared here. That's because what I did, if I turn off this base layer, I replaced the fingertips of that base layer with a new copy of that comp, if I turn that back on, right. You can see that it's not totally perfect. I probably could play with the mask a little bit more and get a more seamless transition, but, but you're moving so quickly. You don't even really notice it when it's playing. Right. So all I'm doing is swapping out the fingertips with a new set of comps. So if I, um, let me find which layer this is, right? So this set of fingers here is coming from this layer too.
Joey Korenman (55:27):
And there's a mask on there. It's actually two masks. Um, there's one mask that is cutting off the wrist and the hand, and then on the original base layer, there's another mass that's cutting off the fingertips. So I'm basically just combining, and these are all the same comp, these are all that big pre-con that has the hand in the fingers, and I'm just trying to line them up. And it's kind of tricky to line things up pixel perfect, which is what you needed to do. So one way to help you do that is, um, let's say, I want to line up, let me turn everything else off. I want to line up layer two over layer one. You can, um, you can switch your transfer mode to difference, and it will show you an overlay. Um, and basically every, if you're trying to line two things up, they are lined up when a difference mode creates black. Right? So if I, if I move this hand, you can see that, um, I'm now starting to see two sets of hands except where they intersect. It turns black. So this makes it a lot easier to nudge things around and decide, okay, is this more lined up, less lined up? I may want to scale this up a little bit. Um, but it's a lot easier if you use the difference mode and then switch it back to normal.
Joey Korenman (56:49):
Um, and then that's really, that's really the trick. So I did that on those, on those fingers. And then when we zoom in again on those fingers, and then when we zoom in again on these fingers and you just keep doing that trick and to get this kind of weird spiral and camera move, um, I just used two Knowles. I parented all of the hands to this, um, to this position now. And the position now has a few key frames on it. It's just, if you watch it move, you'll see what it's doing. It's just kind of helping keep things framed where I want them, but really what's doing most of the work is this scale and rotation. Now the position all is parenthood to it, and it's just scaling up and rotating constantly along the entire comp. And that's really it. Um, and let me think of there's.
Joey Korenman (57:45):
Anything else I need to tell you guys? Uh, one thing I'll point out is that, um, if you're using scale to zoom into things, um, there's something called exponential scale. And what that means is that when you're scaling into something, um, at the beginning of that scale, it feels like things are moving very fast. And then as the scale grows and grows and grows and grows, it starts to feel like it's growing slower. Um, and that's just because of the way scaling works. If you want, if you want there to be a feeling of a constant speed as you're scaling, you have to use exponential scale in after effects. There's two ways to do that. Um, one is you set your scale key frames. So there's one at the end, one at the beginning. Um, and you can go into a key frame assistant and set exponential scale, and that will, um, that will adjust your, your scale.
Joey Korenman (58:39):
Um, so that it sort of, uh, helps you interpolate your scale in a way that it feels like a constant speed. The way I did it was using the curves. So here's my scale curve. And I just created, um, you know, a very, a very big buildup into the scale so that it speeds up, speeds, a speeds up, and it just keeps getting faster and faster and faster all the way until the end. And you would think that that would make it feel like we're accelerating in reality. It doesn't, it makes it feel like a constant speed. So, um, it's one of the tricky things that you'll learn about using scale. Thanks for watching. I hope you learned a ton of new techniques that you can use in this lesson, including how useful it can be to just break down another artist's work and try to figure out exactly how it was made. You can learn some surprising new techniques that you may not have thought of before just doing your regular day to day stuff. If you learn something valuable from this video, please share it around. It really helps us spread the word about school emotion. It means a lot, and we will applaud you. Thanks again. And I'll see you next time.
Music (59:44):
[outro music].
All-Access
Keep building taste with guided motion design training.
Get 50+ courses, project-based lessons, critique, and a community built for artists who want their work to feel sharper.
Explore membership:quality(82))
Cavalry Is FREE! Is Canva Trying to Mog Adobe? | Motion Mondays
Cavalry went free, Canva is quietly building a full creative pipeline, and The Verge declared war on Adobe.
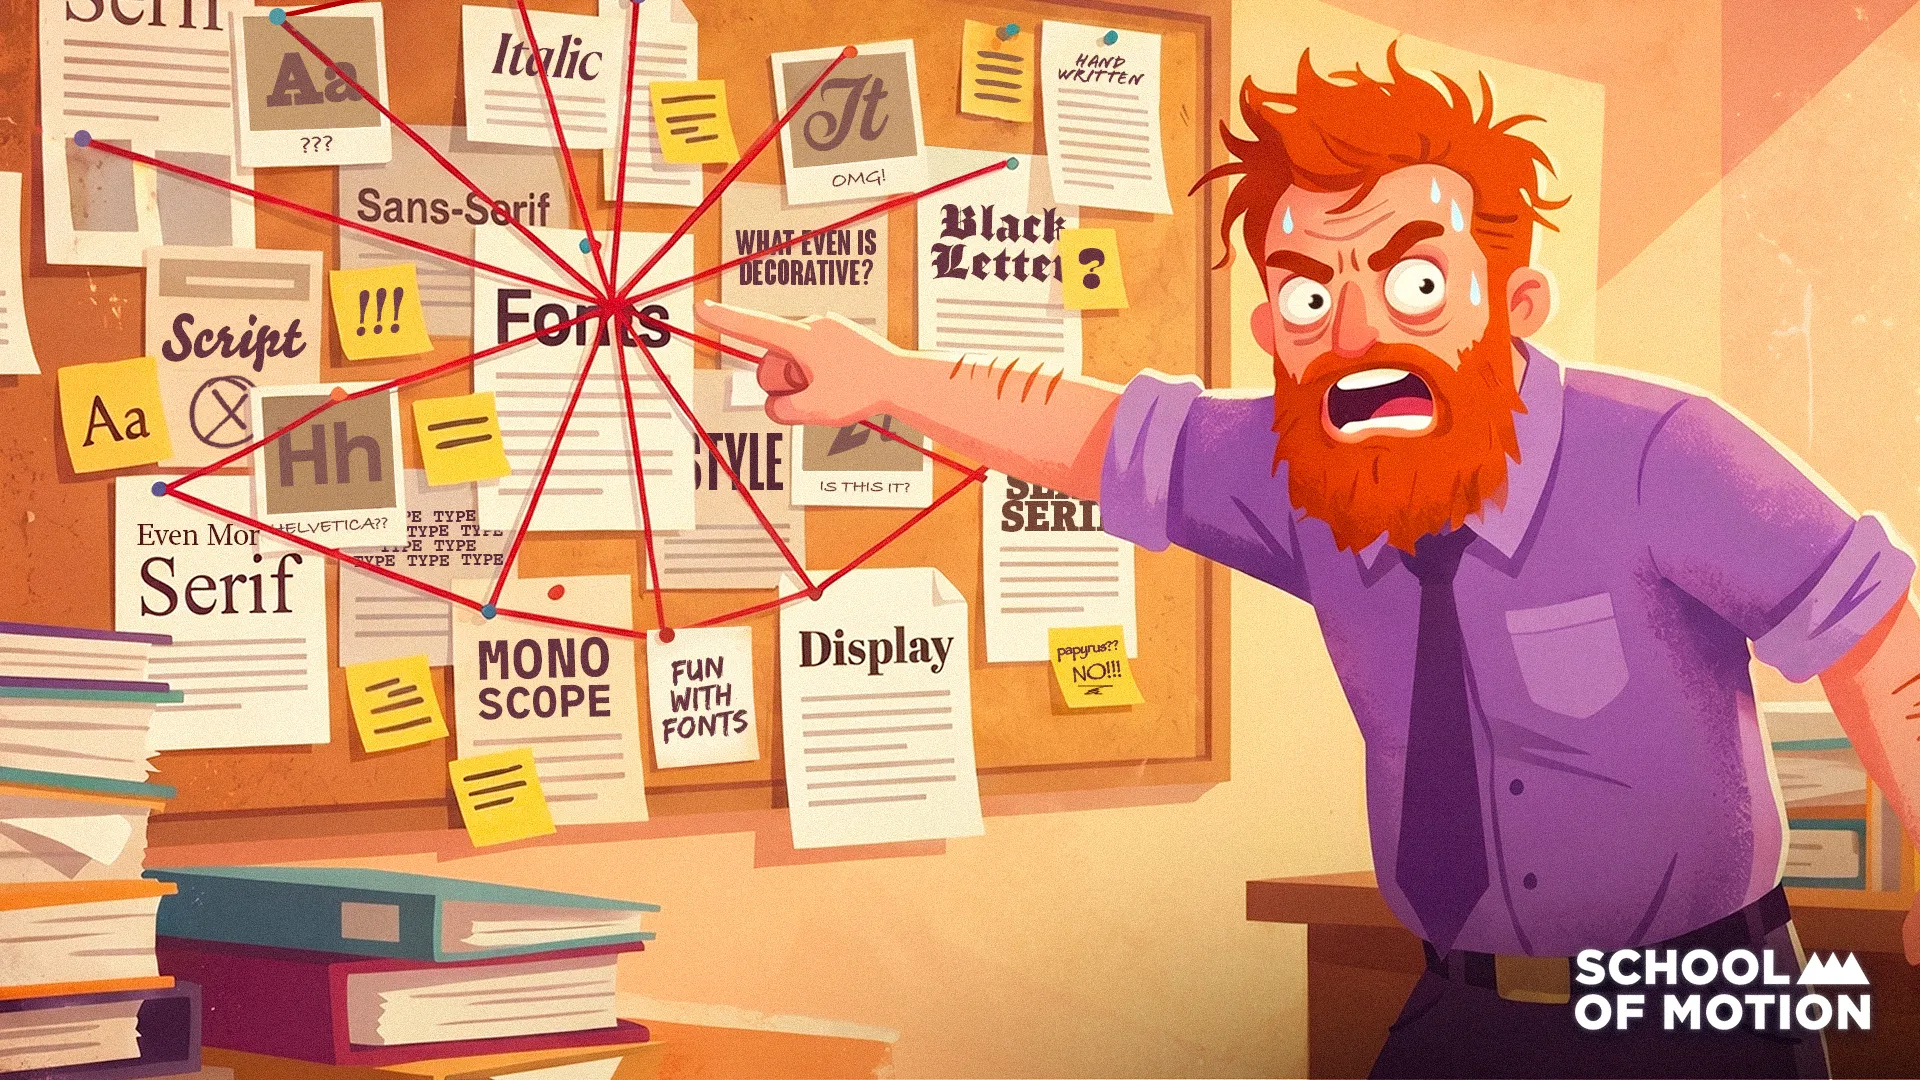
How to Identify a Font: The Best Free Tools in 2026
Discover the best free font identification tools for 2026. From WhatTheFont to browser extensions, find the perfect typeface for your next project.
:quality(82))
After Effects Killed Roto Brush + Unreal 5.8 Is Out | Motion Mondays
After Effects replaces Roto Brush with AI masking, Unreal Engine 5.8 ships with true 3D terrain sculpting and an experimental vibe-coding plugin, and Epic shares their AI concept pipeline to very mixed reactions.