
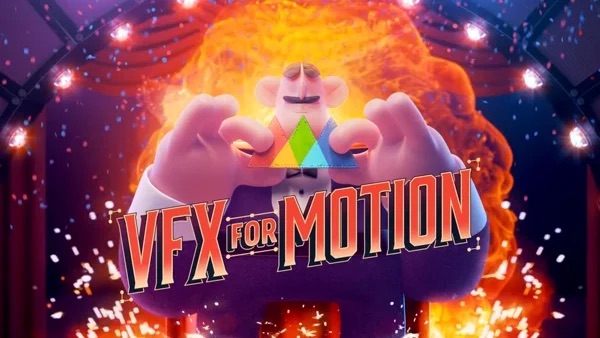
Create Stunning Visual Effects in AE
Learn compositing, tracking, keying, and rotoscoping in After Effects. Enroll in All-Access to unlock VFX for Motion and 50+ other courses.
Here's how to create an awesome cartoon explosion in After Effects.
Drawing hand animated effects takes a lot of time, patience, and practice. Being in an industry that can be as fast paced as Motion Graphics we don't always have the luxury of being on a job where we can just stop and learn a brand new skill that can take a lot of time to master. In this tutorial we're going to see how you can use After Effects to make a cartoon style explosion that looks like someone animated it by hand in a program like Adobe Animate.Check out the resources tab for some inspiration and other goodies that go along with this tutorial.
ENROLL NOW!
Acidbite ➔
50% off everything

ActionVFX ➔
30% off all plans and credit packs - starts 11/26

Adobe ➔
50% off all apps and plans through 11/29

aescripts ➔
25% off everything through 12/6
Affinity ➔
50% off all products

Battleaxe ➔
30% off from 11/29-12/7
Boom Library ➔
30% off Boom One, their 48,000+ file audio library
BorisFX ➔
25% off everything, 11/25-12/1

Cavalry ➔
33% off pro subscriptions (11/29 - 12/4)

FXFactory ➔
25% off with code BLACKFRIDAY until 12/3

Goodboyninja ➔
20% off everything

Happy Editing ➔
50% off with code BLACKFRIDAY

Huion ➔
Up to 50% off affordable, high-quality pen display tablets

Insydium ➔
50% off through 12/4
JangaFX ➔
30% off an indie annual license
Kitbash 3D ➔
$200 off Cargo Pro, their entire library
Knights of the Editing Table ➔
Up to 20% off Premiere Pro Extensions
Maxon ➔
25% off Maxon One, ZBrush, & Redshift - Annual Subscriptions (11/29 - 12/8)
Mode Designs ➔
Deals on premium keyboards and accessories
Motion Array ➔
10% off the Everything plan
Motion Hatch ➔
Perfect Your Pricing Toolkit - 50% off (11/29 - 12/2)

MotionVFX ➔
30% off Design/CineStudio, and PPro Resolve packs with code: BW30

Rocket Lasso ➔
50% off all plug-ins (11/29 - 12/2)

Rokoko ➔
45% off the indie creator bundle with code: RKK_SchoolOfMotion (revenue must be under $100K a year)

Shapefest ➔
80% off a Shapefest Pro annual subscription for life (11/29 - 12/2)

The Pixel Lab ➔
30% off everything
Toolfarm ➔
Various plugins and tools on sale

True Grit Texture ➔
50-70% off (starts Wednesday, runs for about a week)

Vincent Schwenk ➔
50% discount with code RENDERSALE

Wacom ➔
Up to $120 off new tablets + deals on refurbished items


Download the project file and follow along at home.
-----------------------------------------------------------------------------------------------------------------------------------
Tutorial Full Transcript Below 👇:
Sound Effects (00:01):
[explosion]
Joey Korenman (00:22):
Well, hello again, Joey here and welcome to day 22 of 30 days of after effects. Today's video is really cool. What we're going to try to do is replicate the look of a hand drawn sort of anime style explosion done totally in after effects. I sort of became obsessed with this thing. This effect when Ryan Woodward, who's an amazing traditional animator came to visit Ringling college, where I used to teach and showed how he could just sort of draw these things. The only problem is I can't draw very well. So I decided to try to do the whole thing in after effects. And I'm going to show you every single step that I did to get this result. I'm going to be using a lot of the tricks that I showed you in some of the other videos from 30 days of after effects. And it's going to be cool to see how these building blocks can start to work together, to create something really unique looking, don't forget to sign up for a free student account.
Joey Korenman (01:10):
So you can grab the project files from this lesson, as well as assets from any other lesson on the site. Now let's hop into after effects and I'll show you how this works welcome to after effects people. Um, so this tutorial, I'm going to try and do this a little bit differently, and this is kind of an experiment. And, uh, I want you, I want you guys to let me know how well this works, this little animation here. Um, I sort of forced myself to figure out how to make this, and I've never actually really made anything like this before. Um, and it took a long time. Uh, it took a few hours and, you know, really had to rack my brain to get it to work. And, you know, one of the things that always happens in these tutorials is I just, I don't, you know, I'm assuming you don't want me to make a four-hour tutorial where I go through every step.
Joey Korenman (01:56):
So what I'm gonna do is I'm just gonna kind of walk through this comp and I'm gonna sort of try, I'm going to try to show you every little piece and just kinda talk about it. Maybe show you a couple of things rather than build something from scratch. And then I'm going to give you this project file and let you just tear it apart and we'll see how well that works. So hopefully you guys will dig that. So this is sort of the Anna May, you know, explosion. Uh, we had, when I was teaching at Ringling, we had a guest speaker come named Ryan Woodward. I will link to him in the, uh, in the description to this amazing traditional animator. Um, and he can draw stuff like this. Uh, and actually this particular explosion was inspired heavily. You'll you'll know, in a minute, um, by this artist and he's got his two defects compilation up on Vimeo, which I'll also link to and you can see, I tried to sort of replicate the feel of that and then his reel goes on and it's all really, really cool.
Joey Korenman (02:55):
Um, and I'm pretty sure that most of it is hand I'm sure. You know, when they're straight lines, he's probably using, um, you know, a line tool to do that. But a lot of this is just hand drawn. Well, I'm not that good at drawing people. Um, and I can tell you a dry hand drawing effects. Like that takes a lot of practice. It's very tricky. So I wanted to see how to do it in after effects. So let's start diving in here. Um, this is my final comp, so why don't we just dive all the way back to the beginning here? Um, I've got a lot of layers, a lot of color correction going on. Um, but this right here. Okay. This is a giant oversized comp that I've made, uh, it's 2,500 by 2,500. And I'll explain why it's that size. And this is where I actually built up all the layers that make this explosion.
Joey Korenman (03:44):
Okay. And you know, what I kind of wanted to have was like this initial, um, sort of spark and then, you know, this little like, and then it sucks back in and then there's a pause and then it starts to build and build and build and boom, there it goes. So let's walk through this layer by layer. Um, all right. So what's the first layer I'm going to solo these, this first layer. All right. Actually, let me not show you that one first, that one's a little trickier and I want to, I want to go through some easier ones first. So first let's look at these lines initial lines. Okay. So at first we just have some lines sort of shooting out from the middle of the screen and then the, uh, you know, the last couple sort of sucked back in. Okay. Um, and you can see that there's, you know, some perspective on them and they've got a nice angle to them.
Joey Korenman (04:31):
And that was actually really easy to do. Um, there's another tutorial in this 30 days of after effects series that deals with polar coordinates. And that's exactly how I made this. Uh, if I jump into that comp, all this comp is, let me turn off this adjustment layer for a minute. This is an adjustment layer that has polar coordinates effect on it. If I turn that off, this is actually what that looks like. Okay. And all I'm doing is animating lines. Moving. Let me actually pick one of these and zoom out so you can see the key frames. It's just moving down like that. That's it. Okay. Um, what's cool about this is that I, I, all I had to do was animate one line because I pretty much wanted them all go in the same speed or pretty close. So I animated one line and I made sure that I separated the dimensions of the position, animated, the wide position.
Joey Korenman (05:20):
And then I could just duplicate it. And, you know, just to show you if I, if I duplicate this right, uh, I can either just use the arrow keys and nudge it over, like to the left or the right, right. Or I can actually click and drag it. And it's not going to mess up the key frames at all. Because as long as you only move it on X, you don't move it on. Why your why key frames won't change and you can move it around. And the reason that I wanted them to be kind of all moved around horizontally is because then when you, when you animate lines from the top of your comp down to the bottom, and you put a polar coordinates effect over the whole thing, this is what it does. Okay. And if, if you're unfamiliar with polar coordinates, if you haven't watched that tutorial, I would definitely watch that one first.
Joey Korenman (06:02):
Cause I use it a lot in this. Okay. So that was the first thing I did. I made a bunch of these lines to sort of radiate out and the last few, I actually have extra key frames on, so they come out, but then they, they sort of go back to where they came from. Um, one thing I should have pointed out all of this stuff, I'm animating at 12 frames a second, uh, which is a little unusual for me. I normally do everything at 24 or 30, but because I was kind of trying to mimic that hand drawn look, I thought, what the heck, I'd animate it at 12 frames a second. And you can see that when you do that, it, it adds kind of a staccato feel to it. And it feels like a cartoon. So, um, so I'm glad I did that.
Joey Korenman (06:45):
Right. So there's my lines. And you can see how simple that was. And I literally made one line animated the position, and then I just went through each line. Right. Picked a different color for it. Um, and then I adjusted the stroke with, on some of them, um, here, I'll show you if I, if I adjust the stroke, you can see what it does. Right. The thicker, it is the more, you know, the, the wider, the, uh, you know, this kind of beam is that's shooting out of the center. So there you go. That's how you make the lines really simple. All right. So then the next part, um, I've got these particles here. Let me turn these on.
Joey Korenman (07:22):
Okay. And what I wanted them to do was just kind of suck in like that. Right. And then later on in the animation, when the big explosion happens, there's another copy of this, except they explode outwards. Okay. Now you could easily do this with particular, but I didn't want to use particular. I wanted to try and do this whole thing with native plugin. So let me show you how I made, uh, these particles, this first, this first instance of that, pre-com where they suck inward. That's actually time remapped to play backwards. Uh, the, I actually animated these animating out like that. Okay. So we'll hop into one of these I'll show you exactly what I did. This is really, I mean, it's funny how simple some of this stuff is, but I just did the exact same thing. Um, you know, with the lines, I just sort of animated dots from the top of my accomp to the, you know, somewhere in the, some of the middle like this right now, the key to getting this to feel right is the animation curves.
Joey Korenman (08:26):
Okay. So what I did was an animated one of these balls, right. And I can just solo this one, open up the key frames. And all I did was animated on Y position and opacity. So it, it comes in and sort of disappears, right. That's what it does. And if we look at the Y position animation curve, uh, let me actually switch this to value graph. There we go. So you can see that it goes really fast at the beginning, and then it levels out slowly. So by frame, you know, for it's already most of the way to where it's going to go. And then it spends the next few frames easing in there. Okay. And I did that because I wanted it to feel like an explosion. Now, if we come back here, I spent a lot of time actually went frame by frame through this at some points to figure out how this explosion should look.
Joey Korenman (09:12):
But one thing about explosions that is, you know, really easy to see is that things happen extremely fast when the, when the boom happens right. Really fast, like 1, 2, 3 frames, and then it'll slow down. Right. Um, and it's sort of like the air resistance catching up with the explosion and finally slowing it down. So that's why I animated it that way. And once I animated one of those balls, I duplicated it a bunch of times. And I just basically pulled, you know, I literally would just grab, um, I would grab a layer like this. Um, and I would just nudge it over with my arrow keys left and right. And because I had separated the dimensions, you can move it independently on X and Y without screwing up your key frames that are there. Um, and then the next thing I did, you can see that I've sort of randomly spread all these out in time, just so there's a little, you know, it feels a little bit more organic.
Joey Korenman (10:08):
There's a buzzword for you. Um, the way I built this was originally, they were all lined up like this. Right. And you can see that the key frames are all identical. Um, and so I animated them. I animated one, I duplicated it a bunch of times I spread it out left and right. And then what I did was I went to the second Y position key frame, or, sorry, that's not true at all. Um, it's even easier than that. Uh, what I did was I sort of went layer by layer. So like, I'll pick this layer. And when you ha, when you select the layer that has key frames on it, you can actually see here's key frame one, here's key frame two, and I can click and drag key frame two, and I'm in the middle of the animation, but I'm telling it to go further, you know, by the end of the animation.
Joey Korenman (10:54):
And so I just kind of went and randomly did that for each one. Right. And then when I was done, I just took a minute and I sort of randomly like, went like this. Right. And just kind of spread them out. So let me undo everything I just did. Um, and I literally just handed this. Right. And, and that's, you know, sometimes that's the best way, and it didn't take that long to do it. Took me a little while to figure out that that's what I should do, but that's always the case. Right. So there's my particles, pre comp. And then on that pre comp in my splurge in PC, um, comp here, I've got a polar coordinates effect and that's it that polar coordinates effect makes it look like it's, it's coming either out or in to the center. Um, and again, this first, this first particles pre-com here has been time remapped to go backwards.
Joey Korenman (11:42):
Okay. So this is actually what that animation looks like with polar coordinates on it. Um, one other thing that I did that I think I actually forgot to turn back on, but let me turn it back on. So you see this animation, how it just looks like a bunch of dots. So that's kind of cool, but I have an adjustment layer here with turbulent displace on if I turn that on, and this is another trick I've talked about in a different tutorial, where if you use turbulent displace on an adjustment layer, it lets layers underneath it, move through the displacement. And so you can get these really interesting kind of shapes, right. And it, and it almost looks like motion blur in some cases, see how it's stretching out some of these. And if I go back to this pre comp and we look at that, you can see that it, it looks a lot more like, you know, it looks a lot more random and kind of cool.
Joey Korenman (12:34):
And I actually really like it. Um, one other thing, that's happening on a bunch of these pre comps here, this particles pre-con, for example, I'm rotating it slowly, right. Um, and it's actually more obvious on the lines. If you look at the lines, you can kind of see how they're rotating clockwise. Uh, and that's, that's a really easy actually the lines aren't rotating clockwise in that funny. Um, the particles are rotating clockwise, the lines, the lines I did another way here. Let me, let me hop back into lines. See, this is good. I think if I tried to rebuild this whole thing in front of you, it would just be a nightmare. So I'm going to walk you through it and hopefully it'll stick better. That way, if you notice the lines are moving subtly right to left. And so what I did, and I'm not, I honestly can't even remember why I did it this way.
Joey Korenman (13:20):
It would have been easier to just rotate the rotate, the comp right. In my explosion comp. But what I actually did was I parented all of these to a no, and the Knoll is moving and when you move something right to left and then you put a polar coordinates effect on it, it has the illusion of rotation, right. It actually makes it look like it's rotating D particles pre comp on the other hand does have rotation on it. And whenever I want something to just rotate at a constant speed, I don't key frame it. Um, I put an expression on the rotation, property, time, times a number, that's it. Um, and it's a small number, so it doesn't rotate very fast, but it gives it a little bit of motion. Okay. So there's another layer. All right. So then I've got this circle blast. Oh one and I've got two copies of it.
Joey Korenman (14:12):
Right. And that's really simple. All of that is let's dive in there. This is just an ellipse layer. Right. But I've got it. I've got the size kind of equaled out here, X and Y. So it's a circle. Um, if you look at the scale, I've animated the scale and I've just got it really quickly scaling up and then it just slowly sort of scales up a little bit more. Okay. So again, it's that explosion feel it's like super fast and then really slow. Um, and then I'm also animating the stroke width of it. So it starts out as a thicker stroke and then it gets thinner and thinner and thinner rather than just fading it out. I thought it might be a little more interesting to have it get thinner and thinner and thinner like that. Almost like, you know, the Corona of an explosion sort of dissipating.
Joey Korenman (15:04):
Right. And that's it, um, that that's that layer that was pretty easy. And you can see that a lot of this, the feel of it comes from just timing, these layers out. You can see that, you know, we start with some lines, right. And then the first initial burst, and then there's another one, a couple frames later, and I've just put a fill effect on these to give them some color. That's all I've done. So, so far, all we have are the lines, the particles, and these two circles. Right. And there you go. That's what we have so far. Right. And it's, it's getting there now. Um, the tricky part was this thing. Okay. Um, and I knew that this was gonna be the tricky part. I mean, whenever you look at hand drawn effects like this, they have this amazing quality to them because someone who can draw pretty well can really like shape these explosions into beautiful shapes and, you know, and then even add like shading to them and stuff like that. And it's really cool, but it's also very hard, especially if you can't drop. So I had to fake this. This is actually just all done in after effects. Um, and I was actually pretty impressed with how well it worked out. So let me show you, let me break down how this is working. Okay. So this small burst layer is what you're seeing and I'm going to dive in, and there's a few pre comps in here, right? This is actually what I created that then gets the polar coordinates effect. Right.
Joey Korenman (16:31):
So each of these has some effects on it, but let's first dive into this. Pre-camp here. Okay. You see that, you see how ridiculously simple that is. That's, what's creating that explosion. Believe it or not just that. Okay. I have a shape layer and it's coming in from the top quick and then it shrinks back and that's it, there's a stroke on it. So, you know, the, the center can be a kind of hollowed out. I thought that might look cool. And that's it. What I then did. And let me kind of, let me turn, let me turn these off and we'll just start with the middle one here. Okay. And let me turn off this fill effect. So this is the pre comp of that happening. Okay. Because it's pre comped. If I put a turbulent displace effect on it, um, it's going to let whatever's happening on this layer, move through the turbulent displace.
Joey Korenman (17:27):
And what I've done is I've turned the displacement type to twist. I've cranked the amount up pretty high, and the size is pretty high and I've key framed the offset. Okay. So this is one of the cool things about using polar coordinates is you can, you can have noise move through things. And then when you apply the polar coordinates, it's going to look like the noise is moving. Ratedly radially, like moving outwards from the explosion. Um, if we go back to this, pre-camp here, this one here, and let me turn off everything except this. Okay. Except our little small bursts layer we're looking at. Okay. So this is the polar coordinates version of that. Right. And you can see that it's moving and it's, the edges are kind of wiggling. And that's because I'm, I'm animating the offset of the turbulence. So let me just kind of show you what that does.
Joey Korenman (18:21):
Um, if that was off, for example, it would, it would just look like this. Okay. It would come out and as it's moving, the edges are changing, but when it stops and it hangs there for a second, nothing's changing. So what you can do, all right, let me come way out. Let me come out to here. If I grab this offset turbulence, what, what this is letting me do is it's letting me take the noise field rate. Basically the fractal noise that this effect is creating to use, to displace the layer it's on. And I'm moving it, watch if I take this and I move it, you can see it literally looks like the noise is moving through my layer. Right. And it's directional, you know, you're, I can actually follow it and it looks like there's a direction to it. And so I'm moving it down.
Joey Korenman (19:08):
Right. And what that's going to do is when we go up one level and we get the polar coordinates effect, now it looks like it's moving outwards, which is really cool. So that's what I did, right. I mean, it's, it's crazy sometimes how simple the solution is. Of course, I didn't know the solution. So it took me a long time to figure it out. Then I added a fill effect. Okay. Um, and I thought that, you know, that looked, that looked okay, but it didn't look, it didn't have all the detail that you normally see in these things. So the next thing I did was I just duplicated it and I put a copy underneath. Okay. And on the copy, I used a lighter color. And the only thing I've changed, the, this turbulent displace effect in this one are identical except for the complexity setting.
Joey Korenman (19:54):
Okay. So the complexity was three on the other one. And let me turn this one off and I'll show you as I, as you crank this up, it just kinda gets more and more convoluted. Okay. And the result of it that I really like is it breaks off a lot more little pieces here. And if you have another layer over it, that's similar, but, but a little simpler, it kind of looks like little highlights. And then I did this and I did the same thing I then took. Um, I took another copy. Right. And I made this color lighter and I upped the complexity, but then I put this simple choker effect on it. Right. And let me show you why I did that. Uh, if I turned the simple choker off, so here's my main layer. Right. And let me turn the opacity up on this so you can see it.
Joey Korenman (20:44):
Okay. I wanted this layer to sort of be the main layer, almost like it was shading for it or something. So I wanted to keep the basic shape, but eroded away. And so I use the simple choker. Right. And I just sort of choked it down a little bit like that. And then I turn the opacity down to like 16 or something. And then I have this bottom copy on it. So now you've got all these layers and they're all moving kind of the same. And they all kind of look the same, but they're overlapping. And if you choose a highlight color and a shadow color, and you kind of, you know, it almost looks like what you would do if you were going to draw it. Okay. And when you take that and you put, and you apply polar coordinates to it, now you get something like that.
Joey Korenman (21:28):
Now this one's pretty small because this is the initial one, the next one you'll see a little bit better. All right. So let's move forward. We've got all of these things I've explained. All right. We come to here and you know, really a big part of this is just timing it out. I made sure that everything dissipated and those lines sucked in right there. Okay. Now there's a couple layers up here, uh, that I haven't turned on yet. So let me turn those on real quick, right up here. I have this initial shape. All of this is, this is just a line for two frames. Right. And I did that. So it feels like it's, you know, it's like, um, I dunno, I guess I was thinking it's like one of those cool missiles that goes off in like star Trek where, you know, it sort of sucks everything into it and then explodes.
Joey Korenman (22:14):
And I thought, okay, it's sucking everything in and then exploding. Um, I mean, so you see literally just aligned two frames, uh, and you know, it may seem ridiculous, but two frames on a little explosion animation, like this can actually make a huge difference. Um, all right. So then this, this here, this is a flash frame. Okay. Um, and for you to be able to see the flash frame, I have to turn on this layer down here. This is just a solid layer. Um, and it's just black. It's actually just a black solid. And the reason I needed that was because this flash frame is just a solid, but I made it an adjustment layer and I put an invert effect on it and it's one frame in duration. Okay. So this thing sucks in, and then there's a flash frame and then it goes back to normal.
Joey Korenman (23:03):
Okay. And you know, when you go frame by frame, it looks weird, but when you play it, it looks like an explosion. Right. Um, and you know, let's go back to our reference. I mean, there's a lot, he has a lot more flash frames in his, um, and it's kind of interesting, right? Like how there's like this inversion. Um, but a lot of explosions, if you watch these hand drawn things, a lot of times they'll have a little flash frames thrown in there just to give you that initial burst. Okay. So that's how that is. That's a one frame invert adjustment layer. Um, and I did that again later on in the animation. Um, and then this little fizzle layer is the exact same thing as the initial shape. Right. It's a line that kind of sucks in, except this goes all the way from the edge of the frame and takes three frames.
Joey Korenman (23:50):
Okay. So here's what we've got so far, that's it? Okay. Um, and so far I've shown you every single piece of this so far, and hopefully you guys have been able to follow along. Cool. All right. So then once I had this happen sucks in, I had a few frames of nothing. Um, and this is one of those things that, especially when you're starting out in after effects, it's very hard to let nothing happen. Um, and sometimes that's what you want and, you know, animation. Um, I've actually heard, it said that animation is about the time in between the drawings or something like that. So, um, I had a little pause here, a little pregnant pause, if you will. Uh, and then the secondary lines, let me open this up. So these are working the exact same way as the initial burst of lines. There's just a lot more of them in they're going backwards.
Joey Korenman (24:37):
Right. Cause I wanted it to feel like something sucking in. And if you look at the timing of the layers, you can actually see, it's almost like an animation curve. It starts out with like just one and then a couple more. And then by the end, it's like really building up and they're overlapping, right? So the effect is that it builds up speed and builds up into this big thick tunnel of lines. Um, if I turn the polar coordinates effect off and show you what it looks like, that's it, that's all, it is just shape layers, animated. Um, and if we look at the animation curves, right, it does have that animation curve where it starts slow and speeds up all the way to the end. Okay. So those are my secondary lines. All right. So those build up now at the same time, here we go.
Joey Korenman (25:23):
So this is the slow build burst, and this is another one of these cool sort of cell animated looking things. All right. I'm just going to kind of preview through it so you can see, and this one, I just wanted it to grow. Um, you know, as these things are sucking into it, it's like it's gaining energy. Okay. And you can see that there's a ton of movement to it. And a lot of depth. And then it shrinks really quickly at the end, right. For like one frame right there. It gets smaller for one frame. So let's hop in here and this is the exact same technique. There's more layers to it. Right. So let's walk through the layers. Uh, I've got my more complex kind of highlight layer on the, in the back. Here's our main layer, right. We're actually, that may not be the main layer.
Joey Korenman (26:10):
Yeah. That's the main, that is the main layer. Then I've got this kind of highlight layer, right? So these three layers are the same as what I had in my first burst, but then I also have this fourth layer here where I added a shadow color. And I just wanted this, you know, because this one's on screen for longer. I wanted it to have a little bit more detail. So this one actually has 1, 2, 3, 4, 4 colors, you know? Um, and when they all kind of work together and you can kind of see this starts to crawl a little bit, but let's look at this, pre-com this pre comp, it's just a shape layer animating like this.
Joey Korenman (26:51):
It's kind of, I dunno, it's kind of sad how simple that is. This is actually a nearly linear animation. I just had it ease in a little bit at the end. But then when you go back here, the turbulent displace is doing all the work and I've got it on twist and I've got it cranked up and I'm offsetting the turbulent through the turbulence through it. Right. And let me do a little Ram preview here. And you know, the net result is that you get little pieces that break off and, but then they sort of dissipate and go away and it almost feels like, you know, like flame or something. And it's a very cell looking because I'm just using, you know, four colors, right. Let me, let me zoom out so you can see the whole thing, right? So this is what's going on.
Joey Korenman (27:38):
Oh. And one thing that's, that's kind of important to know too. You see how at the beginning here it's smooth, but then it gets more kind of crazy as it gets away from the edge. I wanted it to be like that. And that's really easy. I'm in turbulent displace. If you leave the default setting on pin, all that basically keeps the effect from affecting the edges of your frame. Um, and if you turn it off, so let me, let me show you, like on this one here, if I, uh, if I turn off pin all and I say none right to do there, I did the wrong one. Here we go. Say none. Now it's going to do, it's going to basically do that effect all the way from the beginning. And I liked how, when you have pin all turned on, right, the edges, it sort of looks like it has, it has to take its time getting there.
Joey Korenman (28:26):
Right. And it just, I don't know, it just works better. Right. So there you go. And then of course, up in our main pre-camp, I've just got a polar coordinates fact on there. Here's another thing I did to this that I forgot to mention. I put a sharpen effect on there. Um, now why did I do that? Well, let's zoom in here and let me actually go, let me solo, just that slow build layer. Let me go to full rest. So you can see this right now. I'm going for a hand drawn look, if I turn off sharpen, right, that's fine. And it kind of looks hand drawn, but if you turn on sharpen and you crank it up, you see how you get a lot more definition to the edges. Um, and you know, it, it's funny, like I used to never use the sharpen effect.
Joey Korenman (29:08):
Cause I thought, you know, if you sharpen something, it's going to add like garbage too. It's going to add these artifacts to it. But sometimes you want that. Um, and sometimes, really if you're, if, you know, if you're subtle with it, which I'm not being here, it just does like a nice job to photos and stuff like that. But I used it pretty heavy handed here because it almost gives you like a little stroke. Um, and I mean, you could really crank this thing. You know, I had it, I think at like 70. Um, but if I'm eating really crank it up and it'll almost give you like a stroke, you know, it's almost like giving you an extra edge on these things. Um, and it's pretty cool. And, and I mean, I got to tell you, like, I probably could not draw this and if I could, it would take me forever.
Joey Korenman (29:52):
Um, so I'm glad I figured out the little trick. All right. So let's go back to half Rez and let's turn all these other layers back on here. Um, let's turn on our fizzle in our flash ramps here. Okay. So we've got our lines that kind of suck in like that. And at the same time you've got the slow build sort of, you know, thing happened here. And then I animated in another pre-camp here. I just animated a circle shrinking in, right. Again, really simple. Uh, if we look at the scale, right, it starts out slow and then it accelerates, um, I duplicated it a few times and I, I changed the scale. Actually. I didn't change the scale I thought I did, but I didn't. Um, and if, and all that does is sort of reinforces the motion that's happening with those lines, right?
Joey Korenman (30:41):
It's like sucking in, like you're getting sucked into a tunnel and then right there, there's a flash frame and then nothing for one, you know, and, and actually, no, nevermind I lied. There is something there, but it's very fast. There's a flash frame on that flash frame. That's where the, the next layer happens. Okay. And the next layer is my quote, huge burst. Huge burst is just another copy. It's just another one of these things. Okay. But this one it's much bigger and it kind of dissipates like this, right? So this is actually the big sort of body of the explosion. Right? Let me, let me do a quick Ram preview of this. Okay. So same kind of deal. It like shoots into frame real quick and then it dissipates and it's got the same sort of setup with layers. Some of the layers have a higher complexity, so you get more detail to them.
Joey Korenman (31:34):
And if we look in here, this, this one is set up a little bit different. Okay. I've got a few different layers in here, but this is what it looks like. Okay. And it's funny. I mean, again, really simple looking, but when you put turbulent displace on and you crank it up, it can make this look crazy. Um, the way I've made this, all right, let me start with my first layer. So I made a shape layer animated at doing this again, pretty simple, right? Let's look at our curves, right. Nothing really special going on, you know, it like jumps up really quickly and then it slows down. I duplicated that and I moved the duplicate backwards in time a little bit. And I set this to, uh, sorry, alpha inverted demands. Okay. And so when, when you have a copy of something and you, you basically set the original to use an inverted mat of the copy, it sort of slowly erases the original one.
Joey Korenman (32:37):
Okay. There we go. Um, and actually it looks like I tweaked the key frames on this second shape layer. So it's not actually doing the same movement. So this first layer, the one you're seeing moves in quickly, but then shape layer to actually looks like it just sort of slowly moves in. Look at the animation curves. You can see that's what it's doing. Right. And settles in. And it's a racing shape one, okay. I should have named these better, but shape two is a racing shape one. And then I also wanted this explosion. So if we, if we kind of stepped back here, uh, and then we can step back here, I wanted that explosion to sort of dissipate. Um, but I wanted it to happen so that it wasn't always this ring of explosion because this one's so big. You can see a lot of detail to it.
Joey Korenman (33:28):
And it starts to look wonky if you stare at it for too long. So I kind of wanted holes to open up in it and for it to dissipate. Um, so what I did was I just used a solid layer. Um, and I animated it so that it just scales open like this. And I duplicated that a couple of times and offset them. So you get, you know, three of these things opening up and the transfer mode, this is the key, the transfer mode on this eraser layer is silhouette alpha silhouette alpha here. If I turn the alpha channel on a trans transparency gun, it actually knocks out whatever is behind it. Right. It makes it transparent. So I very simply created this, which when you add all these effects to it makes this, you can see that's where it starts to dissipate. And then when you put polar coordinates on it, that's when you get this kind of thing. Okay. And you can see it's dissipating into little pieces and it's wonderful. Um, and then I just layered a few other things, right. So I've got another one of these circle animations, right. We're just pops out really quick and slows down. All right. Let me close some of these, um, here's my copy of the, the particles where they actually burst outwards. All right. Let me change my preview range here.
Joey Korenman (34:53):
Okay. Right. So there's the particles. Okay. You can kind of see them there. And actually these, I may want to even delay these a little bit more so we can, we can see them better. There we go. Cool. And then I've got a couple other things here. So this circle, boom, two slightly different, what this is, this is actually a filled in circle going like that. Right. So it starts 0% opaque, uh, sorry. A hundred percent opaque, but very small. And it grows really quickly. And as it's growing, it's fading out same time. Right. So it's just like, it looks like an explosion. Um, and I have that set to add mode. So when I turned that on, you can see that it's kind of like a big flash. And on top of that, I've got this flash frame happening at the same time. So you've actually got one frame of this weird inverted explosion on the next frame.
Joey Korenman (35:49):
It's big and it's kind of blowing out whatever's behind it. Okay. Um, and then the last thing is I just have one more layer of this kind of expanding circle. That's a little delayed and that's it. Uh, I believe that's all the layers, all of them. All right. So one more time. We'll do quick Ram preview of this and you can see there's just, you know, really simple shapes. I guess the only complex thing I did is maybe this kind of cell shaded looking, you know, explosion, cloud thing. Most of the, the feeling of this comes from the animation curves and just very carefully timing things out. Um, so that, you know, there's like this nice sucking back in a pause, and then it sucks in slowly. It builds energy and boom. Right. Cool. So what did I do with this? Well, first of all, let me point out.
Joey Korenman (36:40):
I made this at 2,500 by 2,500. So it's way oversized for an HD comp. And the reason is, um, when you use polar coordinates, uh, on stuff, um, and you can, you can actually see what's happening here, right? It doesn't carry the image all the way to the edge. Um, and so if this was a 1920 by 10 80 comp, all of my image would live in a circular region, you know, like 10 80 by 10 80. And so I would be missing out on all this image information I want. So if you make it oversized, then what you can do, let me hit tab. And you can see all my pieces going into this pre comp, which then goes into explode. So this, this pre-camp here. Uh, you know, this is actually kind of a remnant of, of when I was trying to do something else and then I had bailed.
Joey Korenman (37:30):
Um, but really all this is, this is a 1920 by 10 80 comp with my explosion in it. And that's pretty much all it's going on, but you can see that I've scaled it to fill the frame. Right. Um, and it's not even scaled to a hundred percent and it mostly fills the frame. Doesn't entirely fill it. You see how this, even this edge doesn't quite make it, but I didn't want the explosion to be any bigger than this in the frame. Um, so what I did was I, then pre-com this, and this is where I did all my compositing and everything. Um, all right. So let's kind of step through this, what I've got here. I've got a background color. Okay. Uh, I found a royalty-free image of some stars. Right. And I, I color corrected it. Um, I sit in and that's basically it, right.
Joey Korenman (38:16):
Um, there's my stars. Um, I do have a camera on this. Okay. And the camera's just moving like this, you know, just slowly moving forward. Um, and I've positioned this stars layer pretty far back in Z space so that the explosion can be closer to the camera. This can further away. We'll get a little bit of parallax. Uh, I've also got one of my favorite tricks, uh, which I've done in many tutorials already. Um, optics compensation on an adjustment layer with reverse lens distortion. And that's going to help you get, you know, a, on your stars. It's going to give you a little bit of that tunnel effect, which is kinda cool. You can see the edges move a little quicker than the center. The other thing it does. Um, and let me just turn it off for a minute. If I turn on the explosion layer.
Joey Korenman (39:03):
Right. Um, and I didn't have the explosion start right away. There's a little pause and then it starts, boom. Okay. And here you can see it doesn't reach the edge of the frame, but with my optics compensation on it does. And it doesn't mess with the look of this too much. It actually doesn't change the center all that much, but it just stretches the edges out. Okay. So now it does go all the way to the edge. Cool. So on this explosion layer, let me show you, you just got a couple of effects here, right? So this is what it looks, what it looks like normally. And I mean, it's, I didn't really change it that much. All I did was I added curves to get a little bit more contrast out of it. There's already a lot of contrast, so I didn't push it too hard.
Joey Korenman (39:45):
Okay. Um, and then I used a human saturation effect just to boost the saturation a little bit. Um, you know, and that was mainly for stuff like this. It just, I just want it a little more, if you zoom in, you can kind of see what it's doing. I want it a little bit more pop out of these blues here. Okay. And then I took that layer and I duplicated it. Right. So this, let me turn this on same layer, same hue, saturation, fast blur levels. Um, now the fast blur, this is what's, this is, what's doing this trick here. I basically blur my a blur, my image. Um, it looks like I de-saturated it quite a bit. Let me, [inaudible] let me saturate a little bit more. Um, and it's blurred and I've taken my levels here and let me open this up for you.
Joey Korenman (40:37):
Right. So what the levels is doing is it's just making that glow a little bit brighter. And if you, if you basically take an image, you blur it. Um, and then you add it back over itself. It gives you a glow. Okay. I've got a whole tutorial called better glows and after effects, where I walk you through exactly how to set this up. Um, and now looking at this, I want to tweak it. I just can't help myself. I feel like the glows a little heavy, it's a little heavy. You want to, you know, make a little less, uh, all right. So there's my glow. Right. Um, and, and so, so far, that's all we got. Um, but it, it kind of just, it's just adds a little niceness to it. It's a little nice to have that glow in there. Right. All right. Let's zoom out.
Joey Korenman (41:18):
Let's see what else we've got here. So then moving forward, we get to here now here, this frame here, and I think I actually, I may need to move this. I've got this white frame here, which this is just kind of like an extra flash frame. Right. And I, you know, I could have just put this actually in the explosion print comp, but I thought it would be nice, you know, to just have the control, to see it all in context. So literally this is just the white frame. I'm not a hundred percent opaque, but it just sort of gives it a little bit of a pre-flash before that, the big one. Right. Uh, so then what's going on here? How come? Uh, I've got another copy of my explosion, right? So here's explosion two and explosion two glow. Right. And it's the exact same explosion.
Joey Korenman (42:11):
All I did was I'll actually, I'll show you what I did. The explosion actually came out all the way to the end. And what I did was right here, I split the layer shift, command B we'll split your layer for you pretty handy. So I split the layers of both the glow and the explosion, and I split them. Um, because when, when after this flash frame, when this explosion is dissipating, uh, I actually scaled down the explosion. So the, the scale on this explosion is 1 30, 2 0.8. The scale on this explosion is 100.5. So this is actually bigger. And then there's a flash frame, and now you're seeing a smaller version of it. And you can't tell because, you know, I, I cut on a, um, on a flash frame, but it just, it looked too big. And so I just use that to kind of split it.
Joey Korenman (43:05):
And then what I did was I sandwiched the school of motion logo in between the glow layer and the explosion. Um, so that it w it could sort of look like it was coming from the explosion. Okay. And then no, you know, no comp would be complete without a vignette. So I put a little vignette on there and this one's subtle. All right, come on. People. It's not that bad. Um, and that's it. I've just walked you guys through the entire comp every single layer, every single step. Um, and I feel like this went a lot faster than if I tried to rebuild this thing. Thank you guys so much. I hope you dug this and I'll see you next time. Thank you so much for watching. I hope that was cool. And that you learned some new tricks, and I really hope that you understand now that something that looks super complicated, if you just break it down frame by frame, you can usually figure out that it's made up of a lot of very simple little pieces, especially something like this lines, circles, and some turbulent displace. And there you go. And you're done. You got a nice explosion. If you have any questions or thoughts about this lesson, definitely let us know. Thank you so much for watching and I'll see you next time.
Create Stunning Visual Effects in AE
Learn compositing, tracking, keying, and rotoscoping in After Effects. Enroll in All-Access to unlock VFX for Motion and 50+ other courses.