Learn After Effects the Right Way
Master the After Effects interface and build a real animation skillset. Enroll in All-Access to unlock AE Kickstart and 50+ other courses.

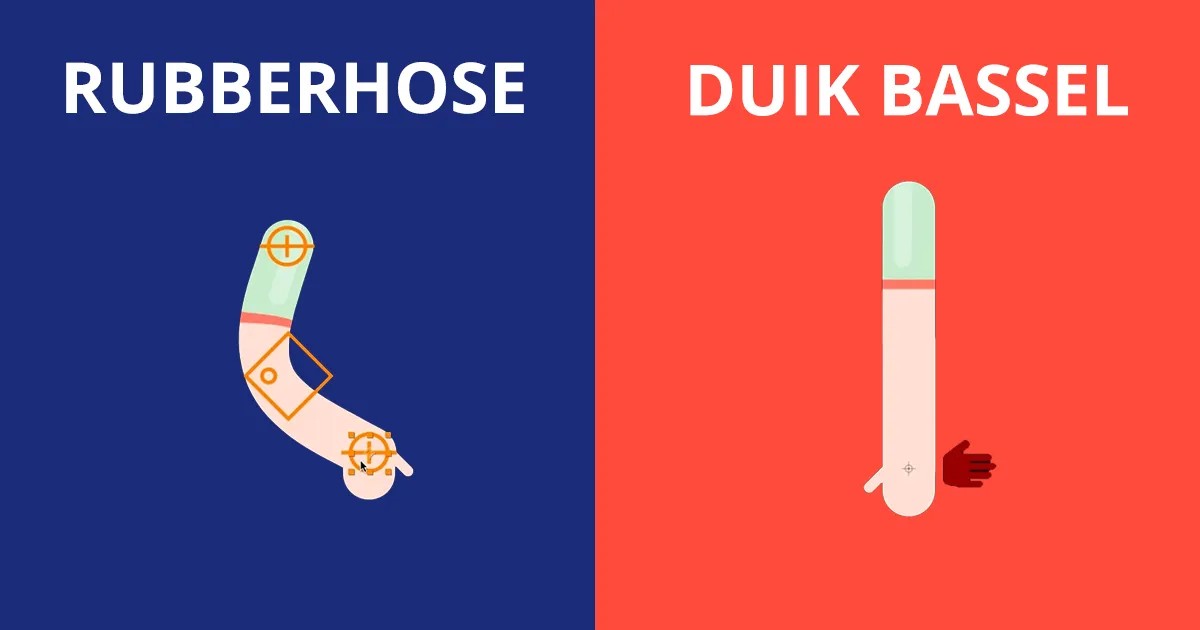
Which character animation plug-in should you use in After Effects? In this video tutorial Morgan Williams compares two amazing character animation tools.
Character animation has skyrocketed in popularity. Thankfully, it's easier than ever before to get into the character animation game. Over time plug-ins like DUIK Bassel and Rubber Hose have become the go-to tools for character animation in After Effects. But which tool is best for animation work? Well, that's a great question!
In this video tutorial Morgan Williams, the instructor of Character Animation Bootcamp and Rigging Academy, will walk us through each plugin. Along the way Morgan will give us insight into the strengths a weaknesses of each tool. So crank up the volume and let's roll that clip...
{{lead-magnet}}
RUBBERHOSE
- Price: $45
Surprisingly enough, rubber hose animation has actually been around for a really long time. Since the 1920s, Rubber hose animation was used as a fast and efficient way to animate a character. The same idea holds true today!
Rubberhose from BattleAxe is a tool inspired by this classic animation style. Using Rubberhose you can create and rig limbs that look a lot like noodles without the ridged look of traditional joints. This leaves you with a whimsical character in only a few mouse clicks.
DUIK BASSEL
- Price: Free
To call Duik Bassel a Swiss Army knife would be an understatement. Duik has almost every feature that you could hope for from a character animation tool. From auto-rigging to inverse kinematics you'll find everything you need to create incredible characters in After Effects. Plus, it's free so... yay.
Want to get into even more detail about rigging a character with Duik Bassel? Check out this video tutorial that I created here on School of Motion.
RUBBERHOSE VS DUIK: IS IT EVEN A CONTEST?
As you hopefully found from this video, both Duik and Rubberhose have their own uses depending on your needs. If you're looking for the fastest rig possible, Rubberhose might be the best tool for you. If you're looking for a professional tool with all of the bells and whistles you need in a pro-workflow, perhaps try Duik. Both are fantastic options.
WANT TO CREATE PROFESSIONAL ANIMATED CHARACTERS?
If you're interested in creating animated characters like a pro I highly recommend that you check out Character Animation Bootcamp. The course is a deep-dive into the world of character animation. In the course you'll learn the ins-and-outs of posing, timing, storytelling and more. Also, if you want to focus more on rigging, check out Rigging Academy. The self-paced course is a great way to master character rigging in After Effects using Duik Bassel.
Best of luck on all your character animation projects!
-----------------------------------------------------------------------------------------------------------------------------------
Tutorial Full Transcript Below 👇:
Morgan Williams (00:11): Hey everyone, Morgan, from school of motion here, I wanted to do a compare and contrast between two very popular character rigging tools that are available rubber hose and do quick. Bassel now in this video, I'm not going to do really any how to lessons in how to use rubber hose or do it facile. I'm going to focus more on their different strengths and weaknesses and why you might want to choose one over the other, or possibly a combination of the two when you're rigging characters. If you want to learn how to use rubber hose and do it Bassel I recommend first checking out the links we've provided to battle axes tutorials on rubber hose. One of the great things about rubber hose is it's very easy to learn and use, and those tutorials will give you a really good start on the basics. Now do it Bassel is much more complicated and there's a lot more to it.
Morgan Williams (01:10): You can get started with my free tutorial on doing a basic Dwek rig, but my rigging academy course at school of motion will give you a much more complete and comprehensive look at how to rig characters in aftereffects with Dick Bassel. Now the simple truth is these are both great tools, and if you do a lot of character rigging, you really should have both of them as part of your toolkit. But before we dive into some specifics, let's just talk about some kind of big overarching differences between the two. Now, one of the real big advantages to rubber hose is that it's incredibly simple. It's very quick to learn. It's very quick to use, and it does what it does extremely well. Now on the flip side of that, it's simplicity comes with the cost of it being fairly limited. It does what it does very, very well, but it doesn't do a whole lot else than what it does now do it facile on the other hand is a much more robust and comprehensive tool overall.
Morgan Williams (02:19): It does a lot of different things, both to aid with character rigging and animation, but it'll also help with all kinds of situations in after effects beyond just character work. It allows you to create many, many different types of rigs, very complex rigs, as well as simple rigs, and is in many ways a kind of one-stop shop for character rigging and after effects. Now all of that comes with the cost of it being more complex. It's in many ways, surprisingly easy to learn and use kind of on the surface level, however, but it has a lot of depth to it. So the learning curve is a little higher and it's a little more time consuming, especially when you're creating more complicated rigs. But again, what you lose in simplicity, you gain in ability when it comes to do it, Bassel now do it is also free, which is a pretty wonderful advantage right there, especially for such a powerful and robust tool, but rubber hoses cost is really extremely reasonable.
Morgan Williams (03:27): And in my opinion, absolutely worth it for such a well-designed and handy tool. So let's dive in and look kind of specifically at the differences and pros and cons of these two really great tools. I want to start by focusing on the thing that rubber hose really does better than any other tool out there. And it's really the thing that I think makes rubber hose really worth the cost because it's a thing that do it Bassel for all of its wonders and there are many really just can't do as well or can't do as well as simply let's say. And that is creating soft, smooth bands with vector artwork at this particular task. There's really nothing out there that can touch rubber hose. So let's take a look at what we mean. We have a rubber hose rig set up for this arm here, and I'm just going to grab the little hand controller and you can see that as we bend this vector arm, we get this beautiful, clean, smooth band.
Morgan Williams (04:33): It doesn't pinch, it doesn't change its its width at any time, it's a pure piece of vector art bending in a pure vector manner that gives you these beautiful soft curves. And this is where rubber hose really, really shines. There's nothing else out there that will give you this so easily. So quickly now, besides just creating these nice smooth bands. There's also a lot of wonderful ability to customize this. You can change the length of the quote-unquote hose. You can change the bend radius so you can actually make it bend more crisply as if there's sort of an elbow and stiff upper and lower arms. Although quite honestly, if you're going to use rubber hose in this way, I would probably recommend switching to do it Bassel and using a jointed rig system quite honestly, but we'll look at that a little bit later. I would honestly use rubber hose really only if I needed this kind of very soft, smooth vector bend the realism control when turned all the way up, which is usually the way I use it, essentially preserves the length of the limb.
Morgan Williams (05:51): Whereas as you turn realism down, you get more of a springy rubber band rather than so much bending. And then the bend direction just allows you to bend the limb backwards and forwards as needed. It's worth noting that this ability to smoothly animate the shift between bend directions is also a subtle advantage that rubber hose has overdoing and that this kind of motion can simulate the force shortening as a limb turns in space, whereas with doing it merely switches from one orientation to another, with a simple checkbox control, which allows the animator to sort of hide that switch from one side to the other within the animation. Ultimately, if you want to create this kind of smooth, soft bending on vector artwork, rubber hose is really the best way to go. You do give up many of the awesome features and abilities that do it Bassel offers, but at the same time in order to get the same effect from duck basle you have to do quite a bit of extra work and you don't get quite the level of control over that arm that you do with rubber hose.
Morgan Williams (07:07): And we'll kind of take a look at that next. So let's take a look at two ways that a dual basle rig can attempt to do what rubber hose does with this kind of clean vector artwork. And then we'll talk about some of the sort of pros and cons back and forth. So the first way that a duke basle rig can create this kind of soft band is by using the puppet tool and do it Bassel is designed to work in conjunction with the puppet tool when desired. So here we have an arm that is rigged with the puppet tool and you can see I get a similar bending ness, but watch what happens when I start to push that band, I start to get this kind of pinching. I lose the thickness of the shape. I'm getting some distortion in this upper arm here that I don't get with rubber hose that maintains the cleanliness of that vector line perfectly.
Morgan Williams (08:08): And this is just a fact of the puppet tool. The puppet tool is a fairly imperfect tool and it almost always creates some pinching. Some distortion you'll notice that the connection between the hand and the wrist here is kind of getting a little wonky as that puppet tool distorts and so on. Now, both of these offer stretchiness, so I can stretch the rubber hose kind of past the length of the arm and I can stretch the duck. Basle rig beyond the length of that arm as well, but I do really lose that clean vector. Look now we've got some detail on this puppet tooled arm that we don't have on the rubber hose arm, but we could recreate that fairly easily in rubber hose. The rubber hose rigging system has a variety of styles available here, including a highlights and a kind of track suit with stripes.
Morgan Williams (09:09): And, and, uh, and it has a knobby knee that's kind of automated, but rubber hose will allow you to create custom presets like our sleeved arm here. If you need a specific look for your limbs. So the biggest disadvantage with duet here is that we lose that perfect vector. Look with the pinching and distorting of the puppet tool and keep in mind, that's not really doing X fault. That's really the puppet tools fault puppet tool is a much more imperfect tool than it should be. And quite honestly, the recent quote unquote advanced puppet tool engine was actually a huge step backwards in my opinion, from the standpoint of character animation, because they really messed up the starching system. As I'm recording this, the brand new after effects has just been released. I haven't had time to install it and test it, but supposedly there are some new additions to the puppet system that I haven't reviewed yet.
Morgan Williams (10:09): So we'll have to see if things get any better, but I am consistently using the legacy engine whenever I'm using the puppet tool for character animation at this time. And just as a general note, I do not recommend the advanced puppet engine for character work. Now, when we start getting into the features that are available on a dual Bassel, I K rig that's when it really starts to just outstrip rubber hose in general. So keep in mind that in this particular case, we're using a puppet tooled arm, but the duck Bassel system basically allows you to create kind of a, just a basic arm structure and rig. And then the differences just come and how you separate and attach the artwork, whether it's just directly parented in what I call a jointed rig or whether it uses puppet pins. As in this example here, it's also worth noting that a very thick arm like this is particularly bad for puppet tooling because of the massive amount of pinching.
Morgan Williams (11:14): If this arm were a little thinner, it would behave a little bit better and you would get less distortion than we're getting in this case with this very thick arm. So keep in mind, we're not showing you every variation here. And the puppet tool is always weaker with kind of thicker artwork like this, but let's take a look at some of the features available with a DUIK Bassel rig here. One of the things that do it Bassel offers is the ability to zero out the position value of controllers. And this is really significant because here, for example, on this rubber hose rig, I've now moved this controller around, which means if I want to return it to its neutral position with that arm, nice and straight, I have to kind of search around for it and maybe I'll hit it. And maybe I won't. Whereas with the basle rig, I've zeroed out its position value.
Morgan Williams (12:08): So all I have to do is just type in zero, zero to the position and it returns exactly to its neutral position. And of course, rotation has already zeroed out essentially just by default. Now, if you have duke basle, you can zero out the controllers on a rubber hose rig. I'm not going to do that in this instance because I don't exactly know where that neutral position is anymore. I've lost it, but that's exactly why the zero out script is such a nice addition to do it. Bassel do it. Bassel also allows for free customization of its icons once you've created the rig. So I can change the offset position of the icon. I can change the size of the icon.
Morgan Williams (12:57): I can change the orientation of the icon. It's a pasty, all of this can be tweaked so I can put my controllers where I want them make them the size. I want them a color. I want them anything I want with rubber hose. There is some ability to control icon size and color and so on in these preference settings. But once the hose is created, they are fixed and I can't change them after the fact, uh, just like rubber hose, a DUIK Bassel rig also allows you to reverse the orientation of it's bending. But again, this is just a checkbox switch to pop the orientation of the band from one side to another. But unlike rubber hose, I can actually turn the Ika system, the inverse kinematics on and off, and I can make my rig and FK or forward kinematic rig, as I wish.
Morgan Williams (13:59): And this can be animated on and off in the midst of an animation. This is very powerful because there are times when FK is a better choice for animating a limb than I K, especially when you're creating overlap and follow through. So I can disable. I K and then I can use these controls here to move my arm using forward kinematics. Now, speaking of overlap and follow through, which is more easy to animate with an FK system, DUIK Bassel even offers automatic overlap and follow through, which is pretty insane. So I can enable follow through here. And then I can simply animate the rotation of the limb at the top joint there.
Morgan Williams (15:06): And I get automatic overlap and follow through that is pretty amazingly cool. I can tweak the flexibility and resistance of the overlap and follow through. It's pretty darn awesome. Now the truth is this is really just the beginning of the huge number of tools and features and possibilities with doing Bassel. The list is really kind of ridiculous when you start to lay it all out. The auto rigging system, for example, will basically auto rig any structure that you put together, an animal, a bird, a monster, a human individual parts, whole entire rigs can all be rigged with one click of a button, even very, very complicated rigs. The auto rigging is incredibly powerful. The ability to create many different types of structures, tools for constraints and, and automation, including Springs and wiggle systems. And with complete auto rig bipedal, you can create an automatic procedural walk cycle with many, many variables.
Morgan Williams (16:15): My free basic doing basil rigging tutorial on school of motion talks through how to use this. It's pretty great. And again, we're still just scratching the surface here of what's possible with DUIK Bassel. So there's, there's a lot here. And again, this is where do it. Basle starts to kind of outstrip pretty much all of its competition to one degree or another. But as I said, rubber hoses ability to create these clean vector bands as quickly and efficiently as it does is its greatest strength. However, we can create a very similar rubber hose type of rig Induik with a little bit of extra work. So let's take a look at that. So here we have two essentially identical rigs here. These are both doing basle rigs, which means they were created by making arm structures and then auto rigging them. And remember, as I said that, the way DUIK Bessel works is the structures and the rigs are all essentially the same.
Morgan Williams (17:20): And then the only real difference comes in how you attach the artwork. So in this case, in order to get closer to that rubber hose type of rig, what we've done is we've attached vector shape layers directly to our DUIK structure and our DUIK rig. And the way we did that was by using the add bones script in older versions of doing the add bone script was originally created to attach puppet pins, to control layers, but in doing basle, as long as you're using CC 2018 or higher, the bone script will also attach the vertexes and Bezier handles of vector masks and vector shape layer paths to control layers. Now, this is a fantastically useful thing with implications way beyond character animation, because once you connect those vertexes and Bezier handles to control layers, now you can parent them have them animate along paths and all kinds of possibilities are opened up.
Morgan Williams (18:28): So let's just take a very quick look at how this works. I'm going to grab the pen tool here, and I'm just going to draw a little vector path here really quick. And all I have to do is open up the path here, select that path and hit the add bone script. And I get these control layers that will now allow me to drive this vector path. And you can see that I've got busy A's for the Bezier handles. I've got, uh, Vertex, uh, points here. So I can move this in any way I want. And it's a little confusing here, but you'll see these orange controllers here are basically the vertexes and the blue ones are the in and out Bezier handles, which are automatically parented back to those vertexes. So, as I said, crazy useful, if you think about it for two or three seconds.
Morgan Williams (19:30): Okay. So what we've done here, and let's take a look at this first one here, we've created stroked paths for these arms, and then we've run that bone script to create those controller layers for that vector path. Then we parented the vector anchor points here to the structures, hand, forearm, and arm to connect it to our doink rig. Now that's all awesome. Still a few more steps than you would need for a rubber hose rig, but it gets us very close to that rubber hose look, however, there's a problem that we have to solve. So let's take a look about if I pick up this controller and move it, you can see that I'm getting really not quite the smooth band that I want at that joint. And the reason for that is let's turn on our controller layers here. The reason for that is as the Vertex here at the elbow, rotates along with the forearm, because the Bezier handles are also parented to that.
Morgan Williams (20:39): They also rotate. And so we get this not very attractive curve here on this. So that's obviously not what we want, but there is a way to fix this. So let's turn off these layers here and let's take a look at our other one and we'll fix the problem here. So I'm going to bend this army and see we've still got the same issue. We've got the same problem, but we can solve this by using the orientation constraint script here in duke Bassel. So the orientation constraint basically uses an expression to tie the rotation of one layer to the rotation of another layer. So what we can do is take this forearm Vertex here and I'll turn it, turn it on. We can turn on its Bezier handles as well. So we can see what's happening here. And I'm going to add two orientation constraints to this layer.
Morgan Williams (21:35): Then I'm going to choose the first one here and I'm going to constrain it to the right arm structure, but I'm going to give it a weight of 50%. Then on the second orientation constraint, I'm going to choose the right forearm structure. And I'm also going to set that to 50% and there we have a perfectly, even out curve on our arm balancing the rotation of that Vertex with the Bezier is parented to it. So now everything works just like we would want it to, as we position this arm, the rotation of that Vertex adjusts automatically, and we get exactly the curve that we want. Now, this gives us something very close to a rubber hose rig, but obviously quite a few more steps. It's not as automatic. And we don't have all the levels of control that we have automatically with a rubber hose rig, but we can add back some of that control.
Morgan Williams (22:37): Again, it just takes additional steps and it has to be done manually. So for example, on this particular rig here, I have rigged up an arm curve control that is very similar to the arm curve control in rubber hose. So I can make my curve bigger or smaller or all the way down to a sharp elbow, just like you do with rubber hose. But again, this had to be done manually. And the way I did that was by using the awesome connector script. Induik Bassel, the connector is an extremely powerful script. And one of my favorite things about duke Bassel in a lot of ways, it's very similar to joysticks and sliders, but it's kind of joysticks and sliders on steroids. The connector basically allows you to take any property and have it drive any amount of animation on any number of layers. So to create this little arm control here, what I did and let's unlock these two layers here and take a look.
Morgan Williams (23:39): I created an animation on these. Bezier handles to have them move into the Vertex and back out again, they're sort of neutral position in the middle here. I then use the connector to connect that animation to the slider controller here on my right hand controller. So now when I move the slider down, it runs the animation from the middle here downward. When I move the slider up, it moves it from the middle upward. Basically just drives that animation with that slider control. And if you want to learn more about using the connector, check out rain boxes, do it page for some documentation and tutorials on how that works. Or if you take rigging academy, my course at school of motion, we use the connector quite a bit and I show you a few different ways. You can use the connector and character rigging, but the connector is again, one of those things with implications that go way beyond character work.
Morgan Williams (24:41): Now you could continue to rig up additional controls to get this arm rig closer and closer to a rubber hose rig. For example, you could attach a position control to the Vertex layer here in order to simulate the lengthening and shortening of the hose that control that comes automatically with rubber hose. But again, all of this would have to be done manually. Another difference here from the rubber hose rig is that it would be a lot more complicated to create an arm that wasn't just a path with a single stroke on it. If you wanted stripes or a sleeve or anything like that, that would become a more difficult prospect, not impossible, but it would get fairly complicated. So even though we can essentially create a very similar kind of rig Induik to a rubber hose rig, there are clearly some disadvantages and it takes a lot more steps and a lot more manual work to get there.
Morgan Williams (25:41): Although what you would gain from that extra work is all of the features do it offers IKS FK switch, automatic overlap and follow through customizing your controller, icons, all that kind of good stuff. And again, kind of underlines the idea that you can do a lot more stuff over all with duke basle, but you have to accept a higher level of complexity and a little bit of a steeper learning curve. Now let's move on from this idea of soft bendy arms. And let's take a look at what I usually call jointed arms, which is simply separate artwork for the upper and lower arm jointed at the elbow. Now, once we get into the world of jointing, once we get away from that thing, that rubber hose does so beautifully, the curved vector shapes do it basle starts to really take the lead. So note that with the Dudek Bassel rig here, we have a really nice, beautiful, clean elbow.
Morgan Williams (26:50): We have a clean joint here at the wrist. Everything looks really, really sharp. And this is partly because we've designed this character with perfectly circular overlaps at the joint. So we get these very, very clean bends between the jointed elements also allows us to have artwork that has texture or detail on it, which is more limited both for rubber hose. And if you're using a vector shape with Dwek Bassel and notice that we're pivoting perfectly at that elbow, we're also pivoting right in the center of the circular overlap here at the shoulder and at the shoulder and at the wrist, we've got all the same advantages we looked at before, the ability to control the icon, look and position, and we have all the wonderful Ika controls, including the ability to turn Ika on and off automatic overlap and follow through all that kind of good stuff.
Morgan Williams (27:52): Now, in this case, we don't have the ability to stretch because there's no puppet tool on this in order to get that kind of stretching, you have to use the puppet tool in my rigging academy course, we show you a method called blended joints that allows you to have a jointed, a nice clean jointed rig like this, along with stretchiness, but on its basic level, you don't get the stretchiness with just a basic jointed rig it'll stretch, as you can see, but the pieces come apart. And what is usually best to do in that case is actually turn auto stretching off so that as you move the controller beyond its length, the arm stays together. That's usually a little more desirable in those cases. Now with this type of rig rubber hose runs into some problems. Now, some of those problems have to do with how you set up your artwork.
Morgan Williams (28:49): And in this particular case where we're trying to create these clean circular overlaps, rubber hose has a really tough time with that. And the reason for that is how you create. And the reason for that is the method by which you create what is called a rubber rig, which is a rubber hose style rig that utilizes different pieces of vector artwork, jointed pieces. So let's just take a quick look at battle axes website, where they have a really quick explanation of how this rig is set up. So note that part of the system is that you have to actually move the artwork away from its position on the body, and you have to center the joint, the knee or elbow joint in the center of the composition, and then select the two pieces in order to create the rubber rig. Now, this has two distinct disadvantages.
Morgan Williams (29:51): One of them is that you simply can't rig the body part as it is aligned to the figure, the way you design the character, you have to rig it and then move it back into place, which can definitely be a pain in certain situations. But the bigger issue, in my opinion, is it doesn't allow you to control precisely where the anchor point of the hip and the ankle or the shoulder and the wrist joint are on the artwork. Now, again, with certain types of rigs, this wouldn't be a problem, but with many types of rigs, it will be a huge problem. In our particular rig is an example of one where we really need precise placement at the hip or shoulder and the wrist or ankle. So let's take a look at that. So here we've created that rubber rig on this jointed arm, and you can see if I pick it up and start moving it initially it works pretty good.
Morgan Williams (30:53): Although if I start to bend it a lot, you can see that I start to kind of lose the alignment here of the elbow. It's not as clean because it's really hard to get that center position exactly. Right. But also know that it is not rotating in the middle of the shoulder where it would need to, as it's laid on the artwork, it's rotating at the top of the shoulder, which is really not what I want. What I want is this. I want it to rotate in the middle of the shoulder, but I have no way to control that with a rubber rig. I can't position this where I want it. The script, basically just places the shoulder control and the risk control at the ends of the artwork. Now that's a particular problem here at the wrist because now if I try to bend the wrist, whoops, that does not work.
Morgan Williams (31:46): And again, I have no control over that. It's simply going to place those anchor points on those controllers, where it wants to, that's a huge problem. In many situations, again, with some types of rigs, with some types of artwork that wouldn't be such a big deal, but it's certainly a big deal with this particular rig that I'm trying to create here. Now, there are some advantages here. One of them is that I do get stretchy. I K without any puppet tool at all, which is really nice. But again, there's a way to do that with duck basle as well. And we talk about that in rigging academy. There's also this, which is kind of neat, which is that I can move the center bias and I can actually change the length of the upper and lower arm. I can create shortening effects and so on with that center bias, which is kind of neat, but notice that it pretty immediately starts to pull that elbow joint out of whack.
Morgan Williams (32:50): So in the example, on battleax you'll note that there wasn't sort of an overlap at the elbow. The artwork kind of came to a point right there. So if your artwork is designed that way, this would work pretty well. Doesn't work so good when you want to have this kind of overlap happening. Now, you can also create a rubber hose rig using puppet pins, and that's called a rubber pin rig. And we've got that set up here. Now the advantage here in the rubber hose world is that I can now actually control the position of my upper and lower controllers, but in many ways, there isn't any good reason to use this because I also get all the disadvantages of the puppet tool, the pinching, the lack of cleanliness of the band, all the stuff that makes the puppet tool difficult to work with, especially with very thick limbs like this, all those disadvantages kind of come back.
Morgan Williams (33:55): And at this point, there's very little advantage to using rubber hose for this type of rig. And we already looked at this exact same rig with Derek Bassel. Uh, this is the same one we looked at in that first composition. So we have those disadvantages where the puppet tool is concerned, but we get all the advantages of the control over the controllers. The [inaudible] switch, the automatic overlap and follow through all that kind of good stuff. So this is another area where if you're not using rubber hose for the thing it does best, which is those soft bendy vector curves. You're probably better off moving to do it. Basle because it has so many advantages. Now, of course, we can add starch to a puppet tool to create more from upper and lower arms. And we've done that here, but again, there's not really any advantage to using rubber hose here.
Morgan Williams (34:59): The advantage is still pretty firmly with dual basle in this case, because of all of the additional features you get, as well as things like auto rigging and auto walk cycles and all that kind of fancy stuff that you get with duck. But it's certainly possible to use rubber hose in conjunction with [inaudible]. And we talked already about how one thing you can do is simply use do X zero out script that we talked about before to zero out your controller positions so that you can find that those so you can find those neutral easy. That's certainly an easy way to utilize some of the aspects of doing along with rubber hose, but we can take it even farther. And we can actually use a rubber hose attached to a doink rig in order to get some of the best of both worlds. And let's take a look at that with this last composition here, these legs, one of the biggest advantages with [inaudible] is in its auto rigged system for legs and feet.
Morgan Williams (36:07): And it comes in the way do it basle handles the foot rigging. So we still have the ability to tweak the controllers. We still have the IKK FK switch and the overlap and follow through the automated overlap and follow through all that good stuff. But when you do an auto rig on a leg and a foot structure with Derek, Bassel, you also get this wonderful set of foot controls, which allows you to, for example, wiggle the toe, go up on tip toe, roll back on the heel. And perhaps most importantly, create a foot roll where you roll back on the heel and forward on the toe like this. This is extremely powerful for creating walk cycles. It's really, really terrific. So this is very, very powerful and something you literally get with one click of the auto rig button after you create a leg structure in doing now, what if you want that you want all this great control over the foot, but you also want that smooth bendy vector look of rubber hose.
Morgan Williams (37:25): While you can simply create a rubber hose and let's take a look at what we've done here on this other side, you can simply create a rubber hose and here it is on the right leg. So here is our rubber hose and we are using a particular style of rubber hose, which is the tapered hose that allows me to have a thicker top and bottom here. And we've simply created that. And then simply parented the two controllers, the ankle and hip controller, right to our doink structure, which is living right here. So here's our duck structure. We can turn the visibility of that on real quick. So there's our doing structure that has our rigging and we simply parented the ankle and the hip right into that structure, the hip to the thigh, the ankle to the foot. So now when I pick up my controller here, I get that lovely rubber hose band on the leg, but I also get all of my awesome foot controls that do it provides, and it all works really nicely together.
Morgan Williams (38:47): Now, one of the things that you sort of lose in this particular situation is the control over the rubber hose that is all attached to the ankle controller. And you generally want, you know, all the bits and pieces of your rig kind of hidden away. So you're only dealing with one controller for the leg. So I could simply turn this on and make this part of my visible rig. That's certainly one option. But the other thing that I could potentially do is simply take some of these controls and connect them to my foot controller. So for example, I could take the hose length control here, and I could go to the right foot and I could simply add a slider and call it hose length, can lock my effect, control window, and then open that same effect here on the ankle controller. And I can just connect that to the slider and then set the hose length to the same length we had before.
Morgan Williams (40:02): And then now I can shut this away and hide this. And I still have that control over the length of my hose. So I could do that with all of the controls, if I wished, and then I would have all the controls of the rubber hose attached to my duet controller. So there's ways around this, again, takes a little bit of extra time, but really not all that difficult. Now, the other great advantage of combining the rubber hose along with the doink rig is that now I could, for example, use the awesome procedural walk cycle tool, and it could have rubber hose, legs, rubber hose, arms, but as long as it was attached to a [inaudible] rig, I could use that procedural walk cycle and get all those advantages. So a great way to get the best of both worlds out of duck Bassel and rubber hose.
Morgan Williams (41:01): So I hope this little comparison and contrast between rubber hose and do it has given you a good understanding of the strengths and weaknesses of these two terrific tools. In my opinion, they're both awesome, especially because some of the things rubber hose can do are really quite difficult in doing so. Using them in tandem is a really smart approach. If you do a lot of character rigging, I honestly recommend them both and consider both of them a must have in your character rigging toolkit. If you're interested in learning more about animating these types of rigged after effects puppets, be sure and check out character animation boot camp at school of motion. And as I already mentioned, rigging academy will give you a deeper and more comprehensive guide to rigging characters and after-effects with Dwek Bassel.
ENROLL NOW!
Acidbite ➔
50% off everything

ActionVFX ➔
30% off all plans and credit packs - starts 11/26

Adobe ➔
50% off all apps and plans through 11/29

aescripts ➔
25% off everything through 12/6
Affinity ➔
50% off all products

Battleaxe ➔
30% off from 11/29-12/7
Boom Library ➔
30% off Boom One, their 48,000+ file audio library
BorisFX ➔
25% off everything, 11/25-12/1

Cavalry ➔
33% off pro subscriptions (11/29 - 12/4)

FXFactory ➔
25% off with code BLACKFRIDAY until 12/3

Goodboyninja ➔
20% off everything

Happy Editing ➔
50% off with code BLACKFRIDAY

Huion ➔
Up to 50% off affordable, high-quality pen display tablets

Insydium ➔
50% off through 12/4
JangaFX ➔
30% off an indie annual license
Kitbash 3D ➔
$200 off Cargo Pro, their entire library
Knights of the Editing Table ➔
Up to 20% off Premiere Pro Extensions
Maxon ➔
25% off Maxon One, ZBrush, & Redshift - Annual Subscriptions (11/29 - 12/8)
Mode Designs ➔
Deals on premium keyboards and accessories
Motion Array ➔
10% off the Everything plan
Motion Hatch ➔
Perfect Your Pricing Toolkit - 50% off (11/29 - 12/2)

MotionVFX ➔
30% off Design/CineStudio, and PPro Resolve packs with code: BW30

Rocket Lasso ➔
50% off all plug-ins (11/29 - 12/2)

Rokoko ➔
45% off the indie creator bundle with code: RKK_SchoolOfMotion (revenue must be under $100K a year)

Shapefest ➔
80% off a Shapefest Pro annual subscription for life (11/29 - 12/2)

The Pixel Lab ➔
30% off everything
Toolfarm ➔
Various plugins and tools on sale

True Grit Texture ➔
50-70% off (starts Wednesday, runs for about a week)

Vincent Schwenk ➔
50% discount with code RENDERSALE

Wacom ➔
Up to $120 off new tablets + deals on refurbished items


Learn After Effects the Right Way
Master the After Effects interface and build a real animation skillset. Enroll in All-Access to unlock AE Kickstart and 50+ other courses.