
Learn After Effects the Right Way
Master the After Effects interface and build a real animation skillset. Enroll in All-Access to unlock AE Kickstart and 50+ other courses.

Save some money with these 5 free After Effects tools.
As a Motion Designer it can be easy to be in a constant state of spending and saving money for plugins and tools. So today instead of spending money we’re going to take a look at a few of our favorite free tools in After Effects.
ENROLL NOW!
Acidbite ➔
50% off everything

ActionVFX ➔
30% off all plans and credit packs - starts 11/26

Adobe ➔
50% off all apps and plans through 11/29

aescripts ➔
25% off everything through 12/6
Affinity ➔
50% off all products

Battleaxe ➔
30% off from 11/29-12/7
Boom Library ➔
30% off Boom One, their 48,000+ file audio library
BorisFX ➔
25% off everything, 11/25-12/1

Cavalry ➔
33% off pro subscriptions (11/29 - 12/4)

FXFactory ➔
25% off with code BLACKFRIDAY until 12/3

Goodboyninja ➔
20% off everything

Happy Editing ➔
50% off with code BLACKFRIDAY

Huion ➔
Up to 50% off affordable, high-quality pen display tablets

Insydium ➔
50% off through 12/4
JangaFX ➔
30% off an indie annual license
Kitbash 3D ➔
$200 off Cargo Pro, their entire library
Knights of the Editing Table ➔
Up to 20% off Premiere Pro Extensions
Maxon ➔
25% off Maxon One, ZBrush, & Redshift - Annual Subscriptions (11/29 - 12/8)
Mode Designs ➔
Deals on premium keyboards and accessories
Motion Array ➔
10% off the Everything plan
Motion Hatch ➔
Perfect Your Pricing Toolkit - 50% off (11/29 - 12/2)

MotionVFX ➔
30% off Design/CineStudio, and PPro Resolve packs with code: BW30

Rocket Lasso ➔
50% off all plug-ins (11/29 - 12/2)

Rokoko ➔
45% off the indie creator bundle with code: RKK_SchoolOfMotion (revenue must be under $100K a year)

Shapefest ➔
80% off a Shapefest Pro annual subscription for life (11/29 - 12/2)

The Pixel Lab ➔
30% off everything
Toolfarm ➔
Various plugins and tools on sale

True Grit Texture ➔
50-70% off (starts Wednesday, runs for about a week)

Vincent Schwenk ➔
50% discount with code RENDERSALE

Wacom ➔
Up to $120 off new tablets + deals on refurbished items


Download these project files to follow along!
Note: All of these tools are free, but if you want to send a little money to the developers it would be greatly appreciated.
1. Buttcapper
Buttcapper wins the award for silliest name on this list, but (pun intended) this free After Effects tool is super handy for shape work. In a nutshell, Buttcapper (let’s be adults here…) allows you to change the end caps of your shape layers with a set of buttons. This will save you from adjusting your butts in the dropdown menu. Buttcapper can also be paired with the FT Toolbar for even faster butt-cap access.
If you read that paragraph without smiling you are way more mature than me...
2. Redefinery Scripts Bundle
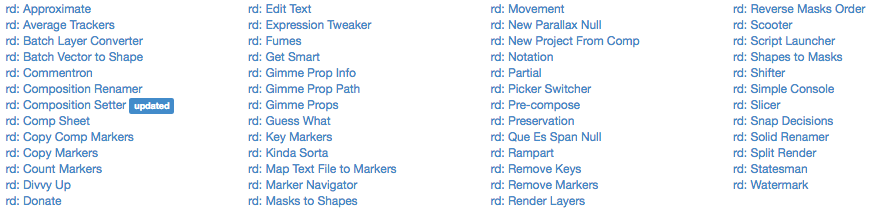
The Redefinery Script Bundle is a huge pack of free scripts in After Effects. The 51 piece collection isn’t easily defined because there are simply so many different uses for the scripts. Here’s a few of our favs:
Composition Setter
Normally if you want to change the duration of a composition you have to adjust all of the layers inside after you adjust the duration and if you have pre-comps you have to go in and adjust each comp by hand. Composition Setter allows you to change the duration of a composition and adjust all of the layers and compositions inside to match the new duration. Needless to say this is much more convenient than adjusting all of the layers by hand.
Masks to Shapes

Masks to shapes does exactly what the name implies. If you want to convert a masks into a shape just use this script and you’ll create a new shape.
Notation
Notation is a simple little script that allows you to write notes inside your composition. These notes can then be shared and saved with other collaborators on your project. It’s like a simple version of Frame.IO or Vimeo right inside of After Effects.
There are dozens of other awesome effects over on the Redefinery website. Go check ‘em out and let us know if you find any helpful uses for them.
3. Creative Cloud Libraries
If you’re reading this blog post then chances are you’re already a subscriber to the Creative Cloud. However, even though most Motion Designers subscribe to the Creative Cloud, I’m always blown away at the number of people that don’t use Creative Cloud Libraries on their Motion Design projects.
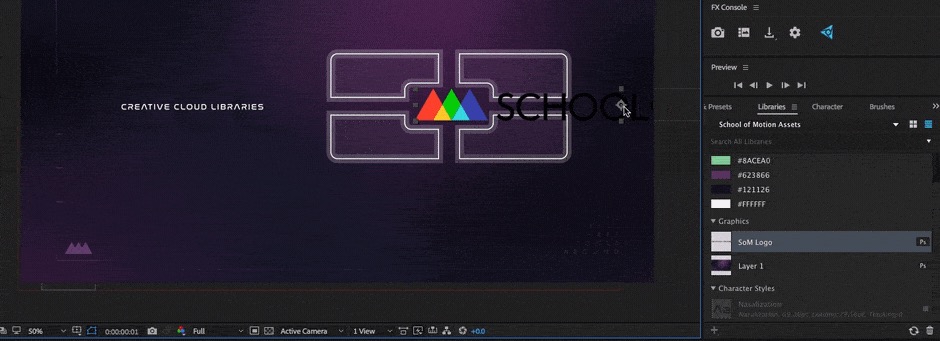
Creative Cloud Libraries allow you to sync and share assets across all of your Creative Cloud applications. The cool part is if you’re a subscriber to the Creative Cloud than you already get 100GB of space for free. It's like Dropbox for Adobe applications. Sync-able assets include:
- Color Palettes
- Logos
- Image Assets
- Music
- Text Styles
- Sound Effects
- Project Files
Needless to say, sharing assets on the cloud is super powerful and a real time-saver. This video created by Adobe gives you the basics of how to use Creative Cloud Libraries on your projects.
4. DUIK
DUIK is one of the best After Effects tools ever made. The tool is essentially an all-purpose Character Rigging panel in After Effects. By using DUIK you can get your entire character ready for animating in After Effects. Without it the process of rigging would be super painful, with DUIK it’s only kinda painful.
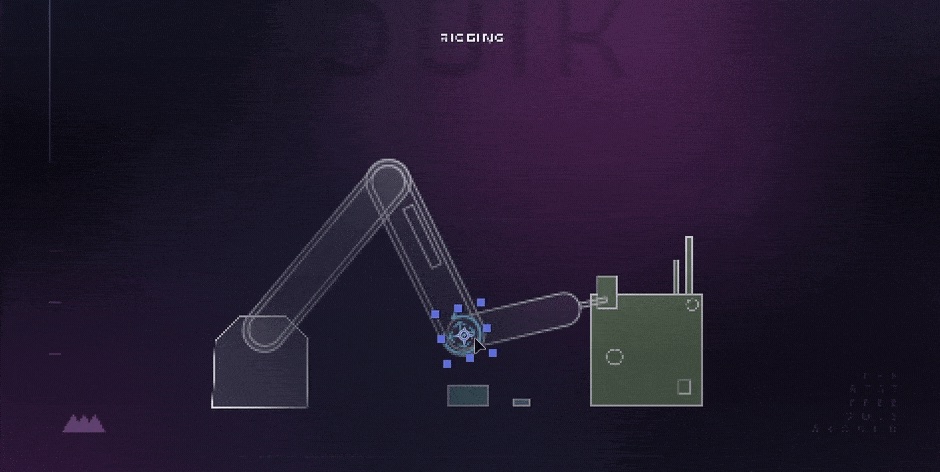
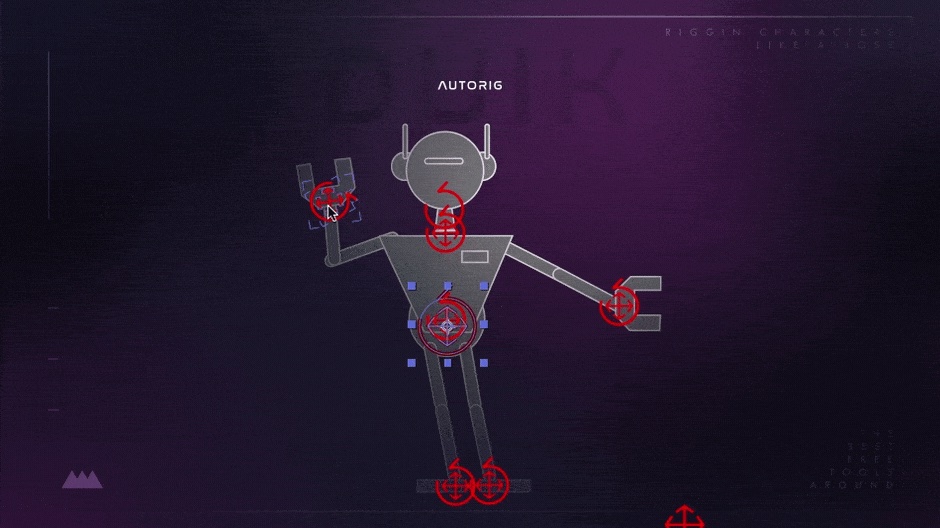
Autorigging
DUIK has a too many features to cover them all here, but the most powerful tool is the autorig feature that automatically rigs up your character in After Effects. All you have to do is define your body parts and DUIK does the rest.
DUIK is actually the main tool used in Rigging Academy and Character Animation Bootcamp here on School of Motion. If you’re serious about character work they are the best place to start.
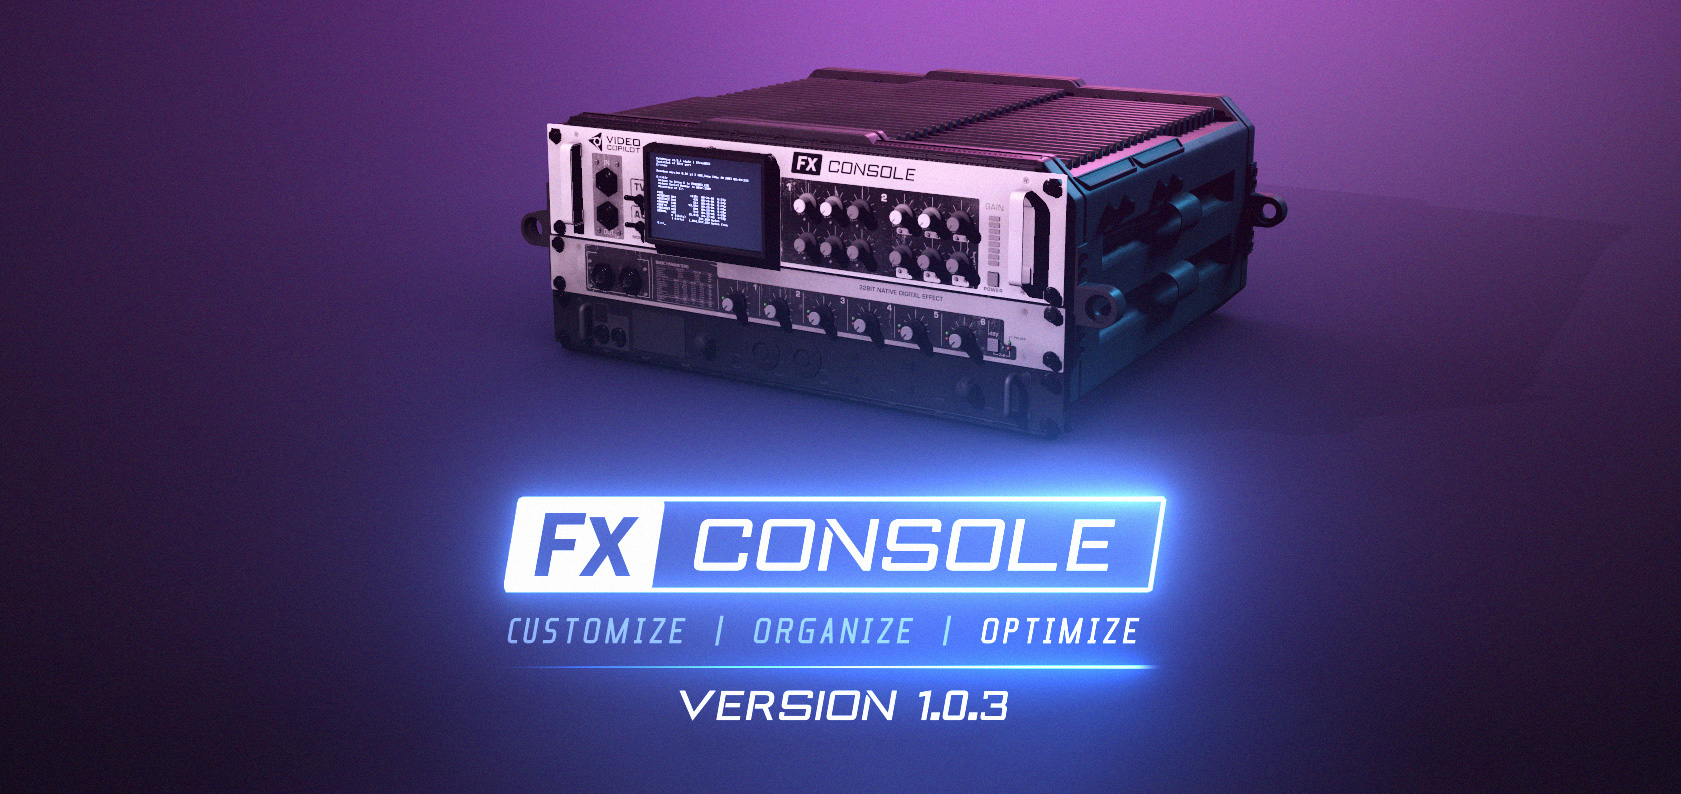
5. FX Console
FX Console is an incredible free tool developed by Andrew Kramer and gang at Video Copilot. The tool is essentially a keyboard activated search engine for effects in After Effects. Instead of using the normal effects browser you can just use FX Console to apply an effect without ever touching the mouse.
Using FX Console you can map your favorite effects to keyboard numbers so you don’t even have to type in their name. It’s pretty dope.
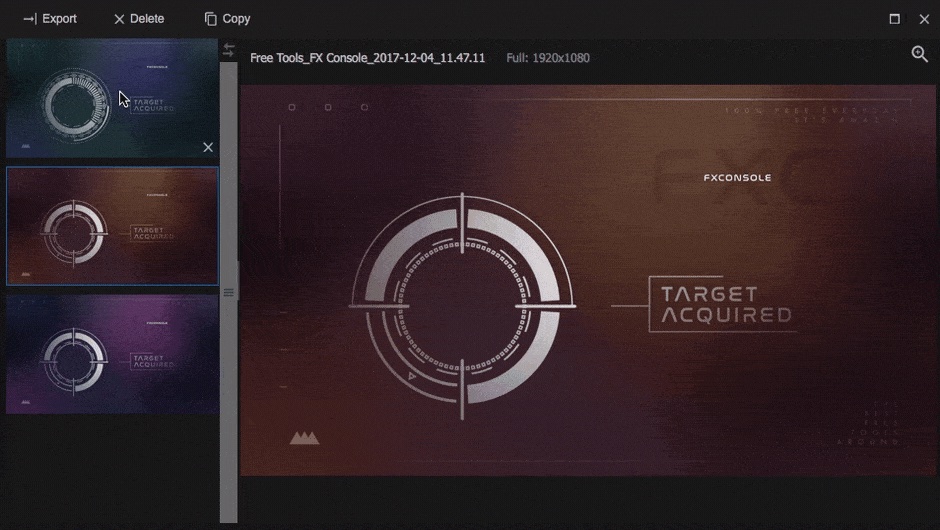
Image Browser
FX Console even takes it one step further by including an image browser so you can save and compare screenshots. These images can be saved to the clipboard and copied into any other application. I don’t know how they created this tool, but I guess they have a few wizards at Video Copilot HQ.
That’s all of the free tools on this list. Now stop reading this article and go out and install them on your machine.
-------------------------------------------------
Full Tutorial Transcript Below:
Caleb Ward (00:11): Hey, what's up. This is Caleb ward with school of motion. And in this after effects tutorial, I'm going to show you how to use five free tools and aftereffects. Now all of these tools are fantastic resources for any after-effects artists, but at the end of the day, these tools were created by a developer. So if you're feeling generous, even though they're free, you know, feel free to donate some money towards their causes, they are doing fantastic work and they definitely deserve it. So let's get started with the very first free tool. Now, like all the tutorials here at school of motion, the project files are completely free. All you have to do is just click the download link. You'll find a link in the description of this video. So the first tool that I want to talk to you about is a well, I got to admit, it's kind of a funny name it's called, but Kapur.
Caleb Ward (00:59): And you know, you know how whenever you're working with a shape layer and after effects and you need to cap those butts. Well, normally let's say we have this design right here, and this is a shape layer. And let's say we wanted these edges to be harsh right here. We don't want them to have rounded buts, come on, be mature here, people. Uh, so if we wanted to normally do that, you'd have to go down here to the dropdown menu. You'd have to go to contents, go to the shape. You would have to find the stroke. And then you would go over here to, uh, the line cap and you would change it to a bud cap or a round cap or a projecting cap. Now this is not necessarily a terrible way to do this, but if you work with a lot of shape layers, and if you're an after effects artist, and specifically, if you're on school of motion, there's a great chance that you do a lot of shape layer work.
Caleb Ward (01:50): This is not ideal. So the best thing that you can do is download this free tool called bud capper. And it's up here in the top, right panel here. So do you use, but capper, all you have to do is select your shape layer. And then you can just go to window and run the butt capper script there, and we'll pop up this little panel. And so you can just select, uh, you know, whichever but style you like the best. All right. So let's move on to the next tool. So the next free tool that I want to talk about is the redefiner free script set. So this is actually 51 different scripts for after effects and every single one of them are free. Now, obviously I'm not going to show you how to use all 51, but I wanted to show you just a few of the different scripts in that pack.
Caleb Ward (02:31): So you can get an idea of kind of what utility tasks these different scripts can do for your project. One of my favorite scripts inside of this script set is called the comp center. So, uh, the comp center basically allows you to change the duration of your composition, and it will automatically change your pre comps and your layers and your timeline to match the new duration. So that's important because typically, so let's, let's take a look at our competition here. We have a one-second composition, so let's say we wanted to adjust it to be a ten second composition. So typically you'd go to composition, composition settings, and we could change this duration from a one second to 10 seconds and hit, okay. But if you zoom out here, you'll see that all of your layers are only at one second. So it's usually not that big of a deal to go in and we can select all of them and then we can extend them out here.
Caleb Ward (03:23): It's a, it's annoying, but you know, it gets the job done. But the problem is, if you want to adjust a pre copy, can't do it. You have to then go back in and adjust the duration of all your compositions inside of your composition. And it can be a real pain. So comps that are actually fixes this. So what we can do is we can just go to file scripts and we're going to run our comp set our script here, and we will make sure the width and height is set to 1920, by 10 80. All of these other parameters here will just remain at default unless you change them. And then the duration we're going to change to, we can do 15 seconds and make sure seconds is selected right there. All these other settings are fine and we will go ahead and hit apply.
Caleb Ward (04:08): So it doesn't look like a lot change, but it actually did quite a bit in just a few seconds there. So I'm going to go ahead and zoom out here. So if you zoom out, you'll see that all of our layers are now set to 15 seconds long. And if we scrubbed through it, we can see that our, um, composition will automatically update. And our light orb will just kind of spin around beyond the one second mark. So we can go ahead and preview this and see what I'm talking about. All right. So there you go. Our composition was automatically adjusted. We didn't have to go in and adjust all the pre comps and layers and things like that in only a matter of clicks. So the next tool that I want to talk about in this script set is the mask to shape script.
Caleb Ward (04:49): Now it does exactly what the name implies. It'll convert your mask to shapes, but practically speaking, that's really important because sometimes you may create a solid and make a shape real quick and not expecting to have to use all the shape modifiers. But what happens when you want to do something like use a repeater to a shape layer? What do you do? Well, you would probably have to use either some sort of effect or some sort of script to make the repeater work well, and it's just kind of a pain. So the best thing to do is to use this script, to convert your mask, pass into shapes. So I'll show you how it's done. So right now we have a white solid right here, and this is just a white solid with a mask that has been cut out. So what we can do is run the mass to shape script.
Caleb Ward (05:33): So I'll go ahead and go down to scripts here, and we will find mask to shape and it will convert our solid. It won't get rid of the solid. So the solid is still there, but it will convert that solid into a shape and put that shape into the timeline. So right now you can't see anything because the shape does not have a fill applied to it. So we'll just go to add and then fill, and then we can change the fill to white, to match the solid that we had before. So now we can do exactly what I was talking about earlier. We can actually add a repeater to this shape, and we just go here to add and go to repeat her. And then we can adjust the transform of the repeater. Let's adjust the position here, and then we can make the copies.
Caleb Ward (06:13): Let's say five. And there you go. We're already starting to get a pretty cool design. And it all started with a solid layer instead of a shape layer. So this is a really powerful tool if you do a lot of design in after effects. So let's say you're working late on a project. You're getting kind of sleepy and you notice something that needs to be changed, but you don't have time to get to it right now. Well, wouldn't it be helpful if you could just add a quick note in after effects that will tell you what you need to do whenever you hop back on the computer next time, or wouldn't it be super cool. If you could like leave notes for other people, if they get into your after effects project, it would be cool. I'm going to go ahead and answer that question for you. Uh, and you can do that with another cool script in the redefiner script set called notation. So if you just go to file scripts and then we can find notation here, you can see that we can go in and we can add notes
Caleb Ward (07:07): Directly in the aftereffects timeline. And when the next user opens up after effects, they can access these notations. So it's a really handy tool if you work in a team environment, or if you find yourself for getting things very easily, and if you're anything like me than you probably do. And so it's a great tool for adding feedback to your projects. So let's move on to the next tool. Our next tool is not only free. It's also one of the most useful tools in all of after effects. It's called Dudek and Dew is a character rigging tool that makes the character animation process a lot easier. If you're not already familiar with school emotion, we actually have a character animation bootcamp and a rigging academy that uses do it in the workflows. So I'm going to show you how to use this tool, just kind of on a basic level.
Caleb Ward (07:59): And if you want to learn more, go check out those boot camps over at school of motion. So right now we kind of have this robotic arm and let's say, we want to do an animation to make it look like this robotic arm is working on this crazy looking box here. So what I've gone in and done is I created individual layers for each of the arm components, and then I've moved the anchor point to the center where it needs to pivot. And so you can move the anger point by just using the pan behind tool. So by default, it's usually about there in the middle. And so you can just click it and drag it to right in the middle of the pivot point where it needs to be. And so what I'm going to do here is I want to make sure that all of our appendages are linked up together in the correct order.
Caleb Ward (08:45): So we want our forearms, so the furthest extremity to be connected to the next extremity and parented to the next extremities. So I'm going to connect our forearm and use the parent, uh, pick whip tool here to parent it to the arm. So this secondary arm here, and then I'm going to parents, the arm to the leg. I don't know, it's not technically a leg, but I don't know what you would call an arm. That's connected to another arm, like a super arm or something like that. So now we have all of our arms connected to each other. So now I want to rig it to where it, when we adjust just this last arm right here, it will actually adjust all of these other arms to match. So in order to do that, we need to create a controller. So I'm going to select the forearm here, and I'm going to go to our dual plug-in here, and you can activate do it by going to window, and then finding duet right there.
Caleb Ward (09:33): And I'm going to select controllers and we can just go ahead and click create. You can adjust the size and the color and all that stuff. It's going to create a red one by default, but that's fine. And so we're going to create a default controller and you'll see that the very center of the controller has automatically been applied to the very center of that anchor point. So because we had our forum selected, that's exactly what we wanted to happen. So let's go ahead and we're going to select our forearm, our arm, our leg, and then we're going to select our forearm controller. And it's important that you select it in that order. So it needs to be, uh, the furthest extremity, the next one, the next one, and then your controller. And then we're going to go to, I K, which stands for inverse kinematics.
Caleb Ward (10:14): And that is an important tool in, uh, all of character animation, because it allows your elbows to bend correctly. And so, uh, we're gonna make sure we have that selected, and this is a two layer icon and a goal. And then we're going to go ahead and hit create. So nothing happened right off the bat, but this is incredible. This is where the magic happens. So now we can actually adjust our controller here and you'll see that all of the other layers bend in a natural way. So we can kind of animate this robot here. We can even rotate this robot arm and it will animate just like a robot. So, uh, the same could be used for an actual character. You can rig all sorts of different things, maybe a tail, maybe, uh, some sort of monster clock thing. You could use this tool, uh, for that, but even beyond just rigging up individual hands, there's an incredible tool and do it called the auto rig.
Caleb Ward (11:15): So the way the auto rig works is if you have created your character in Photoshop or illustrator, you can import them into after effects, or I suppose you could build them directly in after effects and you can have do it automatically rig your character without you having to go in and rig all the arms individually, like we just did in the last composition. So I have my character right here and I've gone in and adjusted all the anchor points so that they are in the correct place. And I'm gonna go ahead and select all of my layers here for this character and hit auto rig. And because this is a human robot, you know, it's walking on two hands, we're going to do a plant a grade, and we're going to go ahead and click full character. So I'm going to do a bit of a time-lapse here to set up all of my layers, but at the tail end of it, you'll see that everything is rigged correctly and look at it, go, it's creating a rig.
Caleb Ward (12:10): All right. So our robot is rigged up here, so we can actually go in and you'll see all these controllers have been created and we can adjust these controllers. And we will have a very easy time animating this robots. And so all of these controllers can be adjusted and you can see our robots like dancing here. And one thing you may have to change. So this elbow right here, if we kind of adjust it, you can see it's bending in the wrong direction. So all of the controllers that were created here, if you go to your effects, controls, you'll have some further customization that you can do. And all we have to do is select this, uh, K left forearm, uh, clockwise checkbox there, and it will get the inverse kinematics correctly for that hand. So again, like before we can adjust the hand, uh, to the correct orientation, and then we can adjust it like this and the elbow, uh, will automatically adjust to where we need it.
Caleb Ward (13:02): So, so yeah, this is a really, really handy and helpful tool for any, uh, character animation work. And, you know, if you're doing walk cycles or creating cartoons and after effects, it is an indispensable tool. Now, if you're watching this tutorial, then chances are, you're a fan of video, copilot and rightfully so we are too. But one of the most incredible things that video copilot does again and again and again, and again, is they create free tools for the community. And one of the coolest tools that has come out in the last few years is the effects console effects console is a keyboard driven search console. So what that means is instead of having, let's say we wanted to add a glow effect to this HUD element right here. So instead of having to go to the effects browser, find glow, drag it over, or you could double-click and apply it.
Caleb Ward (13:52): So this process of dragging and dropping it facts can get kind of annoying. So instead with effects consoles, you can apply a facts without ever leaving your keyboard. So your fingers stay on the keys. And if you know anything about video editing or motion work, the easier it is for you to keep your hands on the keyboard, the faster your work will be. So I have effects console mapped to control and space on my computer, but you can map it to any sequence of keys that you want. So I'm going to go ahead and hit it. And then all we have to do is type in glow and hit enter, and you'll see that the glow effect was supplied. And then let's say, if we wanted to add noise, you can just type in noise. And if we wanted to add fractal noise, you can do that too.
Caleb Ward (14:30): And all you have to do is hit enter and it'll apply. So in, you know, five seconds, we've already applied three different effects. And, you know, maybe that would have taken you 10 or 15 seconds before. Uh, but second saved here. There can definitely add up when you're working on motion design work. So if that was the only thing the effects console did, it would still be an incredibly useful tool in, but it goes even further. So, uh, one of the coolest things you can do with vex console is save your favorite effects. So, you know, you probably use certain effects over and over again for me, I use fractal noise all the time. So let's say that I want to make getting frack from noise, even easier than popping up the search bar and typing in fractal noise. So what you can do is you can call up the effects console and I'm going to type in fractal noise.
Caleb Ward (15:16): Now, before I click on it, I'm going to right click and I'm going to create a shortcut. And what it has just done is created a number shortcut that I can use to recall fractal noise in the future. So if I pop it up here, you'll see FRA that stands for fractal. And so all I have to do is hit the number three key and it applied fractal noise to our layer there. Pretty cool. Right? And the cool thing is you can even go into your settings and adjust which effect is mapped to what number, and you can also get rid of them or add more effects. In fact, this entire panel is very useful. I'm not going to get into all of the details about what it can do, but there is a great tutorial over on video copilot, if you're interested. So the effects console is already super useful, but it goes even further.
Caleb Ward (16:03): So let's say you wanted to save a screenshot and send it off to a client. How would you do that? Well, typically you would have to save a frame, right? So you'd go to composition, say frame as file. You'd export it as a JPEG or a PNG, and then send it to your client. It's fine, but it's kind of annoying, right? But with the effects console, you can actually take screenshots directly in after effects without having to go to the render queue at all. It's super, super cool. So all you have to do is hit this little screenshot button here and it will take a screenshot. And then all you have to do is click on the open gallery button to view all of your screenshots. So this is really useful for a number of different things. So the first is exactly what I was saying.
Caleb Ward (16:45): All you have to do is you can right click and you can save to a PNG and there you go, it'll save to your computer and you can send it off to your clients or other collaborators. Uh, you can also copy to the clipboard, which is really handy because that means you can basically just copy and paste it into anything. It could be a word doc, it could be Photoshop, illustrator, it could be anything, but having the ability to copy a screenshot directly in after effects to the clipboard is an incredibly powerful feature. But another way that you could use it is through taking screenshots for iterations of your projects. So let's say, you know, we created three different versions of this project here, and we want to see which ones are favorite. Well, you can click through right here or you can hold down shift and click arrow down and you can compare them all side by side, just like that.
Caleb Ward (17:31): So it's a super handy tool, um, that you can use. And I use it all the dang time to share screenshots, to save things, uh, and it's just an incredibly useful feature. So let's move on to our very last free tool in after effects. So if you're watching this tutorial, there's about an 80% chance that you are a creative cloud subscriber. And if you're not as subscribing to the creative cloud, you're really missing out on a lot of great product updates and a lot of really cool features. But one of my favorite features that people tend to not use as much as they should is the creative cloud library feature. So creative cloud libraries basically work kind of like Dropbox or Google drive. It allows you to save assets and resources to a cloud, and you can access those assets and resources in Adobe application.
Caleb Ward (18:18): So for example, I have the libraries panel popped up right here. And if you don't see it, you can just go to window libraries and it'll pop up right there. And you can see here that I have some colors from a color palette that I created for this project selected. And I also have a logo and a background image, and also have some character styles here. So I'm going to go ahead and delete all of these actually. And I'm going to show you how I put those there and how you can access them for your after effects project. So I'm gonna use Photoshop, but you can use illustrator, um, to generate assets for your creative cloud libraries as well. So I'm going to hop over to Photoshop real quick. So let's say that we're inside of Photoshop and we've just got done creating the first board for our project.
Caleb Ward (19:00): And we have a color palette that we've generated. We have a character style, and then we have, uh, some assets that we want to include inside of our project. So to add them to your library, all you have to do is we'll start with color palette here. I'm gonna hit I for the eyedropper. I'm gonna select white right there, that white lighter color. I'm gonna go ahead and hit the plus button here. And I'm going to select just the foreground color and we're going to add it to our library. And we're going to select the next color there and just repeat this process for all of the colors in our color palette. And then of course, you know, we are adding this just into the, my library section, but you can move this into any new library or folder that you want. It just depends on the project, but for right now, we'll just put these in our root folder here.
Caleb Ward (19:48): And then I'll select this last color here and hit add. And let's say that we want to add in the text here. All you have to do is select the text, hit the plus button there, and then we can just select the character style and add that, uh, to our project here. So let's say that we want to save this background and drag and drop it into our other applications just for reference. So, uh, if you want to do that, it's really easy. All you have to do is select the background layer, hit the plus button, and we'll just import this as a graphic into our library.
Caleb Ward (20:21): And you'll see that it's down there. And then what makes us super special is you can actually use logos in the same way. So if you're working on a project that has consistent branding, you can drag and drop logos and it's super easy. So I'm just going to call up our logo here. It's just a real simple logo. We'll call this school of motion logo, and I am going to make sure it's selected here. I'm going to hit the plus key and we'll import the graphic and it'll import as a PNG. And you'll see that there's the school of motion logo. So the cool thing is when we go over here to effects all of the assets will be imported into your project and it will automatically update if you add any new assets to your project. So let's say that you wanted to add this school of motion logo into your project.
Caleb Ward (21:07): All you have to do is drag and drop it right into the composition, and it will pop up right there. So we can just drop it in there, scale it down a bit, move it over. We can even, uh, maybe use the pin tool here to, to mask out just the triangle part here, just like that. And you know, we can even use the colors here to change. Let's say the box. So we have the box shape right here. Let's say we want to change the stroke color. We can select the stroke and you can actually use this eyedropper here to just grab the colors directly from, uh, the color swatches right here in the libraries panel. We can go ahead and hit. Okay. And then, you know, obviously the opacities turned down on that a bit, but if you turn up the pastor, you'll see the greens match perfectly.
Caleb Ward (21:57): All right. And that's about it. If you want to download these freebies, go check out the PDF over on our website, we have a list of all of the freebies and a link directly to the download. And then we also have an entire article that gets into even more detail about how to use each one of these tools. And again, if you want to learn more about after effects, go check out the other tutorials over at school of motion. And if you're interested in getting into character animation, animation design, go check out the bootcamps over at school of motion. They're a fantastic resource for anyone looking to up their motion design skills. This has been Kayla board. We'll see you next time.
Learn After Effects the Right Way
Master the After Effects interface and build a real animation skillset. Enroll in All-Access to unlock AE Kickstart and 50+ other courses.