Start Your 3D Journey in Cinema 4D
Master the essentials of 3D modeling, lighting, and animation in C4D. Enroll in All-Access to unlock C4D Basecamp and 50+ other courses.

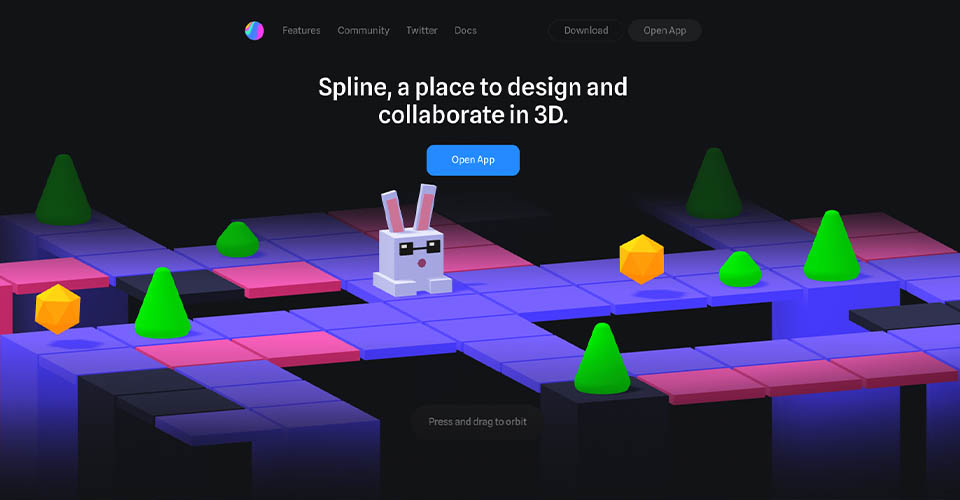
Learn how to design in 3D in no time at all using Spline!
Spline is an easy to use 3D design tool geared for any designer regardless of their 3D experience. It's simpler to learn than full featured 3D apps—such as Cinema 4D or Blender—because it doesn't bog you down with loads and loads of settings and features. Best of all, it is browser-based and FREE, so literally anyone can use it no matter what computer you have! The democratization of 3D is here!
In this video, we'll show you the in and outs of this tool, exploring how you can import vector paths from Illustrator and even 3D objects from 3D apps like Cinema 4D to create an interactive 3D web experience.
Download the project files below
ENROLL NOW!
Acidbite ➔
50% off everything

ActionVFX ➔
30% off all plans and credit packs - starts 11/26

Adobe ➔
50% off all apps and plans through 11/29

aescripts ➔
25% off everything through 12/6
Affinity ➔
50% off all products

Battleaxe ➔
30% off from 11/29-12/7
Boom Library ➔
30% off Boom One, their 48,000+ file audio library
BorisFX ➔
25% off everything, 11/25-12/1

Cavalry ➔
33% off pro subscriptions (11/29 - 12/4)

FXFactory ➔
25% off with code BLACKFRIDAY until 12/3

Goodboyninja ➔
20% off everything

Happy Editing ➔
50% off with code BLACKFRIDAY

Huion ➔
Up to 50% off affordable, high-quality pen display tablets

Insydium ➔
50% off through 12/4
JangaFX ➔
30% off an indie annual license
Kitbash 3D ➔
$200 off Cargo Pro, their entire library
Knights of the Editing Table ➔
Up to 20% off Premiere Pro Extensions
Maxon ➔
25% off Maxon One, ZBrush, & Redshift - Annual Subscriptions (11/29 - 12/8)
Mode Designs ➔
Deals on premium keyboards and accessories
Motion Array ➔
10% off the Everything plan
Motion Hatch ➔
Perfect Your Pricing Toolkit - 50% off (11/29 - 12/2)

MotionVFX ➔
30% off Design/CineStudio, and PPro Resolve packs with code: BW30

Rocket Lasso ➔
50% off all plug-ins (11/29 - 12/2)

Rokoko ➔
45% off the indie creator bundle with code: RKK_SchoolOfMotion (revenue must be under $100K a year)

Shapefest ➔
80% off a Shapefest Pro annual subscription for life (11/29 - 12/2)

The Pixel Lab ➔
30% off everything
Toolfarm ➔
Various plugins and tools on sale

True Grit Texture ➔
50-70% off (starts Wednesday, runs for about a week)

Vincent Schwenk ➔
50% discount with code RENDERSALE

Wacom ➔
Up to $120 off new tablets + deals on refurbished items


Download these FREE Spline 3D Project Files!
How to get started with Spline

First and foremost, navigate over to Spline and familiarize yourself with their interface. Just by exploring their homepage you’ll get a sense of what is possible using this free program. In fact, the type of design on the main page is a great example of the type of interactive work you can create, and it creates a playful and engaging experience for anyone that visits your site.
If you’ve never used any kind of design app, it’s important to take a moment to get your bearings. You don’t have to be an expert at any of this; in fact, Spline is designed to be a more intuitive workspace than some other, more comprehensive programs. While you might not have the same powerful features, this small-scope toolset creates a more inviting program for beginners.
Spline does have a desktop app you can download, but we’re going to show you everything you can do through the website. So let’s click on Open App and begin.
Here you’ll see any projects you’ve already started, as well as examples from Spline’s library to inspire your creativity. You can jump into these samples to get ideas for what is possible using the app.

You don’t need to be an expert in design to get started. In fact, exploration is part of the fun. However, it helps to know where your tools are kept. Take a minute now to scroll over the tools in the interface just to familiarize yourself with their names. It will make the rest of this tutorial go a lot smoother.
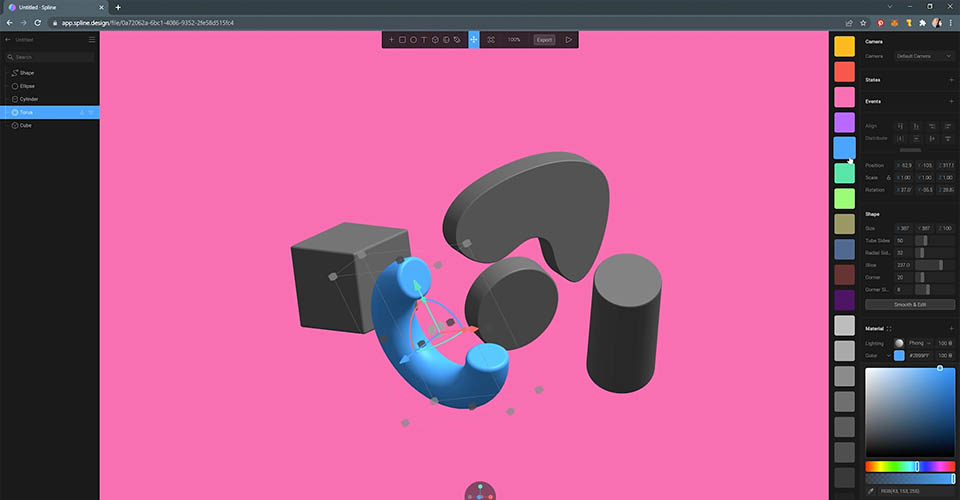
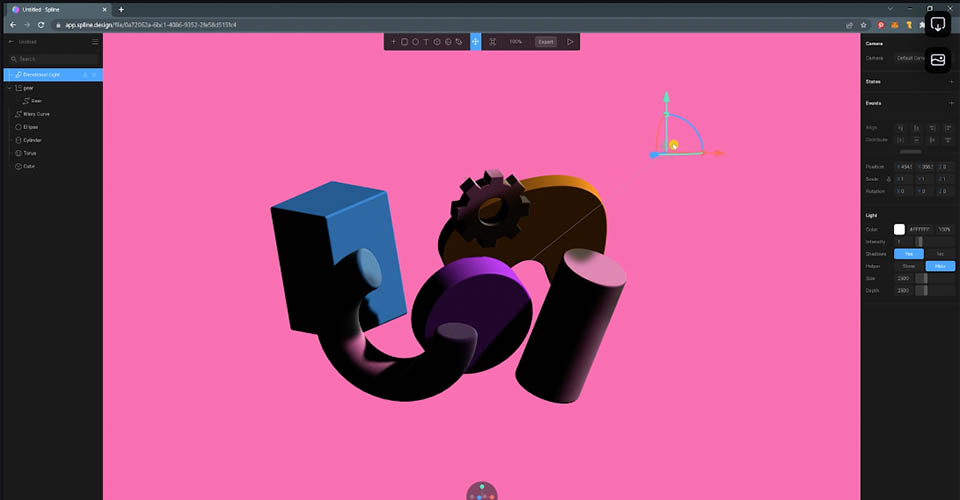
This interface is very similar to Sketch, if you’ve ever used that before. Our Object Manager is on the left, we have various objects to create in the top bar, and we have a wide variety of tools for background, color, lighting, and effects on the right. You have the ability to quickly drop in 2D and 3D objects, text, cameras, and lights. Don’t worry if this is all a bit overwhelming. We’re here with you.
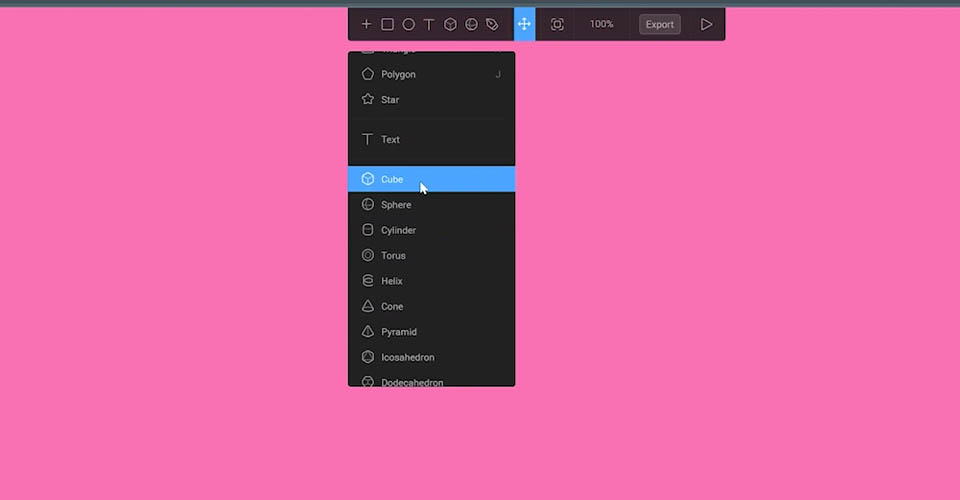
How to create shapes in Spline
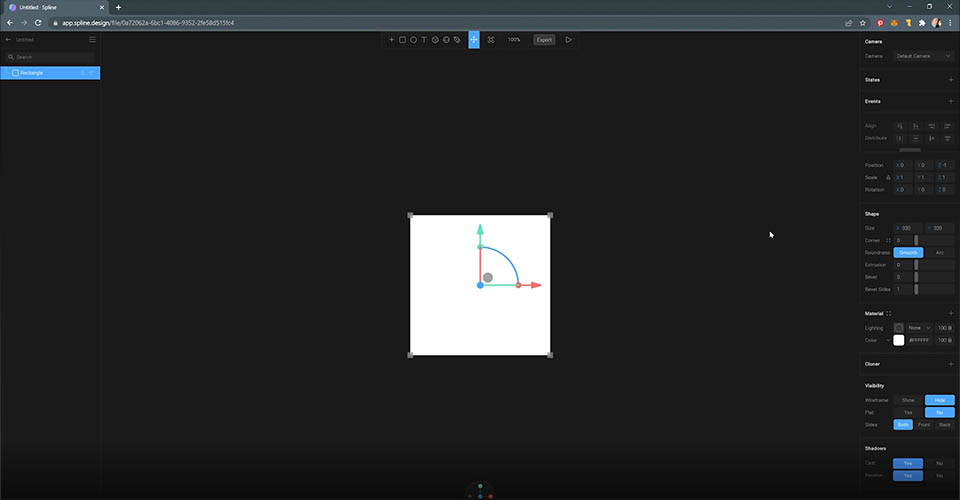
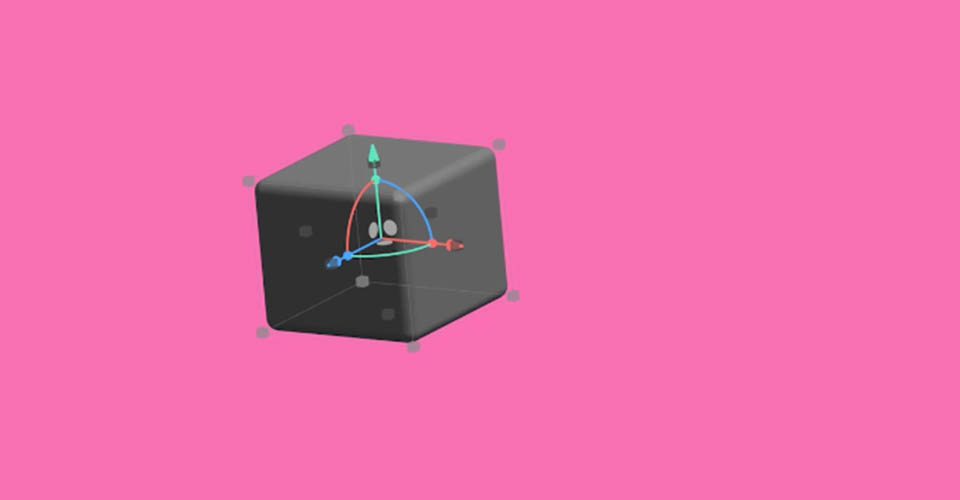
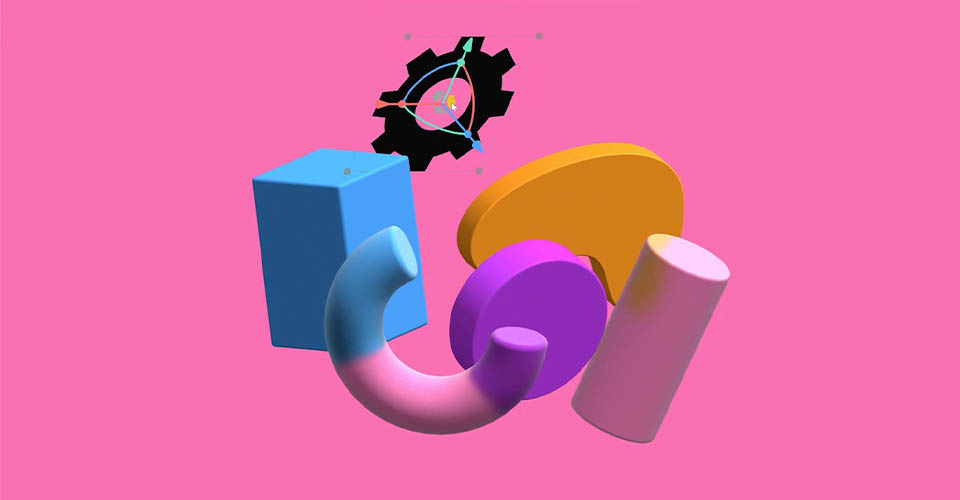
Click on New File and we’ll get started. We’re going to start with one of the best shapes for learning 3D: a cube.
Now add a cube to your canvas by either clicking the mouse or clicking and dragging. Hold Shift to keep even proportions.

And just like that, you’ve created a new 3D object! And that’s our tutorial, for more information, subscribe to…oh, you want to know a bit more? Well, I guess we can dive deeper. You can move the created object by clicking with the mouse and dragging around the canvas, just like you would in Photoshop or Illustrator. To rotate the cube, click and drag the rotational bands.
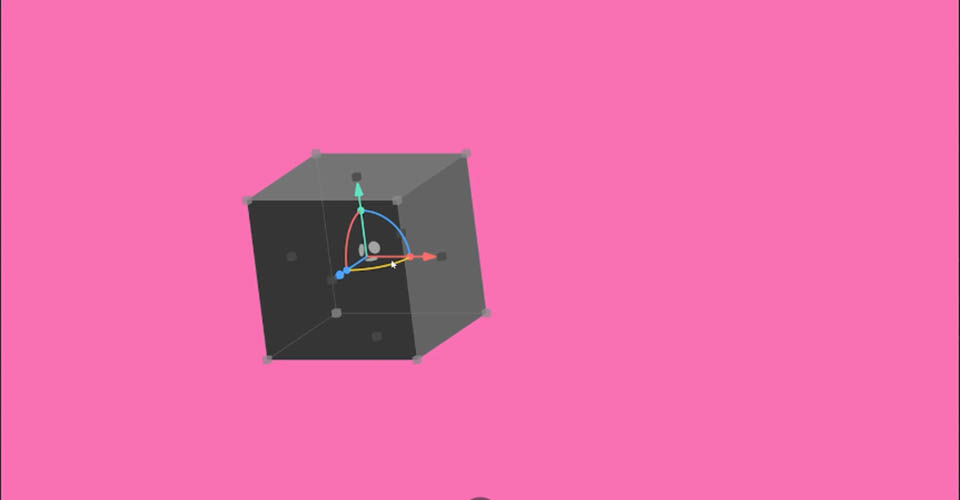
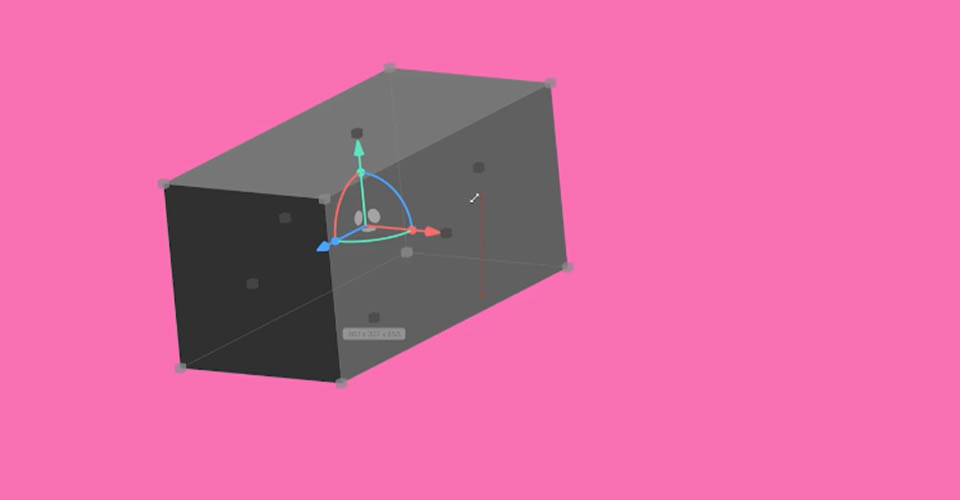
You can click on the arrows to move the cube along that plane, click on the small circles to adjust the cube’s position in 3D space, or click the small gray cubes on the corners or center sides to expand or shrink your shape into a rectangular prism.
With the cube selected, you can go to the shape controls on the right side to adjust properties of your 3D object, such as rounding off the edges.
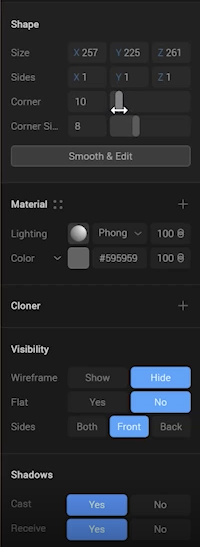
Each object will have its own unique controls as well. A Torus (donut) for example, has controls to thicken the ring, adjust the sides, or add a slice.
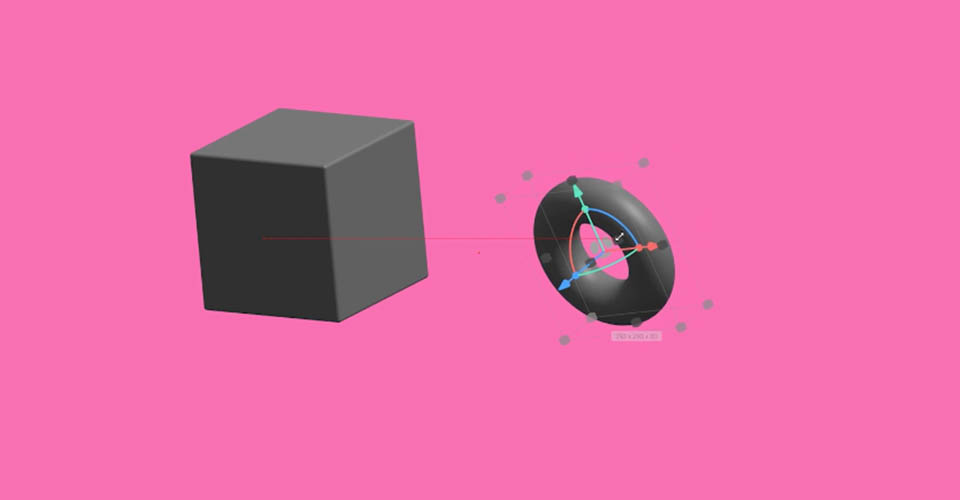
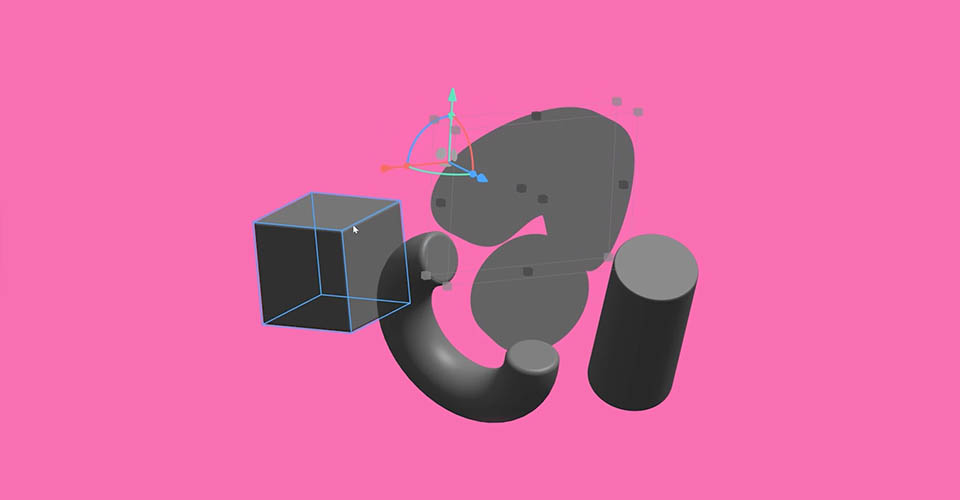
Add in a few more shapes and make a composition that tickles your fancy. Drop in some bunny objects, maybe even a few 2D shapes just to spice things up. Remember, there are no wrong answers when you’re just starting out.

You can even grab the Pen tool and draw a path, using the Bezier Handles just as you would in Photoshop or Illustrator, and create your own custom shapes.
Navigating in Spline
Once you have a few objects in your panel, you’re going to need to navigate around in order to adjust your composition in 3D space. You need to learn how to navigate, and we suggest you commit some of this to memory. Don’t worry, it will become second nature soon.
- Hold Option/ALT and drag to orbit around your composition.
- Hold Space and drag to pan around your composition.
- Use your mouse scroll wheel UP or DOWN to zoom in or out. Or CMD/CTRL +/-
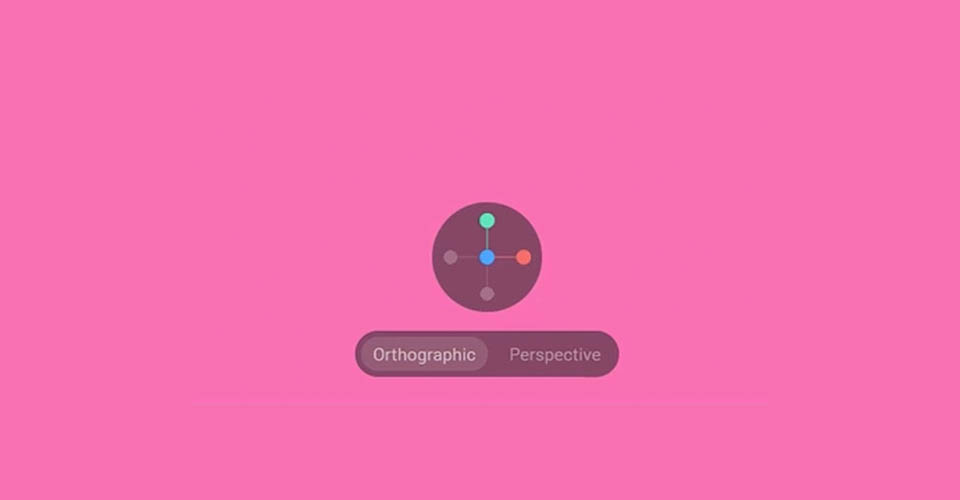
Take some time to play around with the camera controls to see which view options work best for your composition. And if you ever lose track of your objects, right click and hit Reset Camera to center yourself back on the composition.
Material Settings in Spline
Now the objects we extruded don’t have the same shading and texture as our cube or torus, so we’re going to need to learn about material settings. You can really spend a lot of time tweaking these properties to your heart’s content, but we'll cover the basics to get you going.
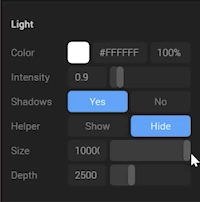
Each object you create will have a default setting in the Material panel on the right. This covers Lighting and Color.
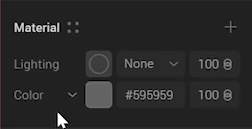
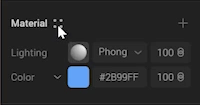
The reason our new objects appear flat is because their lighting is set to none. Without shading, we can’t see depth, so let’s change that. Most of our other objects are set to Phong, which works well enough. Remember that purposeful lighting is one of the best tools you have as a designer to create striking compositions.
If you click on the sphere next to the lighting option, you’ll twirl down into even more options to specify the properties you want in your lighting scheme.
To build cohesive objects, you may want to set up a custom Material Asset, and that’s easy to do. Let’s say we like the way this object looks with these lighting and color settings.
Once you have your settings dialed in, click the 4 Dots next to Material.
This brings up a new empty bin to the left of the properties panel. If you click the + icon, it will add your custom material asset. Now you can easily drop that onto your other objects.
If you want to adjust the look of the material, click on the Gear icon in the material asset bin, and the update will be applied to all corresponding objects automatically.
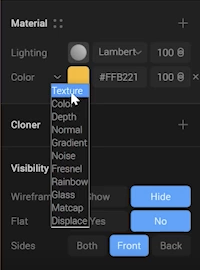
With color options, you can choose to upload UVs that you’ve used before, download new looks online, or apply any of the presets to create anything from metal grating to glass. These are pretty robust tools for a browser-based design app.
We play around with our material and lighting a LOT more in the tutorial, so make sure you take some time to watch EJ explore all of the options available.
How to Import Vector and 3D Designs Into Spline
Spline has a robust import toolset so you can bring in your vector artwork, 3D designs, and anything else you need in order to create your dream composition. If you’re working with a vector drawing, there is just one thing to keep in mind.

When you import vector artwork, the rotation point is centered on 0 (Zero on the X, Y, and Z axes). However, the 0,0 location in most vector programming is in the top left corner of the workspace. Make sure you zero out the coordinates prior to saving and importing your vector artwork, otherwise your rotation point will be far off-center.
Save your vector artwork as an SVG file, and make sure you name it something that is easy to locate. Once your design is saved, it’s time to head back to Spline.
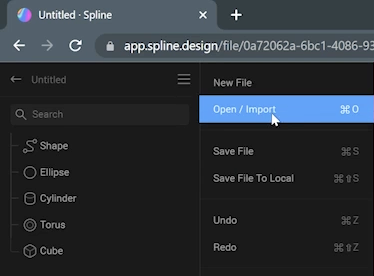
Click on the hamburger in the top left corner, select Open/Import…

…and select your file.
And now your artwork has been imported into your composition. You have all the same controls as before, so you can transform this 2D object into a 3D masterpiece. You can import logos, text, and all kinds of designs to create unique 3D experiences on your website.
Lighting Objects in Spline
As we said earlier, lighting is one of the most important design elements in your 3D composition. Spline comes with a variety of options so you can customize your light sources, environment, and effects.
Purposeful lighting is the most evocative, so let’s add a directional light. Go to your Top Bar, hit the + icon, and select Directional Light.
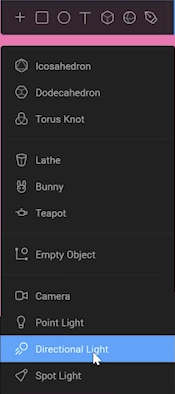
You now have a light object that you can move around in 3D space, and you’ll see the effect on your objects in real time.
With your light selected, you’ll also have access to the light properties.
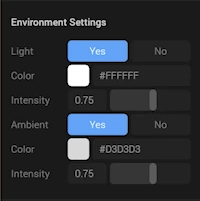
Take a moment to play around with your Global Environment settings. Try applying fog, adjusting your light to create interesting patterns with the shadows, and gain a sense for the tone you’re creating with your choices.
Now, if you think this looks good standing still, just wait until you’ve added some animation.
How to Animate in Spline
This won’t be a comprehensive animation tutorial, since we’ve done a few of those already (check out our channel), and we don’t want to overwhelm you with information in one go!
You can take your composition for a test spin by hitting the play button on the right side of the Top Bar.

Without adding any animation, your users will still be able to spin and rotate your objects. There’s no animation, but you can see how the textures play off each other (especially if you have a few glass objects in the mix). Still,we want a WOW factor, so let’s jazz this up.
A common interaction for Spline is a Mouse Hover. When the user’s mouse hovers over an object, the object will spin or rotate or bounce. It’s a simple trick, and it looks great…so how do you pull it off?
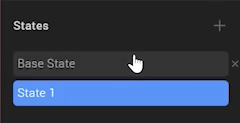
With your object selected, go over to States on the right side and hit the + icon. This creates a Base State and new State to animate or morph into. Base State is default; it is your object at rest. Click on State One and rotate your object. Then click on Base State and your object will snap back to its original position.
Now we have to add an Action which will trigger the transition from Base State to State One. Head over to Events.
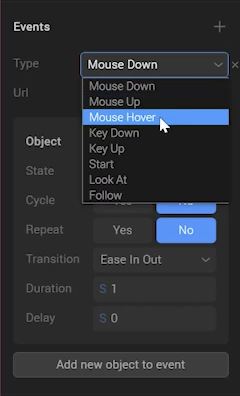
Here you can select the type of event that will trigger the action. You’ll see a TON of options, such as how that animation will trigger, will it repeat or rewind, how you’d like it to ease in and out, etc. Go back to the test screen to see how these changes affect the animation.
Best of all, Spline’s animation toolset takes care of a lot of the Animation Principles you might not know yet. Objects will spring, squash and stretch, and have follow through without you telling them to do so.
Importing Cinema 4D Models into Spline

Importing a custom model from Cinema 4D is fairly simple. We’ve found that the FBX file type works best, so make sure you are saving your object prior to import. Then follow the same process as when we brought in our vector artwork. If you want to see some of the more advanced methods, check out our full tutorial above.
How to Export Your Composition from Spline
Once you’ve finished creating objects, lighting them, adding texture, and keying your animation, you’re going to want to show this composition off to the world. Let’s quickly export our work.
Right in the Top Bar is a big Export button. You see where this is going.

This gives you the option to export as a public URL, an image, a GIF, or a Spline link that will bring guests back to their site.
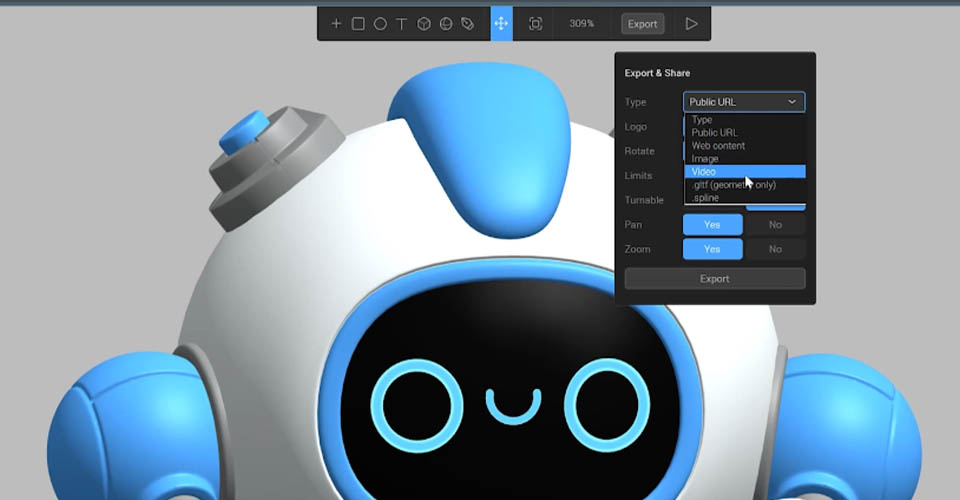
You’ll also have options for how much freedom viewers have to explore your object. If you’re not happy with how it looks from certain directions, you can lock the field of view in place. Maybe you just want a 3D character that follows the mouse cursor with its eyes. Whatever you’d like, the options are here at the click of a button.
Hit Export and you’re all set! Try creating a URL and check out the experience you just created.
Web-based apps might be the future of design and animation, and programs like Spline are going to contribute heavily to the democratization of 3D. Being able to create web experiences in 3D without the need for a souped-up computer or deep knowledge of 3D is game changing. It's going to be very exciting to see where the team at Spline takes this app!
Want to learn more about 3D design and animation?
Is learning about Spline making you want to finally take the dive into the world of 3D? Then be sure to check out our intro to 3D class, Cinema 4D Basecamp!
Learn Cinema 4D, from the ground up, in this intro to Cinema 4D course from Maxon Certified Trainer, EJ Hassenfratz. This course will get you comfortable with the basics of modeling, lighting, animation, and many other important topics for 3D Motion Design. Master basic 3D principles and lay the foundation for more advanced subjects in the future.
Start Your 3D Journey in Cinema 4D
Master the essentials of 3D modeling, lighting, and animation in C4D. Enroll in All-Access to unlock C4D Basecamp and 50+ other courses.