
All-Access Pass
Unlimited access to 50+ courses, unlimited critique, live events, and 24/7 community. Join School of Motion All-Access today.

Cinema4D is an essential tool for any Motion Designer, but how well do you really know it?
How often do you use the top menu tabs in Cinema4D? Chances are, you probably have a handful of tools you use, but what about those random features you haven’t tried yet? We're taking a look at the hidden gems in the top menus, and we're just getting started.
In this tutorial, we’ll be doing a deep dive on the MoGraph tab. As a motion designer, the MoGraph module of C4D is probably THE reason you use it today. It’s ability to create amazing animations through simple keyframing is unmatched in the world of 3D. So you probably have a pretty intimate understanding of Effectors, Cloners and Fields. So we are going to look at some of the lesser known tools in the MoGraph tool box that can change the way you use Mograph going forward.
MOGRAPH, MO’ MONEY
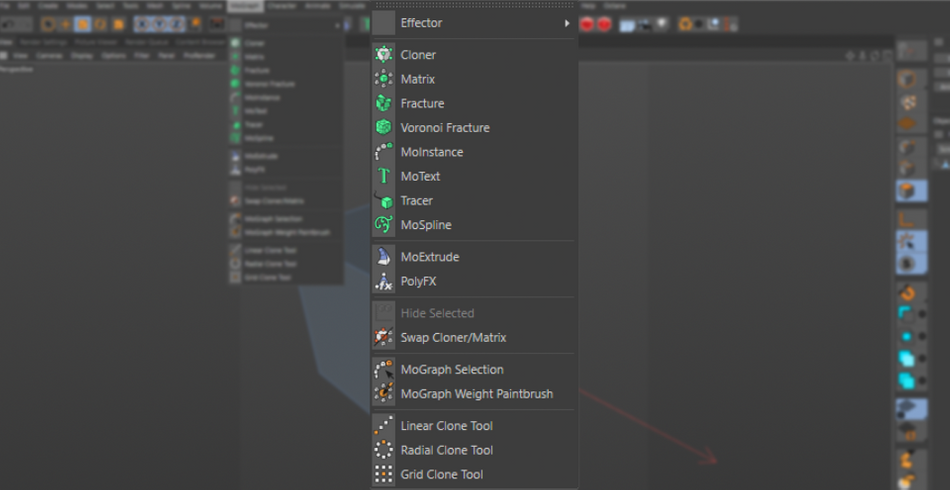
Here are the 3 main things you should use in the Cinema4D MoGraph menu:
- MoGraph Generators
- MoGraph Effectors
- MoGraph Selection
MoGraph Generators in Cinema 4D
When starting with Cinema 4D, there’s a very high likelihood that you started learning these tools first. The Cloner and MoText are ubiquitous with Cinema 4D, and one of the reasons motion design gravitated towards this application. So, let’s break down some of these tools.
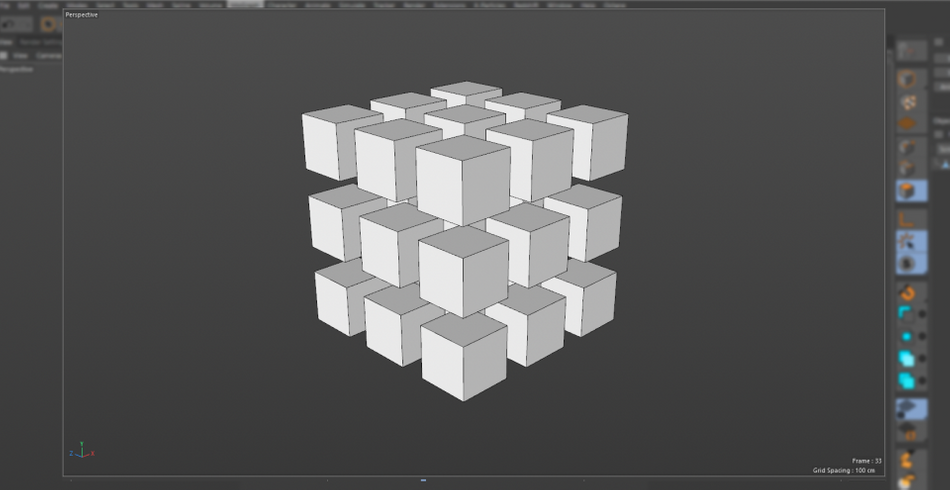
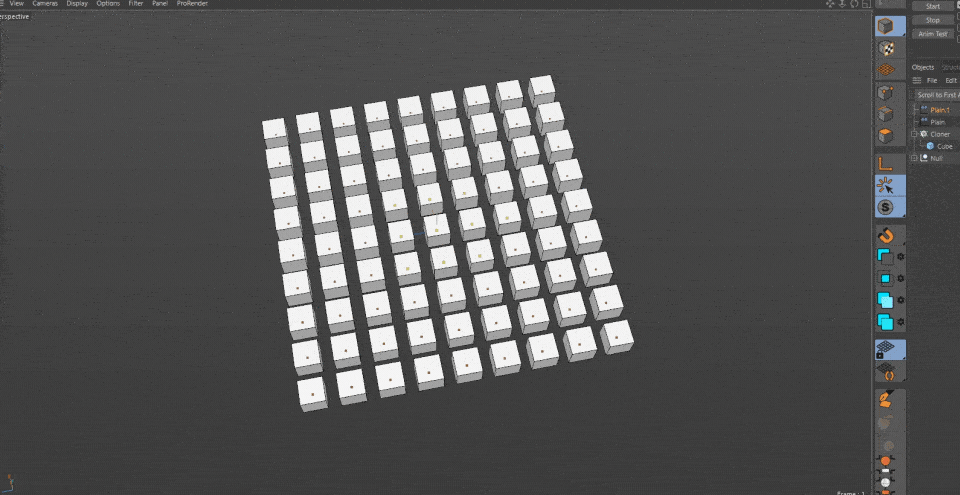
CLONER
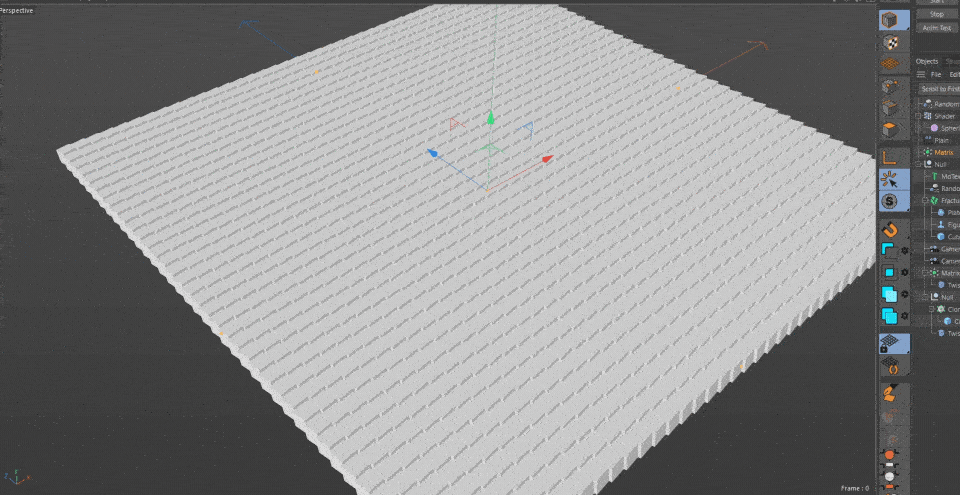
Cloner, Matrix, and Fracture are all very similar in function, with a few differences. Cloners work by making copies of Objects.
MATRIX
Matrix creates points, which cant be rendered on their own, but can be combined with a Cloner or even a particle system. Think of these matrix points as positions that can be filled by objects.
What’s important to note about the Matrix object is that this tool works with Deformers, such as the Bend and Twist, in a much more optimal way compared to the Cloner.

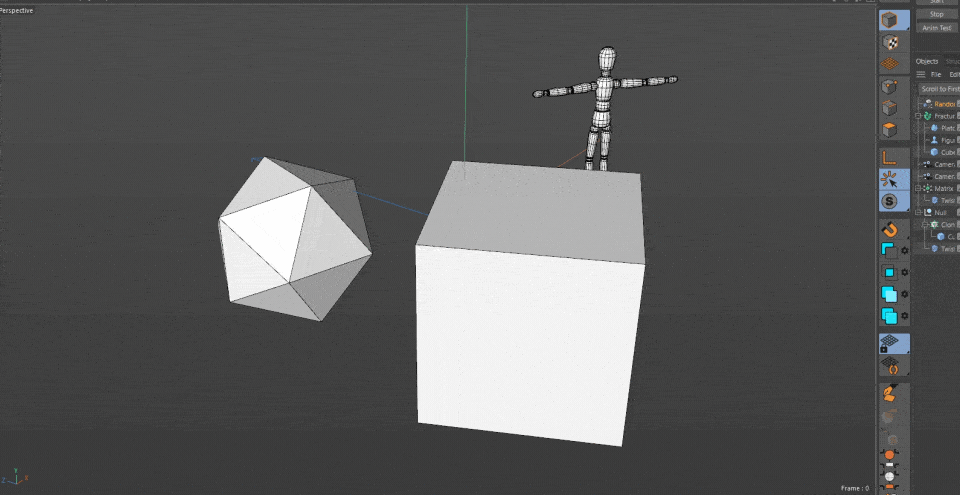
FRACTURE
The Fracture object doesn't create copies, but allows you to animate existing models with your Effectors (more on that later). In the same way you would animate your clones to scale up and twist, you can do that to your model.
It’ll break it into individual components and enable them to be modified by the effector parameters. This is extremely useful when animating multi-part objects.
MOTEXT
MoText is a classic tool. Easily create 3D text, create bevels, and generally make all things Type look amazing.
Ever since R21, Maxon made some updates that fixed a common bevel issue, where if you increased the bevel amount by too much, it would create strange artifacts in the corners. But now, those issues are a thing of the past. Easily create chiseled type, step bevels, or even create your own profile using the spline options!
x
As with all things MoGraph, MoText natively supports Effectors for animation.
Speaking of which...
Effectors in Cinema 4D
These are the primary methods for animating your MoGraph objects. There are 15 in total, but you will find yourself using a few pretty regularly, such as:
PLAIN
Moves, rotates, and scales everything the same
RANDOM
Adds randomization to the Position, Rotation and Scale of the objects.
x
SHADER
Will affect the objects based on the texture, including animated Noises.
x
At first, they will cause a universal effect, affecting your objects equally.
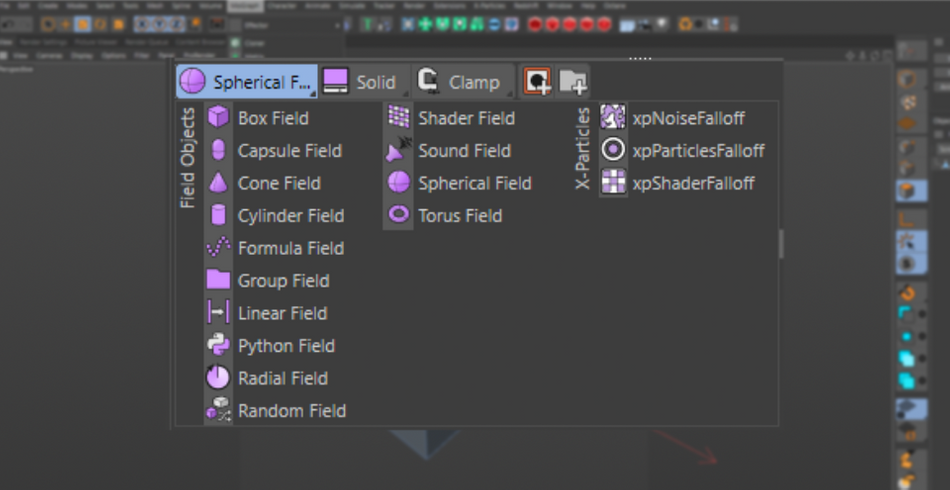
Their true power comes from the Falloff tab where you can limit their area of effect with Fields.
There’s too many types of fields to go through in this list, so it is recommended to experiment with them to see their effects.
Something to remember is that a single Field can be tied to several Effectors. So, let's say you have a cool combination of Plain, Delay, Random, and Shader effectors working in harmony, and you want to animate their area of effect using a Linear field. You can assign the field to each effector. As it animates across, all 4 effectors will activate. Very useful. Thank your lucky stars because back in the day, each Effector had to have their own field.
x
What’s even better is that you can combine your fields together using the layer system. Want to have a Cubic area of affect, but with a Sphere in the center cut out of it? Easy enough. Create a Cube field, then a Spherical field set to Subtract, and you are good to go.
x
All together, these tools can be combined, mixed, and customized to create the exact effect you are looking for.

MoGraph Selection in Cinema 4D
So, let’s say you have a Cloner set in a cubic grid array. And let's say you only want to affect the 8 corner objects. You could try to create 8 fields to affect those clones and tie them to a single Effector. But that’s just messy.

A second, and more efficient, option is to activate your MoGraph Selection tool. This will give you the ability to select individual objects in your Cloner and assign them to a MoGraph Selection tag.

Then, all you have to do is tell your Effectors to only affect that selection.

You can create multiple selections and assign them to separate effectors so a single cloner can carry out multiple animations!
And if you want to get extra fancy, you can actually use Fields on your Selection tag.

So, for example, let's say you want to split your Cubic Cloner completely in half, simply drop a Linear field for your Selection tag and place it so it cuts the cloner in half. Now, half will be assigned to the tag.
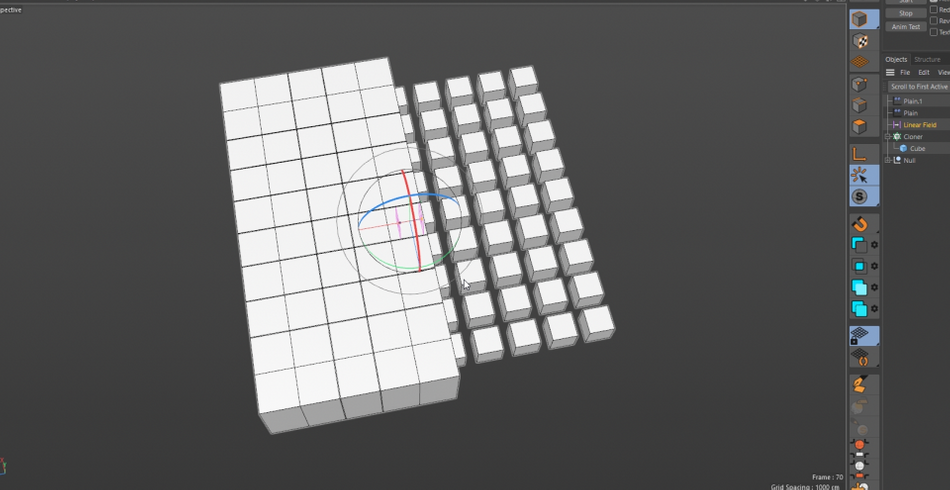
This is really useful if you plan on having the number of clones change in your animation, but still want half of the clones to be affected by a different set of Effectors without having to manually adjust the selected clones.
x
This is what we like to call “procedural”, where we use math to make the computer do the work for us.
.gif)
Look at you!
This is just a brief overview of the Mograph module of Cinema 4D. This is truly the tools that put C4D on the map and continues to pioneer. No 3D motion designer could do their jobs efficiently without the help of these amazing tools. Dont skip out on them!
Cinema 4D Basecamp
If you're looking to get the most out of Cinema 4D, maybe it's time to take a more proactive step in your professional development. That's why we put together Cinema 4D Basecamp, a course designed to get you from zero to hero in 12 weeks.
And if you think you're ready for the next level in 3D development, check out our all new course, Cinema 4D Ascent!
ENROLL NOW!
Acidbite ➔
50% off everything

ActionVFX ➔
30% off all plans and credit packs - starts 11/26

Adobe ➔
50% off all apps and plans through 11/29

aescripts ➔
25% off everything through 12/6
Affinity ➔
50% off all products

Battleaxe ➔
30% off from 11/29-12/7
Boom Library ➔
30% off Boom One, their 48,000+ file audio library
BorisFX ➔
25% off everything, 11/25-12/1

Cavalry ➔
33% off pro subscriptions (11/29 - 12/4)

FXFactory ➔
25% off with code BLACKFRIDAY until 12/3

Goodboyninja ➔
20% off everything

Happy Editing ➔
50% off with code BLACKFRIDAY

Huion ➔
Up to 50% off affordable, high-quality pen display tablets

Insydium ➔
50% off through 12/4
JangaFX ➔
30% off an indie annual license
Kitbash 3D ➔
$200 off Cargo Pro, their entire library
Knights of the Editing Table ➔
Up to 20% off Premiere Pro Extensions
Maxon ➔
25% off Maxon One, ZBrush, & Redshift - Annual Subscriptions (11/29 - 12/8)
Mode Designs ➔
Deals on premium keyboards and accessories
Motion Array ➔
10% off the Everything plan
Motion Hatch ➔
Perfect Your Pricing Toolkit - 50% off (11/29 - 12/2)

MotionVFX ➔
30% off Design/CineStudio, and PPro Resolve packs with code: BW30

Rocket Lasso ➔
50% off all plug-ins (11/29 - 12/2)

Rokoko ➔
45% off the indie creator bundle with code: RKK_SchoolOfMotion (revenue must be under $100K a year)

Shapefest ➔
80% off a Shapefest Pro annual subscription for life (11/29 - 12/2)

The Pixel Lab ➔
30% off everything
Toolfarm ➔
Various plugins and tools on sale

True Grit Texture ➔
50-70% off (starts Wednesday, runs for about a week)

Vincent Schwenk ➔
50% discount with code RENDERSALE

Wacom ➔
Up to $120 off new tablets + deals on refurbished items


All-Access Pass
Unlimited access to 50+ courses, unlimited critique, live events, and 24/7 community. Join School of Motion All-Access today.