

Learn After Effects the Right Way
Master the After Effects interface and build a real animation skillset. Enroll in All-Access to unlock AE Kickstart and 50+ other courses.

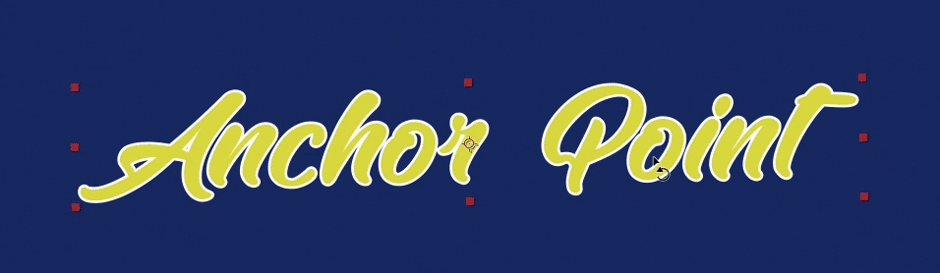
3 Steps to moving the anchor point in After Effects.
We’ve all been there. You’ve designed the perfect After Effects composition, but you need to have your layer rotate around a different point. Or maybe you want your layer to scale down around a specific point so you can make your movement more balanced? What are you to do?
Well, simply put you need to move the anchor point.
What is the Anchor Point?
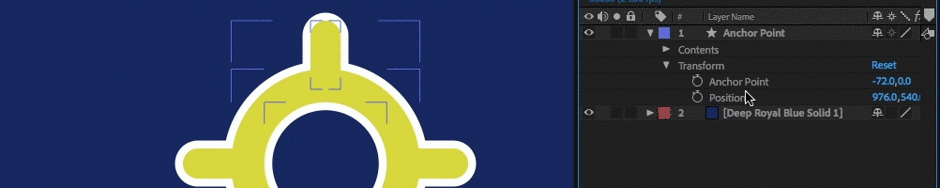
The anchor point in After Effects is the point in which all transformations are manipulated from. In a practical sense the anchor point is the point in which your layer will scale and rotate around. While it may seem silly to have an anchor point and a position transform property both of these parameters do very different things.
As good practice anchor points should be set before you begin animating your composition. So how are you supposed to move your anchor point? Well I’m glad you asked…
How to Move the Anchor Point
If you’ve ever tried moving the anchor point in the transform menu you were probably surprised to see that your layer moved around as well. Many new After Effects artists conclude that this must mean that Anchor Point and Position do the same thing, but this is simply not the case.
On most After Effects project it is not ideal to move your anchor point using the transform menu because doing so will physically move your layers position. Instead you will want to use the Pan-Behind Tool. Here’s how it’s done.
Pro Tip: Don’t set keyframes until you’ve moved your anchor point. You won’t be able to adjust your anchor point if you’ve set any transform keyframes.
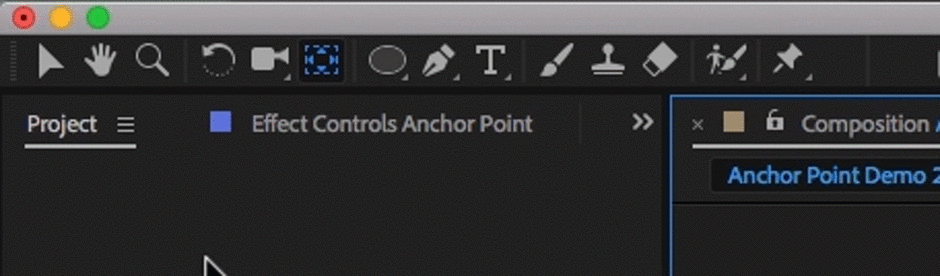
STEP 1: ACTIVATE THE PAN-BEHIND TOOL
Activate the Pan-Behind Tool by hitting the (Y) key on your keyboard. You can also select the Pan-Behind Tool in the toolbar at the top of the After Effects interface.
STEP 2: MOVE THE ANCHOR POINT

The next step is simple. With the Pan-Behind Tool selected move your Anchor Point to your desired location. If you have your transform menu open you will see the anchor point values automatically update as you move your anchor point around the composition.
STEP 3: DESELECT THE PAN-BEHIND TOOL
After you’ve moved your Anchor Point to the desired location simply select your Selection Tool by hitting (V) on your keyboard or select it from the toolbar at the top of the interface.
That’s it! On most After Effects projects you will be adjusting the Anchor Point for 70% of your layers, so it’s important that you get used to this workflow.
Anchor Point Tips
1. CENTER THE ANCHOR POINT ON A LAYER

By default your anchor point will be at the very center of your layer, but if you’ve moved your anchor point already and want to revert back to the original center location all you have to do is hit the following keyboard shortcut:
- Mac: Command+Option+Home
- PC: Ctrl+Alt+Home
2. MOVE THE ANCHOR POINT IN STRAIGHT LINES

You can actually move the anchor point perfectly along the X or Y Axis by holding down Shift and moving the anchor point with the Pan-Behind Tool selected. This is a great way to insure that your anchor point is in the pixel-perfect location.
3. ACTIVATE THOSE ANCHOR POINT GUIDES

Need your Anchor Point to be directly in line with an object in your composition. Well the best way to do that is simply by holding down Control on a PC or Command on a Mac. As you drag your anchor point around with the Pan-Behind Tool you will find that your anchor point will snap to illuminated crosshairs in your composition.
Learn After Effects fundamentals with After Effects Kickstart, included with School of Motion All-Access.
ENROLL NOW!
Acidbite ➔
50% off everything

ActionVFX ➔
30% off all plans and credit packs - starts 11/26

Adobe ➔
50% off all apps and plans through 11/29

aescripts ➔
25% off everything through 12/6
Affinity ➔
50% off all products

Battleaxe ➔
30% off from 11/29-12/7
Boom Library ➔
30% off Boom One, their 48,000+ file audio library
BorisFX ➔
25% off everything, 11/25-12/1

Cavalry ➔
33% off pro subscriptions (11/29 - 12/4)

FXFactory ➔
25% off with code BLACKFRIDAY until 12/3

Goodboyninja ➔
20% off everything

Happy Editing ➔
50% off with code BLACKFRIDAY

Huion ➔
Up to 50% off affordable, high-quality pen display tablets

Insydium ➔
50% off through 12/4
JangaFX ➔
30% off an indie annual license
Kitbash 3D ➔
$200 off Cargo Pro, their entire library
Knights of the Editing Table ➔
Up to 20% off Premiere Pro Extensions
Maxon ➔
25% off Maxon One, ZBrush, & Redshift - Annual Subscriptions (11/29 - 12/8)
Mode Designs ➔
Deals on premium keyboards and accessories
Motion Array ➔
10% off the Everything plan
Motion Hatch ➔
Perfect Your Pricing Toolkit - 50% off (11/29 - 12/2)

MotionVFX ➔
30% off Design/CineStudio, and PPro Resolve packs with code: BW30

Rocket Lasso ➔
50% off all plug-ins (11/29 - 12/2)

Rokoko ➔
45% off the indie creator bundle with code: RKK_SchoolOfMotion (revenue must be under $100K a year)

Shapefest ➔
80% off a Shapefest Pro annual subscription for life (11/29 - 12/2)

The Pixel Lab ➔
30% off everything
Toolfarm ➔
Various plugins and tools on sale

True Grit Texture ➔
50-70% off (starts Wednesday, runs for about a week)

Vincent Schwenk ➔
50% discount with code RENDERSALE

Wacom ➔
Up to $120 off new tablets + deals on refurbished items


Learn After Effects the Right Way
Master the After Effects interface and build a real animation skillset. Enroll in All-Access to unlock AE Kickstart and 50+ other courses.


