


Learn After Effects the Right Way
Master the After Effects interface and build a real animation skillset. Enroll in All-Access to unlock AE Kickstart and 50+ other courses.

A comprehensive guide to creating and saving a GIF.
I have some bad news… You can’t make GIFs in After Effects. Or at least, you can’t make GIFs directly in After Effects unless you buy third-party tool called GIFGun. However, by using some free tools you can convert After Effects videos into GIFs in no-time. In this article-extravaganza I’ll show you how to do this using 4 different methods. We’ll also showcase how to export GIFs using GIFGun directly inside of After Effects. So saddle up and grab a can of Jiff, We’re going to show you how to create a GIF using After Effects. Yeehaw!
{{lead-magnet}}
1. Create a GIF Using Photoshop
- Pros: Free with Creative Cloud, High Quality, Complete Control
- Cons: Slight Learning Curve, Slower than Other Methods,
Photoshop is one of the most powerful tools in the world for creating GIFs. In fact, you might be surprised to hear that you can actually import video into Photoshop. The good thing is Photoshop is included in the Creative Cloud, so if you have a CC subscription you can easily download it on your machine.
STEP 1: EXPORT VIDEO FROM AFTER EFFECTS.
The process of exporting a GIF out of Photoshop starts with exporting a video from After Effects. You can export a video using any codec, I recommend using a compressed video file because you will be taking a quality decrease when you create the GIF anyways. Check out our exporting MP4 video in After Effects article for more on how to do that.
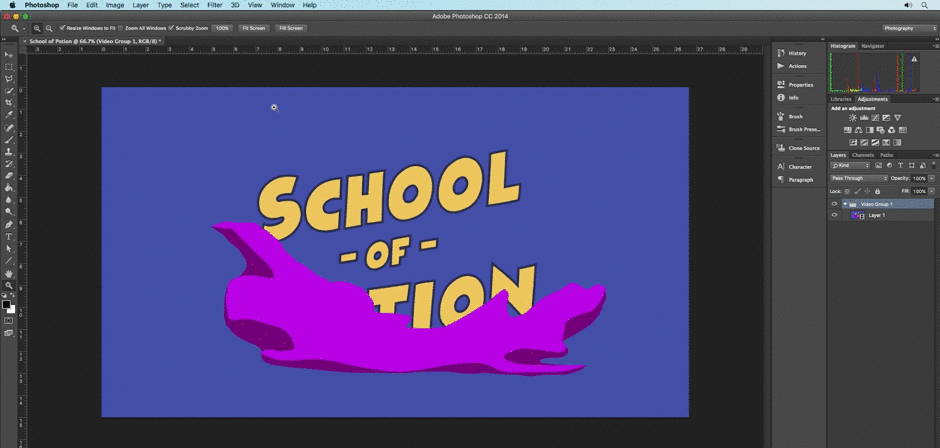
STEP 2: IMPORT INTO PHOTOSHOP
To import video in Photoshop simply hit File>Open or hit command+O. Your video will be imported as a video layer. If you have an image sequence simply select the first through last frame of your image sequence and select the image sequence box before hitting import.
Depending on the size of your video it can take a few seconds to import.
STEP 3: NAVIGATE TO SAVE FOR WEB
Once your video has been imported into your timeline navigate to File>Save for Web…
STEP 4: ADJUST YOUR GIF SETTINGS AND SAVE
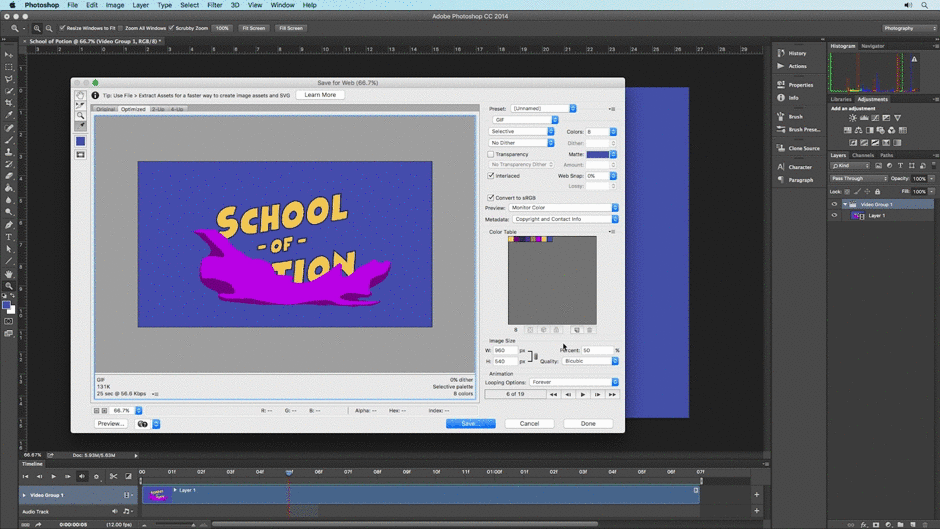
Now that you’re inside the Save for Web menu it’s time to adjust some of the settings. One of the things that makes Photoshop so great is it’s ability to give you an estimated file size in the lower left hand corner of the frame.
From the preset menu at the top you can select a number of GIF presets based on the number of colors and noise in your image. I recommend using as few colors as possible to reduce the file size. Here’s a breakdown of the menu settings:
- Selective to Adaptive: This menu relates to your reduction settings. These settings will decide how your colors are chosen for your specific GIF. Adaptive tends to be smoother than selective.
- Colors: The number of colors used in your final GIF. The more colors you, use the greater the file size.
- Dithering: Dithering is a fancy word used to describe colored noise in your image. You can select a few different dithering options from this menu and set the dither percentage. The more dithering your image has, the smaller your file size will be.
- Transparency: GIFs in Photoshop support alpha channels, but only binary, meaning that the pixel is either fully transparent or fully opaque. However, to smooth out the edges of your GIF, Photoshop allows you to select a Transparency Dithering option that will simulate smooth edges using the matte color box.
- Matte: Sets the background color that the transparency dithering options. This setting will use to smooth out edges if placed on a background that is the same color as the matte. Set the matte color to the color of your webpage or email background.
- Interlaced: An interlaced GIF loads odd horizontal pixel rows then even pixel rows. This allows your GIF to load at a faster, lower resolution before the full GIF is loaded. This can allow your audience to see your GIF before the full image loads.
- Web Snap: Adjust this slider to change your colors to web-safe colors.
- Lossy: The amount of compression in your final GIF. The higher the Lossy % the more noise and pixelation you’ll see in your final image.
- Convert to sRGB: Converts your GIF’s colors to web-browser supported colors.
- Preview: Selects the color profile for the preview box to the left.
- Metadata: Selects the metadata information that is stored on your final image. Metadata is extra information stored inside of your image file.
- Image Size: Come on… I don’t want to be patronizing here…
- Percent: The change in resolution size from the video file in %.
- Quality: Selects the way in which your new file resolution will be interpreted. Nearest Neighbor and Bilinear can be harsh. The bicubic options are smoother with Bicubic Smoother being best for enlargements and Bicubic sharper being best for image reductions.
- Looping Options: Will your GIF play once, loop forever, or loop for a certain number of times?
Once you’ve set your options and previewed your final GIF go ahead and hit that ‘Save’ button.

That’s all there is to it. GIFs saved out of Photoshop tend to be really high-quality and nice compared to those saved out of other applications. However, As you can probably tell, saving a GIF in Photoshop can take a little time. If you want to save a GIF in a jiff try using the next method.
2. Create a GIF Using an App
- Pros: Easy to Use, Fast
- Cons: Can Cost $, Isn’t Always Stable, Less Customization Than Photoshop
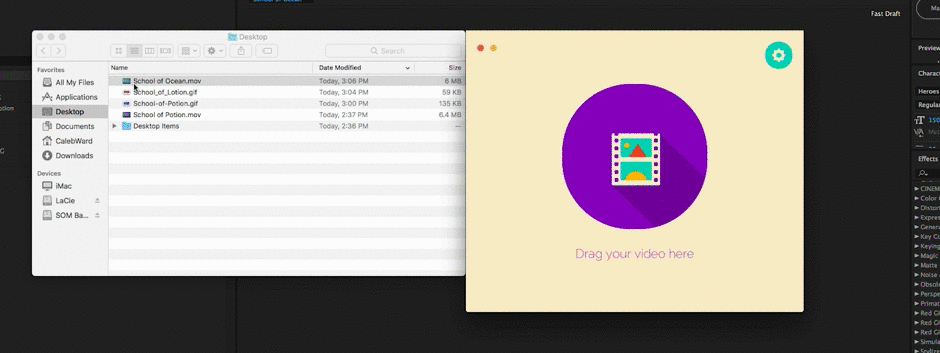
Another way to quickly create a GIF is to use a third party application on your machine like GIF Rocket or Photoscape. Because I use a Mac I use GIF Rocket all the time to quickly convert video clips to GIFs. All you do is save a video clip from After Effects and drag and drop the video file over the application.

Your final GIF will automatically be created. This of course doesn’t give you a ton of options when exporting, but it does make it super fast and easy to export a GIF without spending a dime.
3. Create a GIF in After Effects Using GIFGun
- Pros: Fast, Easy, Customizable
- Cons: Costs $
If you’re looking to export video directly from After Effects, the best way to get it done is to use GIFGun. GIF Gun is a paid tool that can be docked into any panel in After Effects. It’s incredibly easy to use. In fact, I feel like I may be insulting your intelligence by listing out these steps, but just look at how easy it is to export a GIF using GIFGun.
STEP 1: SELECT YOUR COMPOSITION

Just make sure you have your composition highlighted in the timeline.
STEP 2: ADJUST YOUR SETTINGS
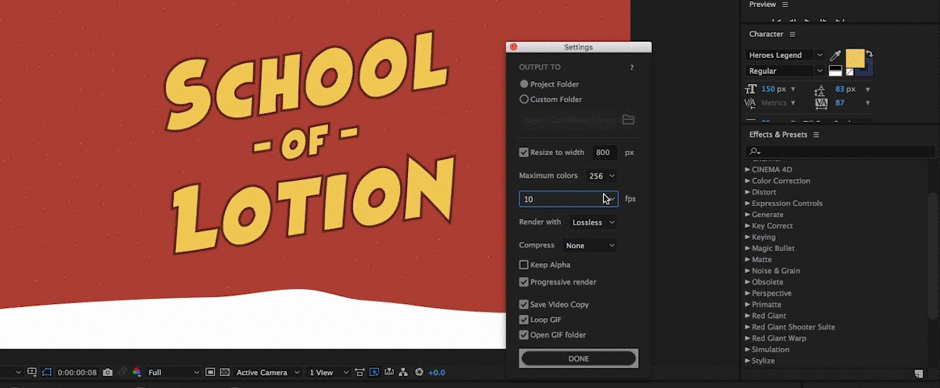
From the GIFGun panel you can hit a little gear icon that will open up your settings. Here’s what each of them does:
- Output To: You can select to export your file to the project folder where your .aep project is located or a custom folder location.
- Resize to Width: Resize your GIF to a new width based on your required needs. This is especially helpful when exporting GIFs for web pages with specific widths. I do this all the time.
- Maximum Colors: The number of potential colors that GIFGun can render in your final GIF. The more colors you have the larger your file size will be.
- FPS: Frames per second. The greater your fps, the smoother your final animation will be, but more frames = greater file size.
- Render With: The video compression format that GIFGun will use to export the GIF. Lossless will be the highest quality possible.
- Compress: The amount of compression that your GIF will feature. More compression will result in a smaller file size, but a reduction and quality.
- Keep Alpha: This setting allows you to render out transparent alpha channels in your final GIF. Remember GIF alpha channel edges are not as smooth as those found in PNGs. GIFs with alpha channels will be larger in size than GIFs without alpha channels. You’ll select this box if you want your transparent background to be see-through.
- Progressive Render: Increases Render Speed.
- Save Video Copy: Saves a copy of the video to your hard drive. Duh…
- Loop GIF: Do you want your GIF to Loop or not?
- Open GIF Folder: Will open the GIF once your file is rendered.
STEP 3: HIT ‘MAKE GIF’
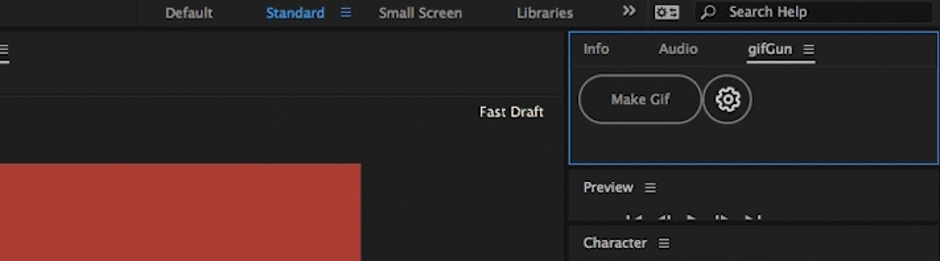
Once you hit the ‘Make GIF’ button your file will be exported.

GIFGun even has a trial version that you can test. You can check it out over on aescripts. I highly recommend GIFGun if you are going to be creating a lot of GIFs in the future. It saves me at least 5 minutes each time I use it. The question is… What are you going to do with all your free time?
4. CREATE A GIF USING A WEBSITE
- Pros: Free, Easy to Use,
- Cons: Low Customization Options

There are a lot of free websites out there that allow you to convert your videos to GIFs online. One of the most popular is Giphy (aka the best thing to ever happen to Slack…). This method can work if you’re in a pinch, but it is really not a great option if you care about quality.

(Bonus) Media Encoder
You can also export a GIF using Adobe Media Encoder if you use a PC. Just select 'Animated GIF' from the dropdown menu and adjust your settings.
Tips for Lowering GIF File Size
There are a few different things you can do to reduce your GIF file size without losing quality. Let’s cover a few:
REDUCE CAMERA SHAKE
GIFs reduce file sizes by blending matching colored pixels together between frames. So to reduce your file size try to minimize any camera shake you may have in your video. I recommend using tools like the warp stabilizer to reduce the amount of shake.
SIMPLE BACKGROUNDS
If you’re rendering out a Motion Graphic masterpiece try to keep the background as simple as possible. A simple single-colored solid should do the trick!
MINIMIZE COLORS
Try to use as few colors as possible when animating your GIF. The fewer your colors the smaller your final GIF size.
COLORED BACKGROUND > TRANSPARENCY

9 times out of 10 you know where your GIF is going to live online before you render it out. So to reduce on file size, go ahead and add in a colored background instead of rendering out your GIF with alpha channels. This will also make your edges less jagged and improve the overall quality of your GIF.
REDUCE FPS TO 15 OR LESS

Unless you’re designing an animated website header or loading screen for a design firm, it’s hard to think of a justifiable reason as to why you would need to have a GIF at 24 or 30 fps. Instead, reduce your frames per second to 12 or 15 and you’ll see your file size dramatically shrink.
THAT’S ALL FOLKS!
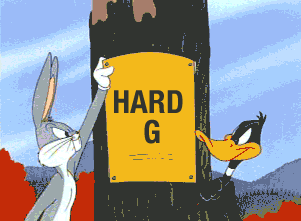
I can’t wait to see your amazing GIF creations. Check out the School of Motion Facebook page where we share animated GIFs from Motion Designers from around the world. Also, If any of you pronounce GIF like JIF there’s a definitive article that you need to read.
Take Your Skills Further with After Effects Kickstart
Want to go deeper? Check out After Effects Kickstart, available with School of Motion All-Access.
ENROLL NOW!
Acidbite ➔
50% off everything

ActionVFX ➔
30% off all plans and credit packs - starts 11/26

Adobe ➔
50% off all apps and plans through 11/29

aescripts ➔
25% off everything through 12/6
Affinity ➔
50% off all products

Battleaxe ➔
30% off from 11/29-12/7
Boom Library ➔
30% off Boom One, their 48,000+ file audio library
BorisFX ➔
25% off everything, 11/25-12/1

Cavalry ➔
33% off pro subscriptions (11/29 - 12/4)

FXFactory ➔
25% off with code BLACKFRIDAY until 12/3

Goodboyninja ➔
20% off everything

Happy Editing ➔
50% off with code BLACKFRIDAY

Huion ➔
Up to 50% off affordable, high-quality pen display tablets

Insydium ➔
50% off through 12/4
JangaFX ➔
30% off an indie annual license
Kitbash 3D ➔
$200 off Cargo Pro, their entire library
Knights of the Editing Table ➔
Up to 20% off Premiere Pro Extensions
Maxon ➔
25% off Maxon One, ZBrush, & Redshift - Annual Subscriptions (11/29 - 12/8)
Mode Designs ➔
Deals on premium keyboards and accessories
Motion Array ➔
10% off the Everything plan
Motion Hatch ➔
Perfect Your Pricing Toolkit - 50% off (11/29 - 12/2)

MotionVFX ➔
30% off Design/CineStudio, and PPro Resolve packs with code: BW30

Rocket Lasso ➔
50% off all plug-ins (11/29 - 12/2)

Rokoko ➔
45% off the indie creator bundle with code: RKK_SchoolOfMotion (revenue must be under $100K a year)

Shapefest ➔
80% off a Shapefest Pro annual subscription for life (11/29 - 12/2)

The Pixel Lab ➔
30% off everything
Toolfarm ➔
Various plugins and tools on sale

True Grit Texture ➔
50-70% off (starts Wednesday, runs for about a week)

Vincent Schwenk ➔
50% discount with code RENDERSALE

Wacom ➔
Up to $120 off new tablets + deals on refurbished items


Learn After Effects the Right Way
Master the After Effects interface and build a real animation skillset. Enroll in All-Access to unlock AE Kickstart and 50+ other courses.


