
All-Access Pass
Unlimited access to 50+ courses, unlimited critique, live events, and 24/7 community. Join School of Motion All-Access today.

Cinema4D is an essential tool for any Motion Designer, but how well do you really know it?
How often do you use the top menu tabs in Cinema 4D? Chances are, you probably have a handful of tools you use, but what about those random features you haven’t tried yet? We're taking a look at the hidden gems in the top menus, and we're just getting started.
In this tutorial, we’ll be doing a deep dive on the Create tab. It’s very possible that you won't ever really need to open this menu. Most of these objects come integrated into Cinema 4D’s user interface. However, as convenient as it is to create your Primitives, Generators, Effectors, and Spline tools, there are a few hidden gems that can help you set up more realistic lighting and optimize your scene.
Here are the 4 main things you should use in the Cinema4D Create menu:
- PBR light
- Lighting Tool
- Bake as Alembic
- Xrefs
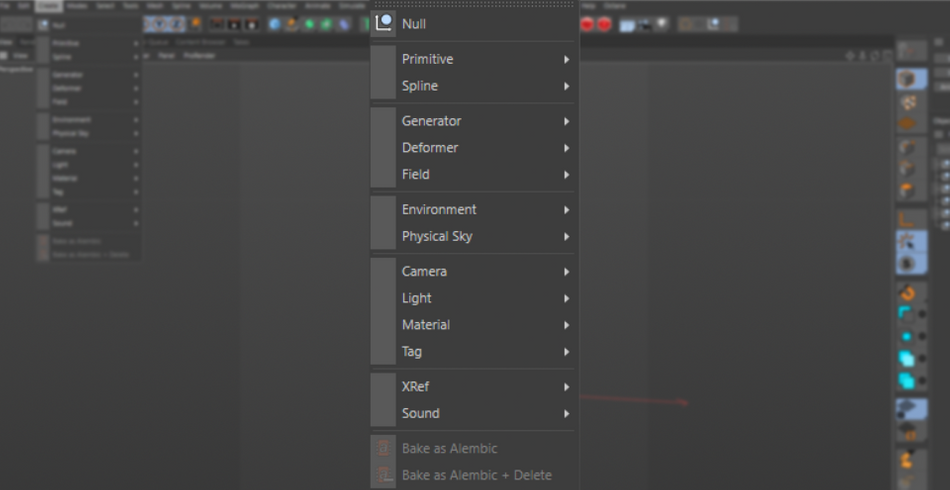
Create > PBR Light
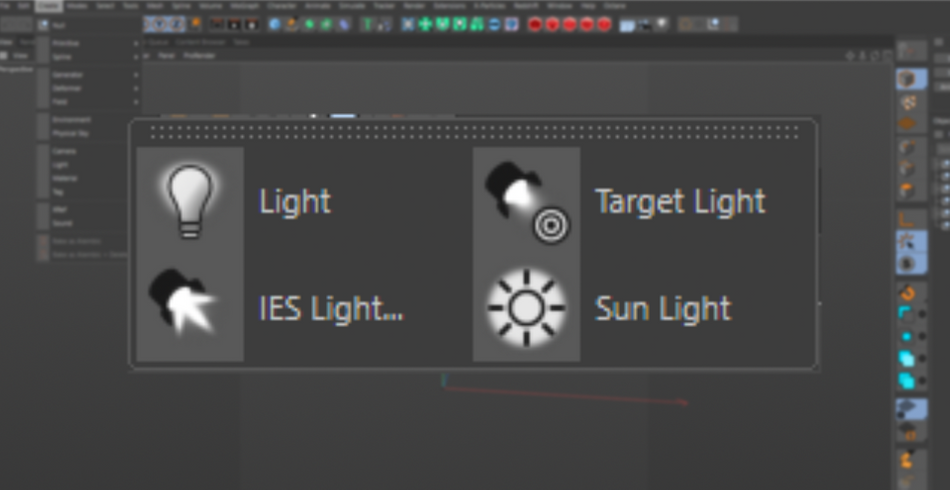
By default, the Light drop down menu built into the interface gives you four options. These are your typical light options: The standard Light, Target, IES and Sun lights, which are great tools for lighting your scene.
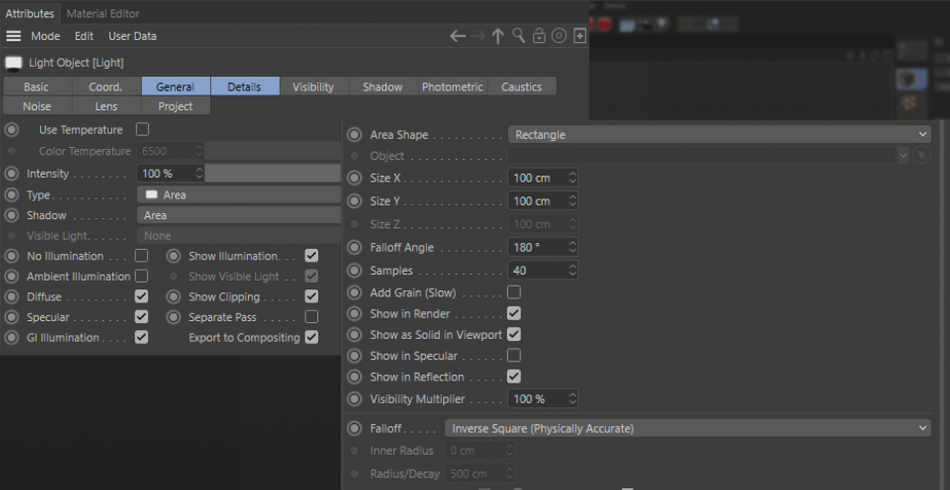
However, hidden inside the Create menu is the PBR Light. The main difference between this light and a standard light is that, by default, this has Physically Accurate settings already active. Your shadows are set to Area and your light falloff is set to Inverse Square.

When combined with the PBR material shader, your renders will produce much more photorealistic results. Of course, be prepared for longer render times.
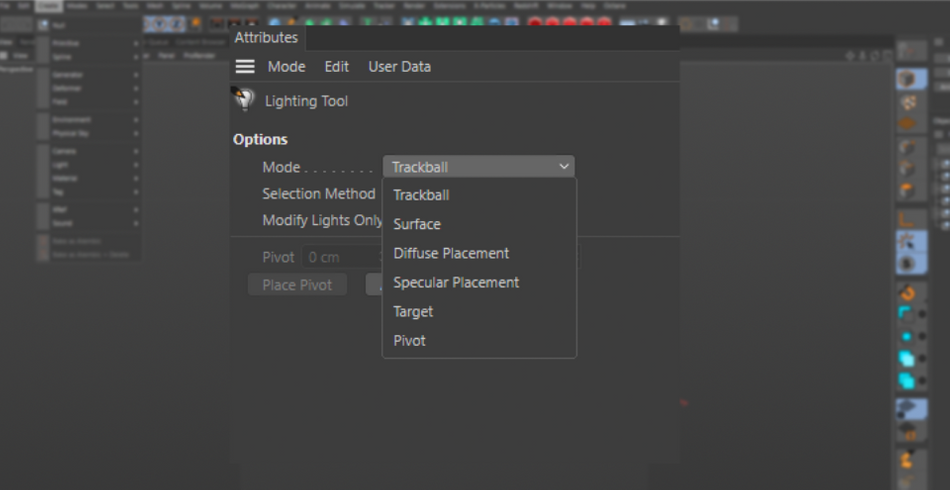
Create> Lighting Tool
Ever heard of the Lighting Tool? You may have skipped right over it, or had no idea it even existed. It’s tucked away in the same Light menu, all the way at the bottom. But if you’re interested in Product Lighting, or good lighting in general, the Lighting Tool is your new best friend.
The Lighting Tool works by clicking inside of the viewport where you would want to light your scene or object. It will then create a light where you click. Then if you click and drag, the light will now move away from the origin point and follow your cursor.

Then if you click and drag while holding shift, the light will move in Z space—a great way to move the light behind or in front of an object.
Click and drag again to rotate the light from its new position to change angles.
You can even adjust the brightness of the light by holding down Ctrl/Command and click and dragging in the viewport.
Once you are happy with the light, simply click on Add Light in the Attributes panel to create a new light. If you want to make adjustments to an existing light, select it in your Object Manager and use the tools as before.
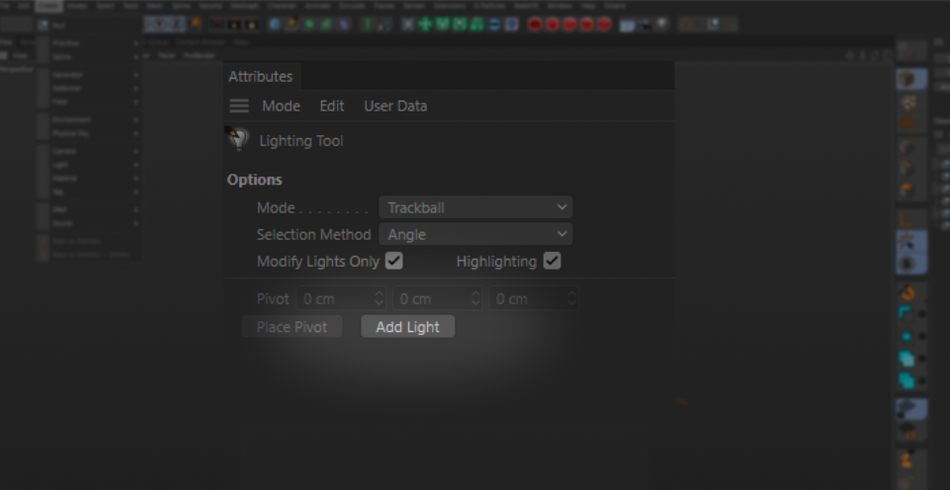
Make sure to explore the different Modes in the attributes, such as Target, Surface, Pivot, as well as a few more. These modify the behavior of the cursor. Find the one that works best for you!
Create > Bake as Alembic
The Alembic file format is a great “exchange” format for 3D. Let’s say you created a very complex scene in something like Houdini, but you want to do the rendering and lighting inside of Cinema 4D. Alembic is designed to make that cross-app trip as smooth as possible.

Now, let’s use Cinema 4D as the “source” of your scene. Let’s say you have a really cool Dynamics simulation and you would like to send that to another host application, or would like to bring it back in C4D so you can add additional simulations on top of it without overloading your computer’s processor.
x
Simply right-click on your object and select Bake as Alembic.
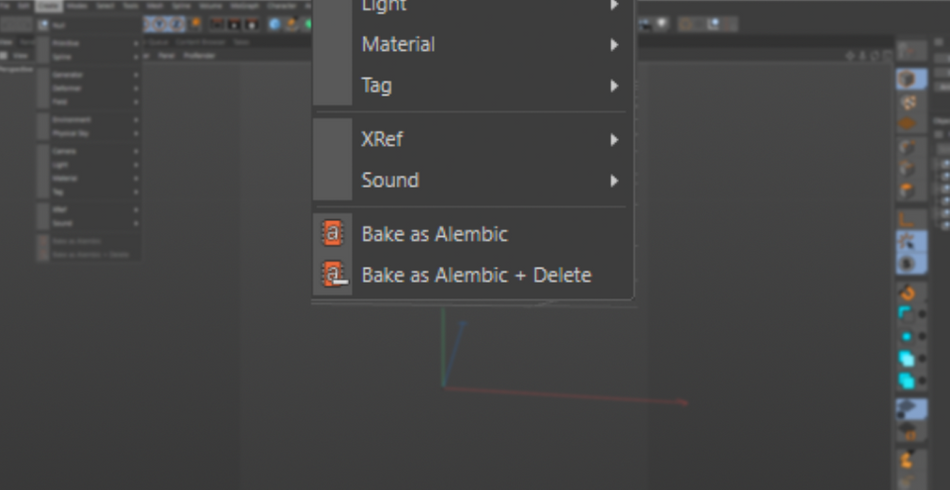
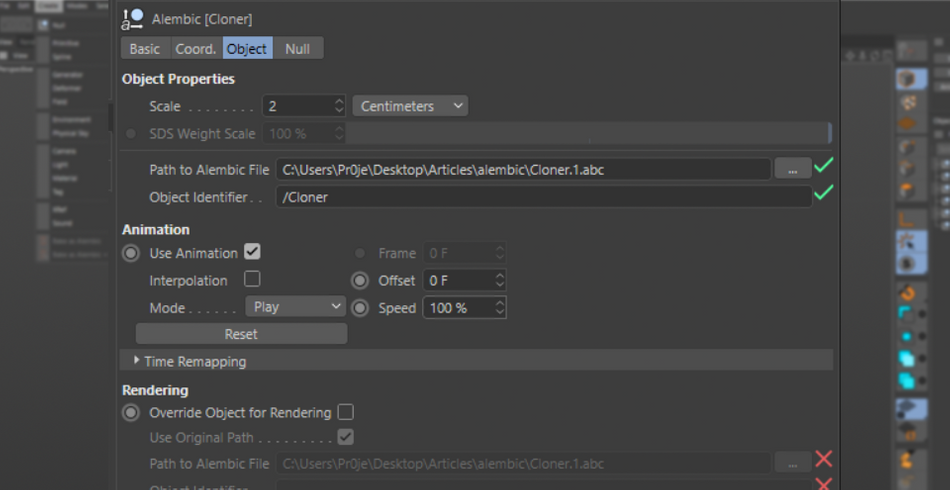
This will turn your object into a type of “3D video clip” where it plays back the animation very much like it would in a video editing application. This frees up your computer’s processing power on the rest of the scene. What’s even better is that you can adjust the speed of your Alembic file as well as the Offset in case you need to make any adjustments with the timing.
If you are a fan of Mixamo and Marvelous Designer and would like to combine the wonderful character animations with clothing simulations, Alembic is the format to do it!
Alembic is also great for when creating animations that need to stay the same on multiple computers (such as a render farm), or when sending over a file that was created with the use of a plugin like XParticles. Save it out to Alembic and everyone working off the file will have the same base animation, allowing each artist to contribute their piece of the puzzle.
x
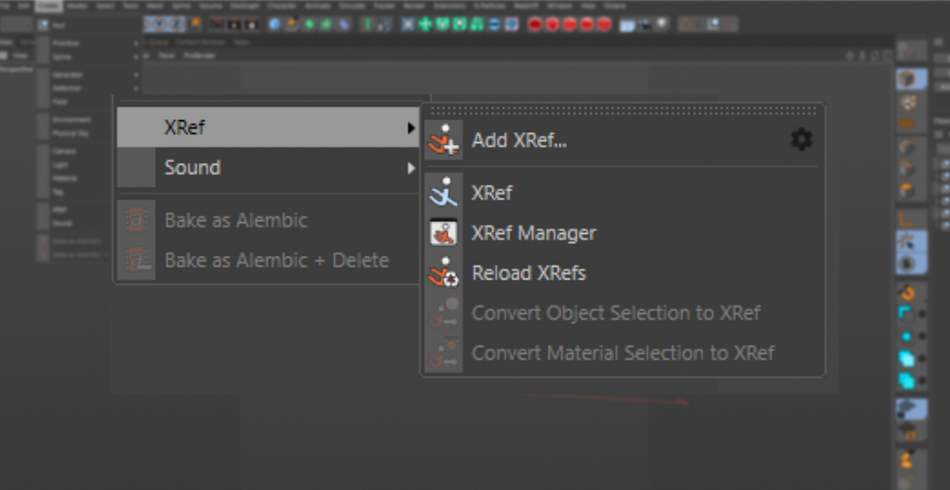
Create > Xref
Xrefs are great tools for working with multiple artists. They allow users to import separate scene files that can be worked on and updated separately from the main scene file.
This means an environment artist can continue building and lighting the scene while an animator works on the camera moves, and a modeler continues to update the hero objects of the scene. All that is needed is to reload the Xrefs and it’ll import the latest version of the referenced files!
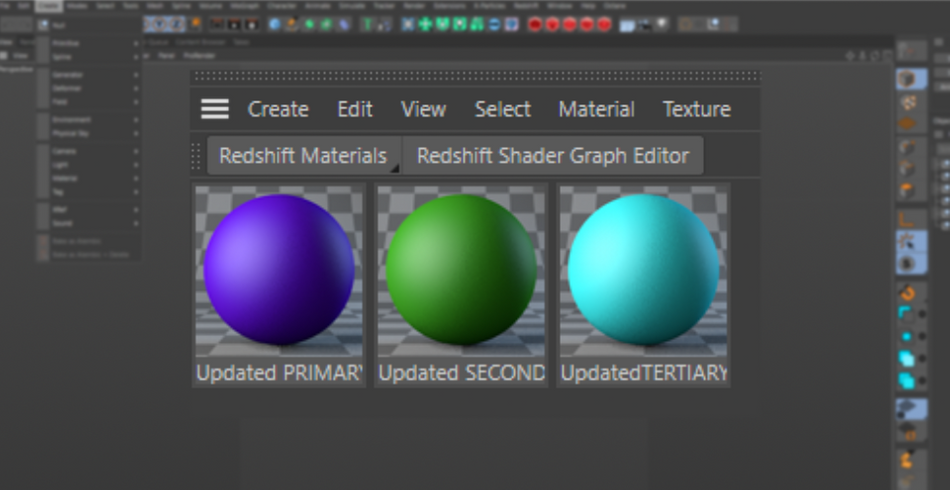
Another useful function of Xrefs is keeping Materials and Colors consistent across multiple deliverables for the same client. All you have to do is have your materials built in a Xref.

If the colors happen to be changed halfway through the project, you no longer need to go through each project file and update the materials separately. You can simply update the Xref and you are up in running!
Xrefs are incredibly versatile and allow you to leverage the strengths of multiple artists on a single project. No need for constantly importing files and replacing old objects. Keep all of the Xref project files in a centralized location and the various puzzle pieces of a 3D project will continuously update in a versatile and non-destructive workflow.

Look at you!
As you can see, the Create menu contains a couple of gems that can completely revolutionize how you light your scene and work on a project that requires multiple host applications. The lighting tool alone is one of those hidden niche tools that can alleviate a lot of the pain of directing your lights.

Cinema4D Basecamp
If you're looking to get the most out of Cinema4D, maybe it's time to take a more proactive step in your professional development. That's why we put together Cinema4D Basecamp, a course designed to get you from zero to hero in 12 weeks.
And if you think you're ready for the next level in 3D development, check out our all new course, Cinema 4D Ascent!
ENROLL NOW!
Acidbite ➔
50% off everything

ActionVFX ➔
30% off all plans and credit packs - starts 11/26

Adobe ➔
50% off all apps and plans through 11/29

aescripts ➔
25% off everything through 12/6
Affinity ➔
50% off all products

Battleaxe ➔
30% off from 11/29-12/7
Boom Library ➔
30% off Boom One, their 48,000+ file audio library
BorisFX ➔
25% off everything, 11/25-12/1

Cavalry ➔
33% off pro subscriptions (11/29 - 12/4)

FXFactory ➔
25% off with code BLACKFRIDAY until 12/3

Goodboyninja ➔
20% off everything

Happy Editing ➔
50% off with code BLACKFRIDAY

Huion ➔
Up to 50% off affordable, high-quality pen display tablets

Insydium ➔
50% off through 12/4
JangaFX ➔
30% off an indie annual license
Kitbash 3D ➔
$200 off Cargo Pro, their entire library
Knights of the Editing Table ➔
Up to 20% off Premiere Pro Extensions
Maxon ➔
25% off Maxon One, ZBrush, & Redshift - Annual Subscriptions (11/29 - 12/8)
Mode Designs ➔
Deals on premium keyboards and accessories
Motion Array ➔
10% off the Everything plan
Motion Hatch ➔
Perfect Your Pricing Toolkit - 50% off (11/29 - 12/2)

MotionVFX ➔
30% off Design/CineStudio, and PPro Resolve packs with code: BW30

Rocket Lasso ➔
50% off all plug-ins (11/29 - 12/2)

Rokoko ➔
45% off the indie creator bundle with code: RKK_SchoolOfMotion (revenue must be under $100K a year)

Shapefest ➔
80% off a Shapefest Pro annual subscription for life (11/29 - 12/2)

The Pixel Lab ➔
30% off everything
Toolfarm ➔
Various plugins and tools on sale

True Grit Texture ➔
50-70% off (starts Wednesday, runs for about a week)

Vincent Schwenk ➔
50% discount with code RENDERSALE

Wacom ➔
Up to $120 off new tablets + deals on refurbished items


All-Access Pass
Unlimited access to 50+ courses, unlimited critique, live events, and 24/7 community. Join School of Motion All-Access today.