
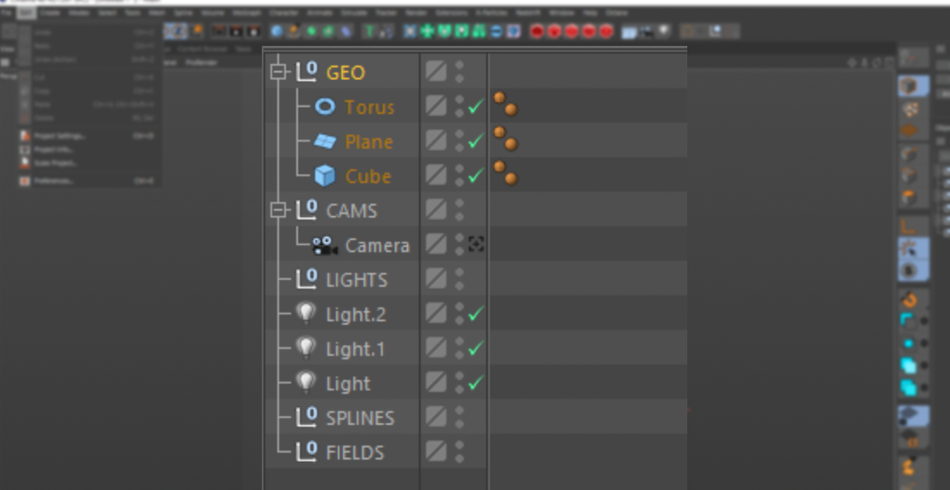
All-Access Pass
Unlimited access to 50+ courses, unlimited critique, live events, and 24/7 community. Join School of Motion All-Access today.

Cinema 4D is an essential tool for any Motion Designer, but how well do you really know it?
How often do you use the top menu tabs in Cinema 4D? Chances are, you probably have a handful of tools you use, but what about those random features you haven’t tried yet? We're taking a look at the hidden gems in the top menus, and we're just getting started.

In this tutorial, we’ll be doing a deep dive on the Edit tab. Chances are, you probably use this tab to Undo, Redo, Copy, Cut, and Paste—but most likely, through keyboard shortcuts. In this menu, there are a few settings you may not have known you needed...that is, until today!
Here are the 3 main things you should use in the Cinema4D Edit menu:
- Project Settings
- Scale Project
- Preferences
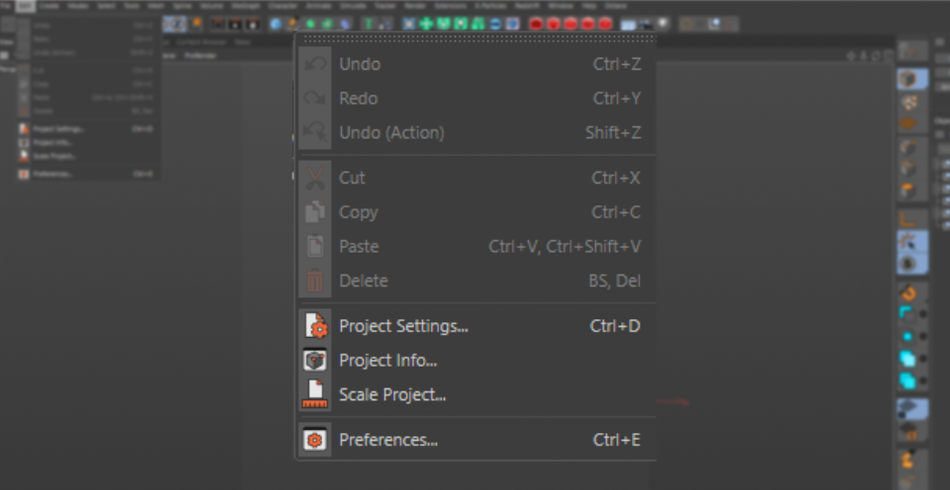
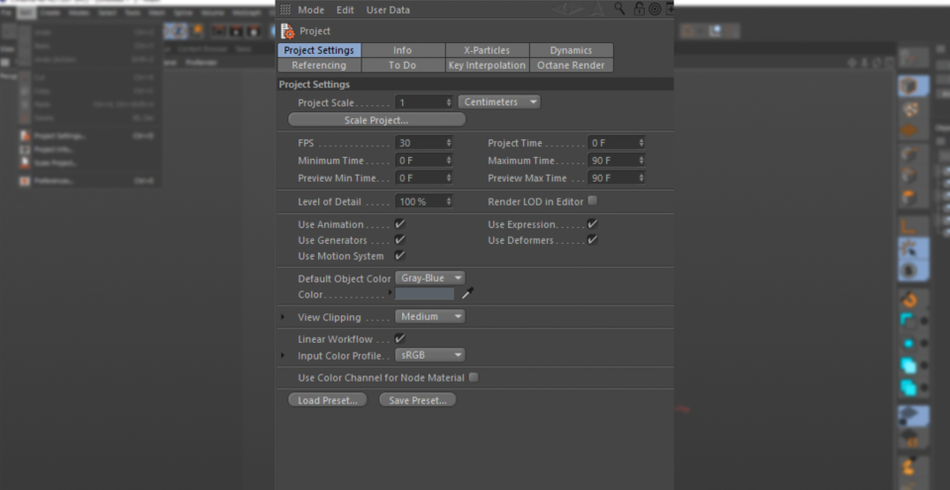
File> Project Settings
This is where you control all things project settings. You can set up the scale of your scene, your frame rate, clipping, as well as other more advanced settings.
KEYFRAMES
If you’re a fan of having your Keyframes be Linear by default, you can set that here. By default, the keyframes are set to Spline (Easy-Ease). While useful for most applications, if you find yourself repeatedly changing your easing to linear, this can help save you a ton of time. Also, if you’re a Character Animator and are doing pose-to-pose animations, you can set your default keyframe to Step.
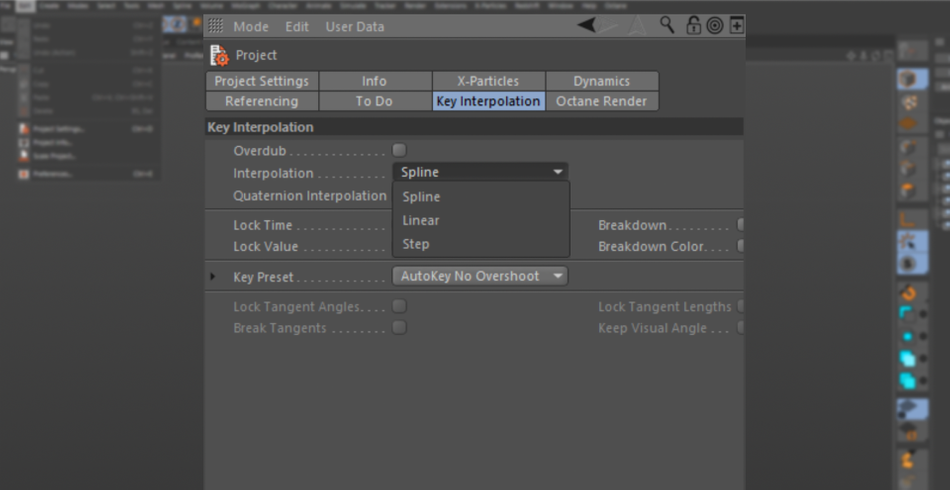
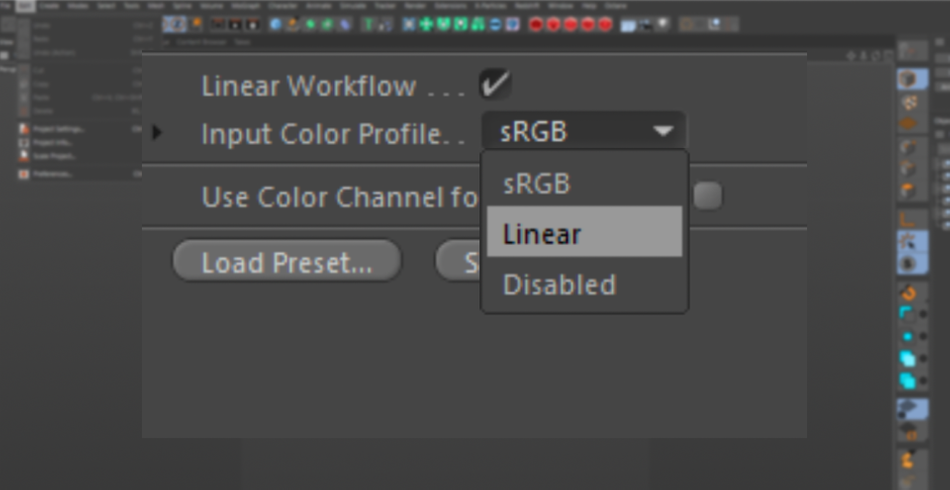
If you’re a fan of working in Linear color space instead of sRGB, here’s where you change that.
CLIPPING
Are you fan of using Kitbash3D sets? By default, they set their kit sizes to real-world scale, so buildings are hundreds of feet in size. In Cinema 4D, there’s a setting called Clipping. This controls how many units are visible in the viewport. By default, Cinema has it set to Medium. Once you zoom out a certain amount, the buildings will start to look really strange as they are culled from the viewport.
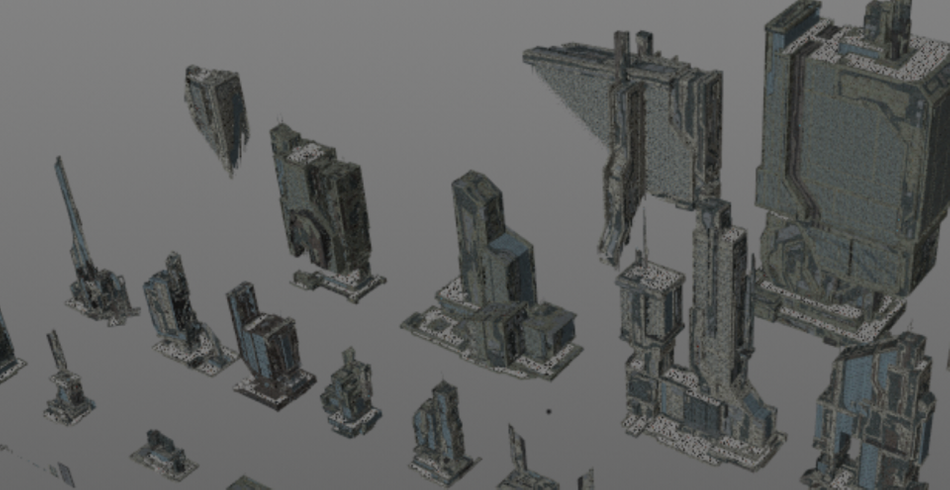
This is where you can change it from Medium to Huge. The buildings will stay in view for much greater distances!
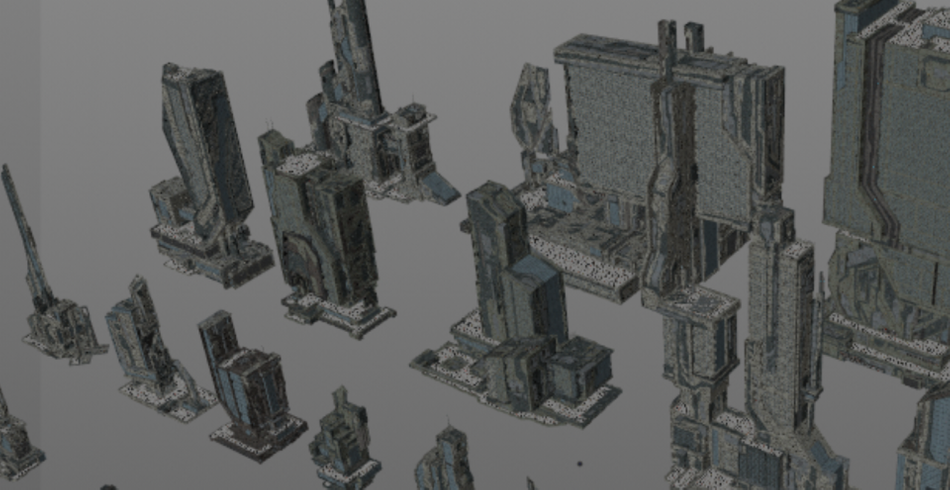
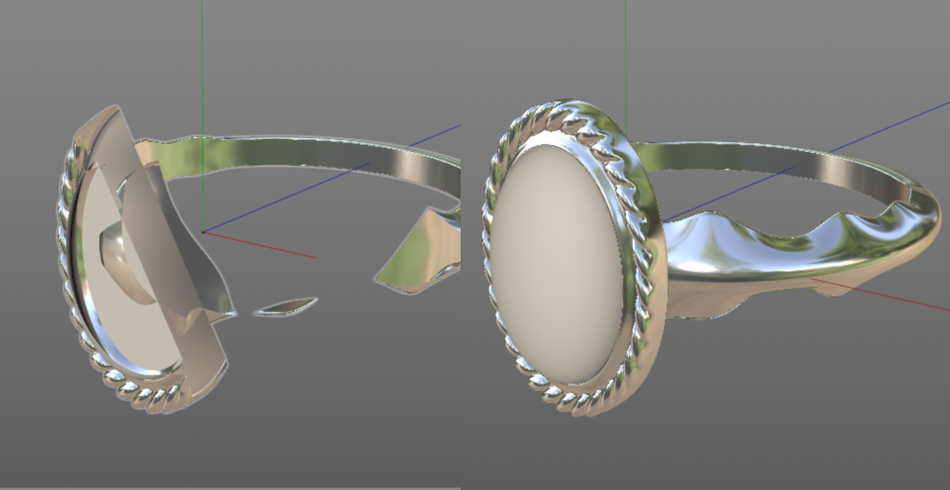
If you happen to work on small objects, such as jewelry, here’s a great time to change the Clipping to Small or Tiny.
DYNAMICS
Now for something a little more advanced. If you move over to the Dynamics tab, you have the option to adjust how Cinema 4D handles simulations. Cinema 4D has an amazing simulation system, however the default settings are set to be fast, not necessarily accurate.

While not delving too deeply into the settings, a very easy rule is to increase the Steps Per Frame to increase the accuracy. This is great for smoothing out simulations that have “jitters”.
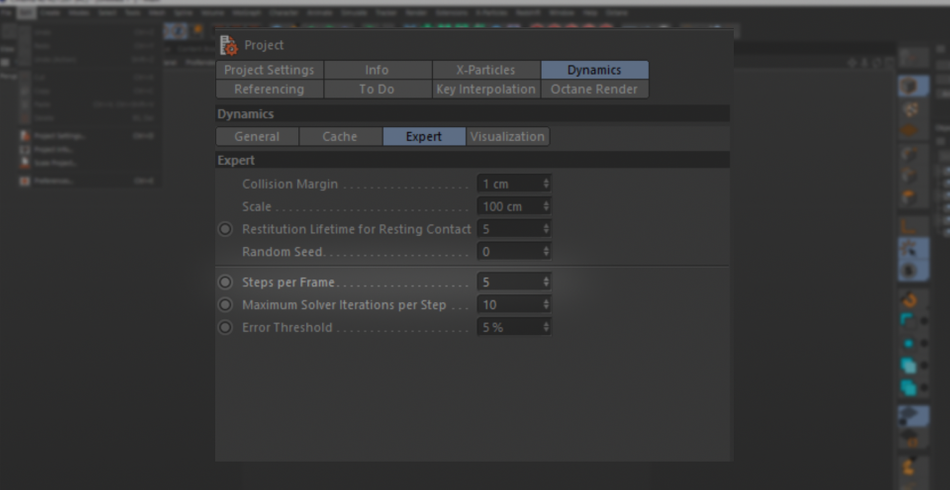
Of course, as with anything that makes your renders look prettier, it comes at a cost. Be ready to experience longer simulation times.

File> Scale Project
Scaling your scene may not seem like a huge deal. But within a few circumstances, scaling is an absolute must. This is most applicable when scaling objects to real-world scales: think massive buildings.

But also, Volumes.

SCALE SCENE
Let’s start with buildings first. There will be times when you purchase a pack of models. It’s very likely that those buildings will not be set to real-world scale. So, this is where you can decide to scale the scene manually and watch your viewport slow to a crawl.
Third party assets also render object lights based on "real-world" scale, so now your lights are WAY brighter then they were before, since their intensity was increased with the size!
x
Or, you can hop over to Scale Scene and convert your default 1 Centimeter to say, 100 Feet.
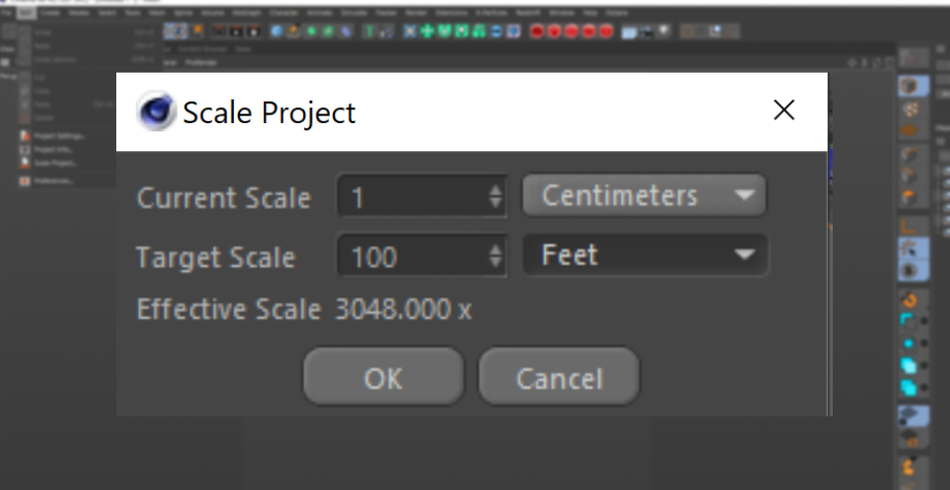
Everything will immediately scale up, and you are now working in much more realistic sizes. Now, your perspective will be much more accurate and your lights will remain at the same level of intensity as before.
VOLUMES
Now, lets look at Volumes. Without getting too much into the weeds of what VDBs are, it’s good to know that Volumes tend to work fastest when they are kept at small scales. Due to how much data they pack into them, the bigger the Volume is in size, the more Gigabytes you have to deal with.

So, lets say you have a wonderful scene set up, but now you would like to drop in some really nice Volumes you bought to give your scene a nice foggy look. You COULD scale the volume to fill the scene, but this comes at a cost. Much like scaling a low resolution image, scaling a Volume will start to reveal the low resolution of the Volume.

So instead of scaling the Volume up, you can scale the scene down so that it fits within the Volume. The resolution is preserved and your scene can go back to looking beautiful!

File> Preferences
You’ll find yourself inside of the Preferences rather often, most likely when retrieving a crashed file or setting your auto-save options, as well as to up your Undo limit. It’s important to learn about the other lesser known settings found in the menu.
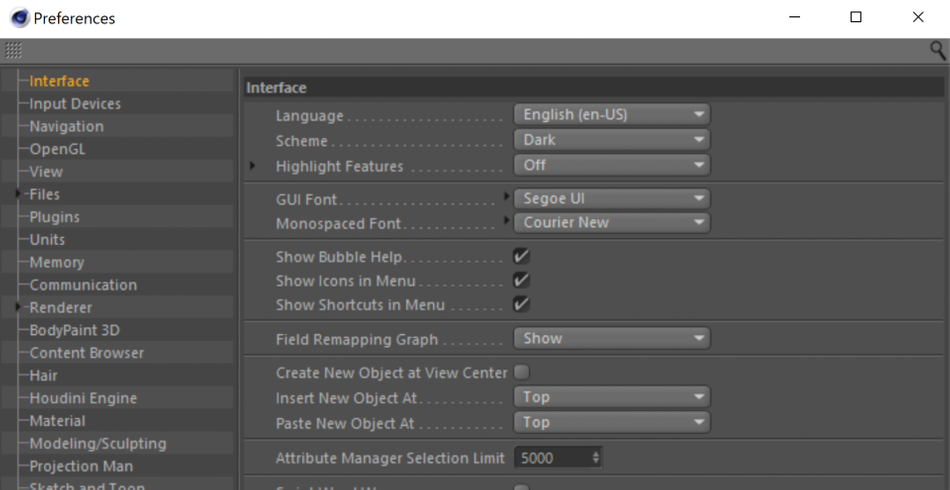
INTERFACE
Inside of Interface you have a couple of options that you may want to explore, namely the Insert/Paste New Object At. By default, any time you create a new object Cinema 4D will create the object at the top of your Object Manager.
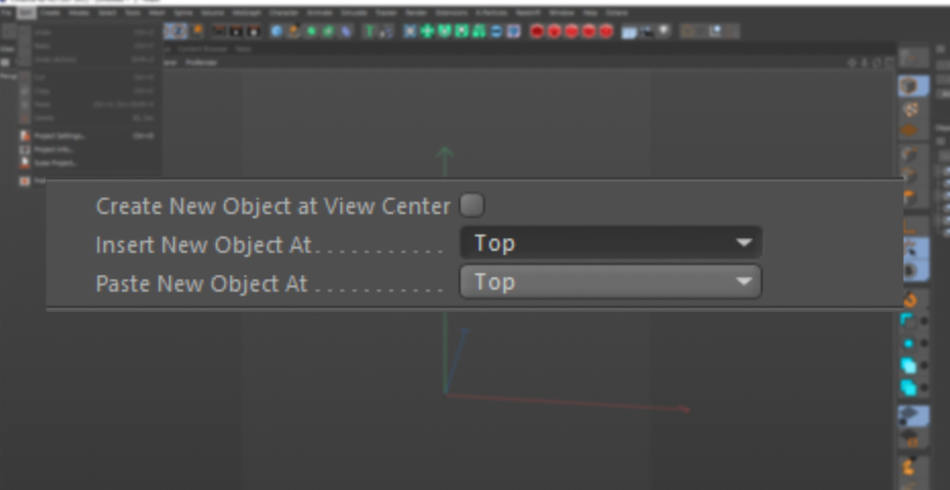
However, with these options you can set the new objects to appear in a number of places, from next to the currently selected object to making each object a child or parent to the active objects.
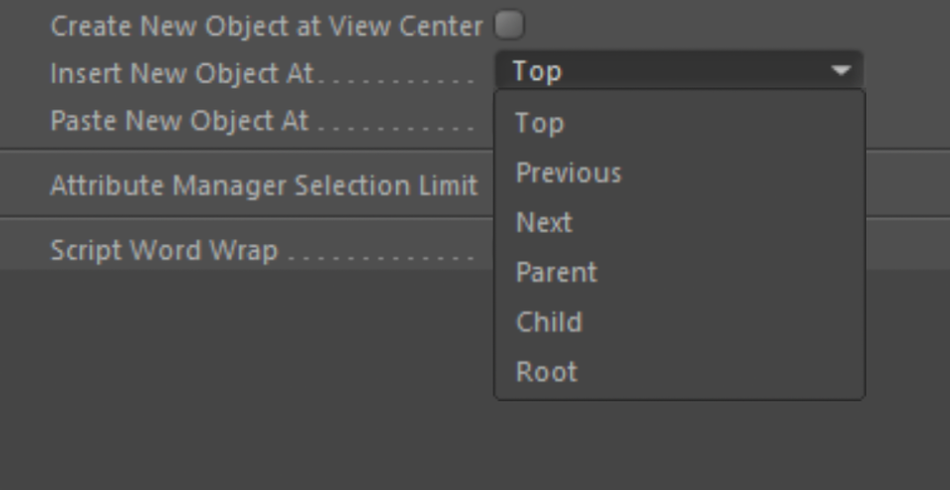
These can help facilitate a couple of workflows. For example, if you happen to work in a prebuilt hierarchy of Nulls (think of them as folders), it makes a lot of sense for your new objects to become children of those Nulls. You can achieve this by having the new objects set to Child or Next.
UNITS
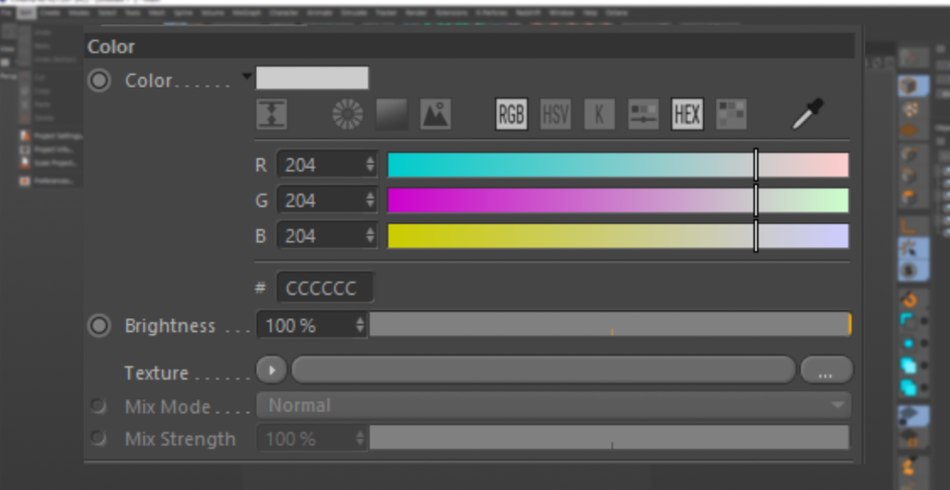
Now, lets hop over to Units. This one has a couple of settings that should be defaults. Inside of the Color Chooser, there is a check box for “Hexidecimal”. When choosing colors in Cinema 4D, if you want to use a Hex code for your color, you have to manually switch over to the Hex tab to be able to type in your hex code.
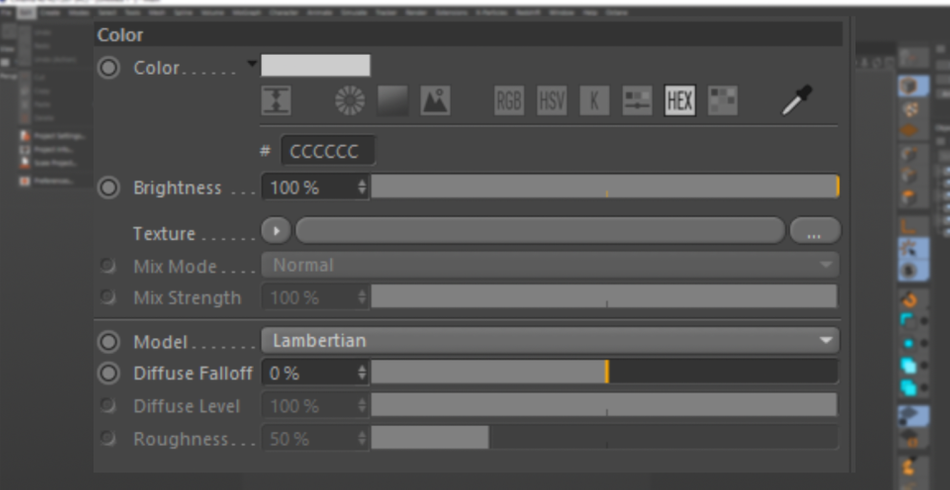
However, in the settings, you can activate Hexidecimal to appear immediately when you open the color chooser. This may save you a click, but it adds up over time!
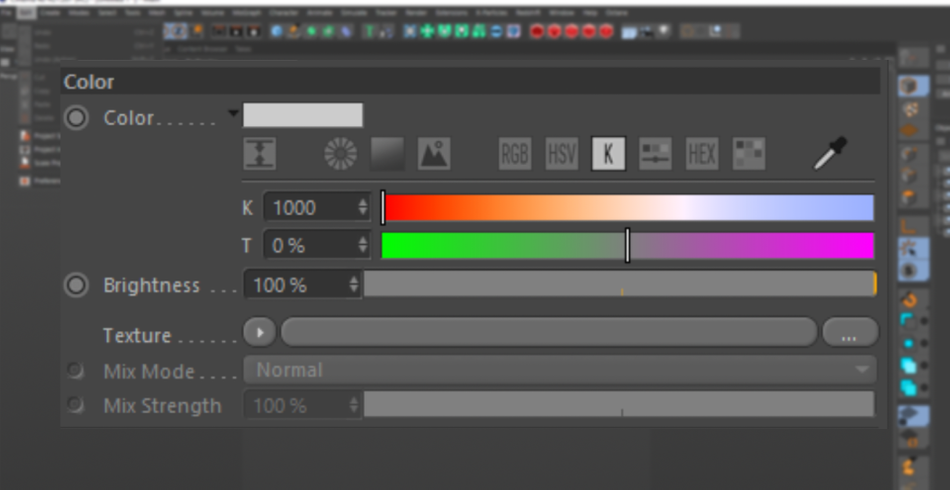
KELVIN TEMPERATURE
You can also activate Kelvin Temperature. If you’re a fan of adjusting your light’s color temperature in instead of RGB color, this is a great way to implement real-world lighting practices.
PATHS
Now finally, inside of Files, there’s a section for Paths. Here, you can set filepaths for texture files. Why is this important? Let’s say you have a giant collection of materials you have bought or have been developing for a while and they reference certain texture files.
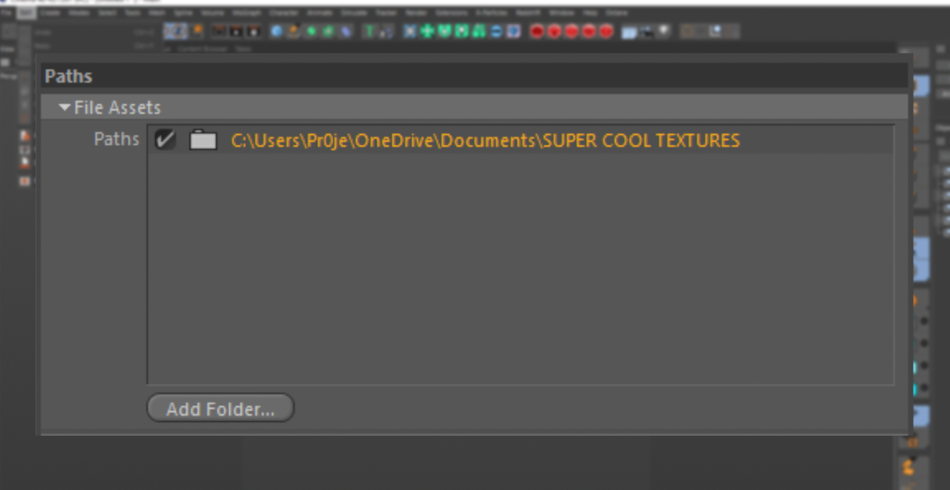
The best way to guarantee that those files will always be found by Cinema 4D—and avoid having to relink them every time—is to place the file path in this box. Now every time you open C4D, those files will be preloaded and ready to rock, waiting for your command.

Edit your way to the good life
So now that you have seen what the Edit Menu can do, hopefully you will explore all of the setting available to you to fully customize your personal workflow within Cinema 4D. The Hexidecimal settings alone will save you hours of clicking over the course of your motion design career. More optimizations await!

Cinema4D Basecamp
If you're looking to get the most out of Cinema4D, maybe it's time to take a more proactive step in your professional development. That's why we put together Cinema4D Basecamp, a course designed to get you from zero to hero in 12 weeks.
And if you think you're ready for the next level in 3D development, check out our all new course, Cinema 4D Ascent!
ENROLL NOW!
Acidbite ➔
50% off everything

ActionVFX ➔
30% off all plans and credit packs - starts 11/26

Adobe ➔
50% off all apps and plans through 11/29

aescripts ➔
25% off everything through 12/6
Affinity ➔
50% off all products

Battleaxe ➔
30% off from 11/29-12/7
Boom Library ➔
30% off Boom One, their 48,000+ file audio library
BorisFX ➔
25% off everything, 11/25-12/1

Cavalry ➔
33% off pro subscriptions (11/29 - 12/4)

FXFactory ➔
25% off with code BLACKFRIDAY until 12/3

Goodboyninja ➔
20% off everything

Happy Editing ➔
50% off with code BLACKFRIDAY

Huion ➔
Up to 50% off affordable, high-quality pen display tablets

Insydium ➔
50% off through 12/4
JangaFX ➔
30% off an indie annual license
Kitbash 3D ➔
$200 off Cargo Pro, their entire library
Knights of the Editing Table ➔
Up to 20% off Premiere Pro Extensions
Maxon ➔
25% off Maxon One, ZBrush, & Redshift - Annual Subscriptions (11/29 - 12/8)
Mode Designs ➔
Deals on premium keyboards and accessories
Motion Array ➔
10% off the Everything plan
Motion Hatch ➔
Perfect Your Pricing Toolkit - 50% off (11/29 - 12/2)

MotionVFX ➔
30% off Design/CineStudio, and PPro Resolve packs with code: BW30

Rocket Lasso ➔
50% off all plug-ins (11/29 - 12/2)

Rokoko ➔
45% off the indie creator bundle with code: RKK_SchoolOfMotion (revenue must be under $100K a year)

Shapefest ➔
80% off a Shapefest Pro annual subscription for life (11/29 - 12/2)

The Pixel Lab ➔
30% off everything
Toolfarm ➔
Various plugins and tools on sale

True Grit Texture ➔
50-70% off (starts Wednesday, runs for about a week)

Vincent Schwenk ➔
50% discount with code RENDERSALE

Wacom ➔
Up to $120 off new tablets + deals on refurbished items


All-Access Pass
Unlimited access to 50+ courses, unlimited critique, live events, and 24/7 community. Join School of Motion All-Access today.