
All-Access Pass
Unlimited access to 50+ courses, unlimited critique, live events, and 24/7 community. Join School of Motion All-Access today.

Cinema 4D is an essential tool for any Motion Designer, but how well do you really know it?
How often do you use the top menu tabs in Cinema 4D? Chances are, you probably have a handful of tools you use, but what about those random features you haven’t tried yet? We're taking a look at the hidden gems in the top menus, and we're just getting started.

In this tutorial, we’ll be doing a deep dive on the File tab. Chances are, you probably use this tab to save your project or export your object as an FBX, but there’s a whole plethora of other amazing tools in here that you should be trying. We’ll learn how to send your project to After Effects using Cineware, saving specific objects of a scene as their own C4D files, and also how to combine multiple projects, and so much more.
Cinema 4D Menu Guide: File
Here are the 4 main things you should use in the Cinema4D File menu:
- Save Incremental
- Save Project for Cineware
- Save Selected Object As
- Merge Project
File> Save Incremental
When working on a project, it’s a good idea to save iterations of your project. This helps create a “timeline” of your progress, but more importantly, it creates a backup system for your project. It is not unheard of for Cinema 4D projects to become corrupted and refuse to open.
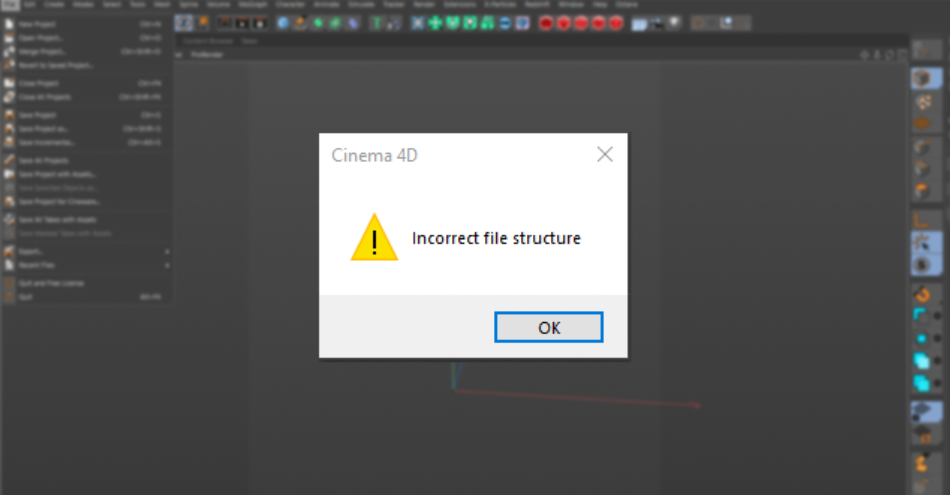
If this happens to you and you only have one project file, its very likely all of the work you did on that project has been completely lost. A true nightmare.

This is what Save Incremental is designed to address. Cinema 4D has several auto-save functions, but even then, it will only create so many before it starts replacing the older files. The only way to guarantee that you have a series of project files, preserving the hours of work, is to create iterations yourself.
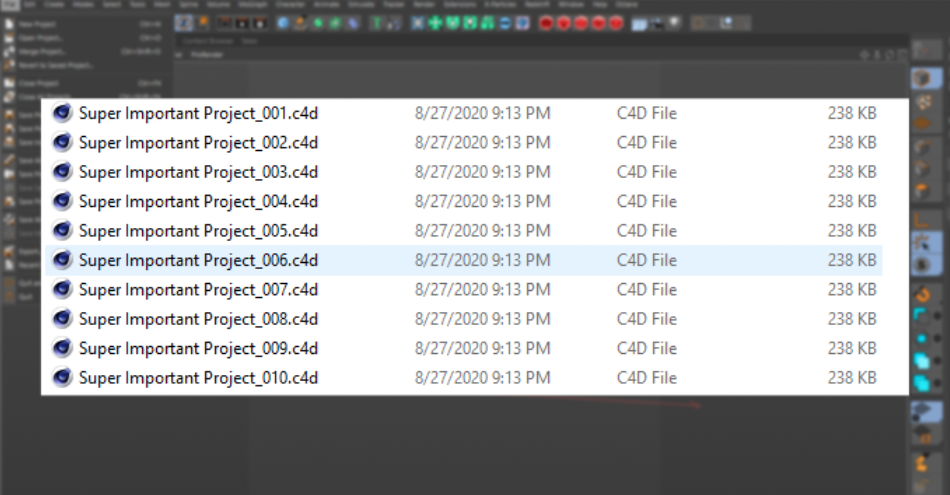
Now, while it is a great tool for preserving your progress. Saving Incremental files also allows you to explore different directions for your project. Say you have a moment of inspiration and decide to take it a different path than your original vision. You can create a new iteration and use that as a test bed for your new ideas while preserving your original vision in a previous iteration!
File> Save Project for Cineware
There’s a popular saying for working in 3D: “you just gotta get it close enough in render”. This is because a lot of the magic you see in 3D renders are often achieved with compositing.

At some point, you will need to bring your renders into After Effects to color grade, composite video elements, and generally take your renders the last 20% to the finish line.
x
An extremely powerful tool in compositing is the ability to send over 3D data like the camera’s animation, 3D positions of objects, and lights. This is especially important if you want to add lens flares, add 2D animations or merge 3D renders with live action footage.

Adobe and Maxon thankfully created a bridge between After Effects and Cinema4D called “Cineware”. And one of the best features of this bridge is the ability to extract 3D data from your C4D file. With a single press of a button, it’ll import the lights and cameras.

However, there are some limitations, namely if your camera is animated by a null, or if you use the Camera Morph tag, the camera will import as a static object. You would have to turn the animation into keyframes through baking. This applies to Lights too!

So here is where Save Project for Cineware comes in. By simply hitting this button, it’ll prepare your C4D file for After Effects by baking your camera and lights to keyframes, turn any objects created by Generators like Cloners into geometry and generally save you a ton of time!
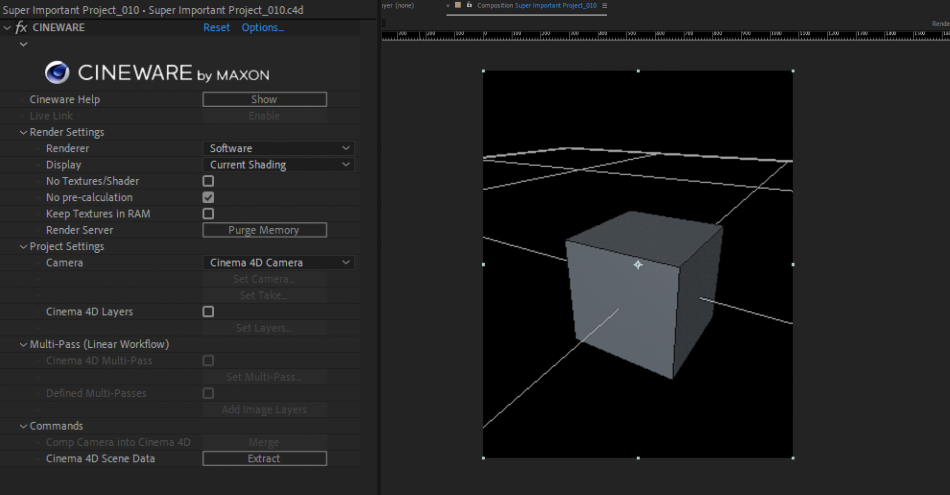
It still doesnt bake Morph cameras for you, so that is something you’ll need to take care of before saving. But overall, it takes care of a lot of the monotony of preparing a file for After Effects compositing.

File> Save Selected Object As
Have you ever needed to save an object from one scene to another? So, you figure you can copy and paste the object into the new scene. Most likely, you’ll find that all of your texture files have now become unlinked and your nicely textured object is now appearing completely black in the viewport.
That’s no fun. So, to save yourself the headache, you can simply select the objects you can to transfer over. Go to Save Selected Object As and it’ll save the selected object(s) into their own C4D file, along with the texture files. This way, all you have to do is Merge it into your new project. Speaking of which...
File> Merge Project
This is by far the easiest and most efficient way to combine objects and even entire 3D scenes together.
This main advantage of this feature is preserving the file paths of your texture files. It’s always a massive bummer and time sink relinking all of your textures. If one scene already has the textures linked, simply merging the file will preserve the file path.
More creativity and less maintenance on your part. Win-win!

File this one under "Awesome"
The File menu is so much more than saving your project. These features can save you a ton of time and energy when working with multiple scene files and model packs. Not to mention having all of the technical parts of preparing your file for After Effects taken care of for you. Definitely try these out and look for ways to incorporate them into your workflow. You’ll soon find that you can live without them!

Cinema4D Basecamp
If you're looking to get the most out of Cinema4D, maybe it's time to take a more proactive step in your professional development. That's why we put together Cinema4D Basecamp, a course designed to get you from zero to hero in 12 weeks.
And if you think you're ready for the next level in 3D development, check out our all new course, Cinema 4D Ascent!
ENROLL NOW!
Acidbite ➔
50% off everything

ActionVFX ➔
30% off all plans and credit packs - starts 11/26

Adobe ➔
50% off all apps and plans through 11/29

aescripts ➔
25% off everything through 12/6
Affinity ➔
50% off all products

Battleaxe ➔
30% off from 11/29-12/7
Boom Library ➔
30% off Boom One, their 48,000+ file audio library
BorisFX ➔
25% off everything, 11/25-12/1

Cavalry ➔
33% off pro subscriptions (11/29 - 12/4)

FXFactory ➔
25% off with code BLACKFRIDAY until 12/3

Goodboyninja ➔
20% off everything

Happy Editing ➔
50% off with code BLACKFRIDAY

Huion ➔
Up to 50% off affordable, high-quality pen display tablets

Insydium ➔
50% off through 12/4
JangaFX ➔
30% off an indie annual license
Kitbash 3D ➔
$200 off Cargo Pro, their entire library
Knights of the Editing Table ➔
Up to 20% off Premiere Pro Extensions
Maxon ➔
25% off Maxon One, ZBrush, & Redshift - Annual Subscriptions (11/29 - 12/8)
Mode Designs ➔
Deals on premium keyboards and accessories
Motion Array ➔
10% off the Everything plan
Motion Hatch ➔
Perfect Your Pricing Toolkit - 50% off (11/29 - 12/2)

MotionVFX ➔
30% off Design/CineStudio, and PPro Resolve packs with code: BW30

Rocket Lasso ➔
50% off all plug-ins (11/29 - 12/2)

Rokoko ➔
45% off the indie creator bundle with code: RKK_SchoolOfMotion (revenue must be under $100K a year)

Shapefest ➔
80% off a Shapefest Pro annual subscription for life (11/29 - 12/2)

The Pixel Lab ➔
30% off everything
Toolfarm ➔
Various plugins and tools on sale

True Grit Texture ➔
50-70% off (starts Wednesday, runs for about a week)

Vincent Schwenk ➔
50% discount with code RENDERSALE

Wacom ➔
Up to $120 off new tablets + deals on refurbished items


All-Access Pass
Unlimited access to 50+ courses, unlimited critique, live events, and 24/7 community. Join School of Motion All-Access today.