All-Access Pass
Unlimited access to 50+ courses, unlimited critique, live events, and 24/7 community. Join School of Motion All-Access today.

Cinema4D is an essential tool for any Motion Designer, but how well do you really know it?
How often do you use the top menu tabs in Cinema 4D? Chances are, you probably have a handful of tools you use, but what about those random features you haven’t tried yet? We're taking a look at the hidden gems in the top menus, and we're just getting started.
In this tutorial, we’ll be doing a deep dive on the Character tab. Rigging a character can be tricky and time-consuming, but this menu is designed to keep your workflow smooth as fresh snow.

Here are the 3 main things you should use in the Cinema 4D Character menu:
- Character
- Joint Tool
- Create IK chain
Character in Cinema 4D
Rigging characters is a difficult and time-consuming task for any artist. An experienced rigger could easily take 10 or more hours to properly rig a character. This is the exact problem the Character builder is made to address.
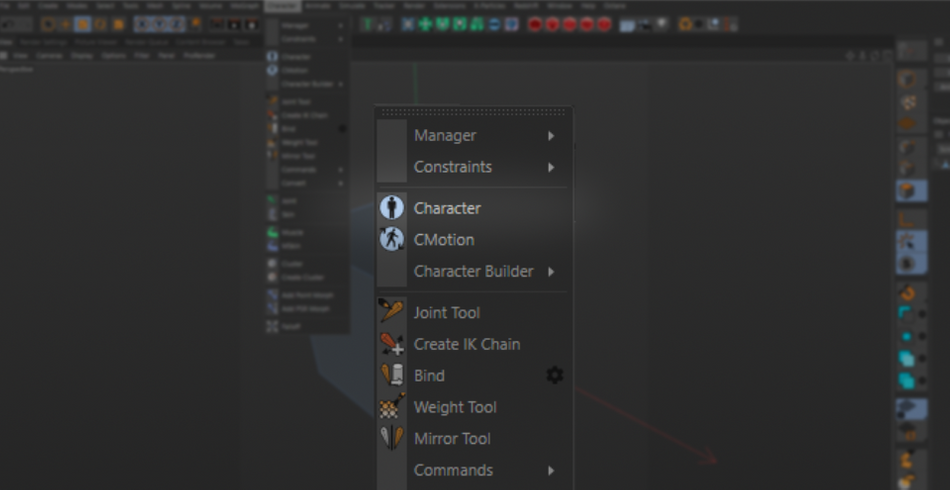
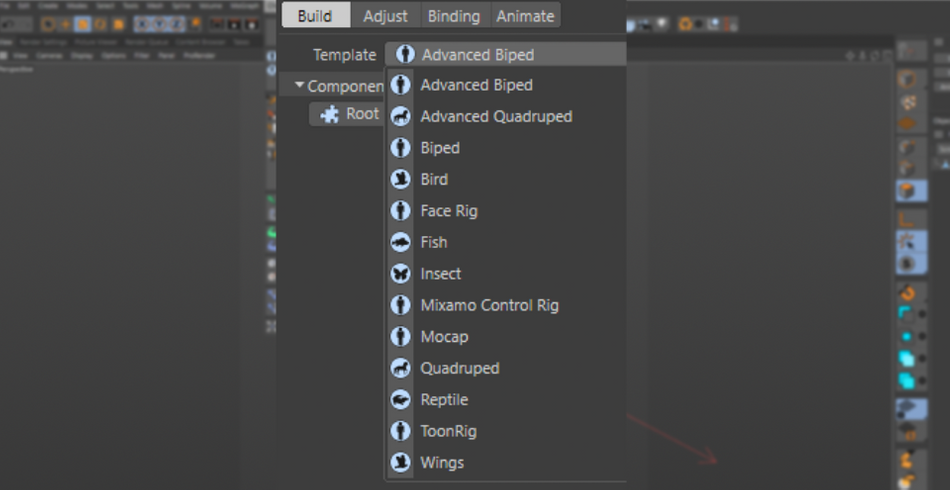
This tool comes loaded with several presets for whatever character you need rigged. Bipedal for humanoid characters, quadrupeds, winged, and even rigs for your Mixamo characters.
Now keep in mind that—even with this tool—it is still an intensive process to get your characters rigged. But it does streamline the process by allowing you to create templates for yourself with the controls you need.
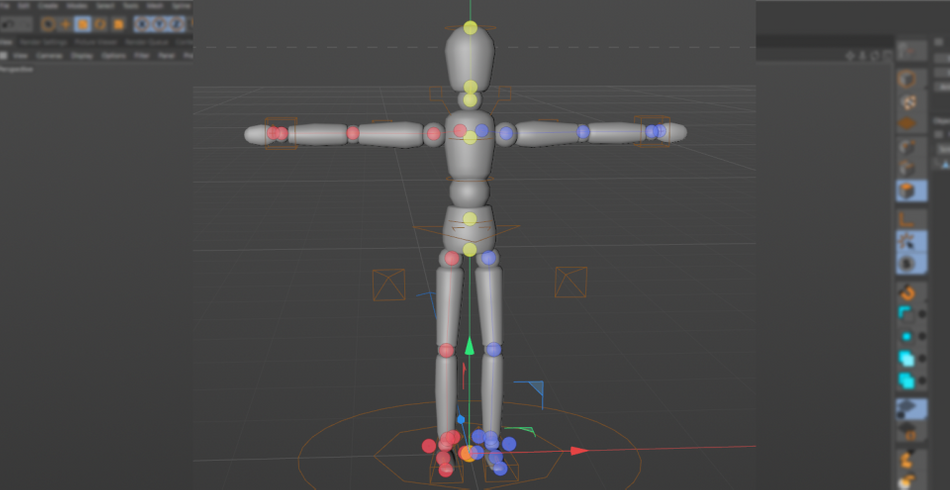
For example, say you have 6 characters for your animation. You know that each one has to have the same level of controls. So, once you have one of them rigged, you can save them as a template. Now, it’s a matter of applying this rig to each character. Easily shaves hours of production time!
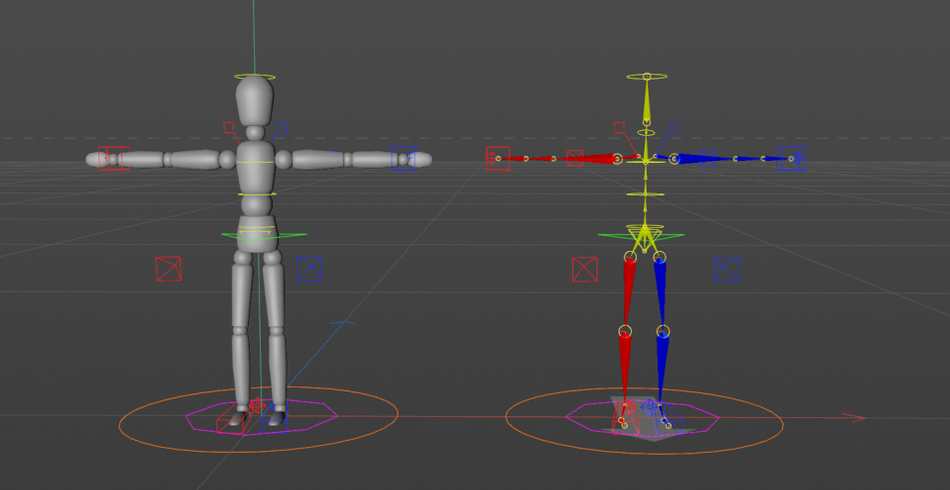
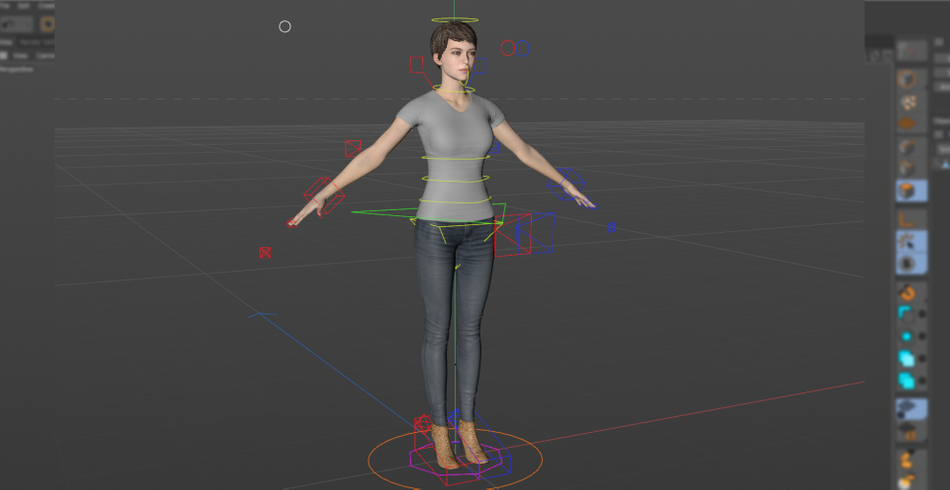
Honestly, this is just scratching the surface of the capabilities of this tool. To cover everything, it would require a course! But if you want to see the character tool in action, open your Content Browser and navigate to 3D Objects Vol 1→ Humans→ 3D People For Animation.

You will find several characters fully rigged and ready to be animated. It’s a very complex rig which even includes Facial Rigging! It’s a great way to practice your character animation skills.
Joint Tool in Cinema 4D
The character menu isn't only for character work. You can actually use these tools on non-character objects as well. Say you want to create a box that opens and closes. Sure, you could create a cube, then set up some planes on the edges as the box flaps and control their rotations individually.
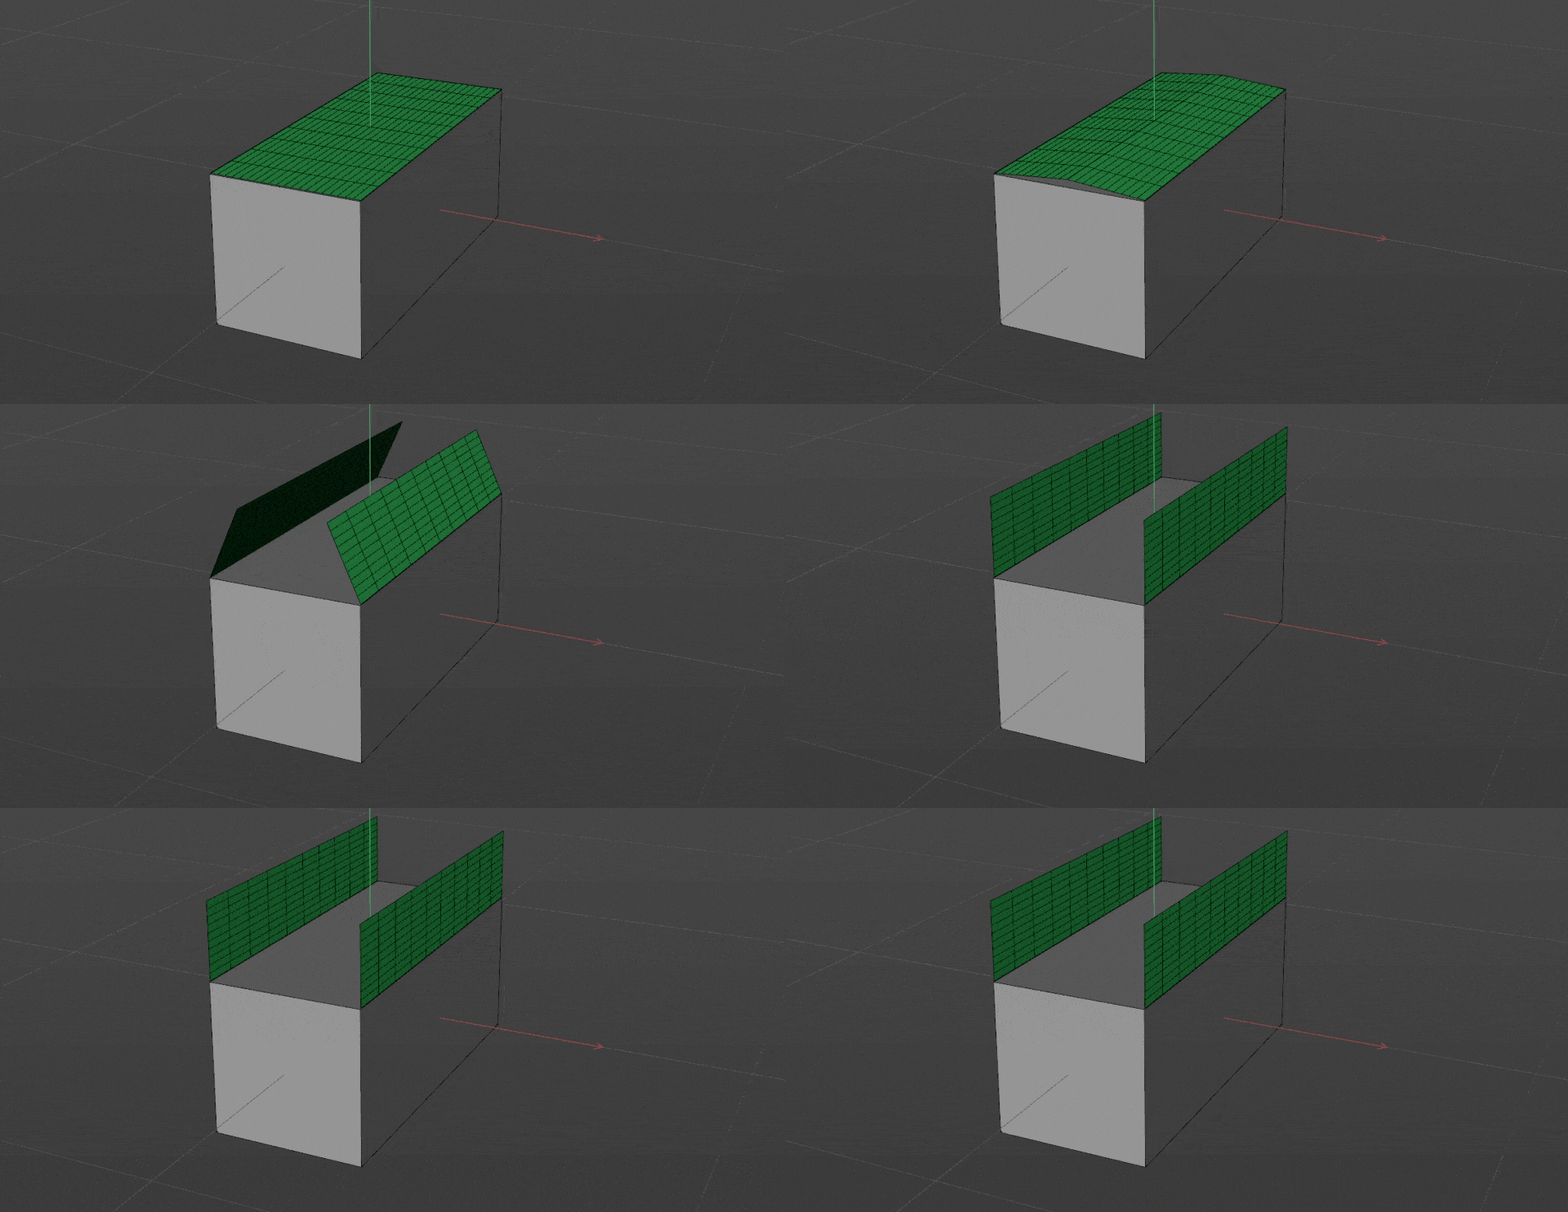
However, another option is to create Joints to control the flaps on a fully modeled box. The main benefit of this is that your box can remain a single object, but also have much more realistic bending on the creases. You can do much more complex deformations on the flaps than you could just using planes.
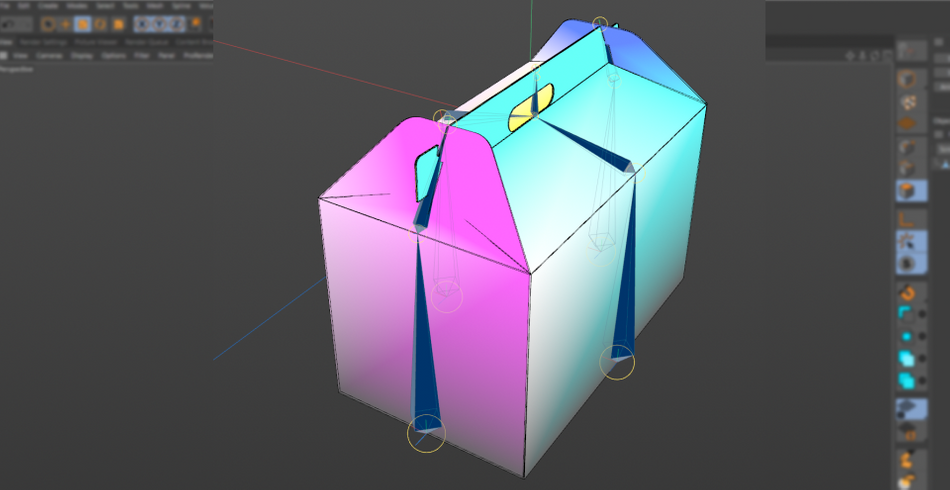
It does require you to bind your joint chains to the object by using a Skin deformer and painting the weights. Which can be a pretty intensive process. But with anything that is worth doing, the end result can more than justify the time it takes.
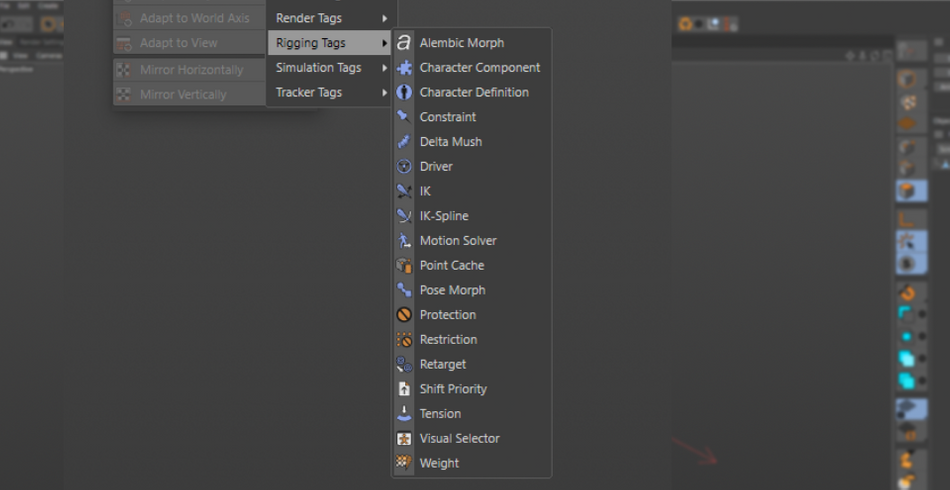
A box is a pretty simple example. But you don't have to stop there. You could apply these joint chains to pretty much any object you work with. You can then apply all of the character tools to aid in animation. This includes using the many Character Tags that work hand in hand with these tools.
IK Chain in Cinema 4D
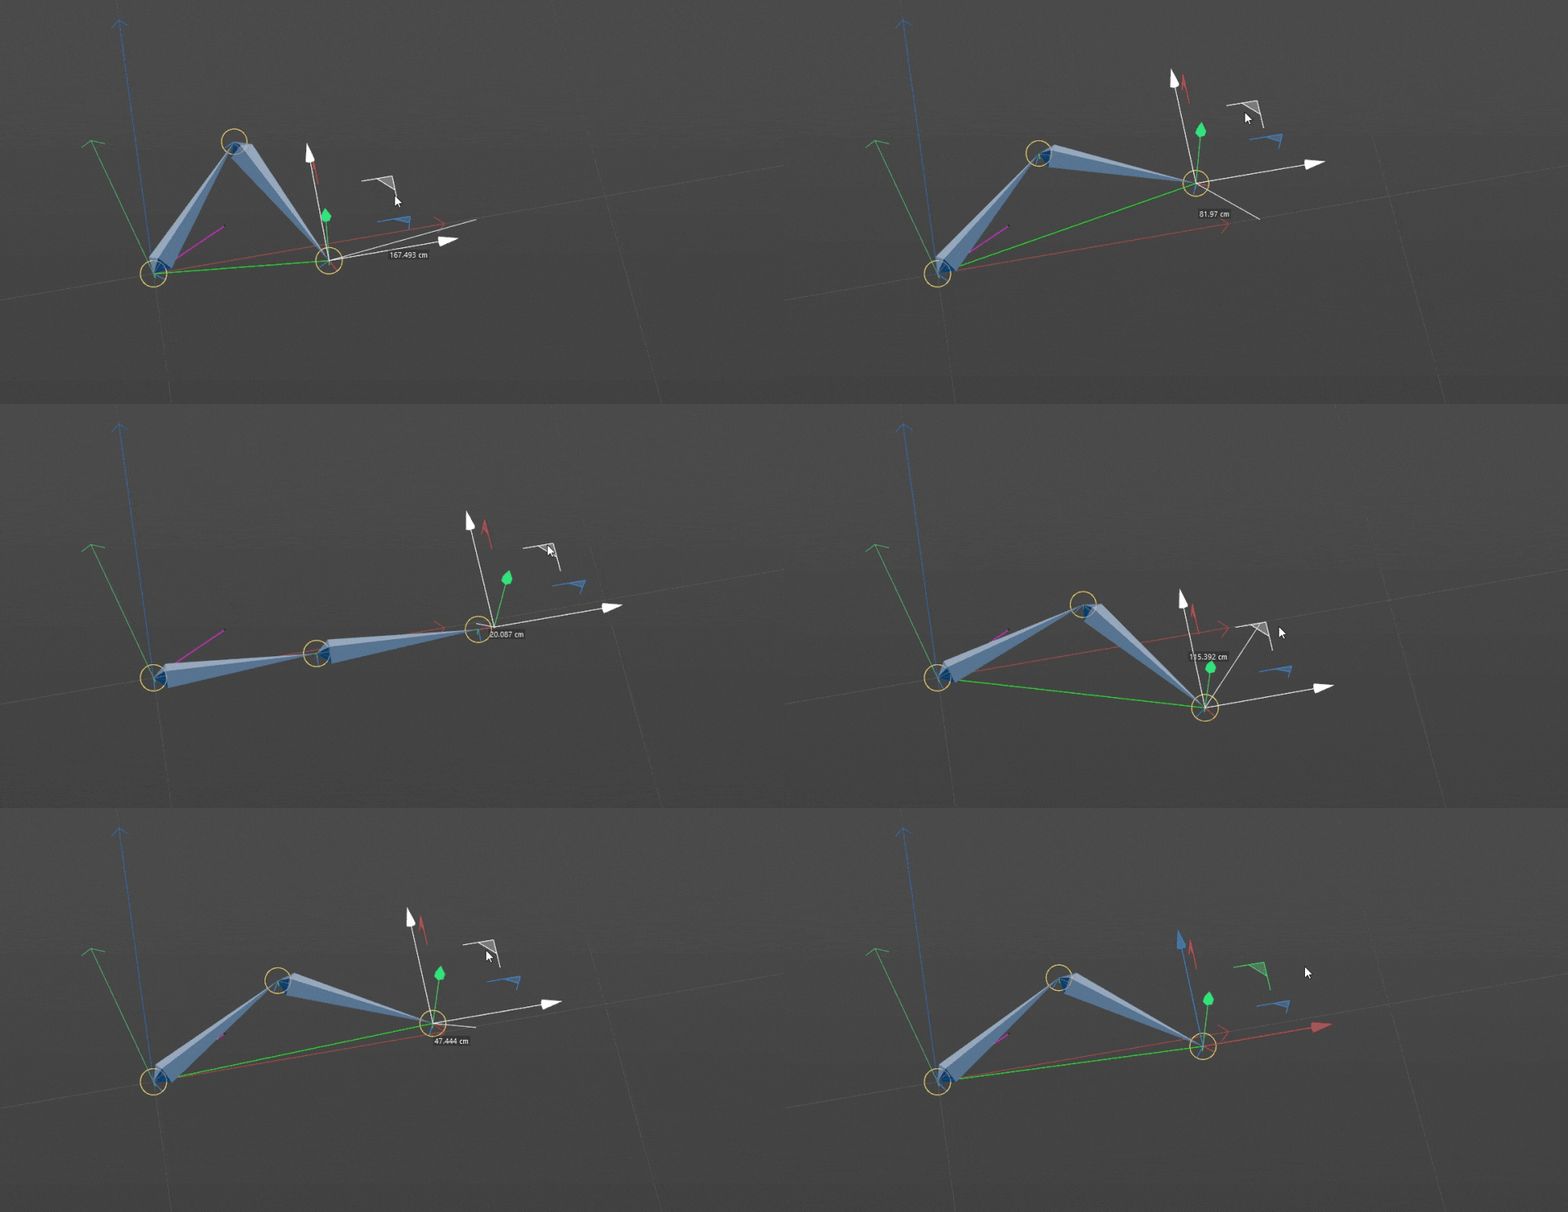
Speaking of character tags, a really nifty tool worth keeping in mind when animating joints or even Null chains is the IK tag.

Now, if you are unfamiliar with the acronyms, they stand for Inverse Kinematics and Forward Kinematics. With IK, you could animate the motion of the hand and watch the rest of the arm follow.
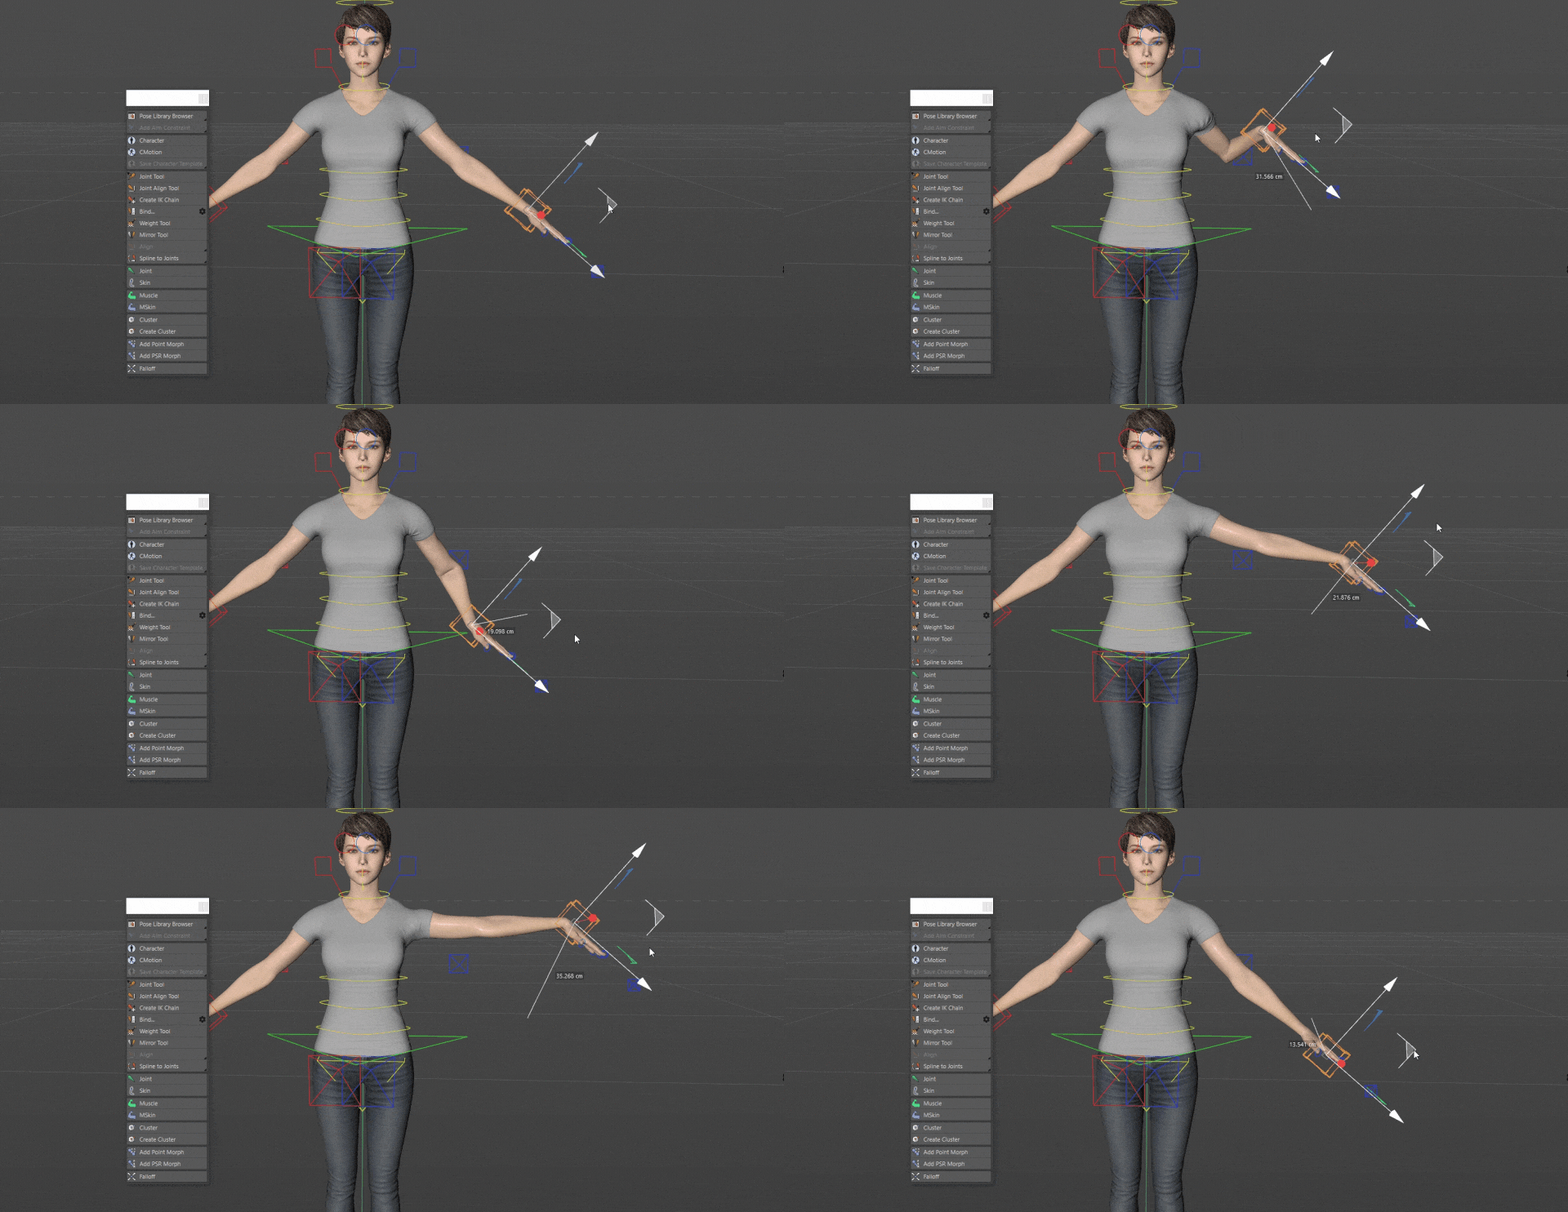
With FK, you animate each joint separately from the shoulder on down.
x
IK has an appeal because it animates the rest of the arm for you and is much more intuitive. All you have to do is animate a single object, instead of each object in the joint chain as you would with an FK set up.
Wouldn't it be great to be able to do that on your non-character objects? Well, you can.
You could manually set this up by creating the tag on the first Joint of your chain and setting the last joint as the end point. Then creating a “Goal”. This will create a Null that will now control the joint chain.
However, a quick way to automate this process is to select the first joint, then while holding Ctrl selecting the end joint. While both are selected, go to Character→ Create IK Chain. This will create a goal for you and tie the joint chain to it. Saves you a few clicks!
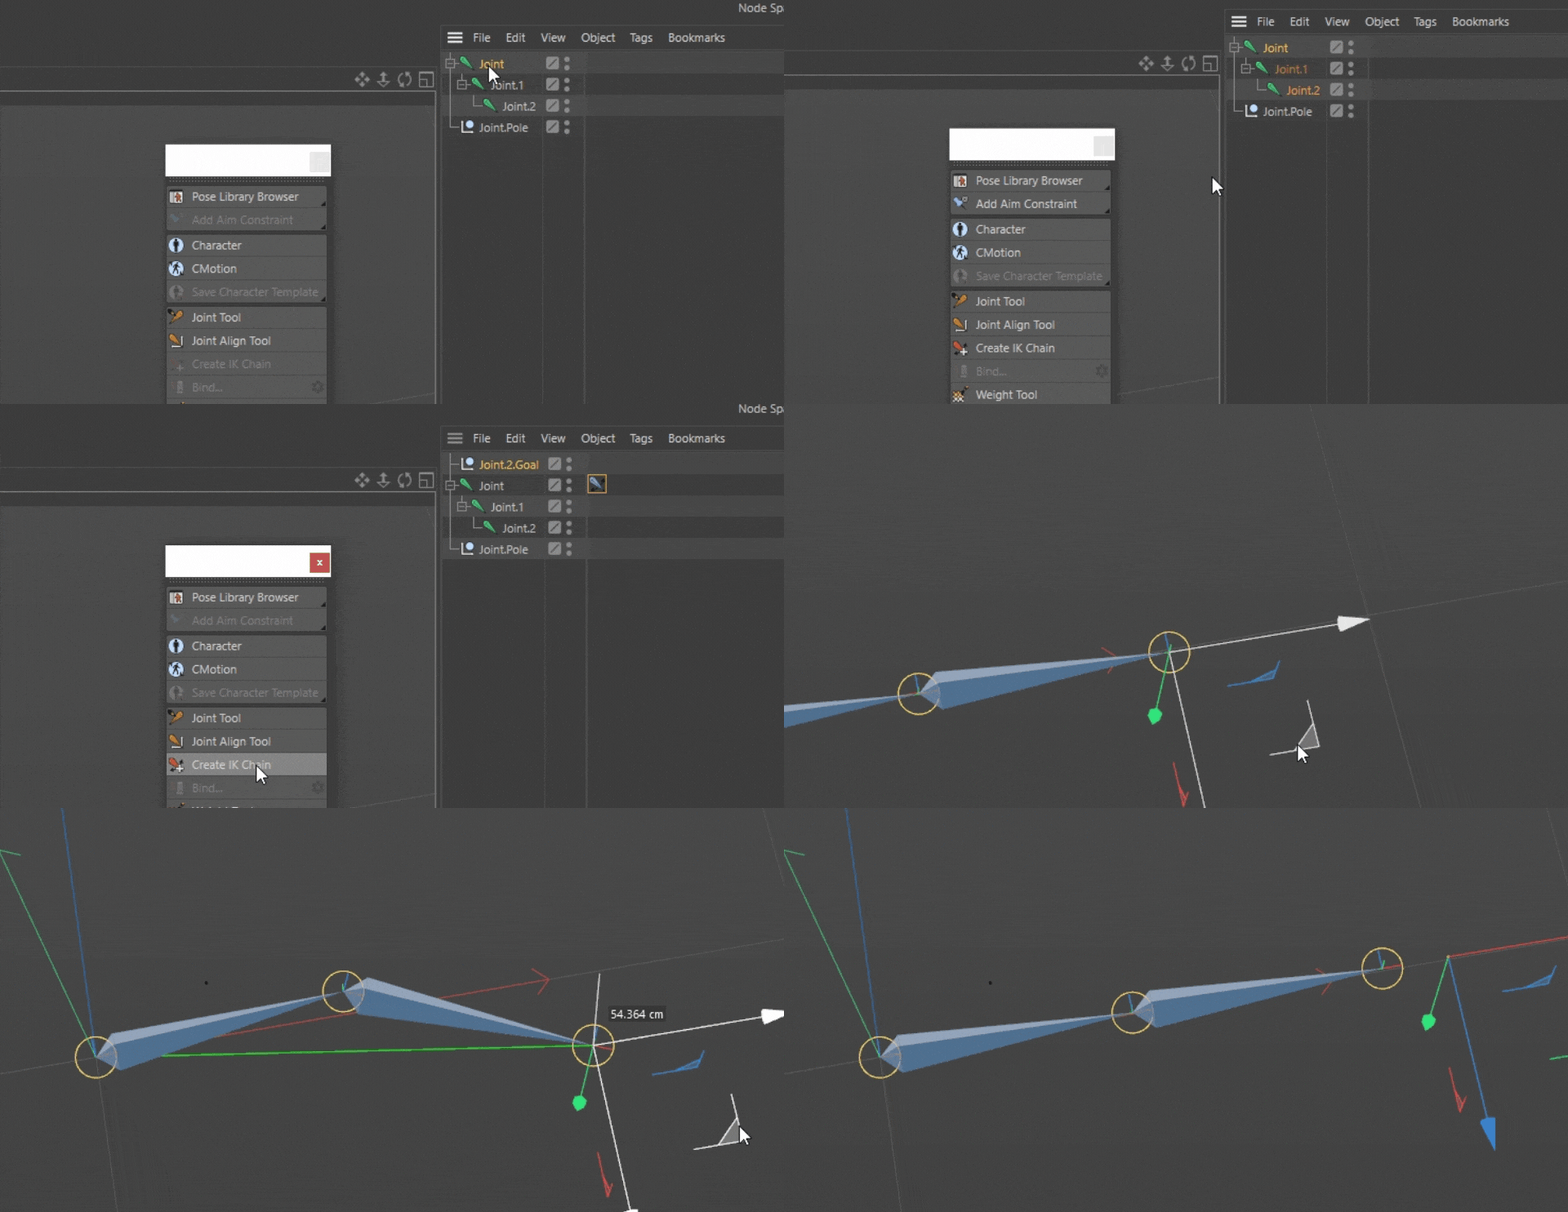
It opens up the door for animating easily using IK! To animate with total control—in addition to the Goal that controls the end of the joint—you’ll also want to create a Pole to control the direction toward which your IK chain rotates.
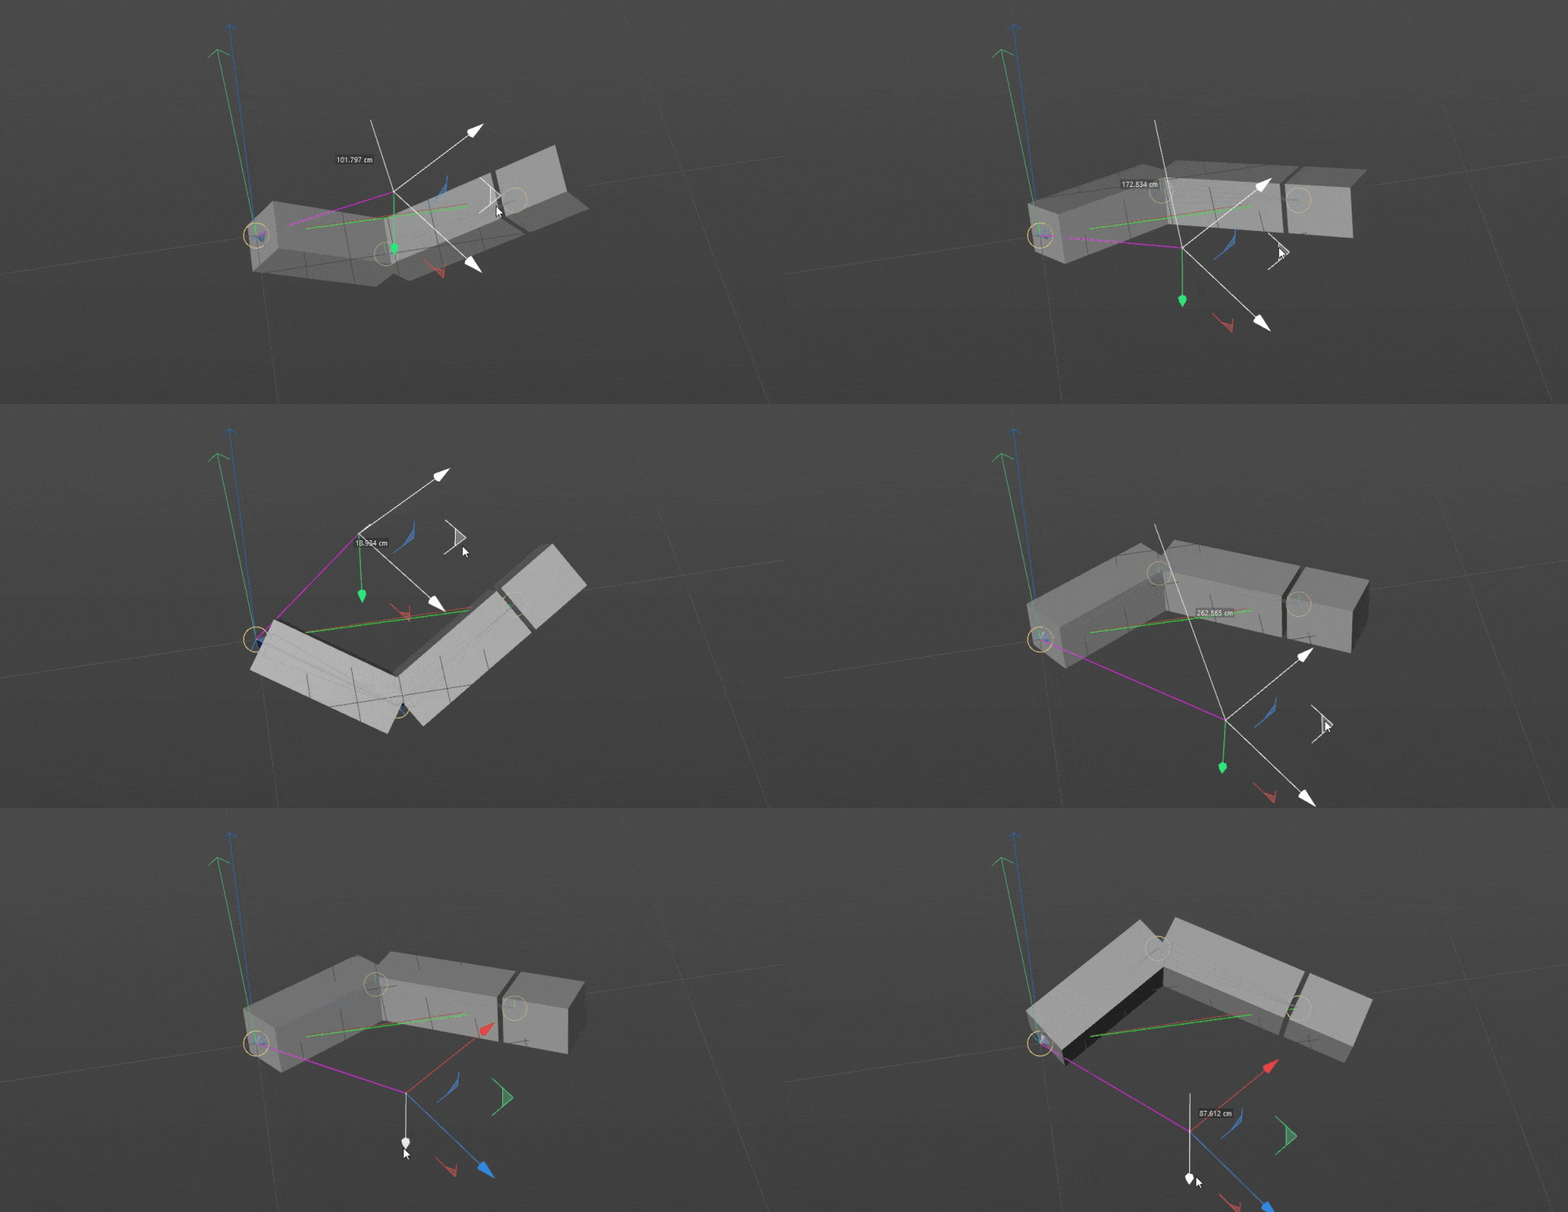
Something to keep in mind when working with IK chains is that you are slowly getting yourself ready to work with character rigs as each of these principles translates directly into character animation! Double education win!
.gif)
Look at you!
There’s so much to cover in the Character Menu and this barely scratches the surface. But even the smallest tools in this menu can help you upgrade your workflow! While checking out the pre-made character rigs in the Content Browser, keep in mind how they use the different Rigging tags. It can give you a ton of insight on how you can leverage them for your own work!
Cinema 4D Basecamp
If you're looking to get the most out of Cinema 4D, maybe it's time to take a more proactive step in your professional development. That's why we put together Cinema 4D Basecamp, a course designed to get you from zero to hero in 12 weeks.
And if you think you're ready for the next level in 3D development, check out our all new course, Cinema 4D Ascent!
ENROLL NOW!
Acidbite ➔
50% off everything

ActionVFX ➔
30% off all plans and credit packs - starts 11/26

Adobe ➔
50% off all apps and plans through 11/29

aescripts ➔
25% off everything through 12/6
Affinity ➔
50% off all products

Battleaxe ➔
30% off from 11/29-12/7
Boom Library ➔
30% off Boom One, their 48,000+ file audio library
BorisFX ➔
25% off everything, 11/25-12/1

Cavalry ➔
33% off pro subscriptions (11/29 - 12/4)

FXFactory ➔
25% off with code BLACKFRIDAY until 12/3

Goodboyninja ➔
20% off everything

Happy Editing ➔
50% off with code BLACKFRIDAY

Huion ➔
Up to 50% off affordable, high-quality pen display tablets

Insydium ➔
50% off through 12/4
JangaFX ➔
30% off an indie annual license
Kitbash 3D ➔
$200 off Cargo Pro, their entire library
Knights of the Editing Table ➔
Up to 20% off Premiere Pro Extensions
Maxon ➔
25% off Maxon One, ZBrush, & Redshift - Annual Subscriptions (11/29 - 12/8)
Mode Designs ➔
Deals on premium keyboards and accessories
Motion Array ➔
10% off the Everything plan
Motion Hatch ➔
Perfect Your Pricing Toolkit - 50% off (11/29 - 12/2)

MotionVFX ➔
30% off Design/CineStudio, and PPro Resolve packs with code: BW30

Rocket Lasso ➔
50% off all plug-ins (11/29 - 12/2)

Rokoko ➔
45% off the indie creator bundle with code: RKK_SchoolOfMotion (revenue must be under $100K a year)

Shapefest ➔
80% off a Shapefest Pro annual subscription for life (11/29 - 12/2)

The Pixel Lab ➔
30% off everything
Toolfarm ➔
Various plugins and tools on sale

True Grit Texture ➔
50-70% off (starts Wednesday, runs for about a week)

Vincent Schwenk ➔
50% discount with code RENDERSALE

Wacom ➔
Up to $120 off new tablets + deals on refurbished items


All-Access Pass

Unlimited access to 50+ courses, unlimited critique, live events, and 24/7 community. Join School of Motion All-Access today.
