
All-Access Pass
Unlimited access to 50+ courses, unlimited critique, live events, and 24/7 community. Join School of Motion All-Access today.

Cinema 4D is an essential tool for any Motion Designer, but how well do you really know it?
How often do you use the top menu tabs in Cinema 4D? Chances are, you probably have a handful of tools you use, but what about those random features you haven’t tried yet? We're taking a look at the hidden gems in the top menus, and we're just getting started.

In this tutorial, we’ll be doing a deep dive on the Render tab. Rendering is something we all dread at first. There are so many variables that can lead to errors, and even veterans can make simple mistakes that lose a day's worth of rendering. Let’s dive into the Render menu and uncover some tips and tricks to help make your life a little easier.
Get ready for a render-bender
Here are the 3 main things you should use in the Cinema 4D Render menu:
- Picture Viewer
- Edit Render Settings
- Render Queue
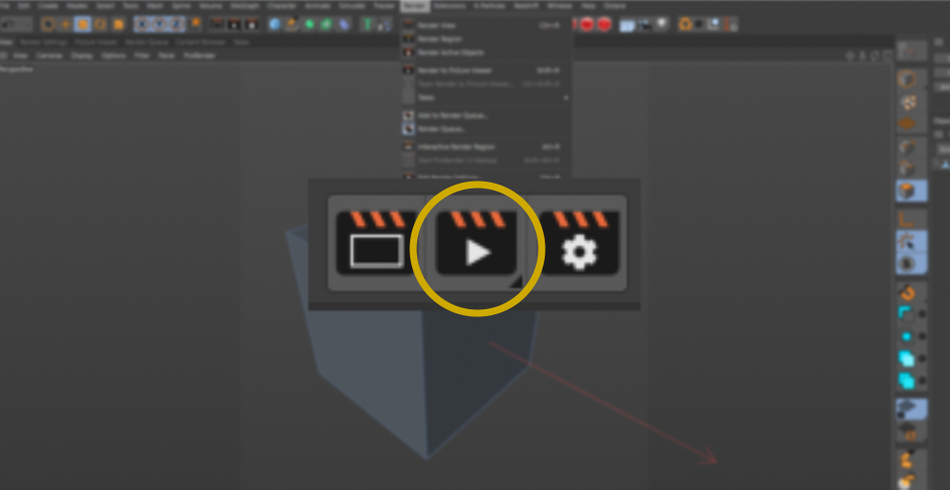
Cinema 4D Render to Picture Viewer
When you are ready to export, this is the button you’ll want to use. You can also activate it in the UI as well as hitting Shift+R.
It’s a good idea to adjust the Render Settings (more on that in the next entry). But before we do that, let’s look at some of the less obvious features of the Picture Viewer.
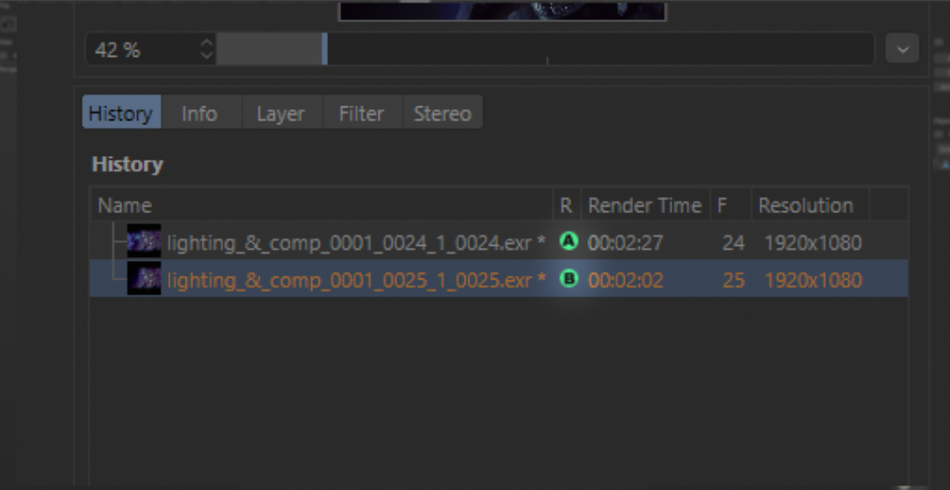
Along the top of the Picture Viewer (PV) window, there are a series of icons for various functions.

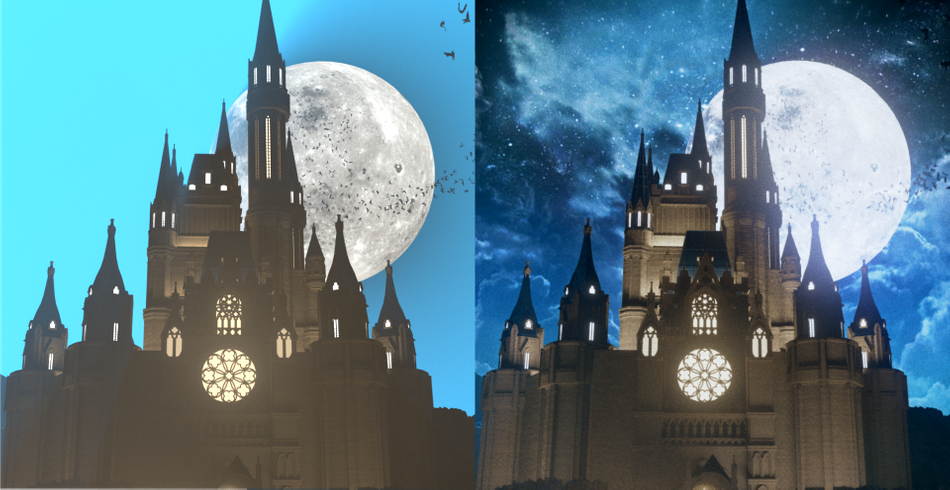
A really useful tool is the AB Compare options. The PV will display every render in the History window. While you could click back and forth between two renders, a more efficient tool is to set one as the A image and the other as the B image.
Once you activate the AB Compare, there will be a line dividing your two renders, allowing you to slide the divider to show the difference between renders.
x
Once you have that set up, there are a few more options next to the AB compare buttons that allow you to swap the images

As well as stacking the images with a Difference transfer mode to see the difference between both renders.
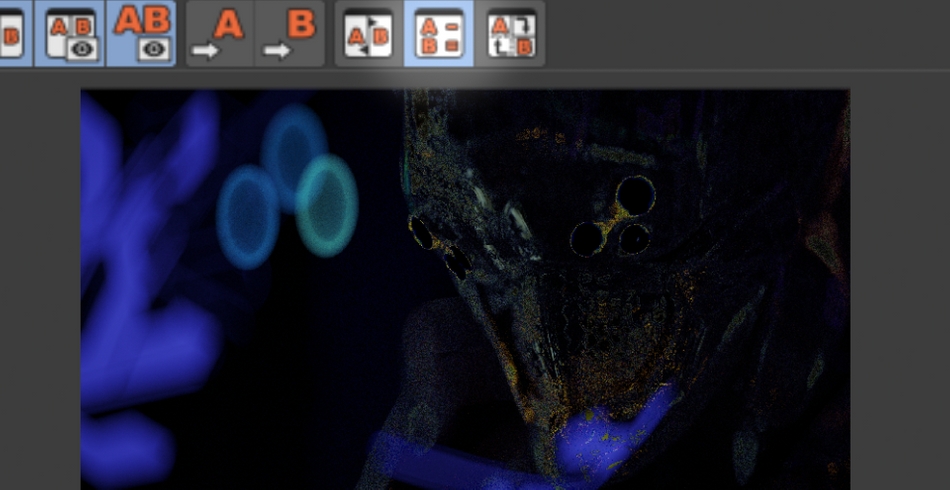
And finally, you can rotate the direction of the dividing line from horizontal to vertical.
Moving over to the History window, you have a few tabs next to it, the most important one being the Layer tab.
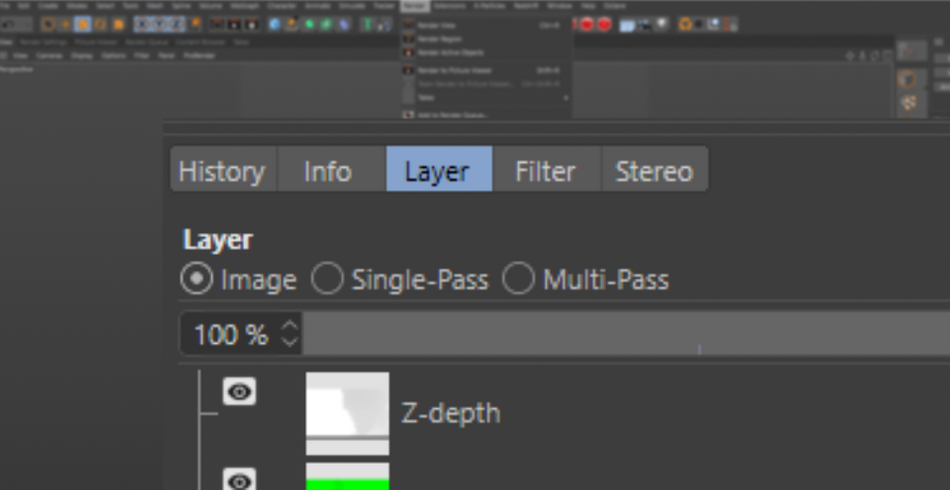
If you are using Multipass Rendering, this is where you can see each pass individually. Make sure you set it from “Image” to “Single-Pass” to be able to view them. This is a great way to check your passes before jumping over to an external compositor.
x
Another really fun capability of the PV is its ability to playback media. You can load images and videos from it. While not really a replacement for your current media player, it does have the ability to make color adjustments by using the Filter tab.
x
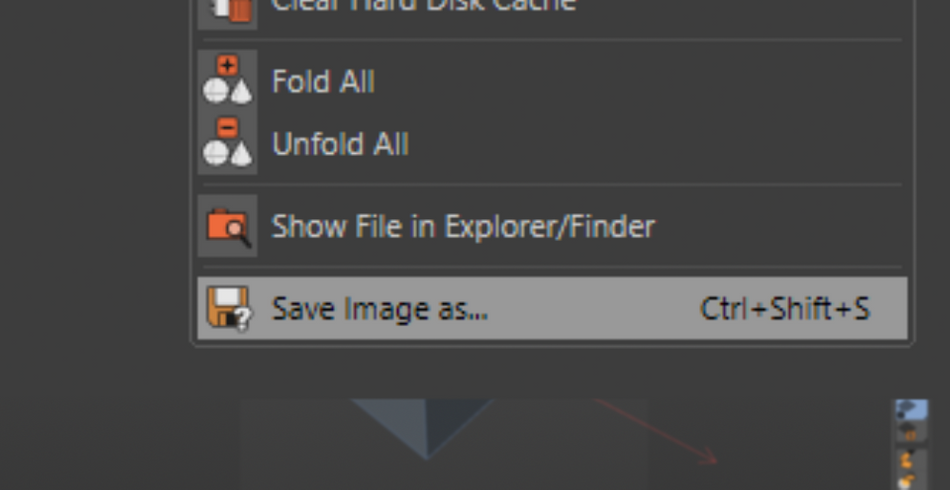
It’s mostly useful for checking certain files before loading them into your scene. You also have the ability to save them as different file types. This is most useful for Videos as Cinema 4D needs videos to be image sequences. Right click on the video and select “Save Image As.”
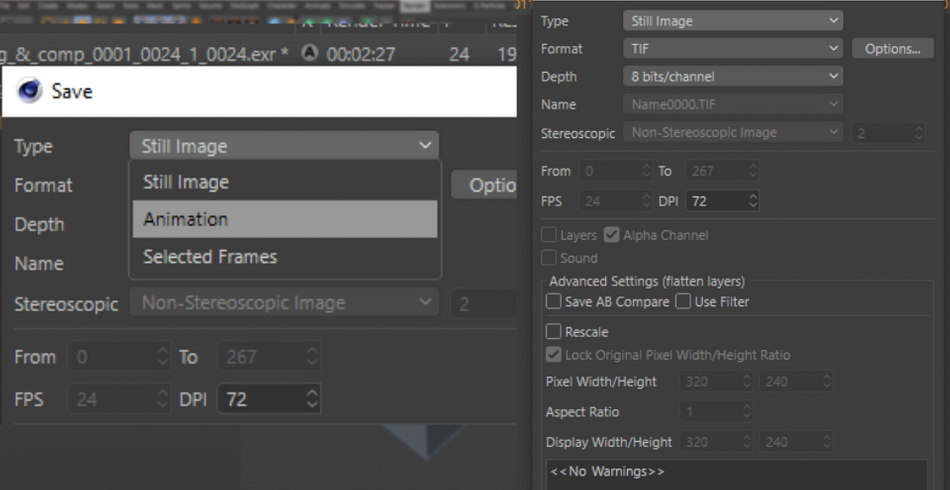
Then you will be able to save it as a Still or Animation.
Then choose the format and frame range, and you can now convert your video into image sequences. No need to jump into After Effects.
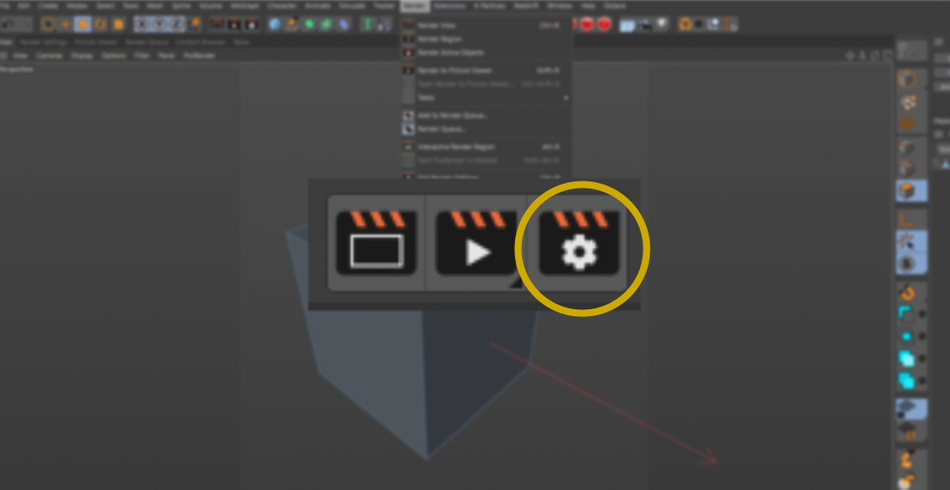
Edit Render Settings in Cinema 4D
This button takes you directly to your Render Settings. Pretty self explanatory. However, there are a few tricks you may want to incorporate into your workflow to help you save time in the future.
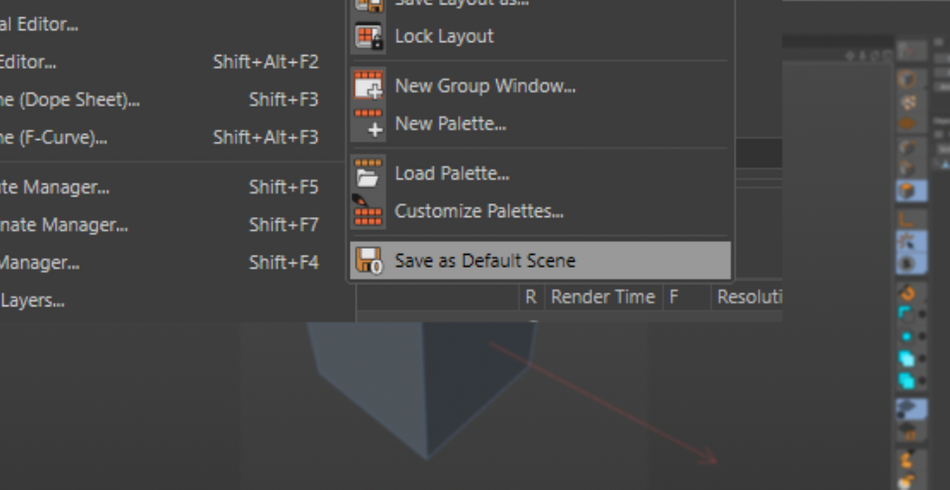
Firstly, after setting your render settings to your specification, it’s a good idea to go to the Window menu→ Customization→ Save as Default Scene. From now on, every time you open Cinema 4D, these render settings will be loaded.
So, let’s look at some of the options available to you with render settings.
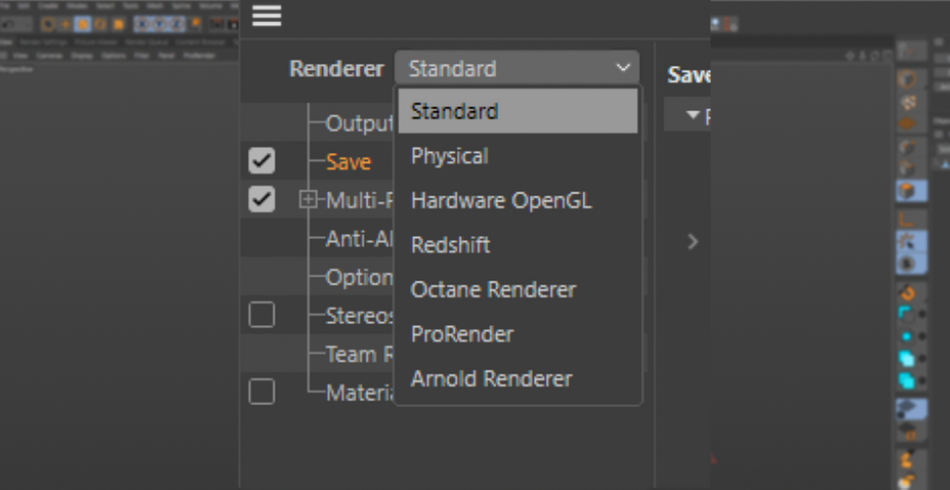
If you have a 3rd party render engine installed, this is where you can select it from the drop down menu. By default, it’ll be set to Standard.
You can also set the render path here (more about that later), adjust the render quality settings such as Anti-Aliasing.

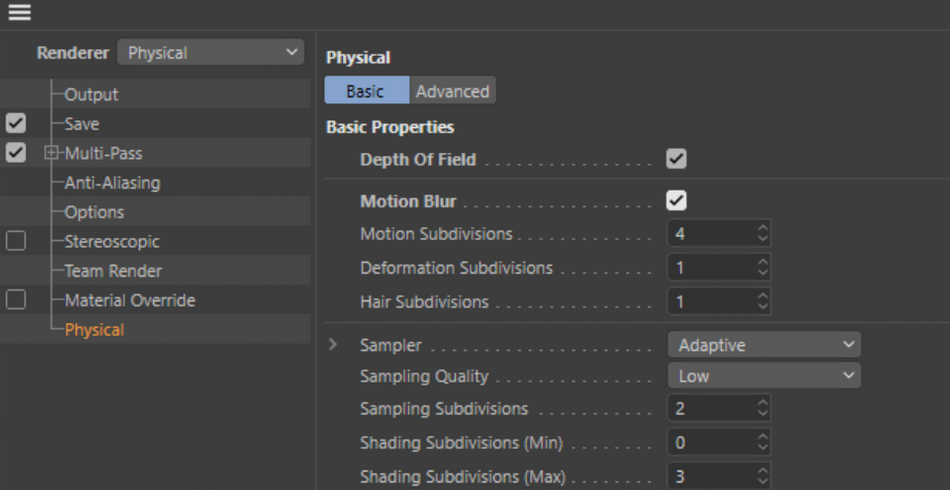
If you are using Physical render, a new tab called “Physical” will appear. You can adjust the render settings for that render engine in there. It includes Motion Blur and Depth of Field.
Under all of this are two buttons: Effect and Multi-pass.
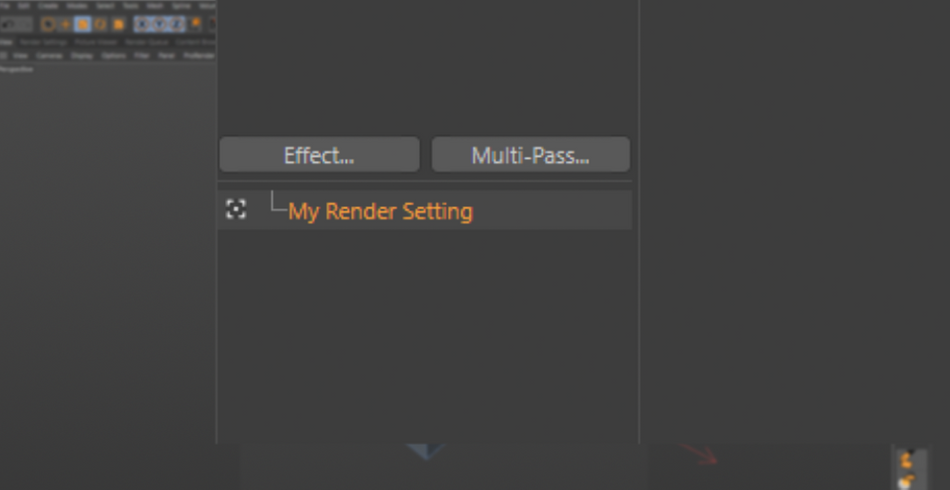
Effects contain some of the more hardware intensive features. This includes Global Illumination, Ambient Occlusion, and Sketch and Toon.

Multi-pass gives you the option to add separate Render Passes to your export. These are different layers of your beauty render. You can separate the color, reflections, refractions, Ambient Occlusion, shadows, along with a ton more.
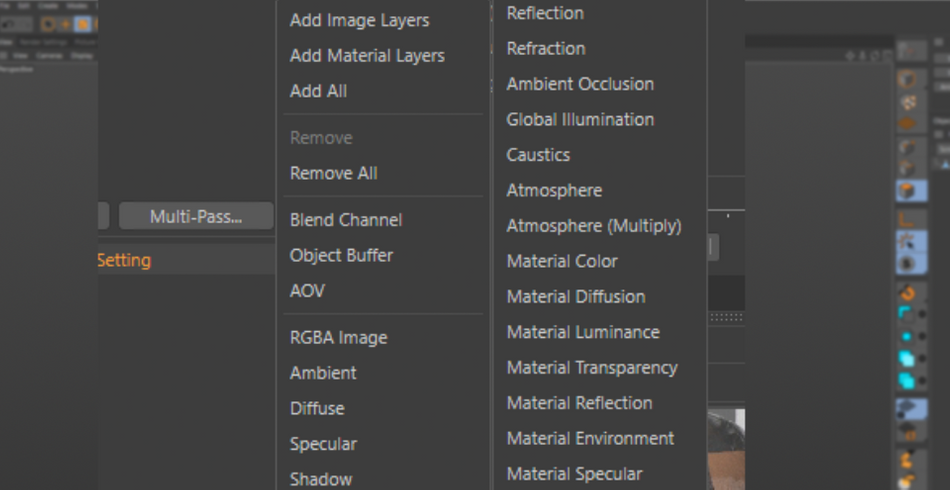
These are highly useful in the compositing stage for 3D renders. You have much more granular control of your final image with these passes. You may be fine with exporting your Beauty pass and applying color grading. But with these passes, your renders can be taken to the absolute next level in quality due to the sheer level of control awarded to you.
Now back to Save paths. You can save a ton of time if you set a default path to save your renders. Early on in your Cinema 4D career, you will spend a disproportionate amount of time choosing where to save your renders. This includes creating new folders, naming the renders, etc.
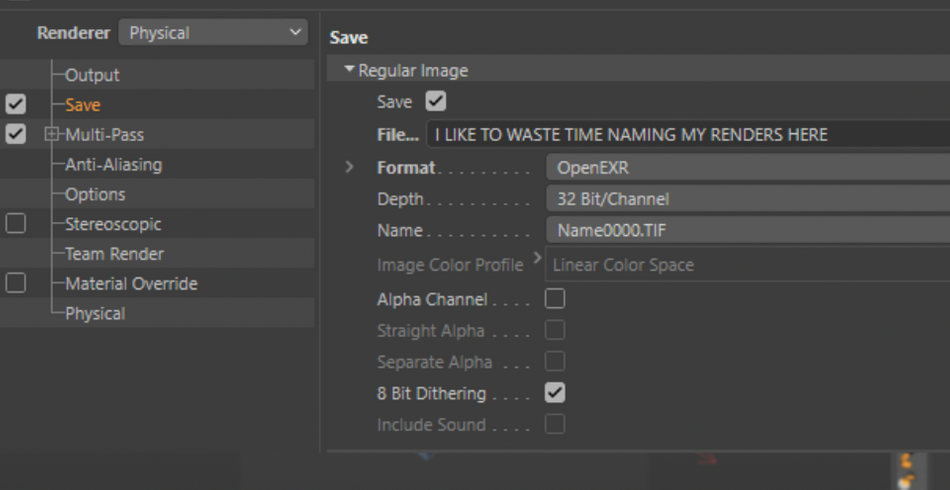
You can save all of that time by either setting a default path to a specific folder, or by using what are called Tokens. What are tokens? Tokens are simple text variables you can use to name and set directory paths for your renders.
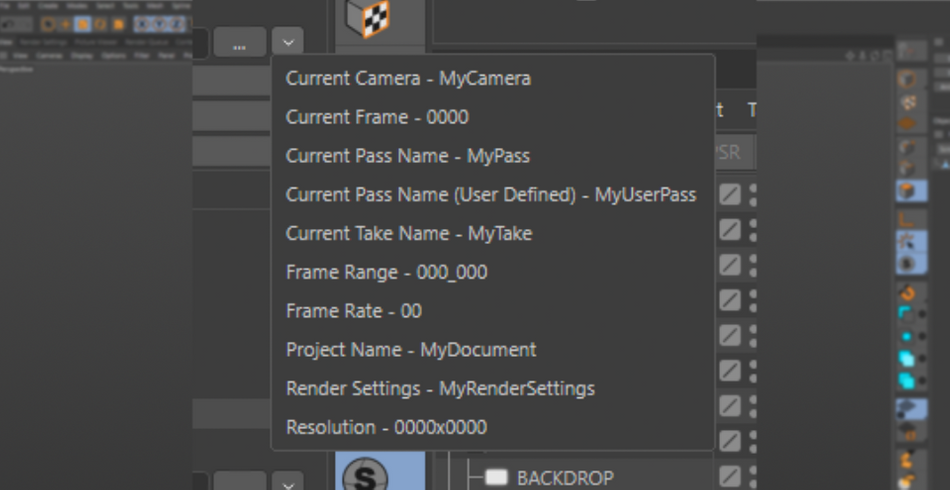
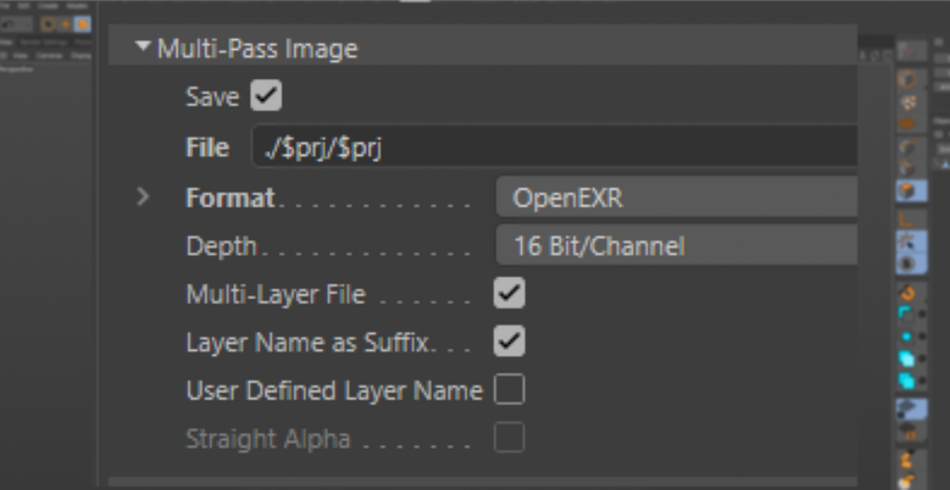
A highly useful token is the “MyProject” token. If you type “./$prj/$prj” into your directory path, Cinema 4D will automatically create a folder named after your project file in the same location as your project file.
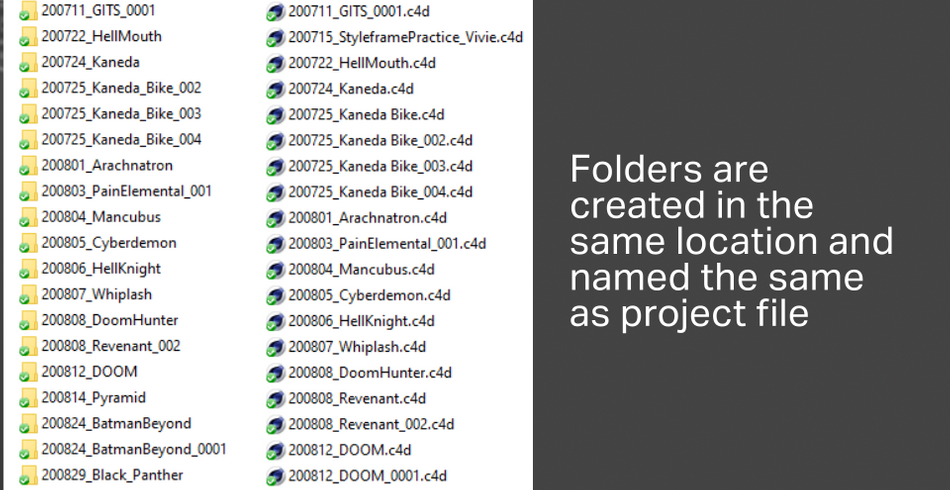
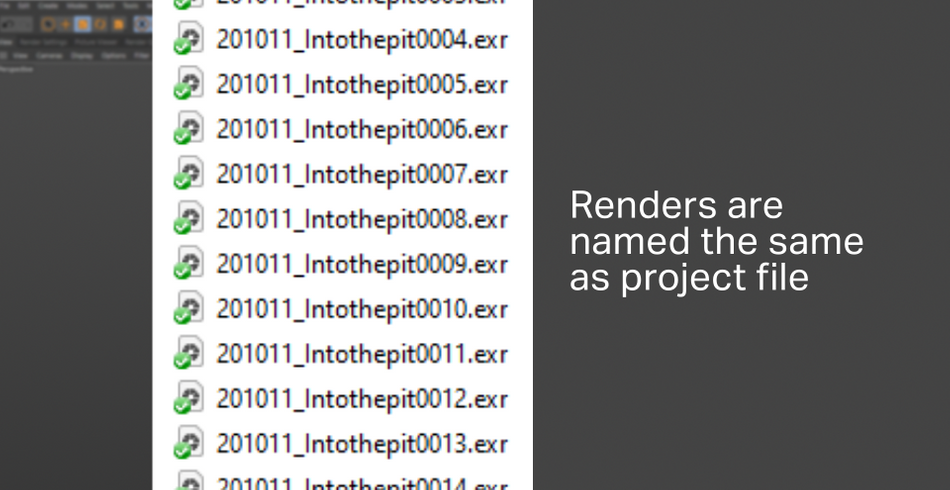
The second $prj will then name your renders after the project file.
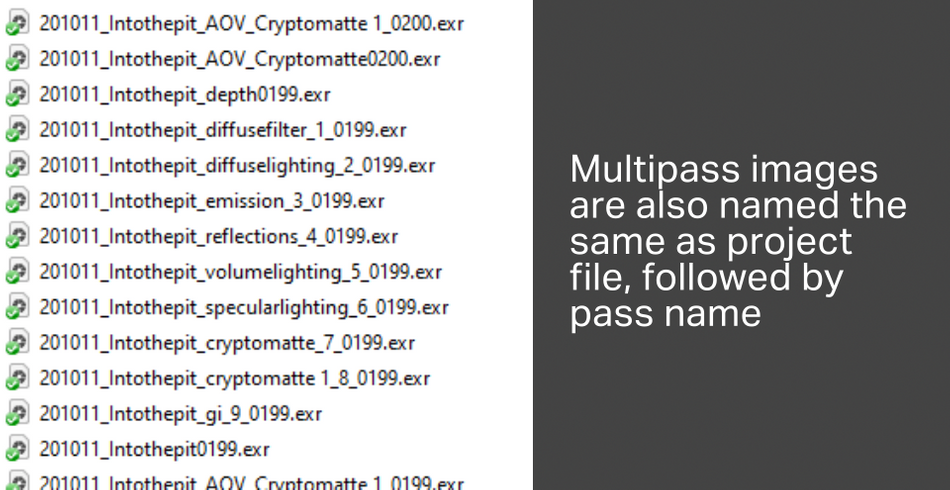
If you type those same tokens into your Multi-pass save path, your passes will be saved along with the beauty render.
So all in all, you should have a folder next to your project and each rendered image will also be named after the project, along with an underscore, pass name and frame number.
This may seem a little redundant at first, but from an organizational standpoint, having a consistent naming convention for your files is extremely invaluable. This makes finding files so much easier for your machine and yourself.
It’s not uncommon for beginner level users to name the project one way, then set the render path to a completely different folder, and the renders themselves named something different from the project file name. If you ever have to go back to that project and locate the renders, you may find yourself having a difficult time doing so. Save your future self the headache and use tokens.
Also, by having your default scene use all of these features, you will also stand out at studios as it shows you are highly organized. This is extremely valued in any team based environment.
x
Cinema 4D Render Queue
If you are familiar with After Effects, you’re probably a big fan of the Render Queue and its ability to render out multiple compositions in sequence. However, After Effects can only render compositions from the project file that is open.

Cinema 4D has its own version of this feature. A main benefit of Cinema 4D’s Render Queue is that it also has capabilities similar to Adobe Media Encoder, in that you can set renders from multiple project files instead of the project file that is currently open.
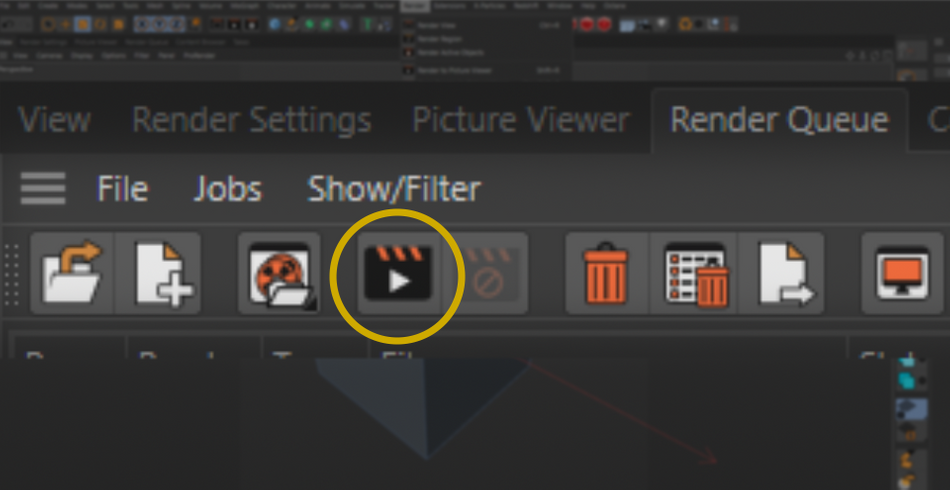
When you have your projects added to the queue, it’s a fairly straightforward affair in getting them to export. You’ll see them listed in your queue.
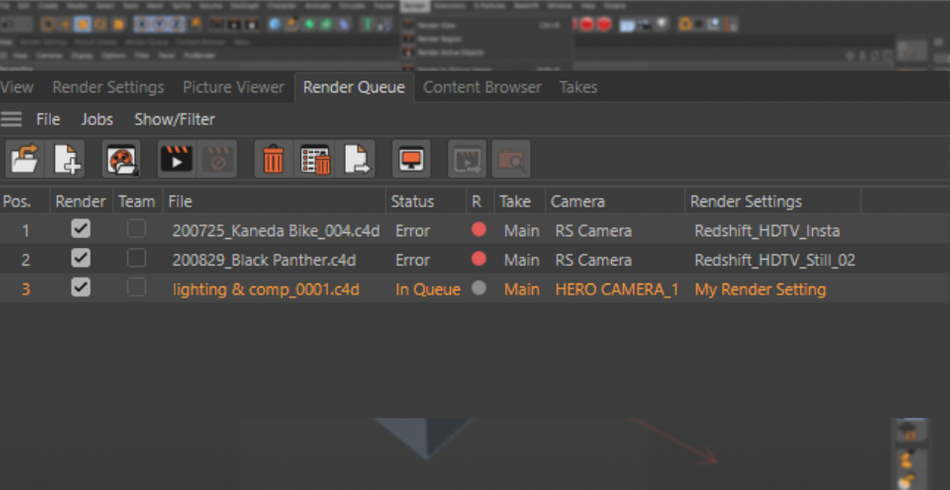
You can set it to Render by activating the check box. You can also set it to Team Render if you happen to have a render farm set up.
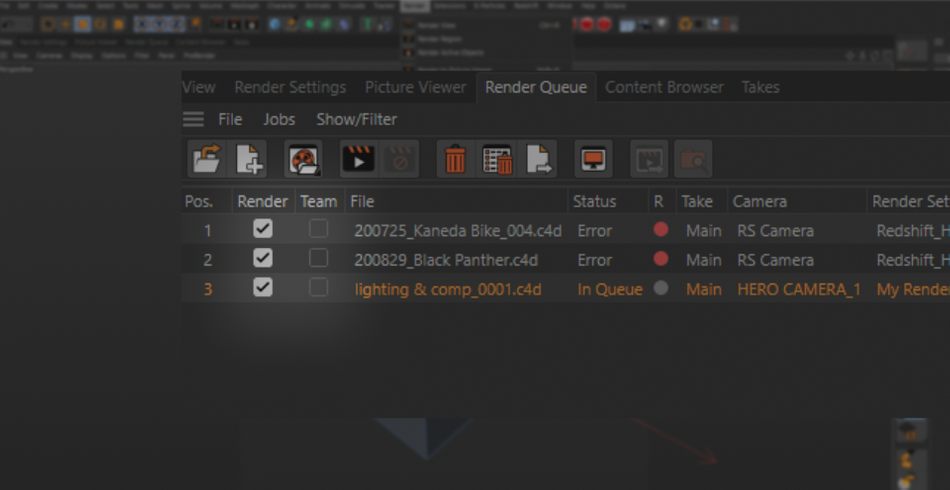
Something to look out for is when one of the projects has a Red circle in the R column. This indicates that your project is missing assets, such as textures. Make sure you fix that before rendering or the queue will not process that file. This can be a major pain if you leave a queue going overnight, only to find that it was stopped prematurely.

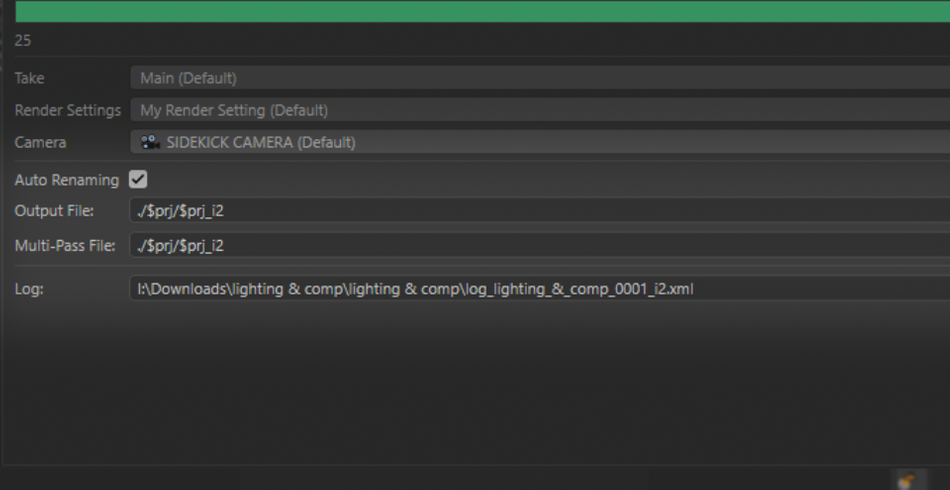
You can also render out multiple versions of a single project file. Say you want to render multiple camera angles, you can either select the appropriate Take, or you can manually set it by changing the Camera.
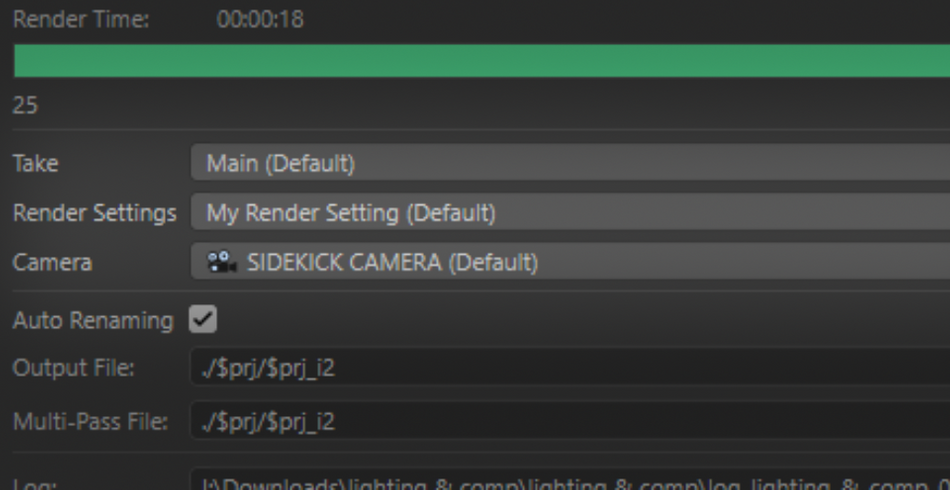
If you’ve been using the Tokens mentioned earlier, you can also use them here in the Output File and Multi-pass File fields.
When you are ready to export, hit the Start Rendering button and you are off to the races!
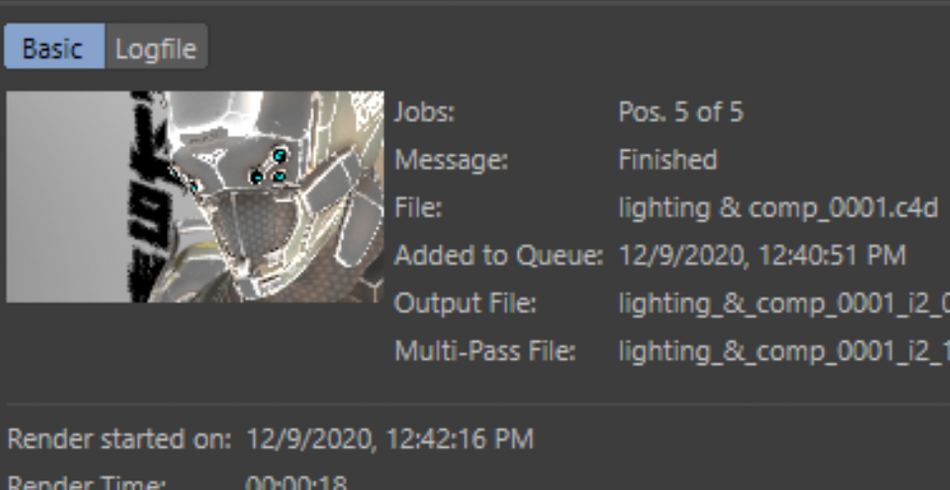
Keep in mind that rendering in the Queue looks a little different from exporting using the Picture Viewer. In the PV, you can see the Buckets render the image, but in the Queue, you will only see a small preview of the most current finished frame.
Look at you!
Hopefully these tips help you think of rendering differently! Tokens and customized Default Render Settings have saved me on multiple occasions. It also doesn't hurt that studios will regularly place you into their upper echelon of artists they contract for knowing these optimization tricks. These signal to them that you are organized and ready to work in a studio environment. Go forth and save yourself from future headaches!

Cinema 4D Basecamp
If you're looking to get the most out of Cinema 4D, maybe it's time to take a more proactive step in your professional development. That's why we put together Cinema 4D Basecamp, a course designed to get you from zero to hero in 12 weeks.
And if you think you're ready for the next level in 3D development, check out our all new course, Cinema 4D Ascent!
ENROLL NOW!
Acidbite ➔
50% off everything

ActionVFX ➔
30% off all plans and credit packs - starts 11/26

Adobe ➔
50% off all apps and plans through 11/29

aescripts ➔
25% off everything through 12/6
Affinity ➔
50% off all products

Battleaxe ➔
30% off from 11/29-12/7
Boom Library ➔
30% off Boom One, their 48,000+ file audio library
BorisFX ➔
25% off everything, 11/25-12/1

Cavalry ➔
33% off pro subscriptions (11/29 - 12/4)

FXFactory ➔
25% off with code BLACKFRIDAY until 12/3

Goodboyninja ➔
20% off everything

Happy Editing ➔
50% off with code BLACKFRIDAY

Huion ➔
Up to 50% off affordable, high-quality pen display tablets

Insydium ➔
50% off through 12/4
JangaFX ➔
30% off an indie annual license
Kitbash 3D ➔
$200 off Cargo Pro, their entire library
Knights of the Editing Table ➔
Up to 20% off Premiere Pro Extensions
Maxon ➔
25% off Maxon One, ZBrush, & Redshift - Annual Subscriptions (11/29 - 12/8)
Mode Designs ➔
Deals on premium keyboards and accessories
Motion Array ➔
10% off the Everything plan
Motion Hatch ➔
Perfect Your Pricing Toolkit - 50% off (11/29 - 12/2)

MotionVFX ➔
30% off Design/CineStudio, and PPro Resolve packs with code: BW30

Rocket Lasso ➔
50% off all plug-ins (11/29 - 12/2)

Rokoko ➔
45% off the indie creator bundle with code: RKK_SchoolOfMotion (revenue must be under $100K a year)

Shapefest ➔
80% off a Shapefest Pro annual subscription for life (11/29 - 12/2)

The Pixel Lab ➔
30% off everything
Toolfarm ➔
Various plugins and tools on sale

True Grit Texture ➔
50-70% off (starts Wednesday, runs for about a week)

Vincent Schwenk ➔
50% discount with code RENDERSALE

Wacom ➔
Up to $120 off new tablets + deals on refurbished items


All-Access Pass
Unlimited access to 50+ courses, unlimited critique, live events, and 24/7 community. Join School of Motion All-Access today.