
All-Access Pass
Unlimited access to 50+ courses, unlimited critique, live events, and 24/7 community. Join School of Motion All-Access today.

Cinema4D is an essential tool for any Motion Designer, but how well do you really know it?
How often do you use the top menu tabs in Cinema 4D? Chances are, you probably have a handful of tools you use, but what about those random features you haven’t tried yet? We're taking a look at the hidden gems in the top menus, and we're just getting started.

In this tutorial, we’ll be doing a deep dive on the Select tab. If you're constantly scrambling to grab polygons or losing track of objects in a growing list of layers, this menu can save your bacon.
Don't reject, select
Here are the 3 main things you should use in the Cinema4D Select menu:
- Create Selection Object
- Selector
- Phong Break Selection
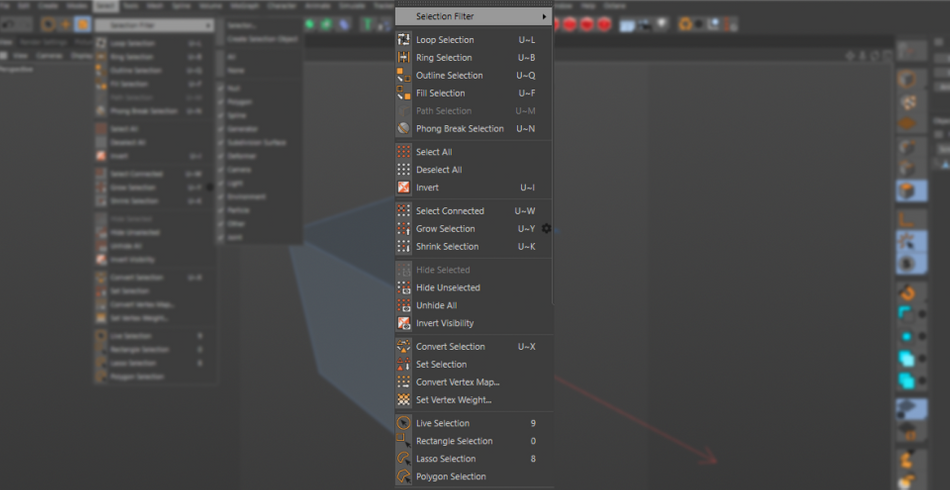
Select > Create Selection Object
Have you ever needed to select a certain group of objects repeatedly throughout a project? But they were in different levels of your hierarchy and tracking down each one would be a massive waste of time?

Well, that’s what the Selection Object is here to help you with.
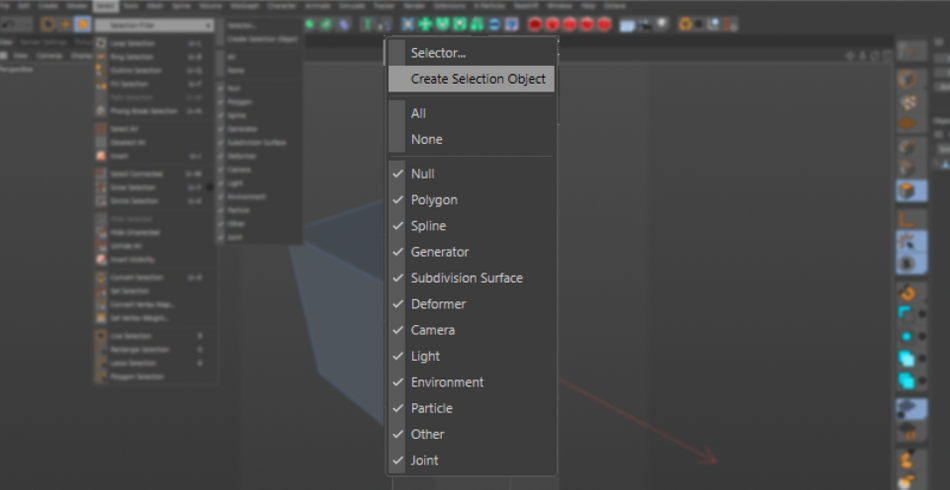
Simply select all of the objects you would like to group, and while selected go to Select > Selection Filter > Create Selection Object.
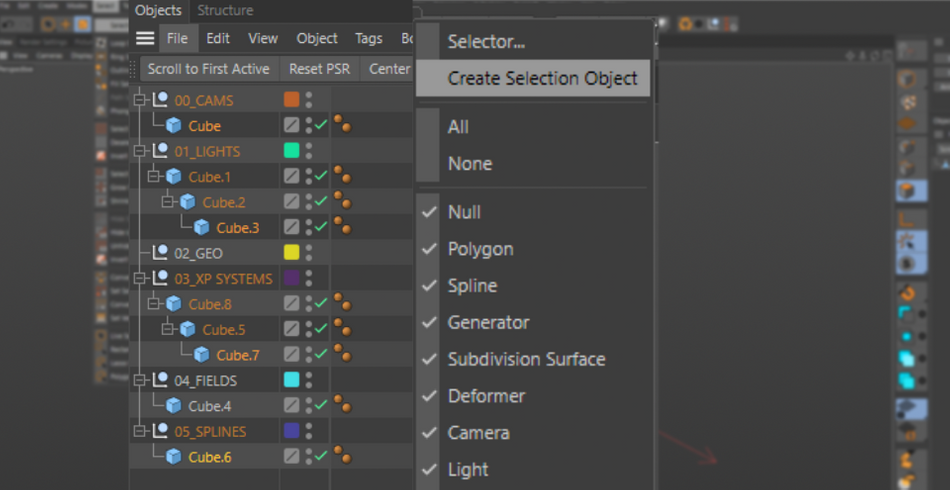
From now on, you can simply hit “Restore Selection” and all of your objects will light up in the viewport, and their object properties will become active in the Attributes window.

No more digging through your object manager!

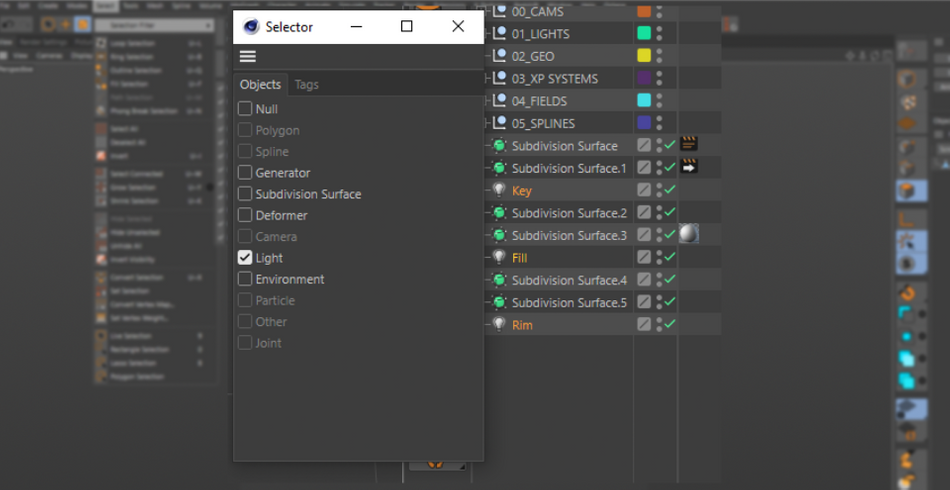
Select > Selector
Think of this guy as a filter for your scene. Want to select every Subdivision Surface in your scene so you can increase the resolution for final render? Call this bad boy up and select the “Subdivision Surface” option and it’ll select each one.
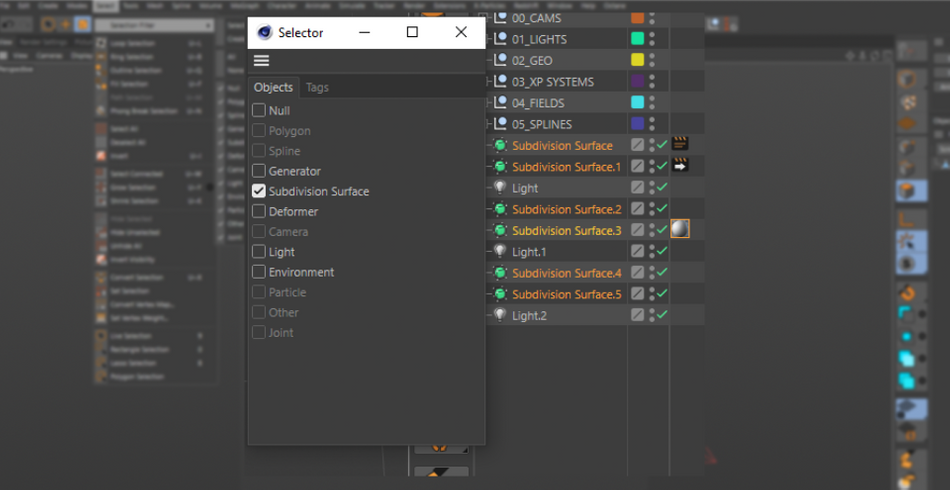
This is especially great if you happen to have objects with varying naming conventions, or objects that don’t appear when you are using the search bar on the top of the Object Manager (ex: naming lights as “Key, Fill, and Rim” without including the word “light”)
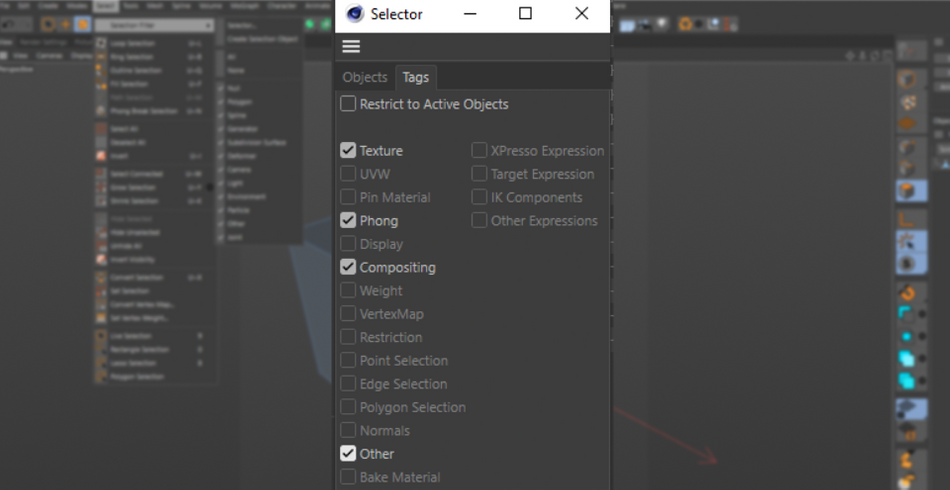
You can even take it a step further by using this tool to select every object with specific Tags. Need to adjust the Phong Angle on all of your objects? Or maybe you need to select every Compositing Tag to double check that they are set to create Object Buffers? The Selector has you covered.
Select > Phong Break Selection
In all honesty, all of these selection tools are super useful for selecting polygons, edges, and points on your object. But the Phong Selection tool definitely stands out as unique for its ability to select portions of objects based on the angle of the polygon surface.
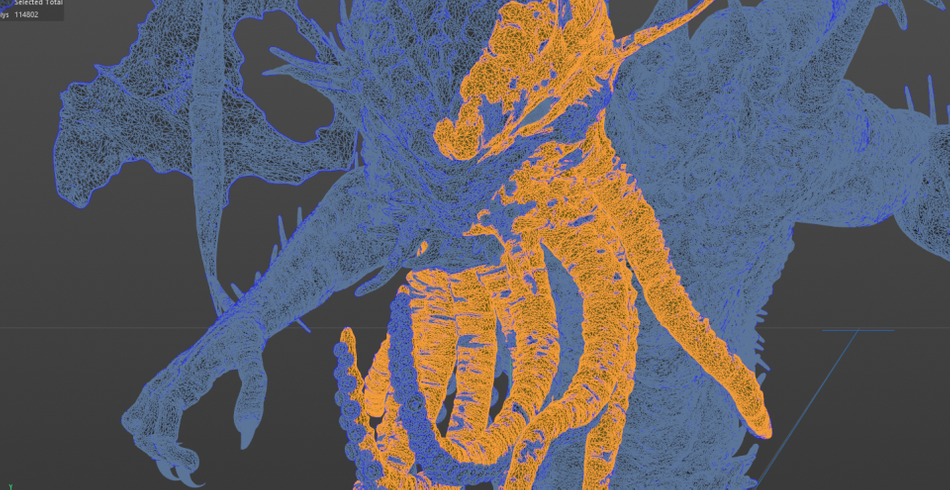
This tool is particularly useful when dealing with high poly objects such as CAD models or zBrush sculptures. They tend to have millions of polygons composed exclusively of triangles.
This is particularly problematic when using the Loop selection tool, as Triangles tend to cause the loops to look random and incoherent.
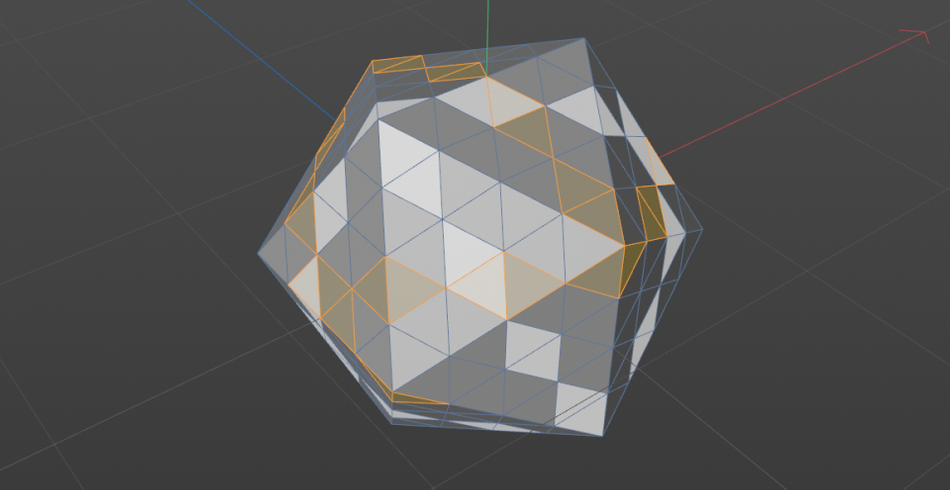
Simply click on parts of your model and you’ll typically be able to see it work immediately.

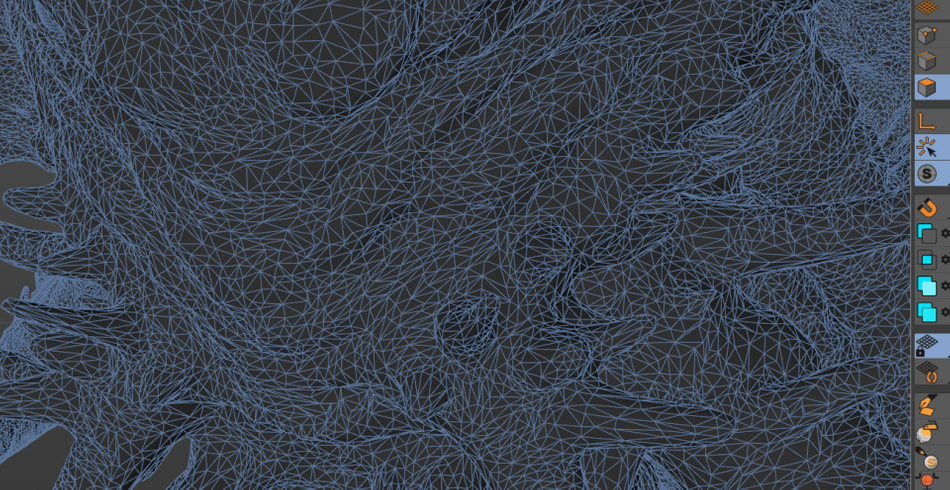
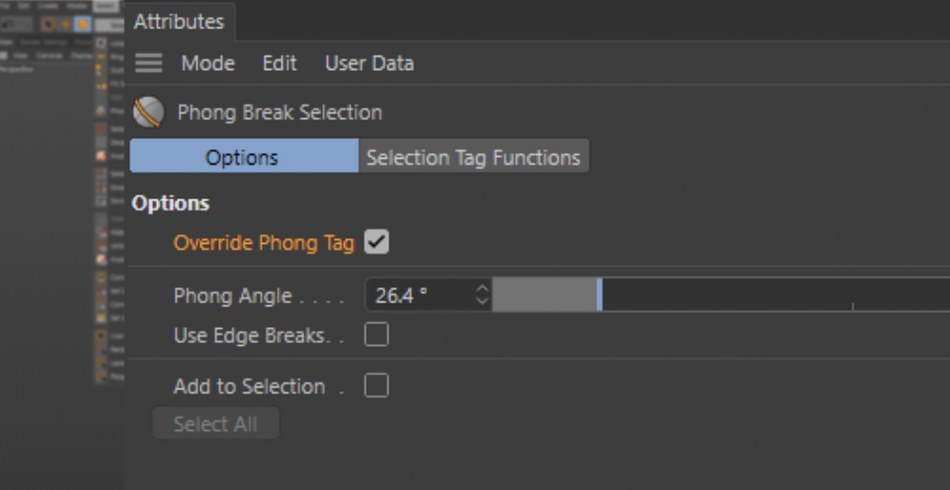
However, if it is having some trouble selecting portions of the model, click on the “Override Phong Angle” check box. This will let you specify your own Phong Angle. Your object will then glow with blue lines, showing portions of the object that have that particular angle. Tune it until you get the result you want.
Look at you!
As a Cinema 4D artist, you will have to manage your scene. There is no getting around it, it’s just part of the deal when working in 3D. You can do it the hard way and waste precious time, or use these neat tools to speed up your workflow, giving yourself more time to find hilarious gifs to post on Slack.

Cinema4D Basecamp
If you're looking to get the most out of Cinema4D, maybe it's time to take a more proactive step in your professional development. That's why we put together Cinema 4D Basecamp, a course designed to get you from zero to hero in 12 weeks.
And if you think you're ready for the next level in 3D development, check out our all new course, Cinema 4D Ascent!
ENROLL NOW!
Acidbite ➔
50% off everything

ActionVFX ➔
30% off all plans and credit packs - starts 11/26

Adobe ➔
50% off all apps and plans through 11/29

aescripts ➔
25% off everything through 12/6
Affinity ➔
50% off all products

Battleaxe ➔
30% off from 11/29-12/7
Boom Library ➔
30% off Boom One, their 48,000+ file audio library
BorisFX ➔
25% off everything, 11/25-12/1

Cavalry ➔
33% off pro subscriptions (11/29 - 12/4)

FXFactory ➔
25% off with code BLACKFRIDAY until 12/3

Goodboyninja ➔
20% off everything

Happy Editing ➔
50% off with code BLACKFRIDAY

Huion ➔
Up to 50% off affordable, high-quality pen display tablets

Insydium ➔
50% off through 12/4
JangaFX ➔
30% off an indie annual license
Kitbash 3D ➔
$200 off Cargo Pro, their entire library
Knights of the Editing Table ➔
Up to 20% off Premiere Pro Extensions
Maxon ➔
25% off Maxon One, ZBrush, & Redshift - Annual Subscriptions (11/29 - 12/8)
Mode Designs ➔
Deals on premium keyboards and accessories
Motion Array ➔
10% off the Everything plan
Motion Hatch ➔
Perfect Your Pricing Toolkit - 50% off (11/29 - 12/2)

MotionVFX ➔
30% off Design/CineStudio, and PPro Resolve packs with code: BW30

Rocket Lasso ➔
50% off all plug-ins (11/29 - 12/2)

Rokoko ➔
45% off the indie creator bundle with code: RKK_SchoolOfMotion (revenue must be under $100K a year)

Shapefest ➔
80% off a Shapefest Pro annual subscription for life (11/29 - 12/2)

The Pixel Lab ➔
30% off everything
Toolfarm ➔
Various plugins and tools on sale

True Grit Texture ➔
50-70% off (starts Wednesday, runs for about a week)

Vincent Schwenk ➔
50% discount with code RENDERSALE

Wacom ➔
Up to $120 off new tablets + deals on refurbished items


All-Access Pass
Unlimited access to 50+ courses, unlimited critique, live events, and 24/7 community. Join School of Motion All-Access today.