
All-Access Pass
Unlimited access to 50+ courses, unlimited critique, live events, and 24/7 community. Join School of Motion All-Access today.

Cinema 4D is an essential tool for any Motion Designer, but how well do you really know it?
How often do you use the top menu tabs in Cinema4D? Chances are, you probably have a handful of tools you use, but what about those random features you haven’t tried yet? We're taking a look at the hidden gems in the top menus, and we're just getting started.

In this tutorial, we’ll be doing a deep dive on the simulate tab. It holds many of the settings available to make your objects react to gravity—from particles, to hair.
IT'S NEVER TOO LATE TO SIMULATE!
Here are the 3 main things you should use in the Cinema 4D Simulate menu:
- Emitter/Thinking Particles
- Force Field (Field Force)
- Add Hair
Using Emitter in the C4D Simulate Menu
Everybody loves themselves a good particle system. However, most are expensive 3rd party tools. Luckily for us, Cinema 4D has a built-in particle system.
While nowhere near as complex and powerful as XParticles, these built in tools are no slouch! When used with Forces objects, you can create really interesting particle systems. Need to make some nice embers for your medieval title card? Drop in a Turbulence force and increase it’s strength.
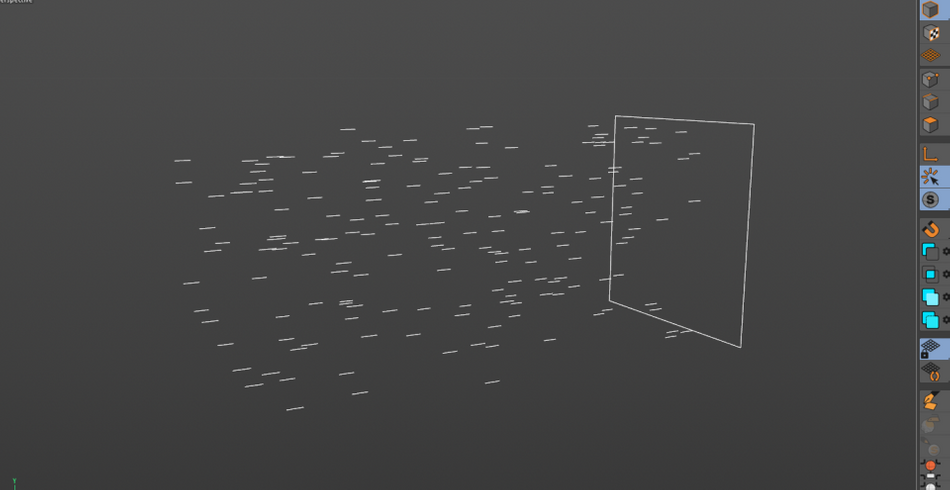
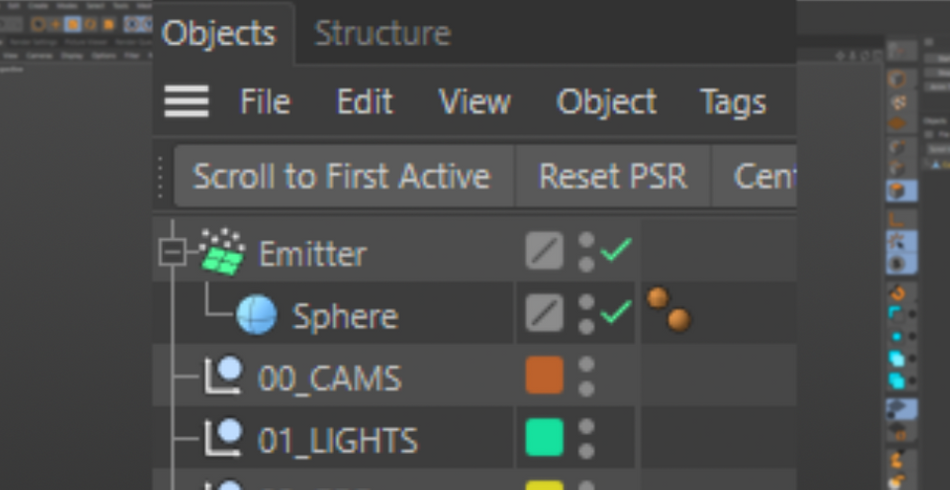
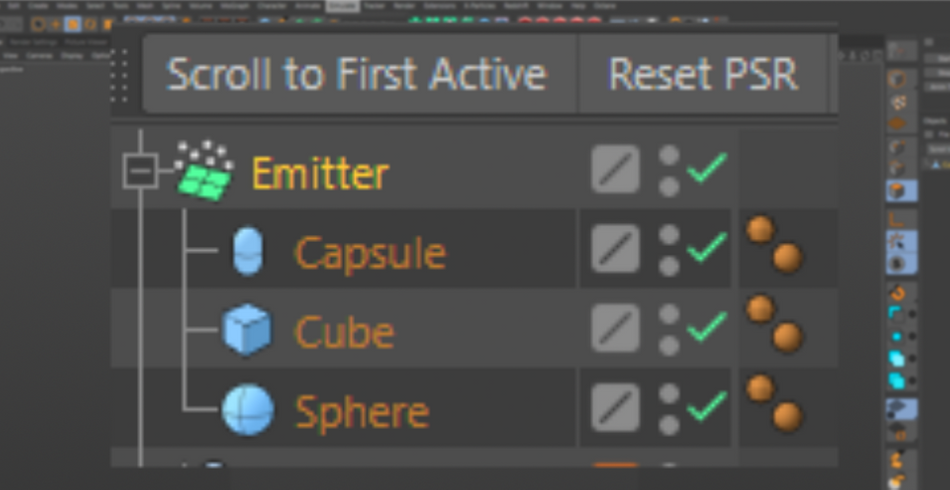
By default, the emitter will create white lines. These will not actually render. So, to render them, create a new object like a Sphere and drop it as a child of the Emitter. It’s also a good idea to scale the sphere down a bit.
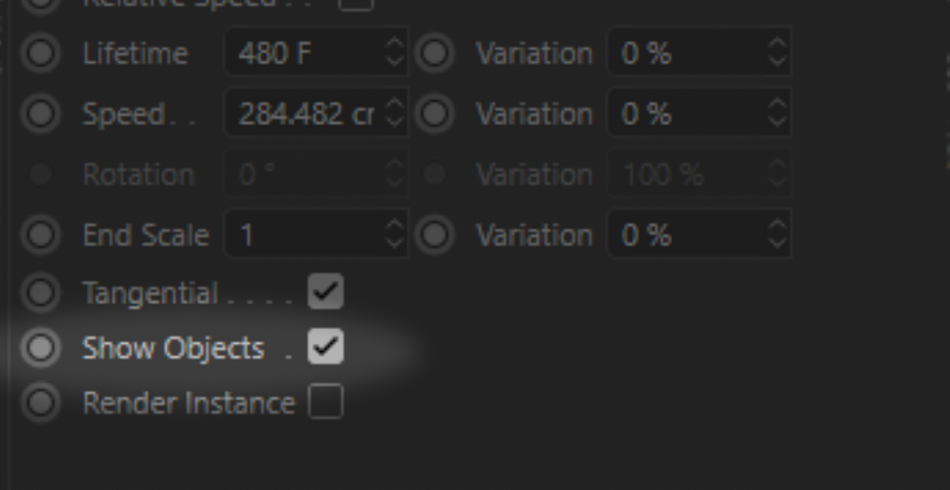
Now, activate Show Objects. This will show your sphere in place of the particles.
Drop in as many objects you want as children to the emitter. The emitter will shoot them out sequentially. Unfortunately, there is no way to set the emission to random.
However, you do have the option to turn your particles Dynamic and have them have gravity and collide with objects. Apply the Rigid Body tag to the Emitter. Apply the Collider Body tag to another object so you can see the particles fall and bounce around.
x
For abstract effects, make sure you go to Project, Dynamics and set Gravity to 0% so your particles float and collide as if they were in space.

Now, if you want to get the most bang for your particle buck, there is a much more advanced version of the Emitter called Thinking Particles. Honestly, it is such an advanced tool that to even attempt to explain how it works would require the rest of the article. I mean, they require Xpresso to even work!
Thinking Particles are worth learning just to grasp how powerful they truly are, and understanding the sheer amount of capabilities you have at your fingertips.

Sticking with the standard Emitter, let’s look at how to control your particles using Forces...
Using Field Force in the C4D Simulate Menu
By default, the Emitter shoots particles in a straight line. It’s a little boring, but that’s because it expects you to combined in some Forces. So let’s oblige it by looking at one of the most useful Forces, the Field Force.
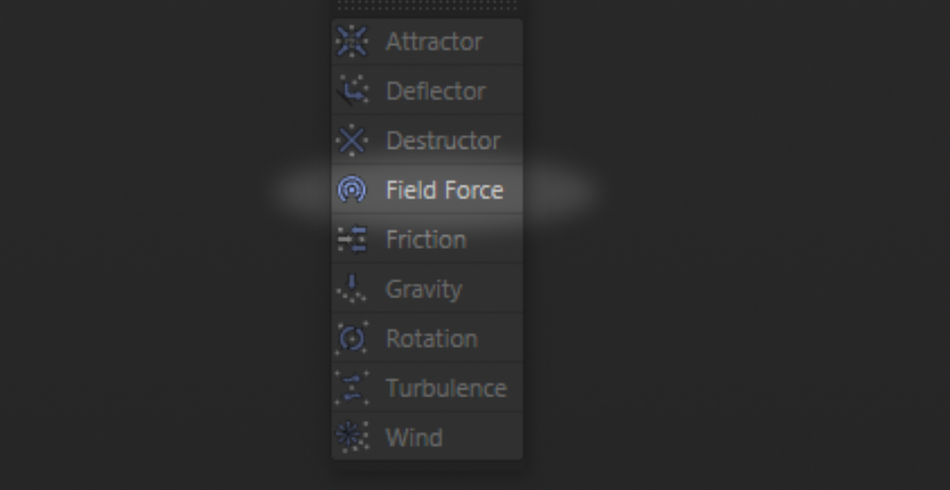
This Force is honestly one of the most versatile of the entire list. You could achieve a lot of the same results as other Forces by using this one alone. Let me explain.
Field Force only works with Falloff Fields such as Spherical, Linear, etc.
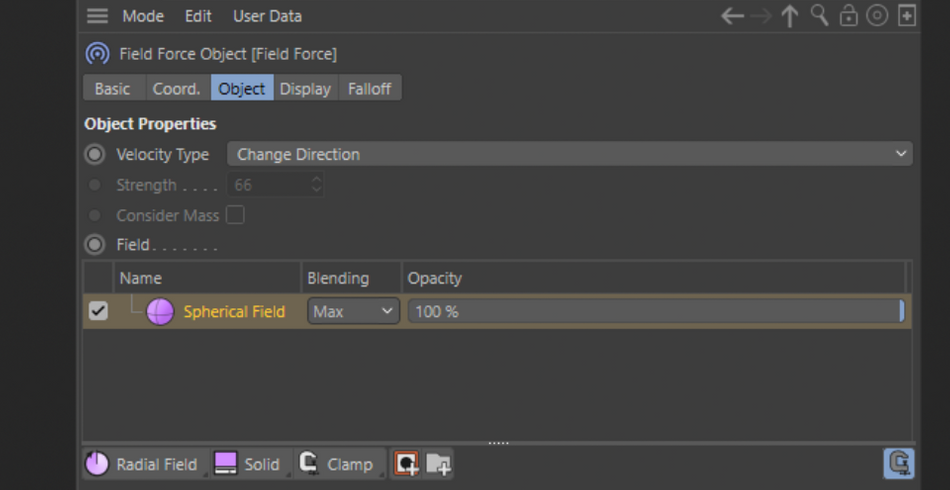
Now let’s say you want to create the same effect as the Attractor and suck in particles towards a point. Simply create a Spherical field. By default, Field Force will attempt to make the particles go to the center of the Spherical Field. Increase the Strength to see it more clearly.

Maybe you want to do the opposite and have your particles avoid a point. That’s also very simple, set the Strength to a negative value. Those particles will now move away from the point.
This effect is what you would get with a Deflector. However, the Deflector works as a flat object that bounces particles. The Force Field gives you the ability to use different shapes to work as your bounce object.
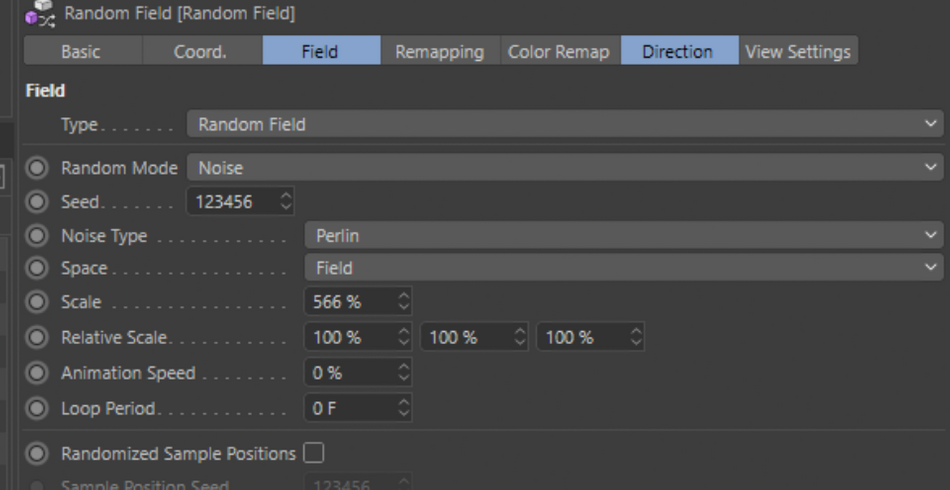
Let’s say you want to use Turbulence and give your particles a randomized motion path. This, too, is easily achieved with the Field Force. Create a Random Field and your particles will now have much more organic motion.
In your Random Field, adjust the Noise settings to control the Noise type, Scale, and even Animation Speed. You can create a completely custom turbulence field here. None of these options are available in the standard Turbulence force.
These are just some examples of what it can do! As with MoGraph, you can combine the Fields to create much more complex and customized effects. Definitely worth your time and experimentation!

Also, keep in mind that these forces can be used on objects with a dynamics tag, so that tip about adding tags to your emitters from earlier? It works doubly so here!
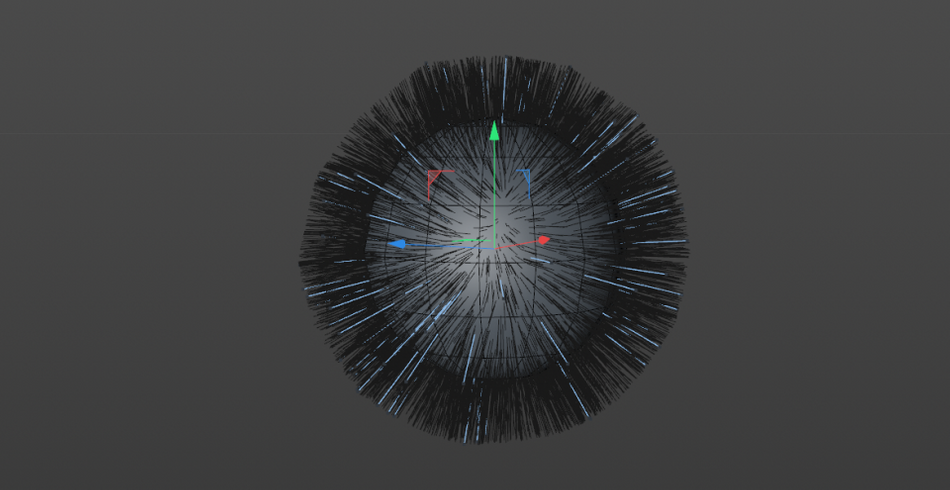
Adding Hair in the C4D Simulate Menu
While you are in the Simulate menu, you may have noticed the Add Hair option. This object does pretty much exactly what you would expect and makes your selected object very hairy.
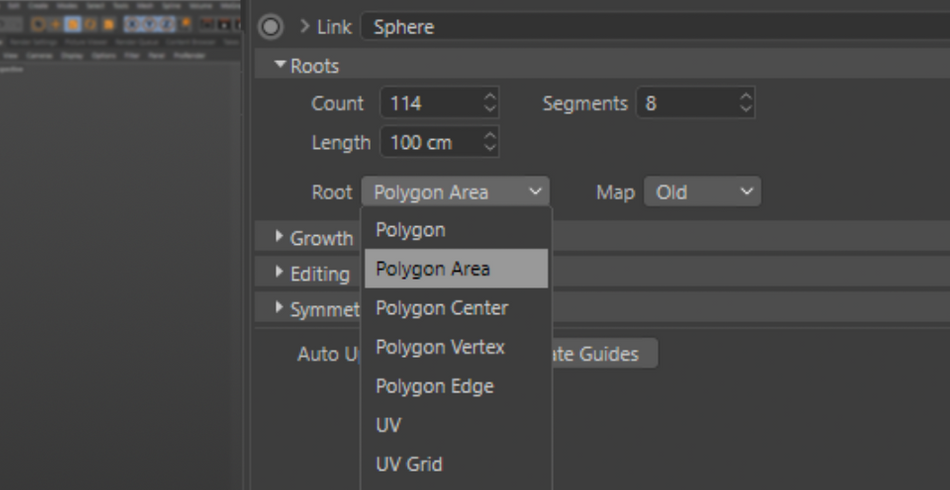
It does require a bit of finessing to get it to look correct. By default, the Hair object is set to create hair on the Vertex Points. Change it to Polygon Area if you want the hairs to cover the entire object evenly.
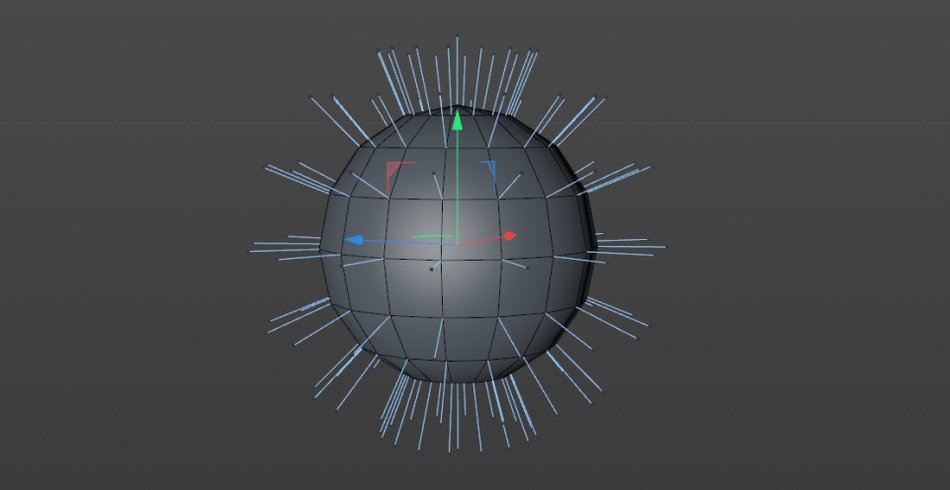
But don't expect to see the actual hair results in the viewport. You’ll be seeing Guides on your object.
These act as proxies to the actual hair on your object. A quick click on the Render View button will show you how your object actually looks.

If you want to see the Hairs in the viewport without doing a Render View, go to the Editor tab on the Hair object. In Display, set it to Hair Lines. This will show the hairs more accurately.
By default, the Hair object sets the hair to be Dynamic and will react to gravity if you press play on your timeline.
Be aware that if the hair is dynamic, it may make it difficult to style the hair using the Hair Tools. These allow you to comb the hair, cut it, curl it, clump it and straighten it.
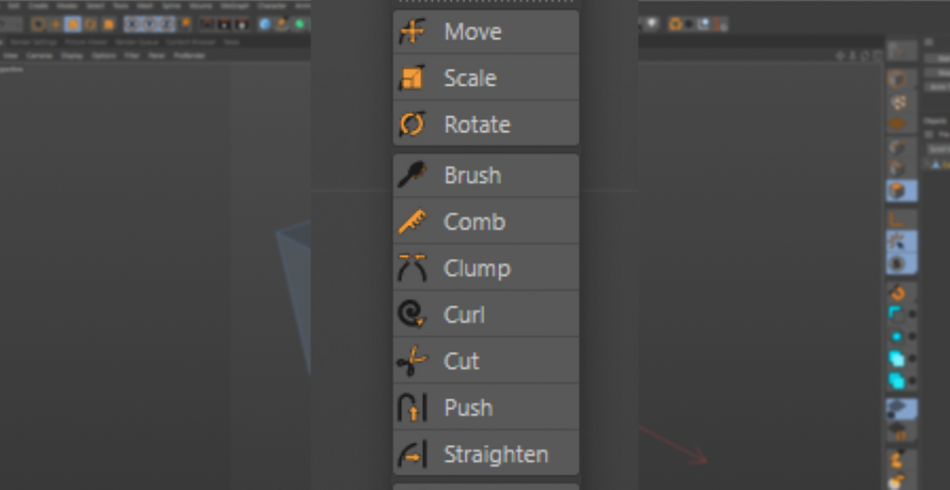
Definitely play around with the tools as they are the only way to get the hair to look exactly how you want it to.
If you want to change the color of the hair from the default Brown. There’s a Material created for you called “Hair Material”. All of the properties of the hair are here. This includes color, as well as 17 other options!
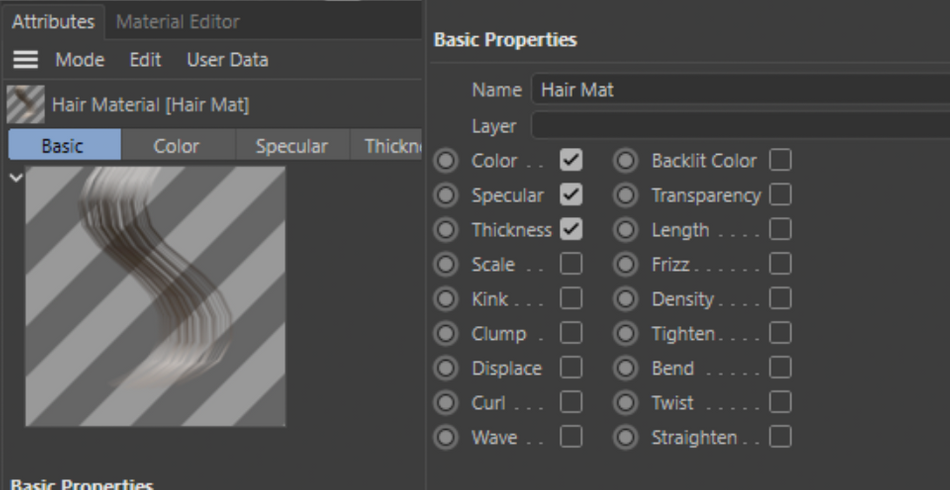
Activate the ones you want to modify and dive into each tab. If you have your Hair Display to Hair Lines, you can actually see the effects each of these tabs have on the hair directly in the viewport, no need to use your Render View!
x
Cinema 4D automatically sets your render settings to include Hair options. So, you are good to render immediately after creating the object. All you have to do is make the hair look fabulous.

Look at you!
Design based around physics is a popular design aesthetic utilized by some of the biggest studios in the world. While these tools are nowhere near as complex as the simulation systems found in software like Houdini, they are a great entry point for artists looking to add simulations to their work.
Now get out there and simulate your heart out!

Cinema 4D Basecamp
If you're looking to get the most out of Cinema 4D, maybe it's time to take a more proactive step in your professional development. That's why we put together Cinema 4D Basecamp, a course designed to get you from zero to hero in 12 weeks.
And if you think you're ready for the next level in 3D development, check out our all new course, Cinema 4D Ascent!
ENROLL NOW!
Acidbite ➔
50% off everything

ActionVFX ➔
30% off all plans and credit packs - starts 11/26

Adobe ➔
50% off all apps and plans through 11/29

aescripts ➔
25% off everything through 12/6
Affinity ➔
50% off all products

Battleaxe ➔
30% off from 11/29-12/7
Boom Library ➔
30% off Boom One, their 48,000+ file audio library
BorisFX ➔
25% off everything, 11/25-12/1

Cavalry ➔
33% off pro subscriptions (11/29 - 12/4)

FXFactory ➔
25% off with code BLACKFRIDAY until 12/3

Goodboyninja ➔
20% off everything

Happy Editing ➔
50% off with code BLACKFRIDAY

Huion ➔
Up to 50% off affordable, high-quality pen display tablets

Insydium ➔
50% off through 12/4
JangaFX ➔
30% off an indie annual license
Kitbash 3D ➔
$200 off Cargo Pro, their entire library
Knights of the Editing Table ➔
Up to 20% off Premiere Pro Extensions
Maxon ➔
25% off Maxon One, ZBrush, & Redshift - Annual Subscriptions (11/29 - 12/8)
Mode Designs ➔
Deals on premium keyboards and accessories
Motion Array ➔
10% off the Everything plan
Motion Hatch ➔
Perfect Your Pricing Toolkit - 50% off (11/29 - 12/2)

MotionVFX ➔
30% off Design/CineStudio, and PPro Resolve packs with code: BW30

Rocket Lasso ➔
50% off all plug-ins (11/29 - 12/2)

Rokoko ➔
45% off the indie creator bundle with code: RKK_SchoolOfMotion (revenue must be under $100K a year)

Shapefest ➔
80% off a Shapefest Pro annual subscription for life (11/29 - 12/2)

The Pixel Lab ➔
30% off everything
Toolfarm ➔
Various plugins and tools on sale

True Grit Texture ➔
50-70% off (starts Wednesday, runs for about a week)

Vincent Schwenk ➔
50% discount with code RENDERSALE

Wacom ➔
Up to $120 off new tablets + deals on refurbished items


All-Access Pass
Unlimited access to 50+ courses, unlimited critique, live events, and 24/7 community. Join School of Motion All-Access today.