Start Your 3D Journey in Cinema 4D
Master the essentials of 3D modeling, lighting, and animation in C4D. Enroll in All-Access to unlock C4D Basecamp and 50+ other courses.

Import and decorate 3D assets on the go with Procreate
Inspiration for 3D art can strike at a moment's notice, but you're not always close to your desktop computer. Wouldn't it be great to decorate and polish your 3D assets using Procreate, a versatile application that only requires an iPad and Apple Pen? Grab your smock and your best Bob Ross wig, it's time to check out a portable solution for 3D artists on the go.
Procreate has already become a major boon for digital art of all flavors. Using simple, familiar tools, artists have been able to create impressive works of graphic art, complex animations, and illustrations ready for import into Photoshop and After Effects. Now, with the new 2.7 update, 3D models can be easily brought into Procreate for detail and painting.
In this tutorial, we're going to explore:
- How to export your custom 3D asset from Cinema 4D into Procreate
- Creating a 4K base texture
- Painting 3D models in Procreate
{{lead-magnet}}
How to export from Cinema 4D to Procreate
Currently, Procreate only supports two kinds of 3D models: OBJ and USD. Let's take a custom asset from Cinema 4D and bring it over so you can see how simple the process can be.
Bake down your model into a polygonal mesh
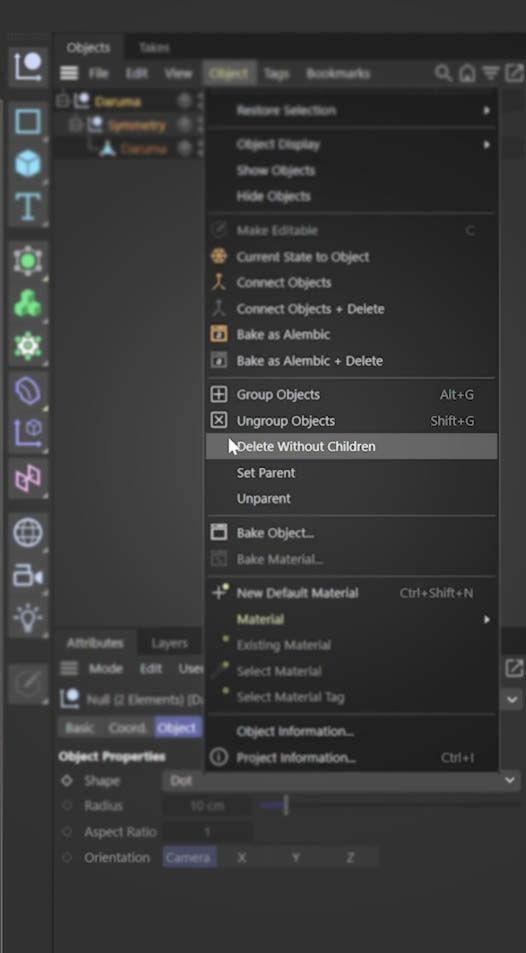
If you have a lot of shaders or geometry in your model, you'll want to simplify things before bringing it over into Procreate. Select your model in the Objects bin and hit C to bake down into a polygonal mesh. You'll also select any nulls and go to Object > Delete Without Children.
drag_handle
Create a UV unwrap for your 3D model
This is one of the most important steps if you have a custom model that you want to export to Procreate. Now we've talked about UV Unwrapping before, but that was when we intended to use Cinema 4D for the detail work to follow. Fortunately, a lot of the steps are the same.

drag_handle
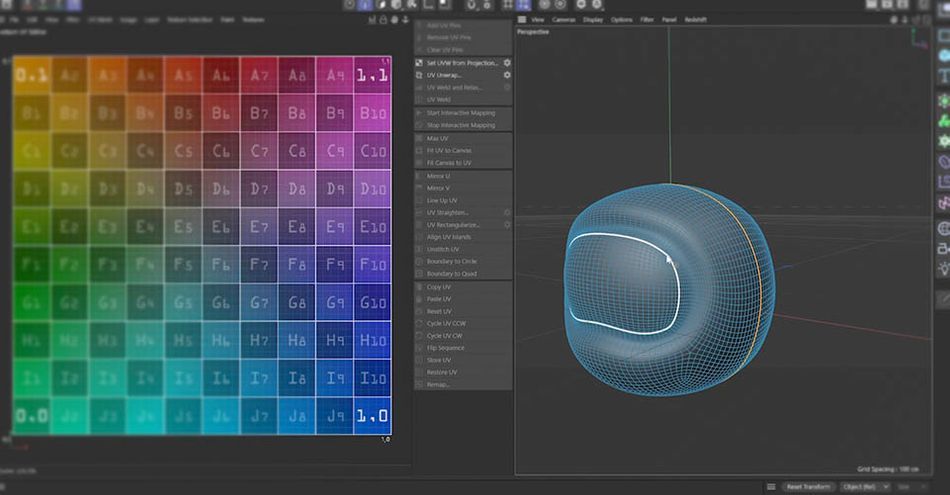
In the Texture UV Editor, you can use Automatic UV to have a quick and easy UV Unwrap on your project. This might be as finely tuned as performing the task manually, but it will save you a lot of time and generally works well.
Now, if you're not happy with your automatic unwrap, we'll have to do a quick selection to set ourselves up. Remember that a UV Unwrap is essentially a guide to all the seams in your asset, like if you had a build-a-bear cutout that just needed to be stitched together and filled up.
First you need to go to Edge Selection, then press U > L to bring up your Loop Selection. Now pick a spot to define a seam.
drag_handle
Left of your window, select UV Unwrap and voila, you've got a quick and easy UV Unwrap that we can now expand upon. If your grids are canted for whatever reason, you can easily fix that by hitting R for the Rotate Tool and dragging the grid until it lines up.
Now you can export this UV out to Procreate using a USD file.
drag_handle
Creating a 4K base texture
By default, you're going to be limited to 2K resolution in Procreate. If you're working in finer detail or higher quality, we're going to need one more step to get things ready. If you want to work in 4K, you'll need to apply a 4K texture to your 3D model, then export in a USDZ format.
Create a New Material

drag_handle
Create a New Material and turn off any Diffuse. Just select Luminance and lets apply to our model. U > L to create a Loop Selection, then U + F to add to the loop selection to fill out the material.
Now CMD/CTRL + Click and drag to duplicate the material, then we can apply it to the rest of the model.

drag_handle
Now we're ready to bake this material into an image texture.

drag_handle
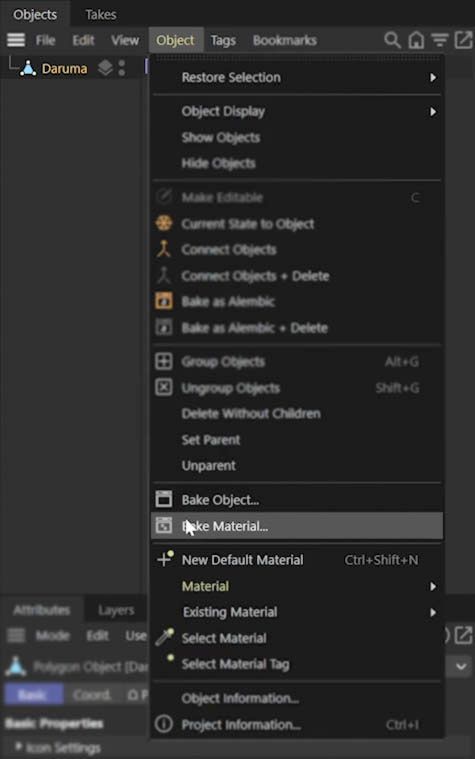
All you need to do now is go to Object > Bake Material. Under Tag, you can choose the file name and the file format. I'll choose TIF. Then we can adjust our file size. Remember, if you have an older iPad you might be locked at 2K. For me, I'll up these numbers to 4096x4096.
drag_handle
Supersampling removes the aliasing, and Pixel Border will produce a buffer so you don't have any seams showing when we bring this into Procreate. For background color, just make sure it is a color you are NOT using on your model.
Now bake out your material. All that's left to do is replace the current material on the model with this new setup. We have one more catch to work out. Procreate only recognizes physically-based node materials.
Create a New Node Material
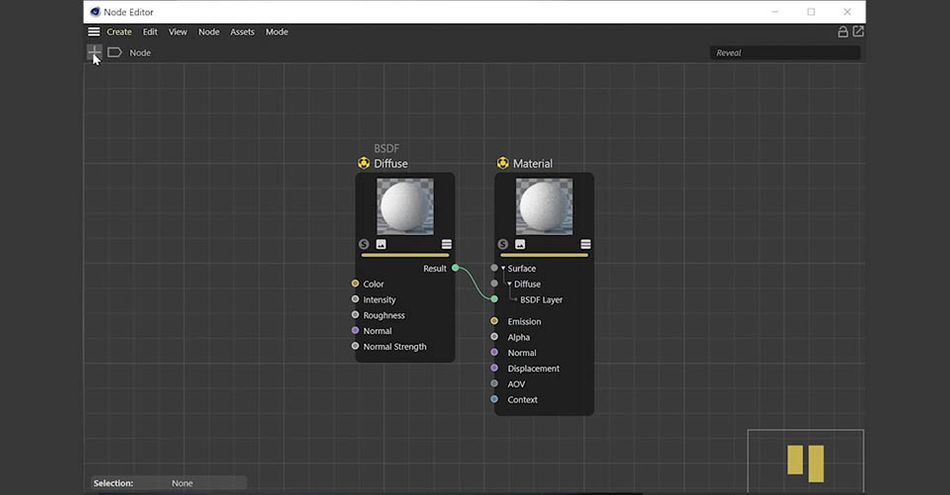
Since we need to work in nodes, we're going to go to Create > New Node Material. Double-click on the node to open the window. Don't worry, we'll just be in here for a minute so you don't have to freak out if nodes aren't your thing.
Hit the + symbol to open our node search window, then type in "Image." Double click on Image to bring that node into our window.
drag_handle
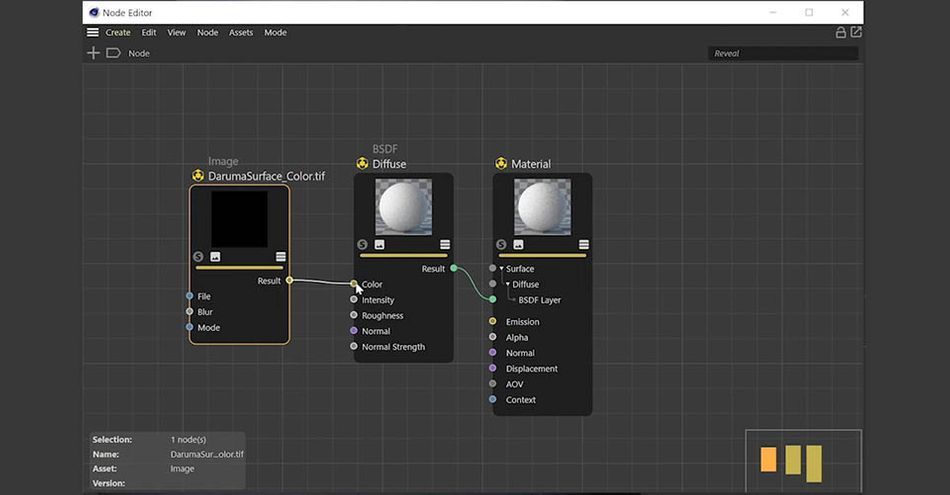
If you double-click on the image node, it will bring you to the file area where you can load the material we just created. Now click and drag from Result in the color node to Color in the diffuse node.
drag_handle
Now apply this node material to your object and you'll see we have our 4K texture nicely placed on our 3D asset.
If you wanted to go a step further, you can even separate the face and head into two object to make painting even easier. If you want to learn how to quickly set that up, check out more tips in the video above!
Export to Procreate

drag_handle
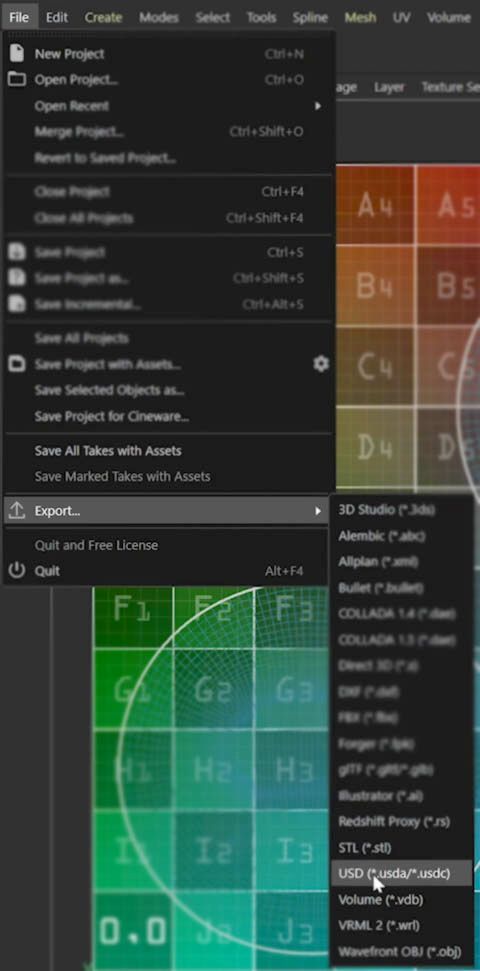
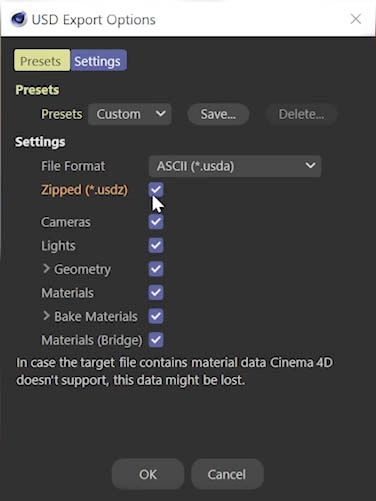
Now, simply enough, you're going to select your node material, go to File > Export, and select the USD format so it will load properly in Procreate. Then, in USD Export, make sure the the Zipped box is checked.
drag_handle
Also make sure Baked Materials is checked on, and that the size matches your intended output. Now just bake this material to your cloud service of choice. I'm using Dropbox, but you could easily use Apple's iCloud as well. Now we can head over to Procreate and get to work!
Painting 3D models in Procreate
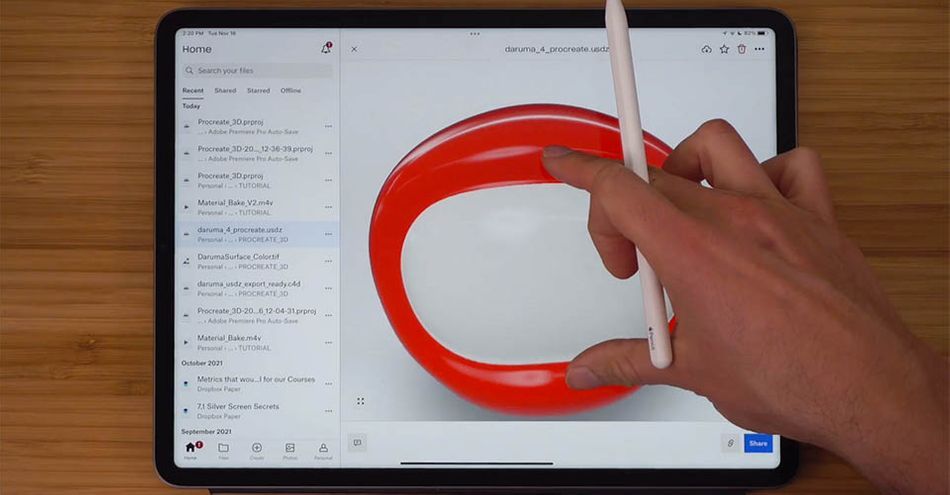
Go onto your iPad and open Dropbox or iCloud. Find your 3D model and save it to your device. I created a new folder to make it easy to find.
drag_handle
Now it's time to open Procreate and get creative. On the main page, go to Import, select your USDZ file, and let's get to work.
drag_handle
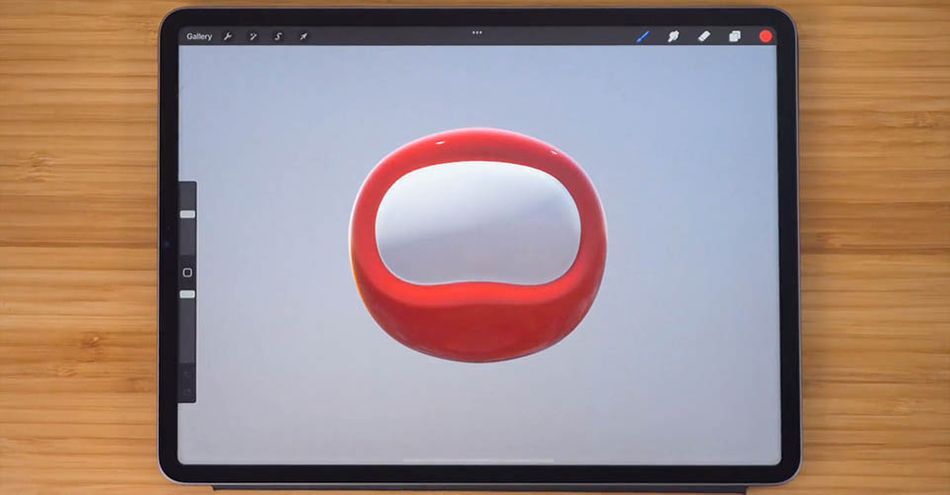
Now you can use all the handy Procreate gestures to move your model around. Rotate and scale using two fingers, and return to original size by pinching quickly. Once you've had enough fun playing around, it's time to get to business.
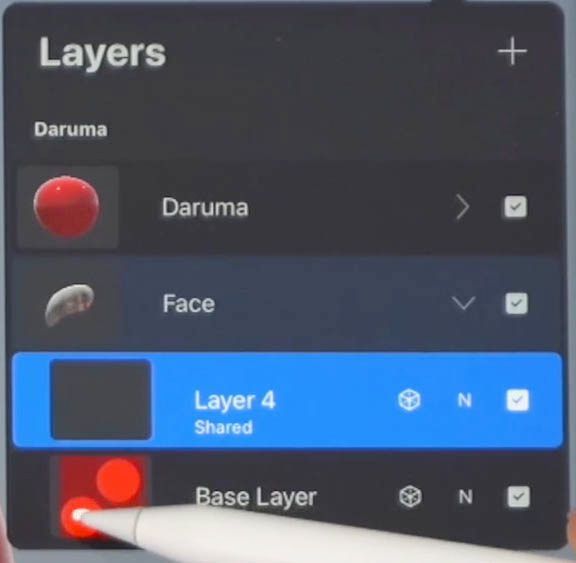
Since I don't want to mess with my base texture, I'll create a New Layer just as we would in Photoshop.
drag_handle
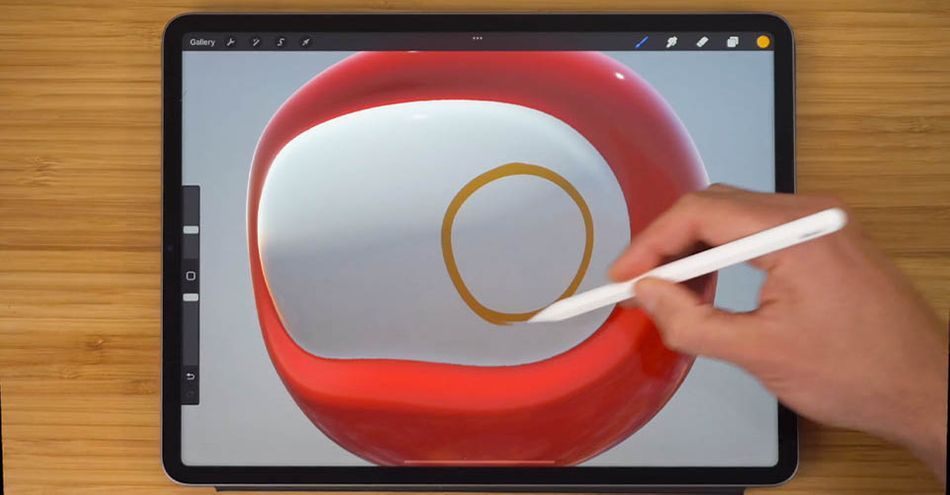
If you created two separate layers for your object, you'll see them here as well. In any case, we'll select our new layer, pick a brush, and get to work painting on our object. Procreate even lets you preview the brush in the pallet menu so you can get a sense of how it will look on a 3D object. Select a color (I'm going with Yellow), and let's see what happens next.
drag_handle
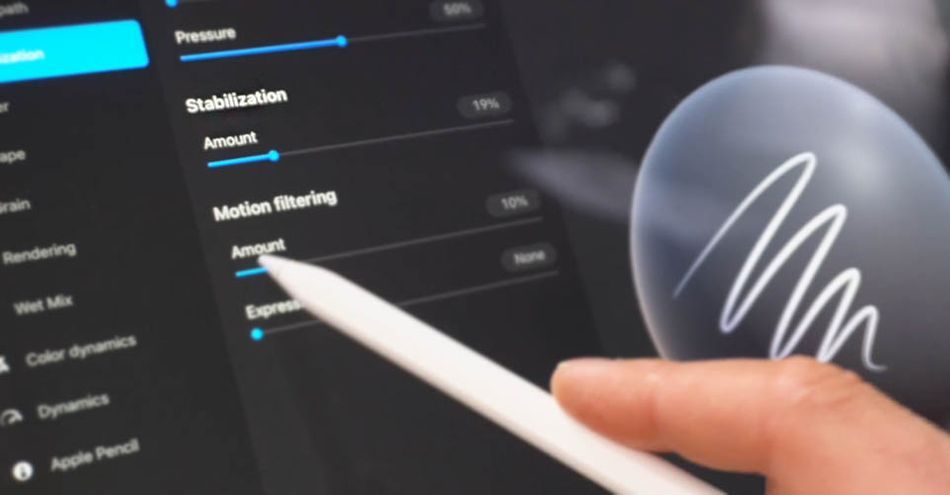
Now, if you're not the best artist in the business (like me), Procreate even has a stabilization setting that you can adjust to help with brushstrokes. It will have you looking like a regular Pablo Picasso in no time at all.
drag_handle
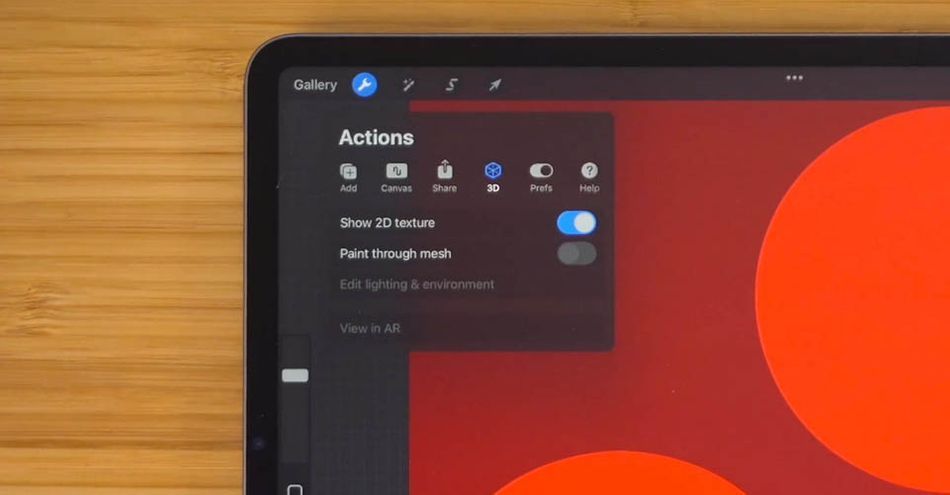
Some of you might not feel as comfortable drawing on a 3D object. In that case, you're going to select a 2D view. Head up to the Wrench (Settings) in the top left, select 3D, then toggle on Show 2D Texture.
drag_handle
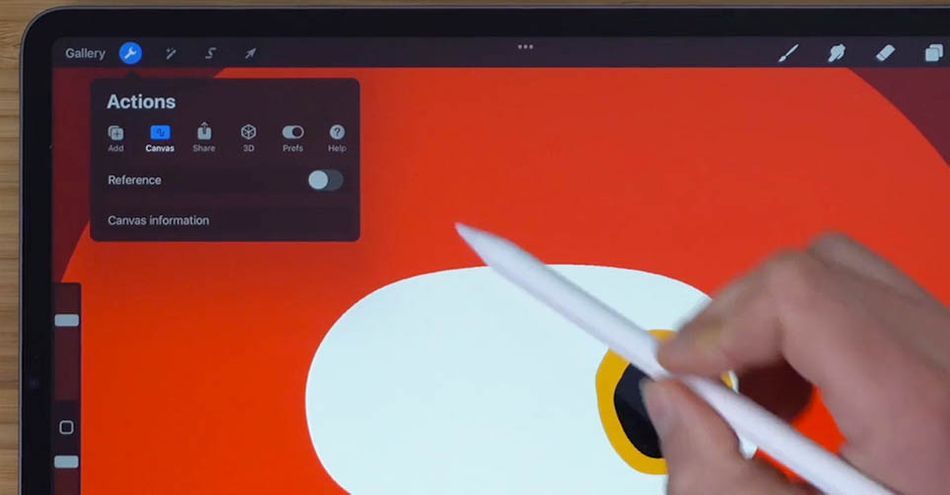
We're now operating on the 2D texture map, which can make fine details a little easier to draw on. Of course, it's going to be hard to picture how this will look in its final form without some form of reference. Head back to Settings, select Canvas, and then toggle on the Reference. Now you'll be able to see your artwork immediately reflected on the 3D object.
drag_handle
You can move that 3D window around, resize, orbit, or rotate as you work. Now you'll be able to work on a 2D map while watching your object transform into something amazing. All this in an app on an iPad!
Now it's time to show off some of Procreate's more powerful tools...but there's just too many to fit into one article! If you want to follow along with EJ, scroll on up to the video and watch as we turn our 3D asset into a finished product.
As you can see, this isn't an overly complicated process. If you have an iPad, an Apple Pen, and Cinema 4D, you can take your projects on the go and create truly incredible work.
Want to create your own 3D models?
While it's great to mold and utilize pre-made 3D assets, there's nothing quite like creating your own. If you want to learn how to craft and animate using Cinema 4D, you're in luck. Welcome to Cinema 4D Basecamp!
Learn Cinema 4D, from the ground up, in this intro to Cinema 4D course from Maxon Certified Trainer, EJ Hassenfratz. This course will get you comfortable with the basics of modeling, lighting, animation, and many other important topics for 3D Motion Design. Master basic 3D principles and lay the foundation for more advanced subjects in the future.
ENROLL NOW!
Acidbite ➔
50% off everything

ActionVFX ➔
30% off all plans and credit packs - starts 11/26

Adobe ➔
50% off all apps and plans through 11/29

aescripts ➔
25% off everything through 12/6
Affinity ➔
50% off all products

Battleaxe ➔
30% off from 11/29-12/7
Boom Library ➔
30% off Boom One, their 48,000+ file audio library
BorisFX ➔
25% off everything, 11/25-12/1

Cavalry ➔
33% off pro subscriptions (11/29 - 12/4)

FXFactory ➔
25% off with code BLACKFRIDAY until 12/3

Goodboyninja ➔
20% off everything

Happy Editing ➔
50% off with code BLACKFRIDAY

Huion ➔
Up to 50% off affordable, high-quality pen display tablets

Insydium ➔
50% off through 12/4
JangaFX ➔
30% off an indie annual license
Kitbash 3D ➔
$200 off Cargo Pro, their entire library
Knights of the Editing Table ➔
Up to 20% off Premiere Pro Extensions
Maxon ➔
25% off Maxon One, ZBrush, & Redshift - Annual Subscriptions (11/29 - 12/8)
Mode Designs ➔
Deals on premium keyboards and accessories
Motion Array ➔
10% off the Everything plan
Motion Hatch ➔
Perfect Your Pricing Toolkit - 50% off (11/29 - 12/2)

MotionVFX ➔
30% off Design/CineStudio, and PPro Resolve packs with code: BW30

Rocket Lasso ➔
50% off all plug-ins (11/29 - 12/2)

Rokoko ➔
45% off the indie creator bundle with code: RKK_SchoolOfMotion (revenue must be under $100K a year)

Shapefest ➔
80% off a Shapefest Pro annual subscription for life (11/29 - 12/2)

The Pixel Lab ➔
30% off everything
Toolfarm ➔
Various plugins and tools on sale

True Grit Texture ➔
50-70% off (starts Wednesday, runs for about a week)

Vincent Schwenk ➔
50% discount with code RENDERSALE

Wacom ➔
Up to $120 off new tablets + deals on refurbished items


Start Your 3D Journey in Cinema 4D
Master the essentials of 3D modeling, lighting, and animation in C4D. Enroll in All-Access to unlock C4D Basecamp and 50+ other courses.