
All-Access Pass
Unlimited access to 50+ courses, unlimited critique, live events, and 24/7 community. Join School of Motion All-Access today.

An Infinite Mirror How-To Guide for Cinema 4D and OctaneRender from Motion Design Artist and Educator David Ariew
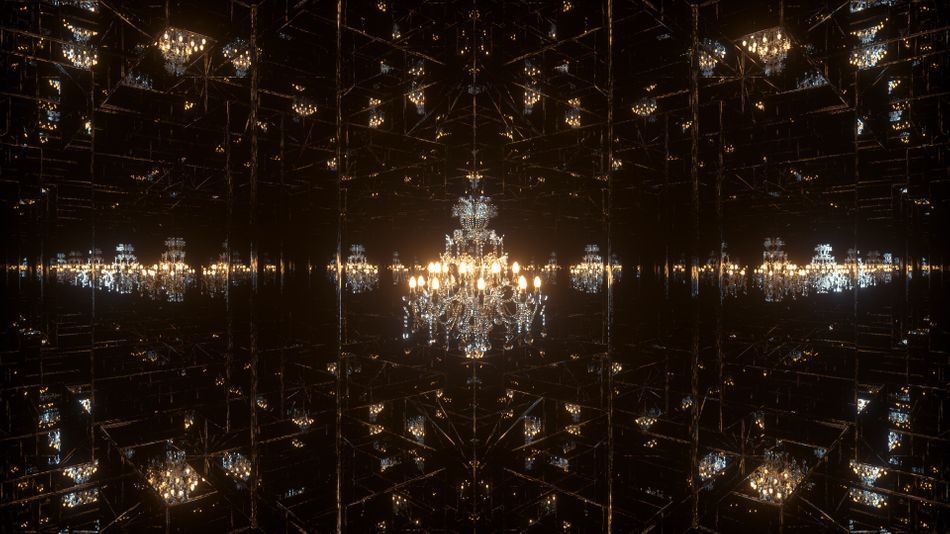
Have you ever been to a museum with a mirror room installation? Now, imagine creating that effect with any object on your own computer.
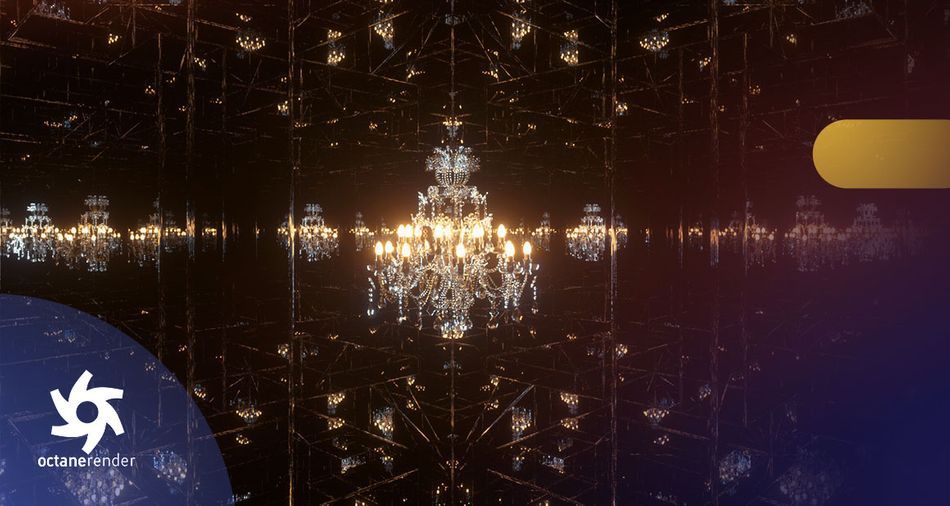
In his inaugural 3D video tutorial for School of Motion, Cinema 4D and Octane artist David Ariew uses a chandelier to demonstrate how to create infinite mirrors — and then takes it much further...
First, David produces simple mirror boxes with a chandelier object, using a mix material and a few settings changes. Next, he walks you through a more complex geometry for the mirror room, and uses beveled spheres and other intricate patterns with Merk Vilson’s Topoformer plugin. Then, he covers the new universal camera features, including the fisheye lens and a variety of aberration settings. Finally, he increases the complexity of the look using Topoformer and Respline — again, all inside the mirror room.
There's a reason they call him Octane Jesus.
How to Create an Infinite Mirror Room: Tutorial Video
{{lead-magnet}}
How to Create an Infinite Mirror Room: Explained
We've highlighted the key takeaways from David Ariew's Cinema 4D and Octane Render video tutorial to serve as your step-by-step guide to creating an infinite mirror room.
ESTABLISHING THE MIRROR BOX FOUNDATION
To lay the mirror box foundation for your infinite mirror room, add a box to your scene and scale it up until it fits all around the object you want to reflect.
Then add a glossy texture to your cube, and change the color to black.
Next, set the index to 8.
Finally, under the Kernels tab in your Octane settings, change the GI clamp to 1.
Note: to see the changes, you must be in Path Tracing mode.
FIXING UNWANTED BACKLIGHTS
To remove the lights repeating all through the scene, you can use Octane's simple light-linking feature.
First, add an Octane object tag to the cube by right-clicking the object in the object manager, and selecting C4doctane tags and Octane ObjectTag. Then, click to enable the tag's Light Pass Mask.
Next, navigate to the Octane Light Tags attached to your light objects, and under the Light Settings tab set the Light Pass ID to 2.
Finally, navigate back to the previously added Octane ObjectTag and, under the object layer, untick the 2 under Light Pass Mask.
USING THE CAMERA TO PRODUCE EFFECTS
Now that we have our foundation, it's time to start experimenting and customizing until we reach our desired result.
One effective technique is altering focal length. To increase the size your object appears in perspective, lower the focal length to 14mm or below; to shrink its appearance, increase the focal length.
This can be achieved manually with the Focal Length setting through the Object Manager panel, or with the keyboard shortcut: the 2 key while holding and dragging the right-mouse button.
USING THE NEW UNIVERSAL CAMERA WITH OCTANE 2019
If you have Octane 2019, you now have access to the new Universal Camera, which offers spherical and barrel distortion, as well as barrel corners, adding unique curvatures to the lens.
Plus, there are a number of cameras you can now test out, some providing infinite focal lengths, and others simulating a 360-degree view.
ADDING A BOKEH EFFECT
Bokeh is the blur effect that mimics the way a lens renders out-of-focus points of light and, when used correctly, it can add great dimension to your scene.
To use the Universal Camera to create this effect, add value to the F-stop, and then adjust the Aberration settings.
ADJUSTING THE REFLECTION PATTERN
To change the reflection pattern, scale your object up or down. The greater the distance between your object and its reflective surface, the fewer examples of the reflection you'll see.
ALTERING THE OBJECT SHAPE
To further experiment with other pattern possibilities, change the shape of your object.
David, for example, leverages the inner extrude method to create a new square polygon and then extrudes that square to form a new box that pushes toward the center of the object.
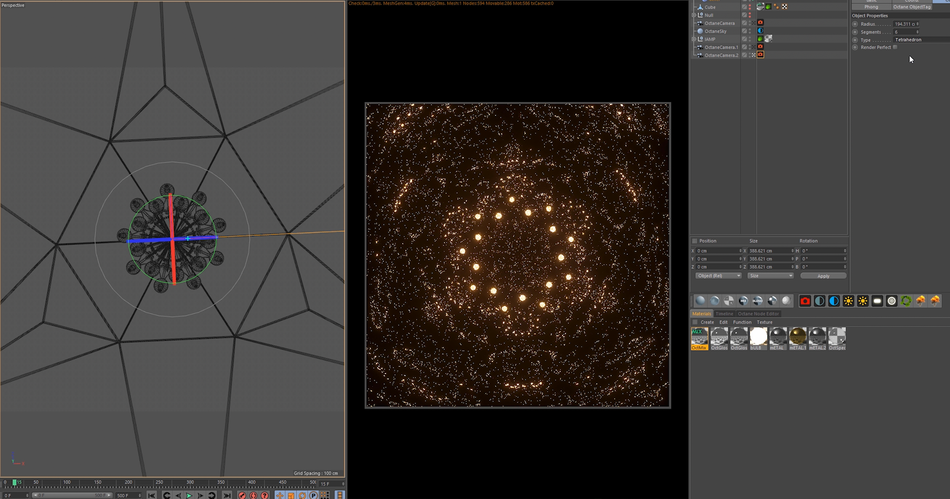
Here's what it looks like if you switch to a tetrahedron:
Then, for even more mirror room patterns, rotate your object, move the camera or switch the lens.

"I love how this makes you look like you're some kind of mathematical super-genius, when in reality you have no idea what you're doing."– David Ariew
Now What?
While we (and others) offer a ton of free content (e.g., tutorials like this), to truly take advantage of everything SOM has to offer, you'll want to enroll in one of our courses, taught by the top motion designers in the world.
We know this isn't a decision to be made lightly. Our classes aren't easy, and they're not free. They're interactive and intensive, and that's why they're effective.
In fact, 99% of our alumni recommend School of Motion as a great way to learn motion design. (Makes sense: many of them go on to work for the biggest brands and best studios on earth!)
But, with so many courses to choose from, which one is right for you?
If you're looking to master Cinema 4D, there's only one answer:
CINEMA 4D BASECAMP
In Cinema 4D Basecamp, taught by School of Motion 3D Creative Director EJ Hassenfratz, you'll learn modeling and texturing, compositing, keyframes and other animation methods, cameras, staging and lighting.
And, as with all of our courses, you'll gain access to our private student groups; receive personalized, comprehensive critiques from professional artists; and grow faster than you ever thought possible.
Get the inside scoop on Cinema 4D Basecamp >>>
-----------------------------------------------------------------------------------------------------------------------------------
Tutorial Full Transcript Below 👇:
David Ariew (00:00): Hey, everybody, what's up. You may not know me, but my name is David Ariew and hopefully you'll be seeing a lot more of me in the near future for school of motion. So today we're going to be creating an infinity mirror room, look using cinema 4d and octane render. Now, what I mean by that is just taking an object and putting it inside a fully reflective box. There's a little more to it than that, but depending on the geometry of that box, you get some very intricate and crazy looks that you could use for concert visuals or your suite, Instagram renders, whatever you want. Anyway, let's check it out.
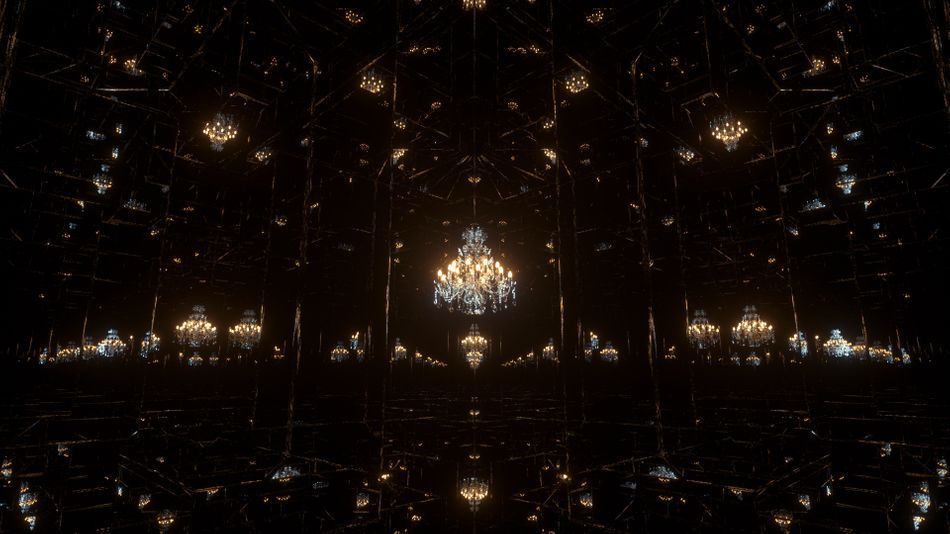
David Ariew (00:38): Okay. So I'm sure a lot of you have seen photos like this before, but there are these things out there called infinity mirror boxes, basically just a box of mirrors. It's like the simplest thing ever, but they're really cool for our museum installations and for getting these really pretty hallway looks of infinite lights and they just kind of look magical and other worldly, but just by the nature of having every surface in the room, being a mirror reflection, you get this extreme depth and feel that you're in this massive sea of the lights or whatever is inside the box. Now, recently I was asked to recreate this look for a client, and this is what I came up with. This one's actually flying through the center of a chandelier. So we get that added element of objects, passing close to the lens, and we get that interesting depth and motion blur. And this is actually one of the more simple boxes that I made, but it doesn't really take much geometry at all to really sell this look. Now this is actually the same shot, but with a fish eye lens, and we're going to get into the universal camera and how to tweak that out, to get these really insane trippy looking visuals
David Ariew (01:43): And again, this is that same scene, but we're just doing a camera orbit and you can see the mirror box geometry kind of cutting in and including the chandelier at certain points, which I think is kind of a cool added detail. And I also animated back to a much wider focal length here. So we're seeing this almost fractal triangular pattern emerging, And then I just had the cameras zoom back in so that we could get a perfect loop here.
David Ariew (02:17): Next. I tried something that wasn't a chandelier and took an animation from a couple of years before borrowed it from a dead mouse project file and copied it in here. It's just some really simple animating lines. There's nothing crazy going on. I'm just animating the scale of these guys, but just want to see if I could get more of a scifi and tech look out of this. I like the perspective here, almost looking down this tunnel is kind of cool. Now here's where things started to get a little bit more wacky and I'll break this down more when we get to it, but essentially I'm just animating the focal length of the new fish islands in the universal camera system, all the way out to its extreme, where we get this super distorted look almost like a shot from a 360 camera and for the techie lines here, I used Filson's plugin, TOPA, former as well as other plugin Reese blind to just grab the splines from the geometry.
David Ariew (03:06): And the only other thing to know here is that I do have motion blur on so that when it gets out to this wide focal length, it's not quite as harsh. We see a little bit of these objects that are passing quickly by the lens, streaking out a bit, and I've animated the aperture so that we get these out of focus, bokeh that past close to the lens. And here's a separate still from that last shot that I just thought looked cool on its own. And here I want to give a shout out to my buddy, Tom, who goes by [inaudible] on Instagram. He got all excited and inspired by the renders that I was posting. So he decided to go and start making his own. And he sent me what he was making. And he started using these buckyballs, which are basically these spheres formed by hexagons as the mirror surface.
David Ariew (03:44): And he was getting some other really cool looks. So that gave me the idea to go back and push a little bit further and try out a bunch of other crazy looks too. And so this one is with the Bucky ball and this one here is actually just using a standard sphere and I'll show you this in a bit. And then I was just getting all sorts of different looks with the various sphere types like Cosa Hedron and then also using mark Filson's plugin, Topo, former, again, to create the geometry of the room to get these really psychedelic looks that remind me of Mandela's. All right. So jumping into C4 D here, we've got our chandelier with a couple of backlights that are just giving a bit of color variation and highlight to this object. If we zoom in to the candle here, I've got some fingerprint texture on here, let's select this material and go to the node editor.
David Ariew (04:29): And if I right click and solo, this, you can see that we've got that fingerprint texture in the roughness. But overall, this is an extremely simple material. I've got some triplanar mapping going on, which you can learn about and other tutorials that I've already done before, but in general, we're not even going to be close enough to see this. So it really doesn't matter. Basically, the chandelier is just made up of a little bit of gold metal, some silver metal, and then mostly glass with some black body mission for the bulbs. Now you're about to find out that this is an extremely simple technique. So to create a mirror box, what do we do? We make a cube, let's scale it up until we're inside the cube. And then let's just create a glossy material. Let's throw that on the cube, take our color down the black, and let's take our index all the way up to eight.
David Ariew (05:22): And there you go. You can see we're already starting to get a bunch of reflections. Now, one issue here is we're seeing these backlights duplicated a million times, even though we've got the capacity set to zero, same thing. If we turn off the camera and shadow visibility or the general visibility, none of that affects anything, but luckily octane version four and above has light linking. So what we can do is we can throw an octane object tag here on the cube, and then we can set our light pass mask to enable. And currently I've got these light pass ID set to two. So if we jump back to our cube here and untake two, we should see these go away, except for in the actual chandelier. Now this might look a little more interesting if we weren't at this odd angle compared to the cube.
David Ariew (06:01): So let's reset this here and reset some of these transform values so that we're squared up with the chandelier. And let's just back this up. Now we're perfectly symmetrical with the chandelier and we can see more of this receding mirror box. Look now let me quickly adjust my late rig because it's no longer working for us. So I'll just group these and scoot them a bit back and to the side here and rotate them a little more towards camera. Okay. So overall I'd say this is looking pretty boring. We might get a bit more out of it if we actually move this up and do more of an Instagram type format. So I'm just going to go for a square for the time being and do 1920 by 1920. And then I'll kind of tweak this a bit. Actually let's do 10 80 by 10 80.
David Ariew (06:53): So now we've got more of a sense of the overall perspective, but there's definitely something missing. And this is the importance of looking at actual reference. When I was looking at the references, I noticed that you could see the actual edges of the mirrors and that gave it more of a practical or tangible feel. So I thought maybe it would help to actually introduce bevels. So if we just grabbed the bevel of the former here and hold down shift to drop it under our cube, we can then go in here and change the offset to maybe something like one. And now you can start to see that we're actually getting a little bevel here. Let's change it a bit bigger. And let's up the subdivisions to something like three, so that we're getting a bit of a beef year bevel here. You can start to see something happening.
David Ariew (07:32): We're starting to catch these little edge highlights. So that's going to look more interesting. Now, the next issue I feel is that this is all falling off too sharply. And the center chandelier is really, really bright, whereas everything else is super dark. So if we jump back to our metal material, let's call this our mirror. We can take this glossy material all the way down to an index of one, and now we're going to get a perfect mirror reflection. But the issue is now that there's zero fall off whatsoever. And to me, it all feels a little bit overwhelming in the amount of detail. And at this point I thought, okay, well this is too bright and this is too dark. Is there a way we can split the difference? And obviously the answer is a mixed material. So let's just drop in a mixed material and we'll create a second copy of this mirror material here, and we'll set this one-to-one.
David Ariew (08:17): So again, we've got this one at index eight and this one at index one, and in our mixed material, we can just drop these together. And it'll default to a 0.5 mics here, and then we can just drop this back onto our cube. And now I think we have the best of both worlds. So this is what I stuck with as the material for our mirror box, for the rest of the project. One other quick thing to mention is I'm in path tracing. If you're indirect lighting, this won't work. So you need to be in path tracing. And again, as usual, I have my GI clamp set to one. So that's one thing you'll have to change. So the rest of this tutorial is now going to be experimenting with different forms of this mirror box, how we can make this more interesting and different focal lengths and breaking down the camera animations I did.
David Ariew (09:00): So let's move a bit closer to this chandelier and maybe get a wider lens right now. We're at a 50, so let's bring it out to like a 35. If you hold down two and right click, you can dynamically zoom. So actually let's go to like a 24 and now you can see we're getting a different pattern. That's pretty interesting. If I actually scaled down this mirror box here, you can see that these objects are all going to get closer and bigger. One problem is at some point you start to clip the box, but this definitely creates a much more dramatic look. Now I've lost my two lights. So I'll bring that a little bit closer. So that's not clipping out of the box. And another thing to note here is that I've got a lot going on without it. We've got this kind of greenish and de-saturated cast.
David Ariew (09:41): So with this on, I like the orange and kind of teal look a lot better. And this let, currently that I've got going on is vision six from the oh Cyrus pack. And another thing to note, that's pretty exciting for me is in our bloom power here. If we crank this up, there's a new feature in 19 20 19, that actually has a cutoff so that we can prevent the scene from getting overly bloomed out. So this will now just affect the highlights or wherever you want to cut this off, basically. So you can see now we've got these lights glowing, pretty intensely without affecting the rest of the scene.
David Ariew (10:17): Now, maybe I want to do some kind of happy medium and bring this down a little bit and maybe not that much bloom, but somewhere in there could be kind of cool. Maybe bring in a little bit of bloom, maybe something like that. Now, if we rotate this cube 45 degrees, we get a totally different look. That's cool in its own, right? And if we widen out our lens, you can see we're going to get some really interesting fractal patterns going on, where we're seeing multiple vanishing points happening. One other thing we could do is we could actually thicken up this bevel even more. So if we took the offset up to something like three, we would have beefier edges though. Actually let's keep it a little bit more subtle. Let's go back to like something like 1.5. Okay? So at this point you can fly all around your object.
David Ariew (11:03): You can put whatever you want into this box and explore. You can get some pretty cool patterns. Say we come over here. So that's not a bad look, but I wanted to see if I could push this further. So what I did was I turned off the bevel and I'm going to pause this render here. Now I'm going to do the simplest thing I can possibly do with modeling. I'm going to go here and expand this a bit and go to my polygons. And I'm going to make this editable and select all, then do an inner extrude all the way down to something like this. And then extrude, let's go back into our camera here and let's turn our bevel back on and then unpause our render. And now you should be able to see we're getting a much more unique look where we're seeing this almost scaffolding like structure emerged just from these bevels that are catching the edge highlights. So coming back to our zero position with our camera, this is the look we're getting. Now, maybe we could increase the scale of our box a little bit here to give ourselves a bit more room, and then we could back the camera off a bit.
David Ariew (12:14): So it gets kind of interesting when we're actually sitting inside this little pocket here and all things considered. This is rendering pretty quick. And now if we widen out even more and maybe increase the exposure. So I think that's a pretty unique look right there. Now, maybe we drop a no object into the center of our scene and put our camera in the know so that we can rotate a little bit. Once I give myself some more room here, we could tilt upwards a bit and then we could also pin down with our camera. And now we're getting this pretty insane looking triangle, which is composed of these three vanishing points. So if I jump back to this clip, this is actually the exact same scene. And I'm going to jump into that scene just to prove it to you. And same thing with this initial shot to exact same scene.
David Ariew (13:07): There's literally nothing else going on, except I'm flying down through the middle of the chandelier. So let's go take a look at those real quick. All right, here we go. So I've just got this camera inside. A no object at the center of the scene and the novel is rotating over the course of the entire timeline, a thousand frames by 720 degrees so that we get a perfect loop. Once we hit the end here and you can see my mirror box is slightly different from what I showed you guys. So it looks like when I made this cube editable, what I actually did was selected all the geometry did an inner extrude. Here, did an extrude outwards, did another inner extruded inwards and then did a final extrusion inwards. So that's all the geometry that I used to create that mirror box, but you can get a lot more creative and complex with it by modeling out all sorts of other different kinds of forms.
David Ariew (13:55): And maybe the forms aren't symmetrical. You'll get lots of really weird and crazy looks just by playing with the form of a mirror box. Now, the other thing going on here is I do have the chandelier slowly rotating because I thought it was interesting to counter the movement of our camera with the movement of the chandelier, makes it feel like it's going a little bit faster paced than the rest of the scene, which I thought was kind of cool. And then the other thing that's happening here is I'm animating my focal length all the way out to something like a 10 mil lens. So if you look here, you can see my key frames and actually this is something I wanted to fix in the original. I felt like this needed to be dragged out a little bit more because it felt like it kind of clumped down a bit to me, but that's just me being picky.
David Ariew (14:34): So if we look here super simple, just animating that focal length. So the camera zooms out to a super wide lens. And that's when, if we pause here at a frame like this, we're going to get this interesting. And you can see that bit of extra geo that I modeled in there is creating a much more detailed looking scaffold. This has got a very fractal vibe to it. And one last thing I want to point out is I do have a little bit of shallow depth of field going on. So if we twirl open our depth of field here, you'll see the aperture is at 0.026, and I've got these anamorphic Boca going on with the aspect ratio of two and the aperture edge of three, kind of my go-to for the Boca as you guys probably already know. But then by the time that the camera animates out here, there's still that same amount of shallow depth of field, but on wider lenses, you aren't going to notice it nearly as much.
David Ariew (15:29): So if I store this render buffer and then take out the depth of field entirely, we'll see what happens. It's super subtle out here. You can see it in this foreground element and it is affecting the background a little bit, but you probably wouldn't notice it at this focal length. I love how these corner points create these little Starbursts. It feels like very cool scaffolding going on and all these layers of reflection that we're getting. Okay. And if we look here at this other shot, it's extremely simple. I've just removed some of the middle elements of this chandelier so that we can actually fly through it. That's literally all that's going on. And we're looking down on the chandelier versus before when we were down here. So super simple. And again, I've got the camera rotating in one direction and the chandelier rotating the opposite direction, which I think adds a bit of extra interest to the shot.
David Ariew (16:14): And then when we're flying through these elements, the motion blur helps smooth things out. So that's just that 2.02 here. Now, the next thing that I started to play with is actually the universal camera, which is new in octane 2019. I believe so if we jump over here to camera type, we can go from thin lens down to universal. Now at first there's no difference in the look, but we should be able to notice a bunch of new fields here. So this is pretty exciting stuff. There's a fish eye field. Now, if we play with this, nothing happens and same thing for panoramic, because these are actually camera types that we can change here in a second. But if we come down here to distortion, we get a bunch of different new options. So there's physical distortion. So you can see what happens there. So let that refine for a second.
David Ariew (16:59): And maybe we widen out this lens to really emphasize it. Now we're getting some really cool curvature going on. Now I'll take this back down and maybe bring our lens back to a less distorted, focal length. And here we've also gotten barrel distortion. Let's see how far we can crank. This can only go up to one, but that's kind of a cool look in of itself. Let's compare this to the spherical distortion to see what the difference is. So let's go compare store, render, buffer, bring this back to zero and then take our spiritual distortion up.
David Ariew (17:37): Okay. So it is a very different look. And then if we combine the two, we can get even more of an extreme luck, which really distorts out the center as well as the corners. And then finally, we've got this barrel corners, which kind of brings in the corners even further and let's bring this all the way up to one. So that's some pretty cool curvature. The other thing to note is that with barrel distortion, we can actually go negative. So we can go to negative one. And then if we reset this and this here, we'll see that this is kind of like optics compensation and after effects where the image is stretching more towards the camera. So that's a cool look to that. Can maybe be used to emphasize like an action scene. If the edges of the frame are kind of rushing towards you a bit more, it almost feels like Zimbler now one of the really cool thing here is we've got this distortion texture. So say I just load a let's load, a C 4d octane image texture in here and jump in and let's just grab something like a super green texture of peoples. And so this is really abstract, but we're actually using this texture to distort the camera. And obviously this isn't like an appropriate use of this texture, or maybe something that you should do, but it could be used for some really weird trippy effects. And as you move the camera, it's hard to see, but we do get totally different elements coming through here.
David Ariew (19:09): So it's almost like we're shooting through this crazy glass texture or something like that. All right. So now this next thing under aberration doesn't seem to work unless you've got some f-stop going on. So let's just increase this f-stop until we get a bit of Boca and our image, which this already looks pretty cool. So let's try playing with this spherical aberration. Let's crank it up to one and let's compare what this looks like to not having it on. So compare to render, buffer and take this back down to zero. And so it looks like it's kind of squishing and almost refocusing our lens. So it would be pretty cool to see what this looks like in a normal scene. That's not for this tutorial, but I'll definitely investigate it later and you should too. And if we take this to negative one, it looks like things get even crazier.
David Ariew (20:06): So for now, I don't know what's happening scientifically here. It really looks like the Boca have changed. Like they've got much thinner opacity towards the center, which that might actually be a property of the aperture edge. So let's take that back down. Yeah. That's just the aperture edge. So forget what I said there. Actually, do you want that on? And then the other thing here is if we had our aperture aspect ratio back at two, this does a much weirder thing in universal camera mode. It doesn't really stretch out the Boca. It just kind of compresses the whole frame much like you would in an actual anamorphic lens, I guess. So that's a bit weird. And then I'll take this back to zero. Now we've got this thing called coma. Now this is really cool.
David Ariew (20:47): Again, I have no clue how to explain what's going on here other than we're getting these common streaks. And I'm definitely gonna mess with this a lot more later because this opens up a whole lot of new possibilities for some abstract images. Let's see what happens if we crank this all the way to one really cool and weird. Maybe let's take our aperture down. So it's not so extreme. I have to say that is pretty cool, which is going to save that one out for later as is actually maybe even nicer here because of the symmetry. All right. And here's something else interesting. If we take this spherical distortion all the way down in the barrel distortion, all the way down, and then the barrel corners all the way down, which apparently can also go negative. We can have something like this and then taking out the coma. This negative distortion is also really cool. All right. So let's bring the aperture back up a little bit so we can check out these other effects here. And maybe let's focus here on our chandelier let's store a render buffer, and then let's see what astigmatism does.
David Ariew (21:56): So this one's really cool in that it is stretching out the Boca, but it's doing it in more of a radial fashion. So it's all stretching out from this central angle. So again, that feels a little bit more like a zoom blur to me, and let's not forget to set it to a negative angle so that we get this horizontal radial stretching. Let's set that back to zero and then let's see what this field curvature does. So if anything, that's just feels like it's enhancing the Boca. I don't really know exactly how to define what's happening here. Let's see what happens if we go to negative one and now it feels like it's reducing the Boca to some degree, but weirdly we've got some of these areas in the very edge of frame that are in focus. So to me, it seems like this is more of a radial blur where now we're sharp on the edges and soft in the middle.
David Ariew (22:44): Whereas before if we crank this up to one and we compare again, you can see the center is changing much less than these edges here. The further out we go, the more blurry we get. So I'm pretty sure this is a form of radial blur, which is another really cool option to have. And these will add a lot of really unique Lenzing kind of looks to our projects from now on. So this is one of the reasons I really love, oh, toys. They put in a lot of these unique creative features that maybe we didn't even know we needed, but now we can't live without. Okay. So next I'm going to switch this from thin lens to orthographic. So now we can have perfectly flattened infinite lenses, which is really cool in its own, right? And let's take down this aperture to zero so we can see this properly.
David Ariew (23:28): So now it's really like we're looking from an orthogonal viewpoint and if I kill the key frames on my camera so that I can rotate around here, you'll see some really interesting wacky results here, especially in this mirror box. I don't know if this is the best way to test. So this is more of like an isometric or actually more correctly parallel lens type perspective. Um, which just means that it's an infinitely long focal length basically. Now, before say we were to take this to our Finland's. If we were to go to our cinema 4d camera and select parallel camera, this would actually be the same thing. So it looks like octane already does respect as parallel camera mode, but now we can just kind of control that from within the universal camera and setting into orthographic. Now there's this orthographic tick box, which I don't totally understand other than that.
David Ariew (24:20): Now, when I zoom in and out, it's not affected by that. Whereas before this was actually linked to our focal length. So I think personally, I prefer not taking this now, other than orthographic, we also have things like equity rectangular, so we can do some super crazy 360 looks and this kind of option was available before and the panoramic camera. So that's basically what's going on here is physical cylindrical. There's a bunch of different projection types, cube maps. So let's go back to universal. That's all kind of the same thing that we also have cube map option here, but this can be a fun one to play with. This is how you would export for VR basically though in a two to one aspect ratio. So something like a 2000 by 1000. So this is more what you'd expect for VR or rather 360 uploads to YouTube, that kind of thing, right?
David Ariew (25:14): Without you probably want to crank it to at least 4,000 by 2000 or even 8,000 by 4,000, because you really need a ton more resolution when you're doing those full 360 stills or animations, but I'm going to jump back here to what we had before, as well as our aspect ratio. All right, let's go back to the universal camera type here and now we're going to investigate, instead of Finland's, we're going to try out the fish eye lens. Now these sliders from the distortion tab and the aberration tab, aren't going to do anything anymore. The only control we've got at this point is under the fish eye field. So by default, we're getting a really cool look. And if we go more towards the 90 degree realm here, we get to much more of a normal looking lens. And the further we take it this way, the more we're going to get this extremely wide fish eye look, there's also this option for hard vignette, which crops the whole image down to a circle.
David Ariew (26:08): And that's not really something that I would want. So I'm going to untake that we've also got circular versus full frame fisheye types, which as far as I can tell full frame, just kind of punches in a bit more. And then we have different projections. So I was going with the stereographics, but there's also equidistant, which is also super unique in its own, right? And we definitely get a lot of distortion here towards the edges. Then we've got equal solid, which again, brings us back to a circle, but it feels a lot more uniform across the projection, which is pretty cool and hard vignette. Isn't doing a whole lot. It's cropping a little bit here, but not very much. Now this one, if we come all the way out, we get a perfect circle. And if we push in, we actually lose that crop at some point, which is good.
David Ariew (26:54): So you can see if we crank it all the way to a 360 fisheye equally distant does a lot more distorting, whereas equal solid, really evens things out a lot more. But then if we go to stereographics, we lose everything entirely because this is the one that really kind of scales everything back and widens out the focal length until we see more and more and more until it finally gets all kind of sucked down to a single point. So if we went 3 59, we're getting some very abstract and cool looks here. And then also remember we can take the aperture all the way down. And at this point I have no clue what I'm even seeing, but it's pretty cool. And finally, we have this orthographic mode, which kind of bulges out the center, maybe more than equal, solid for instance, or equidistant. So you can see the center here with equidistant is a bit smaller.
David Ariew (27:42): And then when we go to orthographic, we get much more of a true to scale representation of the center. And weirdly here, it doesn't look like we can lose that cropping. Even when we come into a shallower angle, we still have that circular crop. And here, I would assume that orthographic means that it's some kind of flat projection, like a parallel camera, but when we actually orbit around, it does still feel very much like it's in perspective. So I'm not the most technical person to say, like, what's exactly going on here. I just know that if I mess around with these different modes, I can get some pretty atypical results. Now I'm going to revert this scene. And if I start my render going and jump back to fisheye, this is the look that I had for another one of my shots. I'll play the shot for you here.
David Ariew (28:46): It's really just default fisheye, circular, and two 40 angle. So super simple. It's that same scene that flies through the chandelier. And it looks pretty impressive and like something I've never seen before, but at the same time, the techniques to get here were kind of stupid easy. All right. So next we're actually going to be changing around the geometry from the mirror box. And I wanted to flag this for you because I'm going to be using some merch, Filson plugins. If you don't know mark Filson, he creates some really cool tutorials and even better. He creates some very powerful plugins for cinema 40. So if we scroll down here, there's things like poly Greenville and another one that's really popular called triple gin. But the main one here that we're going to be focusing on, if we scroll down is called top performer. So we want top performer and a little bit later, we'll also be using this Reese blind plugin
David Ariew (29:35): Okay. So I'm just going to lose this bevel here and save it for later. And I'm going to shut off this cube because we're done with it for now. And we're going to start playing around with spheres. So let's just drop in a sphere. Let's scale it up. And now if we start a render and I'm probably going to change this back to our normal lens, let's go back to a thin lens. And then let's also take our coming back down to zero and let's drop our texture Mack on the sphere. And then also we want our octane object tags. So we're not getting those reflections. So you can see this isn't really working yet, but what we need is the bevel. So let's just drop that in there. And now we're getting some pretty crazy patterns. Let's take the number of sphere segments down because weirdly this works a lot better when we have fewer segments. So let's go down to let's try 12 could even go down to six and now we've got another totally unique pattern. Let's maybe boost this bevel offset. So we see it a bit better.
David Ariew (30:38): Now we can see the lines connecting here a bit more and we could scale down the sphere a bit and then we've lost our lights. So let's group these and bring them a little bit closer to the camera. Let's jump out here so we can see what we're doing. This is our current mirror box. Let's bring these in for this. I'm not sure if we actually need the lights. So let's just go with this default kind of orange look. And now we're getting that really crazy curvature and almost flower light patterns without even needing a fish islands, not to say we can't check out what a fish eye lens would look like. So that's pretty cool too. Again, we're getting some stuff that looks very much like a Mandela. I love it when we can get some really intricate designs without almost any effort whatsoever. And that's my favorite. Just let the computer do all the work. So maybe we drop the exposure a little bit. Okay. Let's go back to our Finland's here.
David Ariew (31:39): And remember we could rotate around the sphere. So maybe we're not facing exactly the same direction and see what happens when we do that. You could even create an animation. That's just rotating this sphere around. So you can kind of imagine what that would look like. It's undo. Now what happens if we change it from a standard to say a tetrahedron? And also, I think one thing that's happening is we've still got our barrel distortion on here, which is contributing to that curvature. So let's go back to zero on all these. This is more like what I was expecting to see. And then I think that we could reset the transforms on this camera so that things are a bit more symmetrical. There we go. This one's okay, because this is actually, what's controlling our distance to the chandelier here and now we could widen out the lens and get something super crazy like that. Let's see what our fish islands looks like. Very cool.
David Ariew (32:44): Let's come all the way out here. I'm really digging this one. We're getting such fractal like patterns that it's reminded me of that Vectron tutorial. I did a few months ago. I'm also liking that we've got a slight shallow end of the field going on so that the stuff on the edges doesn't necessarily draw our attention, gets a little bit out of focus and we can focus more on this central pattern. Now, just imagine if this geometry were animated in some way to kind of unfold. Not that I personally know how to do that, but I'm sure some Houdini artists do and we get some really cool kaleidoscopic shifting patterns. All right, now let's try out a hexahedron and again, let's go back to our thin lens so we can see what this really looks like up close, and maybe let's zoom our focal length in a bit. Very cool. Let's try octahedron.
David Ariew (33:44): So there's octahedron with fisheye and keep in mind, we can always add more segments. So every time we add more segments, we get totally different and unexpected patterns, same thing if we increase our radius. So I love that this makes you look like some kind of mathematical super genius. When in reality, you have no idea what you're doing and let's not forget our friend icosahedron, jump back to a thin lens, me zoom back in a bit and maybe give it more segments. So now we get a really pointy and cool look and there's kind of a diminishing return. Like if we were to do 24, say 24 or 32, the detail actually just starts to be way too much. So this doesn't really work. Also keep in mind that if you rotate by 45 degree increments, you can get some other really interesting looks. Now there's one other object that we can play with. It's really cool. If we just grab a platonic and do the same thing, scale it up,
David Ariew (34:47): Give it our texture and octane tag and then put the bevel on it and let's get rid of the sphere and give ourselves some room. We're going to get some other cool looks too. Now under our type, we could change it from I Cosa to Bucky. And now we've got a Bucky ball, which is made up of hexagons. Now I think I was getting better looks before when I scaled this up a little bit. And now once this refines, we can see that we've got this infinite tunnel going down. Each one of these hexagons, which I thought was really cool. And one thing that could beat this up even more is if we come in here and give our bevel a bit more offset, so maybe we really want to emphasize these lines in this one. So if we play with some of these other modes, we get back to more of a standard mirror box with Hexa Okta DECA.
David Ariew (35:38): Their deck is pretty dang cool. And I, it has its own look. That's slightly different from the ICO. So Hedron with a sphere. Tetra is also really cool. And now this is just a simple prism, just a pyramid. And that's giving us some very cool looking forms as well. I also like having these stronger bevels in this case, because it creates these streaks and more detail that almost looked like strands of wire connecting these various chandelier's together. And also don't forget that we could up the segments to get something even crazier, but I was actually liking it a bit more simple here. I think I'm liking this one enough to save it out. Okay. Finally, let's take a look at what happens when we start using mark Filson's plugin. So I'm just going to drop a sphere in here and scale it all the way up and until we're inside of it.
David Ariew (36:21): And then let's take our bevel in here and our texture and octane object tag, drop that on there. And let's just turn off this platonic for now. And we can probably take the distance of our bevel down a bit. So let's just drop our segments down here and give ourselves some space. So I'm going to drop down to plugins top performer. And if I just drop this on the same level of hierarchy here, I get all these options. So let's just start with Ash Thorpe and let's do mountain to see what's even happening. So let's pause this render.
David Ariew (36:56): So without the plugin, our sphere is looking like this. And with the plugin, we're getting some very interesting, almost stained glass looking geometry. Now, if we take this Delta down, it's not going to distort the sphere. So this could be something that you don't want, where it starts to get asymmetrical. So up to you can get different patterns either way. And we can also take down the number of iterations. So maybe we just start with one iteration, which gives us this. Very cool. Look here. Just jump back in. That's pretty cool, but I think it's a bit too detailed. So let's take our number of segments down even further. Let's try six and now we're getting this cool star pattern. And also if it's too bright, you can either take down the exposure or we can just scale up this sphere. And this will kind of separate out all the elements.
David Ariew (37:51): Let's take this down a little bit here so that we can see our whole image. And now we've actually got a perfect star, which is kind of cool. And each point has this fractal, recursive look going on. And here's what I get by just widening out the lens a bit and increasing the coma to one. I think the fun thing here is that nobody would guess how this was done by just looking at this image alone. Like even me just a week ago, coming to this fresh would say, okay, maybe this was made with particles. Like, I wouldn't know how this was made at all. And we get some pretty cool looks too with this negative coma. And remember we can increase our iterations here to three with our top performer to get something even more complicated looking, maybe let's zoom in the people mode gets something much more angular. Cheddar's mode is pretty cool. Let's take it down all the way on the Delta. And here you can see the thing I was saying before about Houdini animating these geometry features. Maybe we don't even need that because check this out. Look what happens if we animate this Epsilon.
David Ariew (38:58): And if we drop this open, you'll see that Merck was nice enough to put in a David aria of moon. So let's take a look that, of course it doesn't work. It's just totally broken. This one is just the Genki mode. Not I'm just kidding. No, I think we just need more segments. So let's jump this up. 12 or higher. Let's go 24 or we're starting to see something. Now, the other thing we want to do is take this Delta all the way down. So it's not reducing. The polygons can see here, Delta level of polygon reduction. And now maybe we've got too many, take this down to 12. There we go.
David Ariew (39:39): Actually, this need, this does need to be up at like 24. There we go. Now we're getting a core result. Also the bevel is too much. So let's take this back down. That's more like it. And let's scale this up. So it's less overwhelming. And we might also want to take this Epsilon all the way down so that we get less of the collapse of these poly groups. Here. We can change the seed on a lot of these to get different results. In general. This one I think is too complex for this technique. It's just a little bit visually chaotic, but I just wanted to show you since it's nice that he gave me my own noise type. Let's see what else we got polygon sandwich. This one's super crazy. Got my buddy, Steve. Tepes up in here. We can definitely take the number of segments way down on this. This one seems to make, try forces, which I'm definitely into Steve got the good one. And when you can even rotate these guys. So I'm really curious about this. I'm going to do an animation and get back to you guys, but here we can go from this let's store, our render buffer, and we can animate the Epsilon up until we get these triangles.
David Ariew (40:55): Actually, here's what I'm going to do. This is originals where these noise type and he's got some really cool controls on this one. So the Epsilon here we'll scale these central polygons into triangles. So that's one transformation that can occur. And then here with the Delta, we're actually rotating them. So we can kind of make this thing transform in some pretty crazy ways. So I'll get back to you guys once that's done. All right. So sadly, I can already tell that this is going to be a fail as we play back the animation, you can see it's super jumpy. And I think that's just because the polygons are not stable as these elements scale outwards. So it's not going to work for the mirror surface, but this is actually a good lesson in setting your Mac samples pretty low when you render out a test render.
David Ariew (41:35): So I've just got them set to 200, and this is enough to get a pretty solid idea of how the animation is going to look then when you're happy and you don't see any mistakes, you can crank it up to the full samples, which here I was using either 2000 or 4,000 to get out the final looks. Now I did have one other look that I was curious to try out with animation. So it was this one here. And if I render this, so I've got the fish eye on and we're just starting out very close to this corner. So we're getting all this weird detail. And then as we come forward, I can see all these things changing and overlaps happening with the mirror box. And this is the one where we fly again through that chandelier. So we're going to get some cool patterns.
David Ariew (42:15): I'm going to see what this looks like, but again, I'll render it low sample at first so that we can check it out and make sure that it's going to look good. The other thing that I'd like to point out, that's really speeding me up is that I've got my net render going. So here you can see we've got a slave with an additional three GPU's and I actually have one other PC up and running. So let me pull up our octane render network preferences here, and I'll just take this on and it'll authenticate the slave and then we'll go back here. And now we've got five GPU's in addition to the four on this computer. And actually one of those is offline. Usually I have four in my second computer, but I had to pull that card because everything was unstable. So GPU issues and PC building issues, they're pretty common.
David Ariew (42:56): And these cards do eventually burn out, but usually they're under warranty for a couple of years. So often you can send them back and get them replaced. So to download that with the latest version you actually go to instead of octane render standalone, there's a separate tab now for the slave node. So all you do is you make sure it's matched to the same version that you're currently using. So right now I'm using, if you see up here octane 2019 1.4 and I've got the enterprise version. So if you come over here, you see, okay, octane 2019 1.4, we download this. And again, I would do this on my other computer download, and then you would just install this and where that would go would be to your C drive program files. Oh, toy. And you find your latest version here and you say, install demon.
David Ariew (43:43): And I just hit enter a bunch of times because I'm fine with all the defaults and then you run installed demon. And once you've done that, your render node will be up and running. So now that this is up, this machine is actually ready to run as a note as well though. Obviously can't do this and run as a node at the same time. So you'd have to kill the render. And if you had to render on another PC, this could run as a node. So I can already see this is going to be a much more cool looking animation. So what I'll do is stop it and then go back to our settings. And I'm going to crank this backup to 2000 and all render this guy out and get back to you. All right? So I like certain aspects of the shot and other aspects.
David Ariew (44:22): I don't like as much. Definitely the first half I think is better. But when the camera passes through the chandelier, the fish eye lens and distorted perspective causes those shapes to move super quickly. And I'm not liking that quite as much also the shapes overtake the whole screen. And because of that slight shallow depth of field, we've got this kind of blurry mass that's going on. That's obscuring the rest of the picture. So again, not perfect, but kind of a cool experiment anyway. And if I wanted to, I could rerender without the shallow depth of field, but that takes a long time and I'd rather move on. All right. So finally, I'm gonna break down this last shot for you guys that you see here, and it's pretty simple overall. So let's just start with a cube. And again, we're going to use TOPA formers.
David Ariew (45:00): So let's go to plugins and then TOPA former, and let's drop this underneath the cube, and I'm just going to go straight to the people mode here, and we're going to need more segments on the cube. Let's try 15 by 15 by 15, and then we're getting some cool detail. I think I want more iterations. So there's some even smaller details in there. And then let's scooch this over a bit. There's this really cool option in the generate tab, which allows us to create a mixtured rig. So we just hit create, and they're magically, we've got all these Gribble extrusions going on now. I don't necessarily want the polygons to scale down. So you think you could just untake scale here, but it's actually linked up the top performer. So let's just take scale down to zero. And there we go. We've got a standard kind of Gribble cube.
David Ariew (45:46): We could maybe jump the position out to 20 centimeters to make it even more dramatic. And then from here, we're going to use this other plugin by Merck called race blind. So there's a ton of really cool tools in here, but I'm going to jump down to this one called motion trim. And so we'll just put this cube into motion trim. And so that's going to convert all of the polygons into actual spline geometry. So maybe we need to scale up this cube. Let's go 400 by 400 by 400. And I think that's a little bit nicer looking if we untake the motion trim. It's a little less crazy on the extrusion. So I could've just taken the extrusion down. This is fine too. Now the cool thing about motion trim is that you've got this trim amount so we could bump this up. So we're actually seeing less of the splines.
David Ariew (46:29): So this is going to cut the paths and this would actually be easier to see if I took down the number of iterations on this top performer for a second. So let's just take it down to two. So this should let us actually play back a bit faster. So let's go to like an animation speed of 11, and now we've got this super easy to create procedural animation of all the splines moving now, unfortunately using animation speed, created some issues with octane where the texture that's driving, the color of these splines kept popping around when I was using this mode. So I'm going to take this back down to zero. And instead I went to offset here and key frame this which played more nicely with octane and allowed the animation to stay a lot more stable. So I'll just change these to linear key frames and you can see it's doing the same kind of thing.
David Ariew (47:09): So having those limitations from zero to 100 means that if you've got a really long animation sequence, like a thousand frames, like I did, there's only so fast that you can drive it. So that's the one kind of downside of using offset, but there wasn't really a way around it. Now from here, if we render this, obviously we're not going to see anything I'm going to drop in a black background here, but what we can do is we can go to see 4d, octane tags and drop in an octane object tag and under hair. We can render this as hair. Now let's just throw in a daylight here for a second so we can actually see it. So there we go. We've got these splines rendering his hair. And for some reason, this motion trim is also causing octane to constantly update. So I'm going to delete any of the animation here and take this back down to zero.
David Ariew (47:55): And I think this allows it to be a bit more stable. So really what we want here is a black body emission texture. So let's just drop in a diffused material and go to emission and use a black body mission. And also we want our diffuse to be down to black. And at this point we can take off our daylight and then go back to our mission texture and maybe turn on surface brightness and take this down a little bit, and then we'll want our camera image or here on so we can get some nice post-processing and bloom. Now we're not getting any variation in color here. So the easiest way to do that is just by going back to our black Bonnie mission texture here, what we can do is we can just drag in an image texture, and then let's jump in here and add some kind of colorful texture.
David Ariew (48:42): I could actually go with this render that I did for our second tutorial upcoming here on distortions. Let's just use that since it's got some neat looking colors, and then we'll just want to take our power down. And then with our hair here, let's take the thickness to 0.1 and 0.1. And then now we can actually boost the black body emission a little bit. So I prefer those thinner looking hairs. So really that's the whole technique we can also, if you want change the projection type from UV mapping to cubic, which could help here, we'll have to scale it up a lot.
David Ariew (49:20): So this creates maybe more consistent color versus the UV map, which has a bit more random. They both act in different ways, so it's whatever you prefer. Cool. So after seeing that previous setup, none of this should be a mystery anymore. It's that same technique that I just showed you, but that's sitting in the larger context of this mirror box and this mirror box is just that very simple one based on the cube that we made in the very beginning of this tutorial. The only other thing to add here is that because we're doing this rotation and we've got our fish eye lens on for getting a universal, you can see there's the fisheye. And if I go to show track here and look at this curve, you'll see that I'm animating from a super wide fisheye down to our more standard lens. So that's literally all that's happening here.
David Ariew (50:09): We're at this extreme wide angle, almost 360 lens, and then we're animating down, which makes it feel like it's all unwrapping to see the inner contents of all this madness. The other parameter I'm animating here is the f-stop. So that here we get a bit of shallowed up the field. And that makes these objects that get close to the lens, which are just, again, these splines have Boca. And as far as the Bowker goes, I'm using a hexagonal Boca. So if we troll open this step to field, you'll see that the focus side count is set to six, which gives us this hexagonal look, maybe we can find a better frame. That's more indicative. There we go. So now it's pretty clear if this were higher, then it would get a little more round. And the other thing is usually the default is poke around, is set to one.
David Ariew (51:01): So normally we get circular bokeh, but if we take this all the way back down to zero, then we can get these hexagonal shapes. And again, that aperture edges set to three, so that we get the faded center and a bit more definition on the edges. If we didn't have any aperture at all here, this is what it would look like. And you can see that we've also got motion blur on which I've got set to 0.02, so that it's a little bit less harsh when all these objects are whipping past the camera so quickly. And finally with this aperture here, I'm animating it down so that we don't have any shallow depth of field here. And without this, this would all be kind of out of focus. So that's the reason for animating this down. And one last time, if we bring this up, then that takes out the shallow to the field and we can also take off the motion blur, just you can see what this would look like without any of that stuff.
David Ariew (51:49): So hopefully all the mysteries of this shot are revealed. It's actually surprisingly simple overall, but just using these plugins that allow me to cheat plus the new features in octane, make it look a lot crazier than it is. All right. Thanks so much for watching. I hope you at least picked up a few tips on octane universal camera and some other settings. And I hope that this inspires you to take these techniques and make them your own by putting your own objects, your own animations and changing around the geometry of that mirror box to get some unique looks. All right, I'll catch you guys later. Bye.
ENROLL NOW!
Acidbite ➔
50% off everything

ActionVFX ➔
30% off all plans and credit packs - starts 11/26

Adobe ➔
50% off all apps and plans through 11/29

aescripts ➔
25% off everything through 12/6
Affinity ➔
50% off all products

Battleaxe ➔
30% off from 11/29-12/7
Boom Library ➔
30% off Boom One, their 48,000+ file audio library
BorisFX ➔
25% off everything, 11/25-12/1

Cavalry ➔
33% off pro subscriptions (11/29 - 12/4)

FXFactory ➔
25% off with code BLACKFRIDAY until 12/3

Goodboyninja ➔
20% off everything

Happy Editing ➔
50% off with code BLACKFRIDAY

Huion ➔
Up to 50% off affordable, high-quality pen display tablets

Insydium ➔
50% off through 12/4
JangaFX ➔
30% off an indie annual license
Kitbash 3D ➔
$200 off Cargo Pro, their entire library
Knights of the Editing Table ➔
Up to 20% off Premiere Pro Extensions
Maxon ➔
25% off Maxon One, ZBrush, & Redshift - Annual Subscriptions (11/29 - 12/8)
Mode Designs ➔
Deals on premium keyboards and accessories
Motion Array ➔
10% off the Everything plan
Motion Hatch ➔
Perfect Your Pricing Toolkit - 50% off (11/29 - 12/2)

MotionVFX ➔
30% off Design/CineStudio, and PPro Resolve packs with code: BW30

Rocket Lasso ➔
50% off all plug-ins (11/29 - 12/2)

Rokoko ➔
45% off the indie creator bundle with code: RKK_SchoolOfMotion (revenue must be under $100K a year)

Shapefest ➔
80% off a Shapefest Pro annual subscription for life (11/29 - 12/2)

The Pixel Lab ➔
30% off everything
Toolfarm ➔
Various plugins and tools on sale

True Grit Texture ➔
50-70% off (starts Wednesday, runs for about a week)

Vincent Schwenk ➔
50% discount with code RENDERSALE

Wacom ➔
Up to $120 off new tablets + deals on refurbished items


All-Access Pass
Unlimited access to 50+ courses, unlimited critique, live events, and 24/7 community. Join School of Motion All-Access today.