

Level Up Your Animation Skills
Learn to make things move beautifully using the principles of animation. Enroll in All-Access to unlock Animation Bootcamp and 50+ other courses.
Character Animation in After Effects
Character animation is an art form in itself. Designing, preparing the Illustrator file, importing into After Effects, and rigging can take a LONG TIME.
Thanks to a few easy-to-use and inexpensive scripts, Character Animation doesn’t have to be a super-long process. It is very possible to make a simple character with minimal rigging. So in this post I'm going to show you a few techniques that I have learned for creating quick characters. Keep in mind that this is a quick way for creating characters, which is not to say that it is the best way to create characters.

Great After Effects Scripts for Quick Character Animation
I'm not going to go into detail about how to use each one of these After Effects scripts, but there are tons of resources out there for using them in your workflow. You can find out more in the links below.
1) RUBBERHOSE 2 - $45
You have most likely heard of RubberHose 2, but if you haven't, GO BUY IT RIGHT NOW. It’s made by the amazing Adam Plouff and his company Battle Axe. We've even reviewed it here on School of Motion.
2) JOYSTICKS N’ SLIDERS - $39.95
Joysticks n’ Sliders has almost limitless possibilities. The heart of it is having a controller or sliders to blend between different animatable properties, like Position, Scale, Rotate, or even paths. It's super easy to set up, and VERY easy to animate.
{{lead-magnet}}
Creating the Character
DISCLAIMER: Total time designing and rigging: 1hr. There are many techniques in here that might not be the PROPER way. This is a FAST way.
Our Character Animation setup is going to be in two parts: Designing and Rigging. Each one of these parts can take you anywhere from 30 minutes to a few hours, depending on how detailed you want to make the character. Remember, the whole point of this exercise is to make a simple, easy-to-use character that can provide some emotion in a short amount of time.
1) DESIGN
If you're in a pinch, design it right in After Effects. I usually steer away from designing in After Effects, but here, we are all about speed and efficiency.
First, the head.
- Create a comp that’s 1024x1024, and draw out 3 ellipses and two rounded rectangles. Ellipses for the head and eyes, and 2 rounded rectangles for the eye brows.

Grab the pen tool and draw some hair. Make sure you go far beyond the top and outsides of the head (you will alpha matte the hair).
Duplicate the head (the first ellipse you drew). Move the layer above the hair, and alpha matte the duplicated head.

There is the design of the head! Super easy, right? Yes, you can create a mouth, and maybe some ears, but remember the point: fast and simple characters.
More objects = more to rig = more to animate = more time.
2) CHARACTER BODY
Create a comp that's 1000x1000 and drag in the “head” comp. Scale and move it to be at the top of the comp.

With the pen tool, draw out the body and neck. Any design is fine. You can get away with a lot of details and shapes on the body, because the more detail you put on the body doesn’t make a difference in time for rigging and animation. I put a little suit on him with a tie. A little detail goes a long way.

Using RubberHose, create two arms and two legs. Again, this is not an in-depth tutorial. The Battleaxe site is a great place to quickly learn how to use Rubberhose 2.
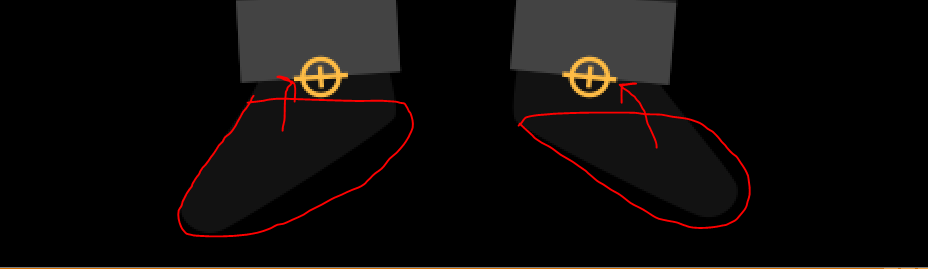
With the pen tool, draw out shoes or feet of some kind. Here, I just did a simple 5 point shape.
Then boom! You have a full character that is already half rigged (thanks to RubberHose).
Look at the guy. All his splendor.

Now all that’s left is rigging. Most of the time will be spent on the head, with a few minor things at the end for the body.
2) Rigging
Inside the head comp, using Joysticks n’ Sliders, keyframe the Position and Rotation of the hair, eyes, and eyebrows on frame 1.
IMPORTANT: DO NOT keyframe the actual shapes themselves, but the overall transform values.
Remember, make the poses on every frame, starting with origin pose, then left, right, up, and down.
Then with all those keyframed layers selected, create a joystick. (Again, this is not a full tutorial, but go to the website for more info).
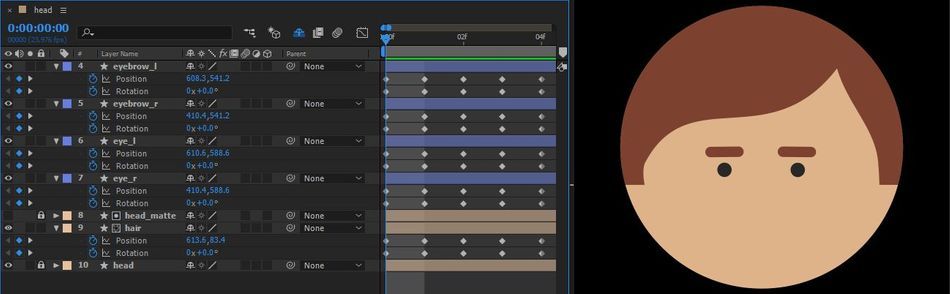
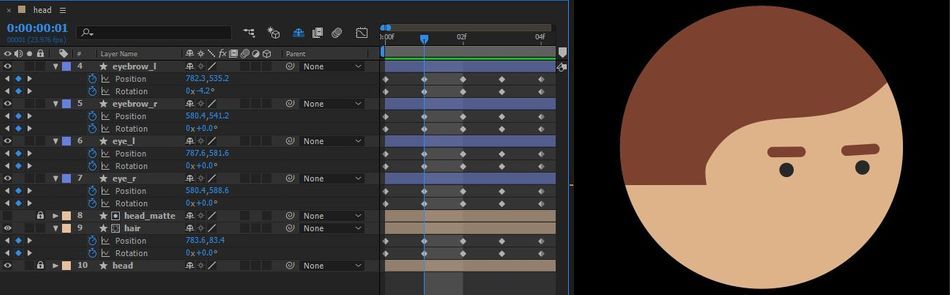
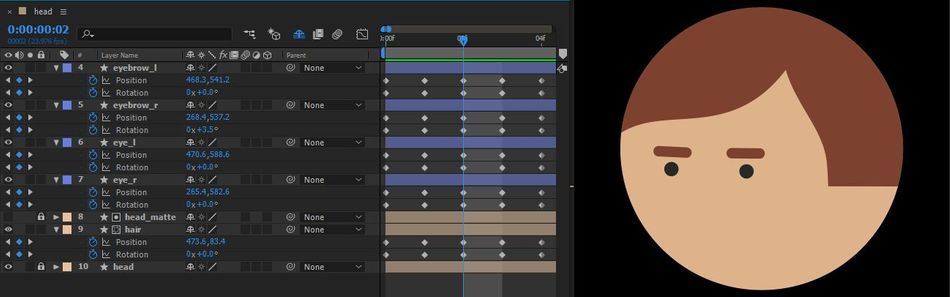
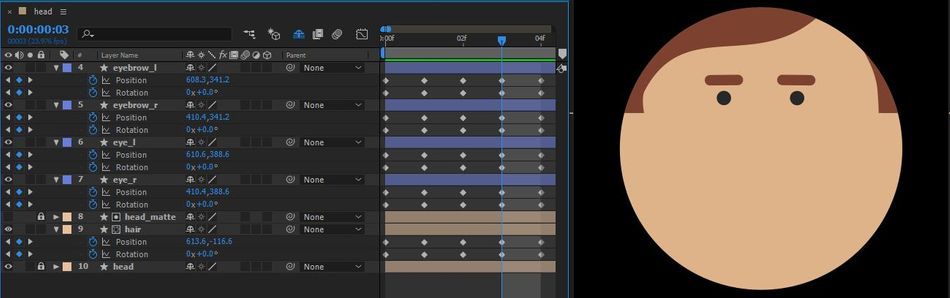
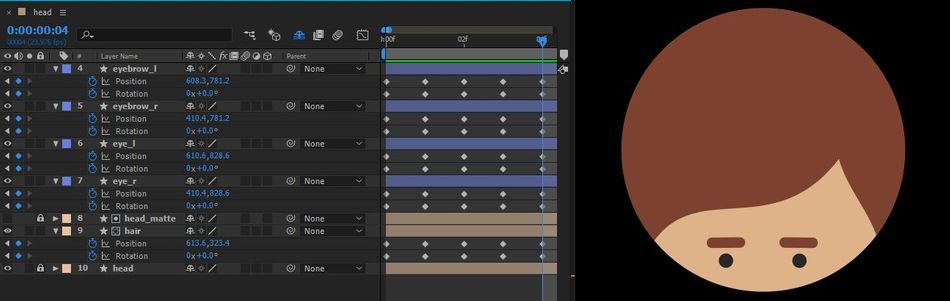
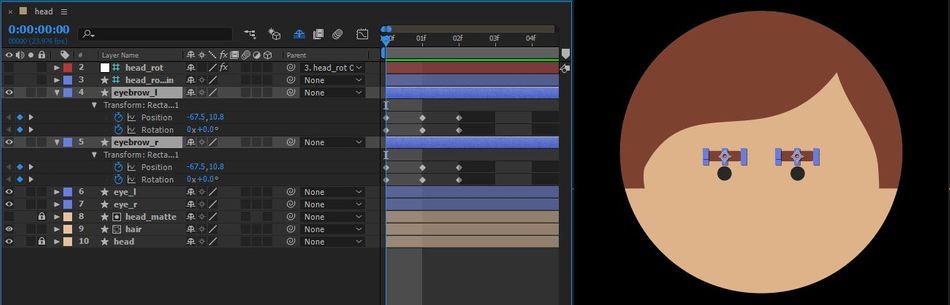
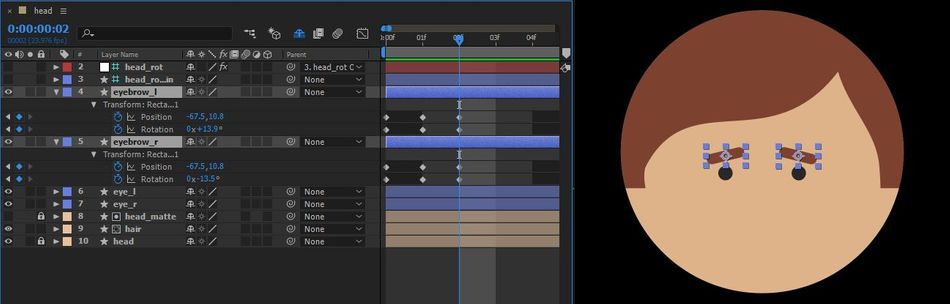
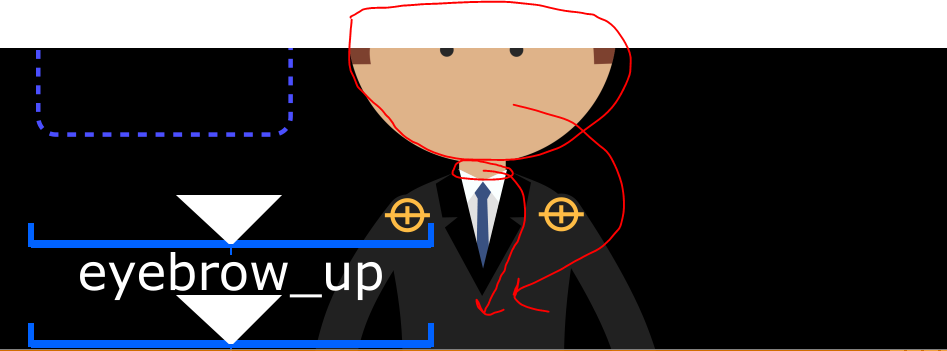
Now for the eyebrows. Keyframe 3 poses: Origin, Up, and Rotation.
IMPORTANT: This time, keyframe the actual SHAPE values.
Here are what the three poses look like:

Once these 3 poses are keyframed, using the SLIDERS section of Joysticks n’ Sliders, create the slider tool.
Now, while you're still in the "head" comp, send both the slider control and head control to the parent comp.
Now go to the parent comp "character" and adjust the position of the Joystick as needed.
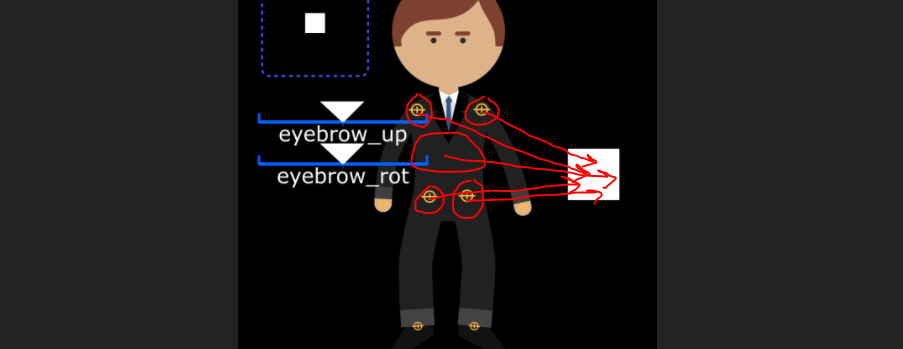
While you're still in the "character" comp, select the eyebrows layer, and create UI Sliders. Rename the controls right in the composition panel. BOOM! You have a nice little UI panel to control the head.
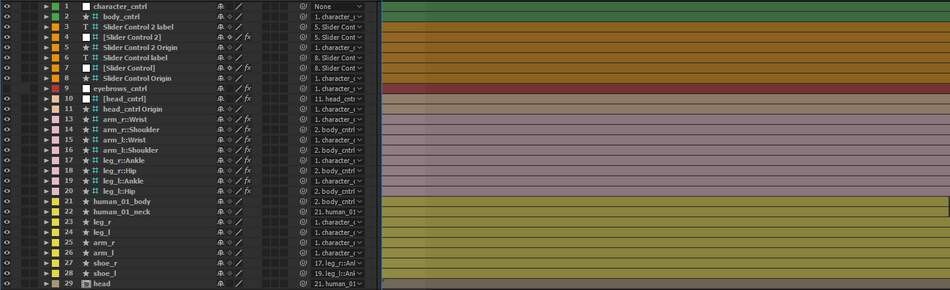
Three small steps to finish rigging the body. As you can see, I colored my layers so they are easier to understand.
1) Parent the shoes to the RubberHose ankle controls, and the neck and head to the body.
2) Create a solid, drag it to the side, and make sure the anchor point is in the center of the body. Parent the body and the RubberHose shoulder and hip controls to it.

3) Create a null and parent everything that isn’t parented to the null to control the position and scale of the entire character.
Here is the end result. If you want, take a minute and hide layers that you won't be using.
At first, it might seem like a lot of steps. But it really isn’t. I made this character and rigged it up in less than an hour.
If you're interested in the ENTIRE process of Character Animation, check out Character Animation Bootcamp and Rigging Academy here at School of Motion.
ENROLL NOW!
Acidbite ➔
50% off everything

ActionVFX ➔
30% off all plans and credit packs - starts 11/26

Adobe ➔
50% off all apps and plans through 11/29

aescripts ➔
25% off everything through 12/6
Affinity ➔
50% off all products

Battleaxe ➔
30% off from 11/29-12/7
Boom Library ➔
30% off Boom One, their 48,000+ file audio library
BorisFX ➔
25% off everything, 11/25-12/1

Cavalry ➔
33% off pro subscriptions (11/29 - 12/4)

FXFactory ➔
25% off with code BLACKFRIDAY until 12/3

Goodboyninja ➔
20% off everything

Happy Editing ➔
50% off with code BLACKFRIDAY

Huion ➔
Up to 50% off affordable, high-quality pen display tablets

Insydium ➔
50% off through 12/4
JangaFX ➔
30% off an indie annual license
Kitbash 3D ➔
$200 off Cargo Pro, their entire library
Knights of the Editing Table ➔
Up to 20% off Premiere Pro Extensions
Maxon ➔
25% off Maxon One, ZBrush, & Redshift - Annual Subscriptions (11/29 - 12/8)
Mode Designs ➔
Deals on premium keyboards and accessories
Motion Array ➔
10% off the Everything plan
Motion Hatch ➔
Perfect Your Pricing Toolkit - 50% off (11/29 - 12/2)

MotionVFX ➔
30% off Design/CineStudio, and PPro Resolve packs with code: BW30

Rocket Lasso ➔
50% off all plug-ins (11/29 - 12/2)

Rokoko ➔
45% off the indie creator bundle with code: RKK_SchoolOfMotion (revenue must be under $100K a year)

Shapefest ➔
80% off a Shapefest Pro annual subscription for life (11/29 - 12/2)

The Pixel Lab ➔
30% off everything
Toolfarm ➔
Various plugins and tools on sale

True Grit Texture ➔
50-70% off (starts Wednesday, runs for about a week)

Vincent Schwenk ➔
50% discount with code RENDERSALE

Wacom ➔
Up to $120 off new tablets + deals on refurbished items


Level Up Your Animation Skills
Learn to make things move beautifully using the principles of animation. Enroll in All-Access to unlock Animation Bootcamp and 50+ other courses.


