

Learn After Effects the Right Way
Master the After Effects interface and build a real animation skillset. Enroll in All-Access to unlock AE Kickstart and 50+ other courses.

How Filmmakers Can Collaborate Using Frame.io’s Camera to Cloud Feature
Are you curious about what’s involved in creating animated graphics elements for a cinematic film trailer? Would you like to be working more collaboratively with your clients or your production team, especially from across the country? Today we’ll be mashing those two questions together into one glorious answer: This behind-the-scenes video of my process working on this collaborative film trailer to help celebrate the launch of Frame.io for Creative Cloud earlier this year!
Working on a short time frame and in four different remote locations, our group of talented filmmakers took full advantage of both our creative talents and the collaborative possibilities of Frame.io.
We’ll be discussing:
- Concepting and creating a graphics-heavy film scene
- Designing and animating a cinematic title
- Tips for collaborating with your clients or team using Frame.io
A Collaborative Short Film Trailer
Recently, Adobe asked me—representing School of Motion—to team up with director Valentina Vee, VFX artist & social video creator Jon Brandon Cruz, and Film Riot’s Ryan Connolly to remotely collaborate on a short film to showcase Frame.io for Creative Cloud, and to make use of the awesome Camera to Cloud feature, which is now available to all Creative Cloud subscribers.
If you haven't already viewed the video above, you should check out the final product: it’s a trailer for an imaginary film named “The Box,” written and directed by Valentina Vee.
A quick note: while it stays pretty tame, it is in the horror genre, so you might skip over it if you’re not a fan of spooky stuff.
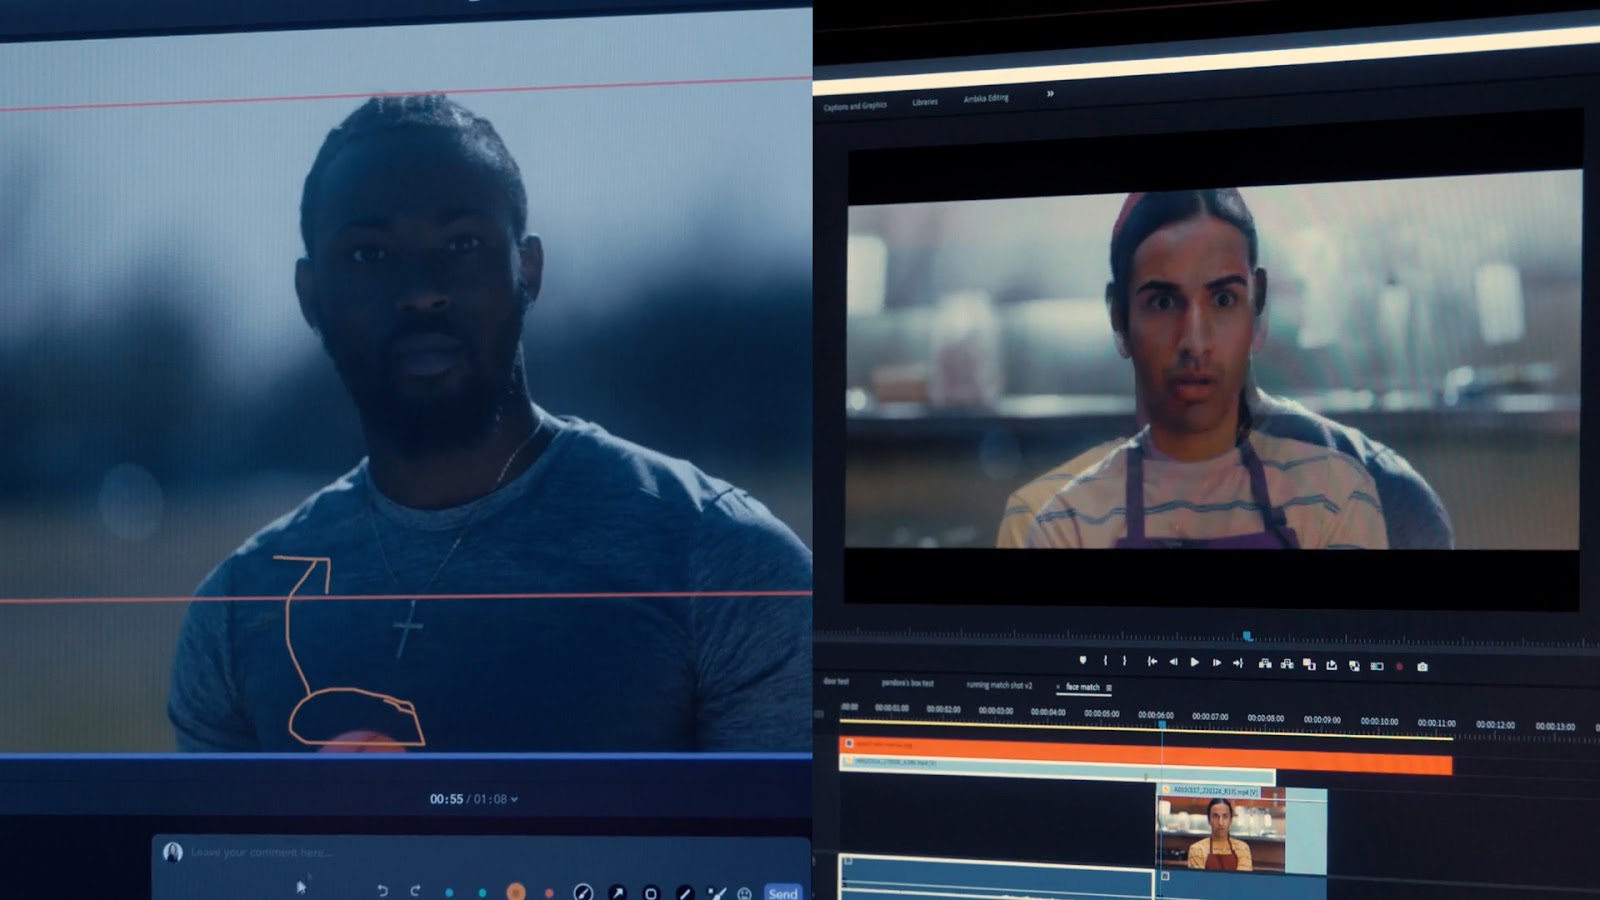
In addition to making the trailer itself, we had to think about gathering footage and interview material to create this original behind-the-scenes video, which you should totally watch! It gives some additional context for the complete project (not just my portion), and how the other collaborators took advantage of the Camera-to-Cloud feature to create several seamless match cuts, on different shoot days and in different parts of the country.
While the four of us have our names prominently on this project, you should also check out the full credits list available at the end of this BTS video (or in the description of ours above) to see all the talented cast and crew who helped bring this idea to life.
This project premiered on the Adobe stage at NAB 2022, followed by a Q&A session with Valentina, Jon and myself.
Concepting and Creating Motion Graphics for a Cinematic Film Trailer
Coming into the project, I knew I’d be handling an animated title card and some basic graphics for the BTS video. As we got further into development and settled on the final script, it became clear that the first scene (the video game streamer) would also require a ton of graphics to help make it look right. At every step below, we made use of Frame.io to communicate about the elements and looks we needed or wanted, so there were no 11th-hour surprises.
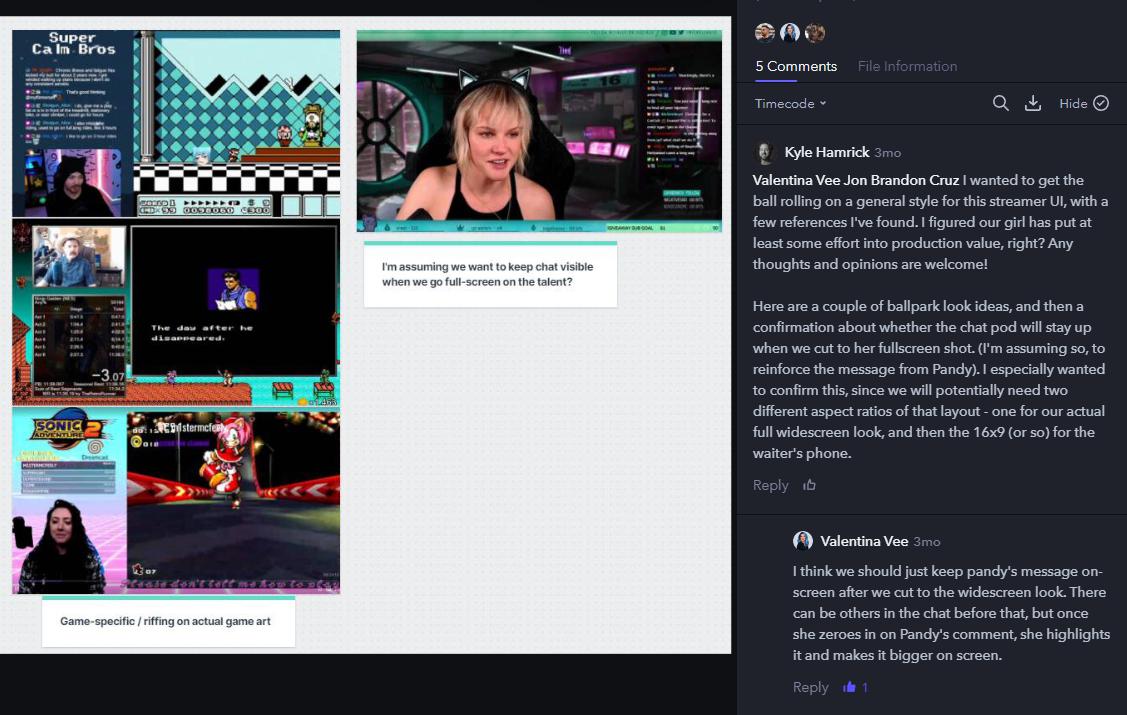
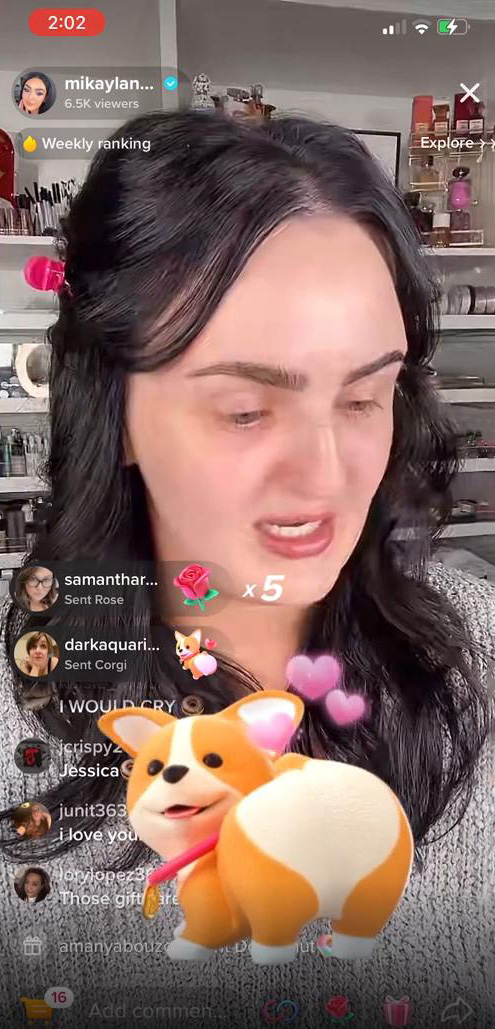
We wanted the streamer’s onscreen elements to feel realistic, so I spent time looking at several game stream examples on Twitch and YouTube. We knew we needed the tip callout to be extremely clear, since it’s helping move the plot along, so we also found some really over-the-top examples from TikTok streamers (one of them was practically exploding with hearts and butt-wiggling corgis, which were tempting to include, but….)
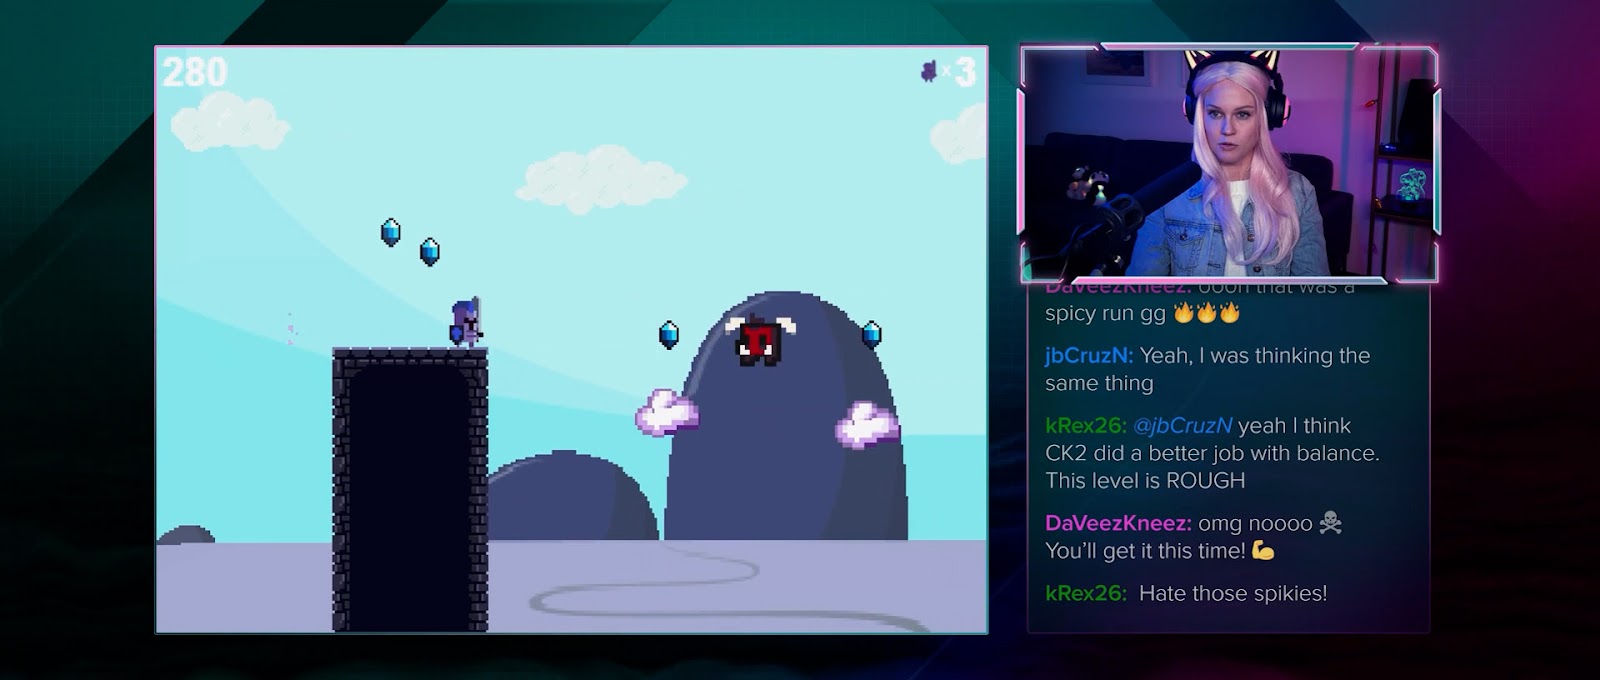
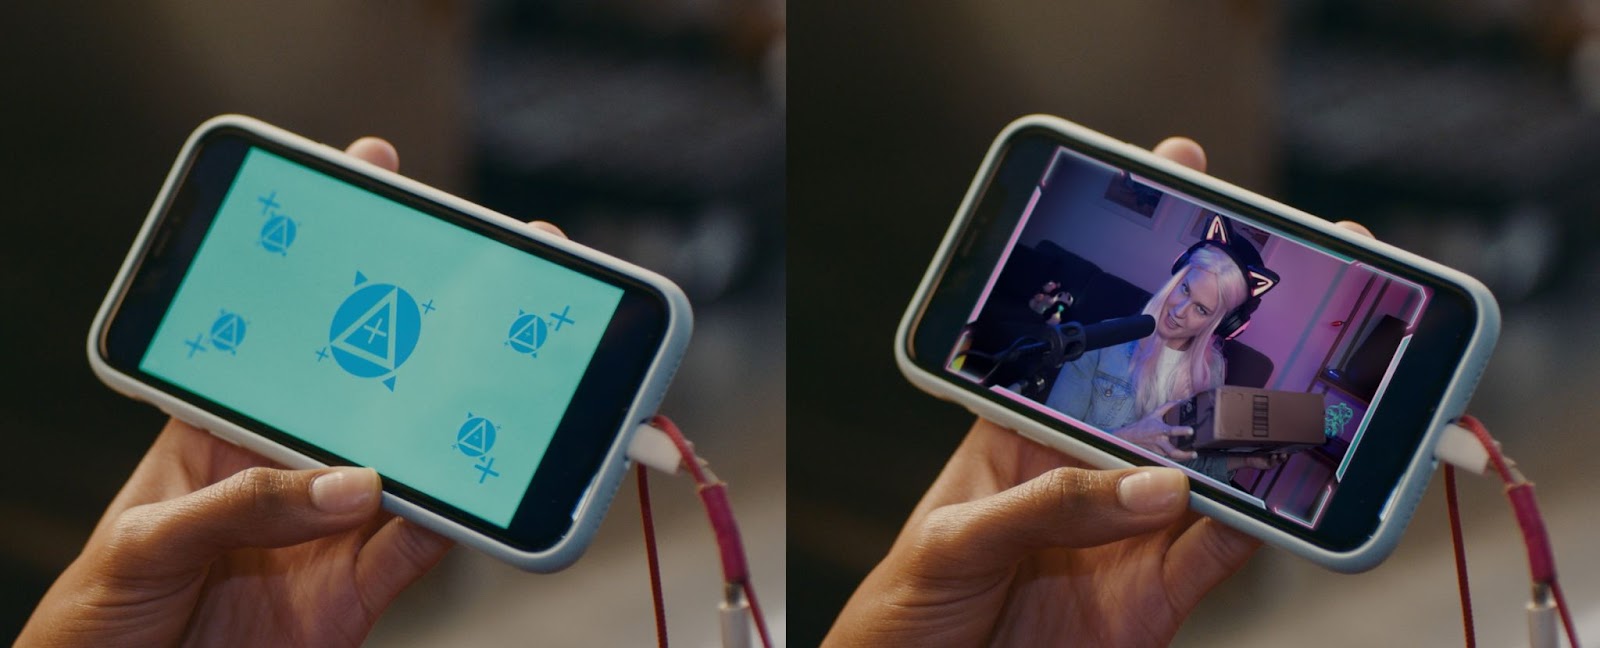
After coordinating with Cruz to confirm the general look and lighting setup of the scene, I designed an interface with all the essential elements—game window, live video feed & chat panel—as well as creating alternate layouts for when our streamer goes full-screen, and when she appears inset on another character’s phone.
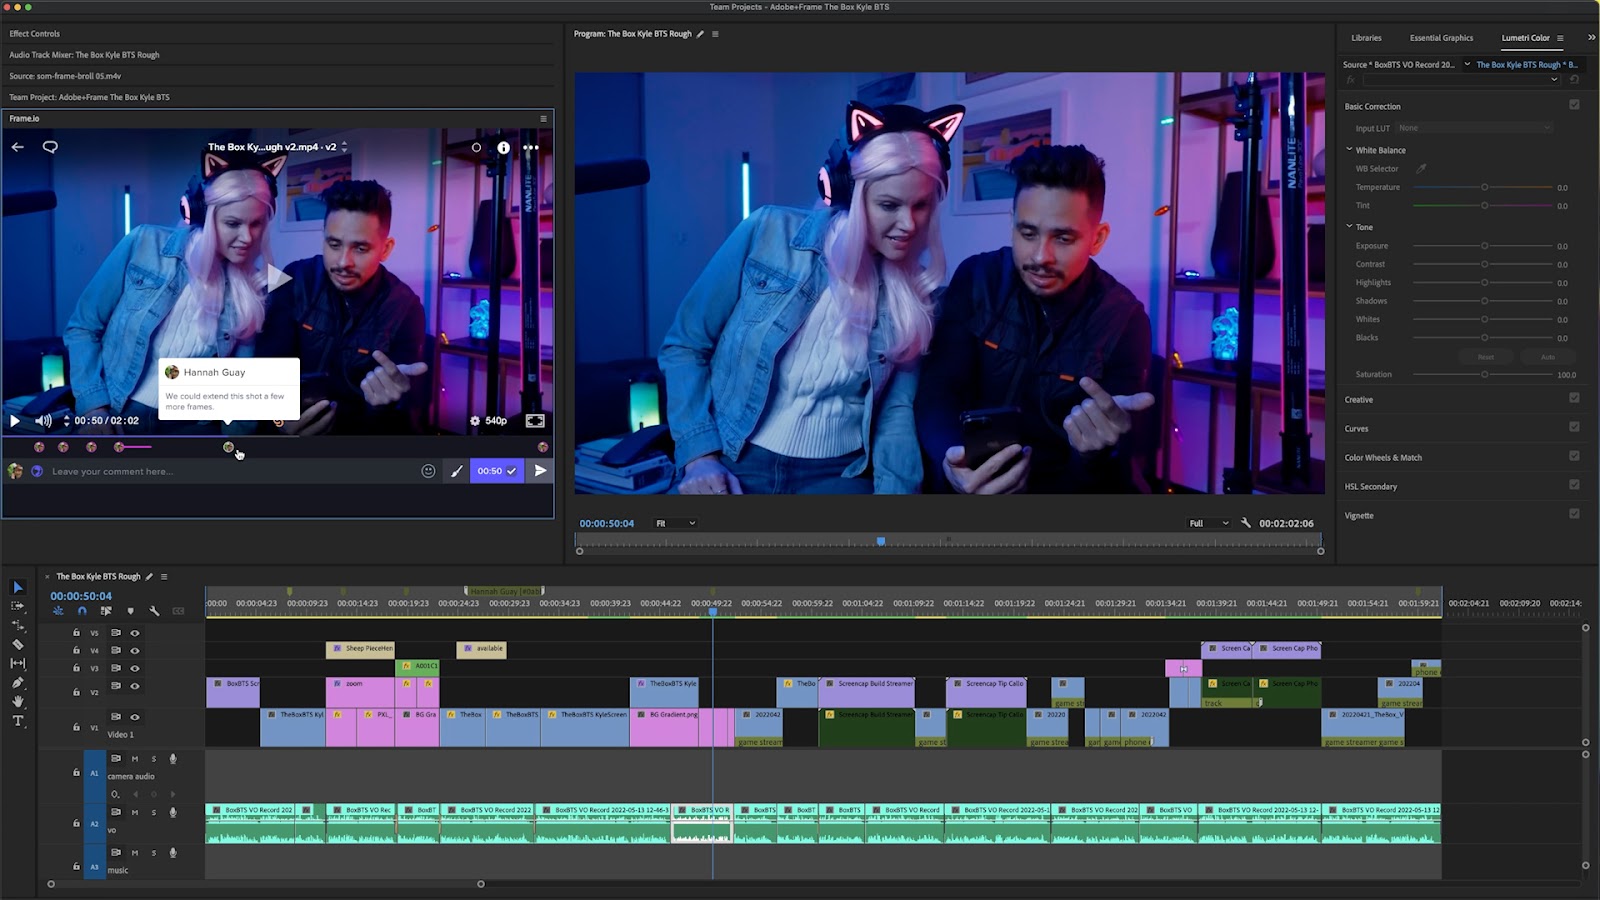
I opted to handle the tracking of this phone screen myself, keeping Cruz free to focus on the several special-effects shots later in the film. This was a snap using the built-in Mocha AE planar tracker, which I then finished off with some compositing techniques to make sure everything looked like it fit together seamlessly.
And of course, there’s one more element needed for this scene - the video game she’s playing! We decided it would be fun (and probably more doable) for it to be an old-school 8-bit style game, and after some thought, I realized it actually might be easier to create a short playable game, instead of trying to fake it all in After Effects! Using the free game-creation app GDevelop, I started with an existing platformer game template, modifying or creating the art and functionality bit by bit as I went along, until I had a fun and functional game that our streamer actress could react to.
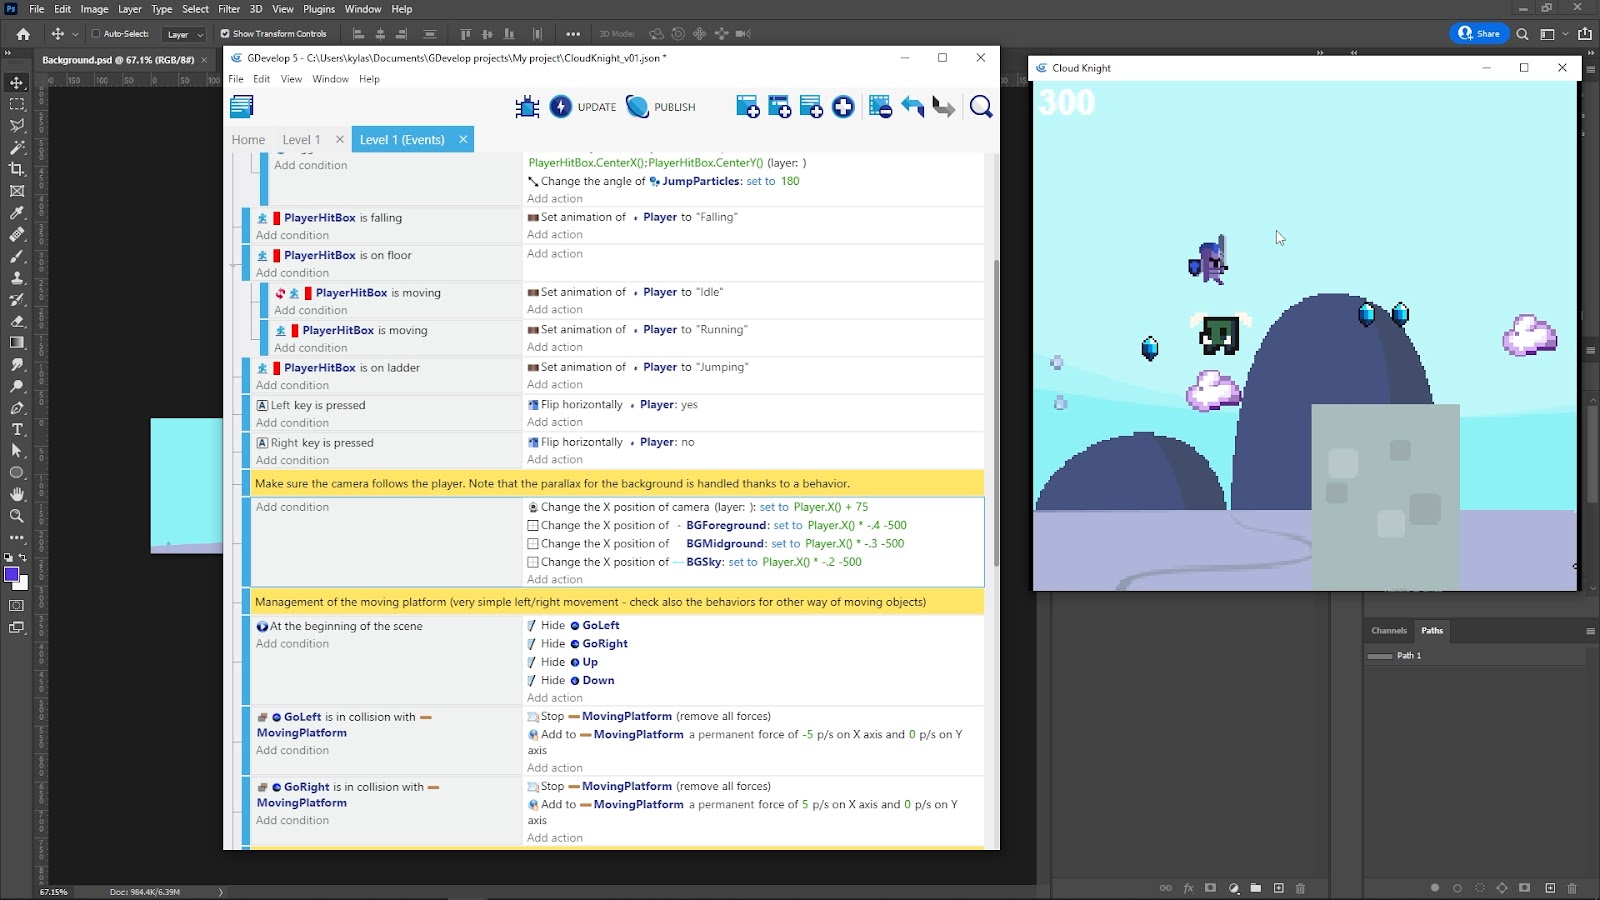
I had just a little experience with similar tools before this, but honestly learned most of this as I went along. It’s a good reminder that learning new tools can be fun, even if it adds some uncertainty into the process. Getting outside that comfort zone is good for you, right?!
Designing a Cinematic Film Title
The title card for a film trailer has to do a lot of things - it has to reinforce the overall vibe of the rest of the piece and help make the trailer memorable to viewers. Starting out with rough concept sketches is always a good first step, so you can get a lot of ideas out quickly without committing too much time. (Many of them will be bad, and that’s ok!)
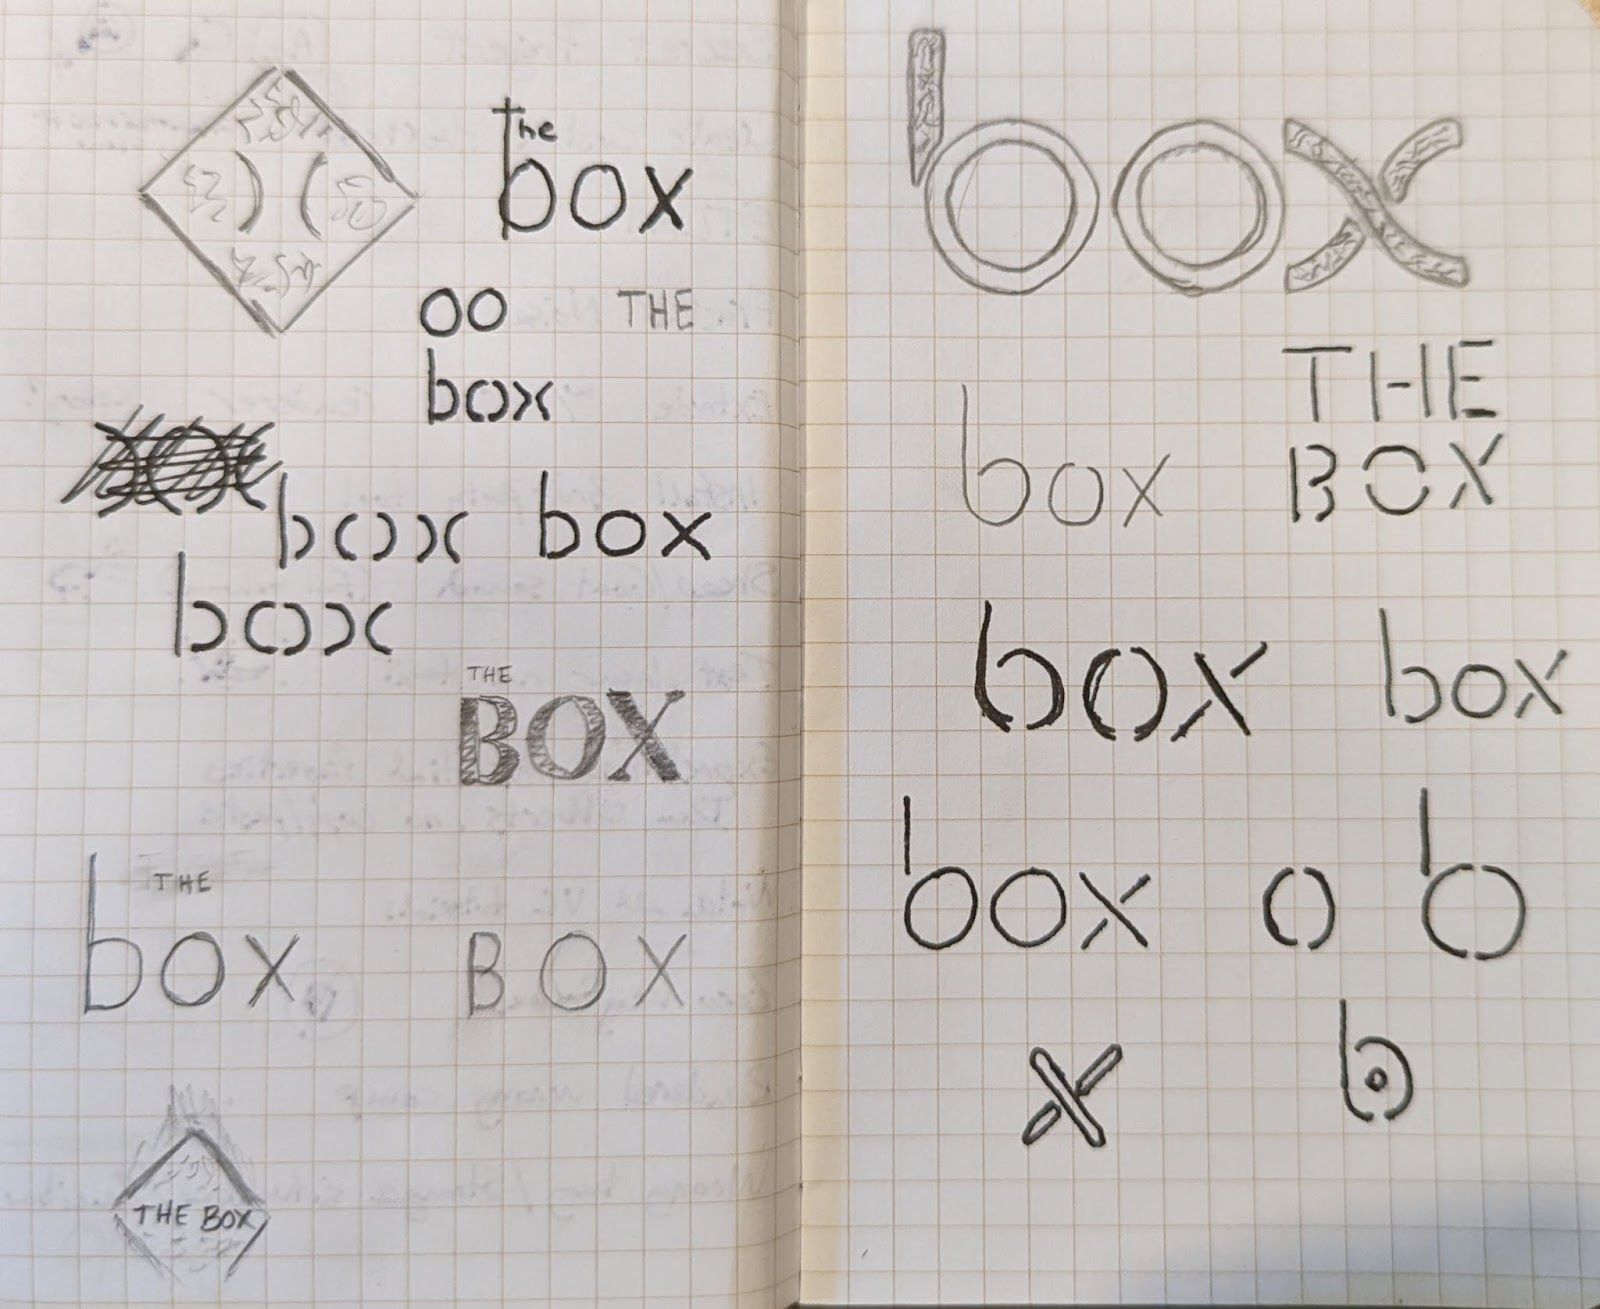
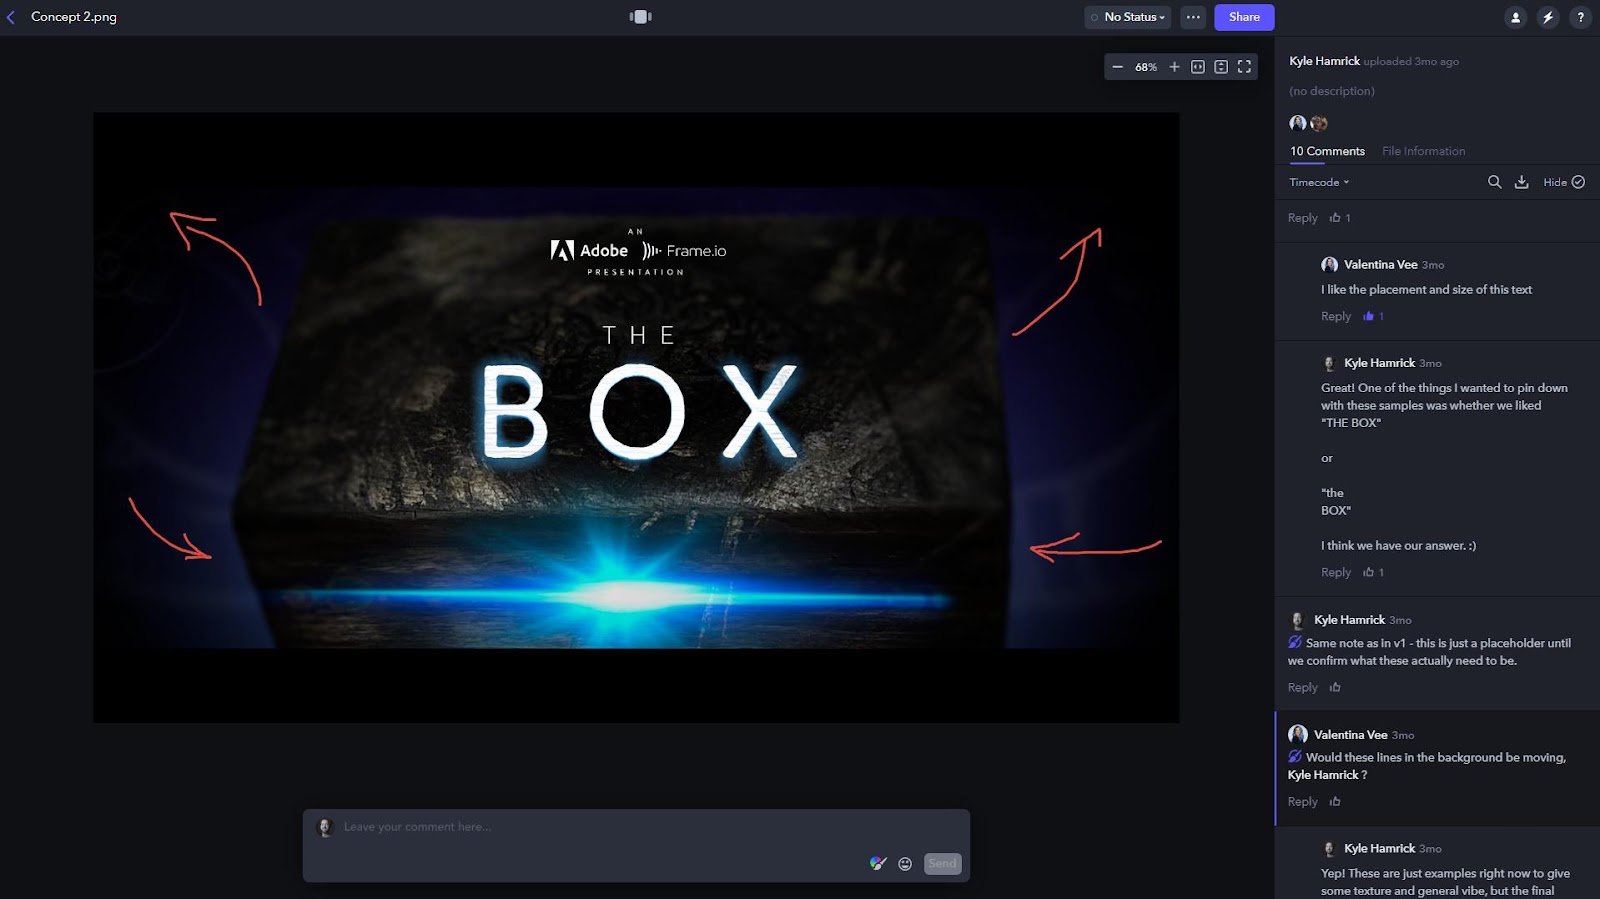
I took full advantage of the easy feedback workflow of Frame.io here, tossing up several early sketches and concepts to see which ones Valentina and the rest of the team gravitated towards. After getting some additional feedback from the end client (Adobe/Frame.io, in this case), I moved forward with final designs and animation.
The final design has references to the wooden box prop and the VFX look Cruz created for the scenes where the box is opened. I added several layers of treatment onto the abstracted, lightly-animated lettering to really play up the unsettling, creepy vibe of the rest of the trailer, and synced up as many movements to the creepy musical score as I could.
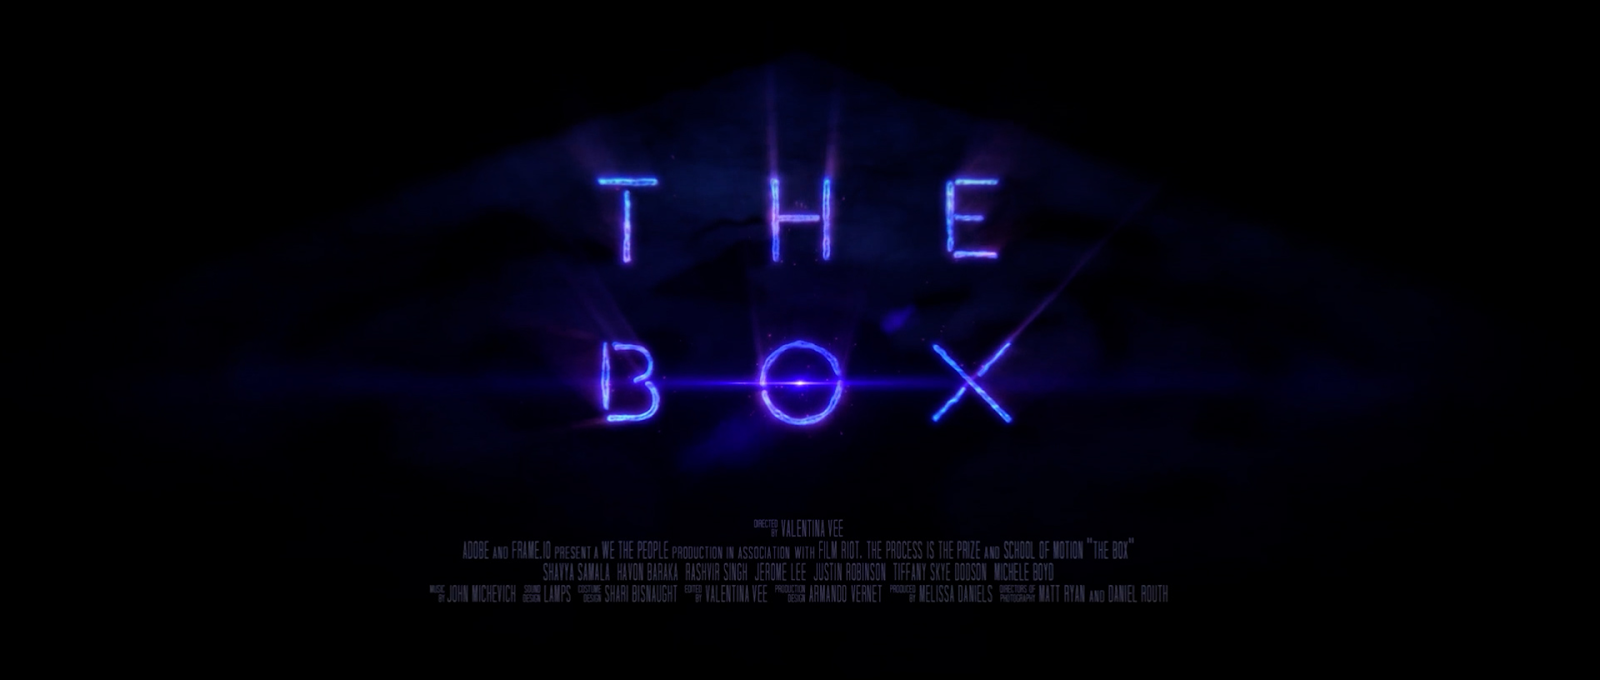
Scroll back up to the YouTube link and watch it in motion!
Frame.io is an Essential Part of your Production Workflow
This project was all about making the most of Frame.io - which is actually something I’ve already been doing for years, long before it became part of the Adobe family. It’s an excellent tool for shipping a project off to clients for feedback, but as you’ve seen above, it’s also awesome for team collaboration and communication. Here at School of Motion, our fully-remote team creates everything from social media mini-tutorials to 12-week courses with hours and hours of footage - and we use Frame.io on every single one of them.
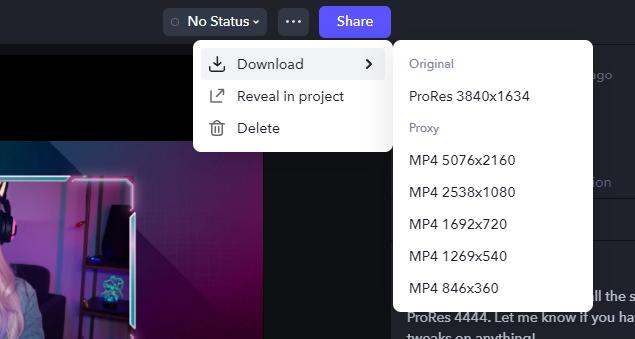
Our editing team loves the lightning-fast file transfer speeds, and uploaded clips automatically get encoded into a variety of proxy sizes, so everyone has access to some version of the footage, no matter their connection speed. It’s also easy to manage access to various files and folders, making sure the right people can see the right things at the right time.
The built-in Premiere Pro and After Effects extension panels mean you can upload your work, make notes, and view feedback all without ever leaving the app. How convenient!
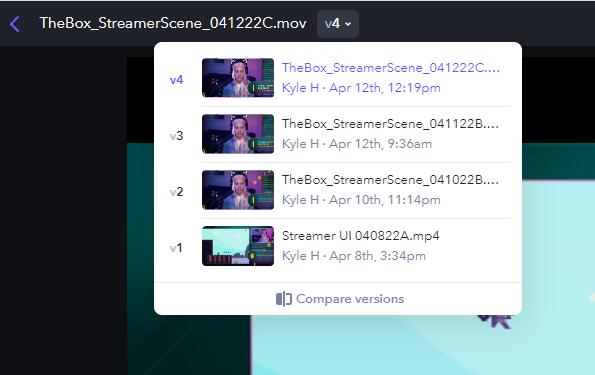
I’ve always been a fan of the super-easy version management - just drag an uploaded clip onto your previous version, and now it’s easy to see what’s been revised - but also easy to look back at earlier versions if you still need to.
Previously only available on higher-tier plans (but now available to everyone!), Camera-to-Cloud enables your team to see clips immediately after they’re shot … even if they’re on the other side of the country! From high-end cinema cameras to your iPhone, this capability is available for every level of production. In our case, I was watching Valentina give notes to improve some of the match cuts, knocking out quick example edits mere minutes after they’d been shot.
As a post-production person, being able to immediately see clips as they’re being shot is huge. Even if you can’t be on set, you can give feedback while the team is still shooting, and head off problems while they’re still fixable. The long-dreaded “fix it in post” is now “fix it in production.”
Frame.io makes your video and design projects run SO much more smoothly, and now that it’s a part of your existing Creative Cloud subscription, there’s no excuse for you not to be using it!
Want to Add Your Own VFX to Your Films?
If this article got you pumped to work on your own films (and add your own VFX), we might be able to get you started. Scratch that, we definitely have what you need…in VFX for Motion.
In VFX for Motion you will learn a broad set of Visual Effects tools and techniques using After Effects. Prepare to add keying, roto, tracking, matchmoving and more to your creative toolkit. By the end of this course, you'll have the practical knowledge of working with live-action footage, and you'll even get some tips on how to direct and work on a VFX shoot.
ENROLL NOW!
Acidbite ➔
50% off everything

ActionVFX ➔
30% off all plans and credit packs - starts 11/26

Adobe ➔
50% off all apps and plans through 11/29

aescripts ➔
25% off everything through 12/6
Affinity ➔
50% off all products

Battleaxe ➔
30% off from 11/29-12/7
Boom Library ➔
30% off Boom One, their 48,000+ file audio library
BorisFX ➔
25% off everything, 11/25-12/1

Cavalry ➔
33% off pro subscriptions (11/29 - 12/4)

FXFactory ➔
25% off with code BLACKFRIDAY until 12/3

Goodboyninja ➔
20% off everything

Happy Editing ➔
50% off with code BLACKFRIDAY

Huion ➔
Up to 50% off affordable, high-quality pen display tablets

Insydium ➔
50% off through 12/4
JangaFX ➔
30% off an indie annual license
Kitbash 3D ➔
$200 off Cargo Pro, their entire library
Knights of the Editing Table ➔
Up to 20% off Premiere Pro Extensions
Maxon ➔
25% off Maxon One, ZBrush, & Redshift - Annual Subscriptions (11/29 - 12/8)
Mode Designs ➔
Deals on premium keyboards and accessories
Motion Array ➔
10% off the Everything plan
Motion Hatch ➔
Perfect Your Pricing Toolkit - 50% off (11/29 - 12/2)

MotionVFX ➔
30% off Design/CineStudio, and PPro Resolve packs with code: BW30

Rocket Lasso ➔
50% off all plug-ins (11/29 - 12/2)

Rokoko ➔
45% off the indie creator bundle with code: RKK_SchoolOfMotion (revenue must be under $100K a year)

Shapefest ➔
80% off a Shapefest Pro annual subscription for life (11/29 - 12/2)

The Pixel Lab ➔
30% off everything
Toolfarm ➔
Various plugins and tools on sale

True Grit Texture ➔
50-70% off (starts Wednesday, runs for about a week)

Vincent Schwenk ➔
50% discount with code RENDERSALE

Wacom ➔
Up to $120 off new tablets + deals on refurbished items


Learn After Effects the Right Way
Master the After Effects interface and build a real animation skillset. Enroll in All-Access to unlock AE Kickstart and 50+ other courses.


