Start Your 3D Journey in Cinema 4D
Master the essentials of 3D modeling, lighting, and animation in C4D. Enroll in All-Access to unlock C4D Basecamp and 50+ other courses.

Learn how troubleshoot a common issue with Cinema4D Dynamics by activating some built-in tools to visualize exactly what’s going on in your simulation.
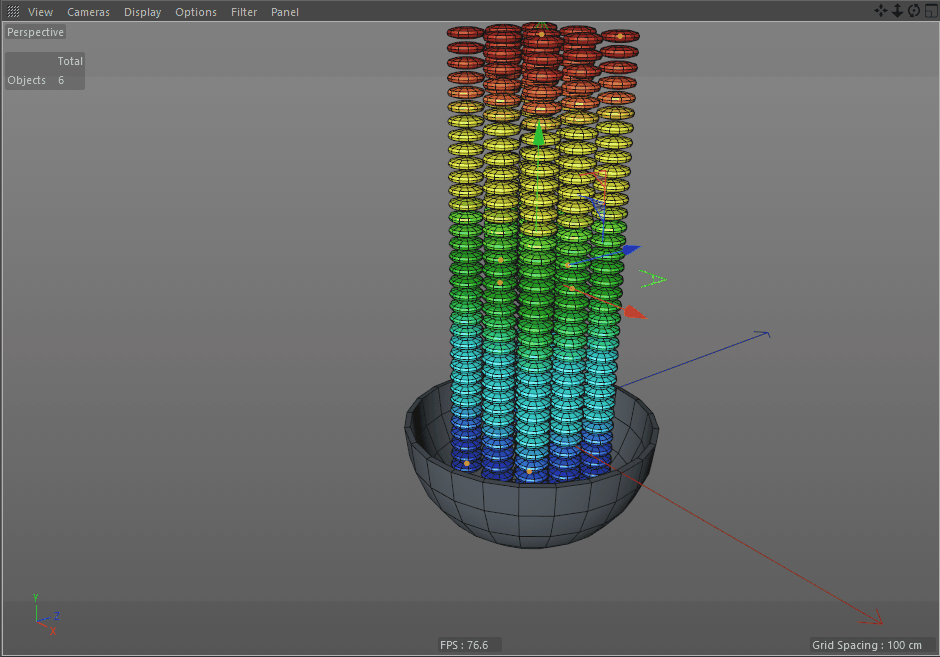
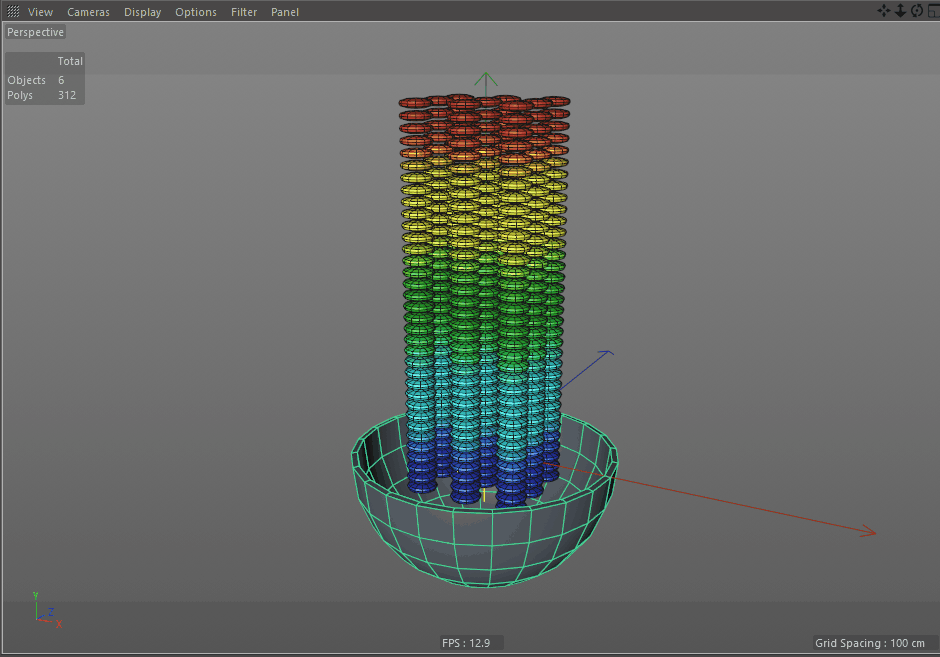
Picture this: The Bowl Company (yup, the one and only) has contacted you about creating some work to showcase their new product, iBowl 3000. The revolutionary new product features built-in WiFi, Bluetooth, and of course an AI Assistant named Hal, but The Bowl Company really wants you to emphasize the fact that their flagship product can hold things. Sounds like a job for Cinema4D’s Dynamics!
Okay so you pitch that first attempt to the company folks, and while they do agree that a bowl which flings its contents in all directions is a cool idea, it doesn’t fully align with their branding vision for the iBowl. Understandable! Just gotta figure out why the Rigid Body tag is deciding to ignore some basic physics here…
REALISM TAKES TIME
Simulating realistic dynamics can be a computationally expensive process, especially when you’re talking about a scene with many dynamic objects in it. In each frame, the software needs to analyze each object’s geometry and determine if it has collided or not, and if so, calculate how that object should react to the collision in the next frame.
Fortunately, we can often get near real-time playback by optimizing our scene and letting Cinema4D ‘cheat’ in little ways to speed up the simulation. Sometimes these cheats lead to unintended behavior (ya know, exploding candy bowls and such), but by utilizing some built-in visualization tools in Cinema4D we can see what the software sees and quickly resolve any problems.
Troubleshooting Tips
- Hide or disable different objects and generators until you can isolate the problem in your scene.
- Simplify the problem object to further narrow down the exact cause.
- The Maxon Help Files are a treasure chest of useful explanations that don’t require a computer science degree to understand
Got a problem with dynamics? Chances are your lights and background MoText aren’t responsible for that. Turn those off to de-clutter your scene, and hey, if the dynamics do run smoother now then you know your problem is connected to those objects (dang area lights, always out to get me…).
Bend deformer doesn’t seem to be working on the 5 million poly 3D scan you imported? Copy that bend deformer to a simple 5x5 cube to determine if the issue is with the deformer or the geometry.
In our case, it’d be much easier to test our scene with 5 candy pieces than it would be with 500, so we’ll reduce our cloner count to a more manageable amount.
SEEING THE MATRIX
Okay, Neo, you may or may not be the chosen one, but you can definitely get that super-powered computer vision to understand your simulation better by enabling Visualization in the Project Settings Dynamics Tab
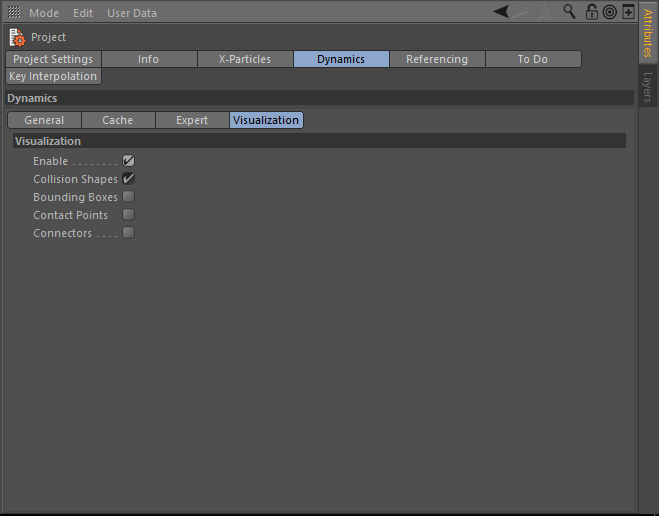
The Project Settings Dynamics Tab allows you to edit some global settings which will affect all dynamic objects in your scene. You can get to this window with the shortcut Control+D (Command+D on a Mac) and clicking on the Dynamics Tab. You can also open this menu from the Menu Bar at the top of your window, clicking on Edit and mousing down to Project Settings.
For the purposes of this article, we’ll only use the tools in the Visualization tab, but you should definitely read up on the others to see how they can help you produce the dynamic sim you want.
Let’s check Enable and then hide our scene geometry to see the simulation as the program sees it.
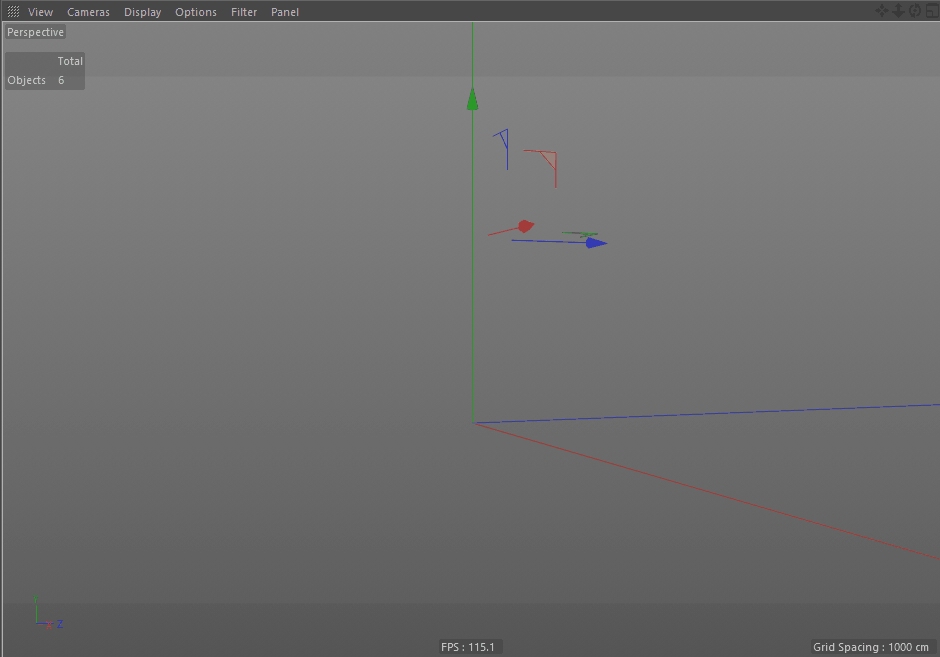
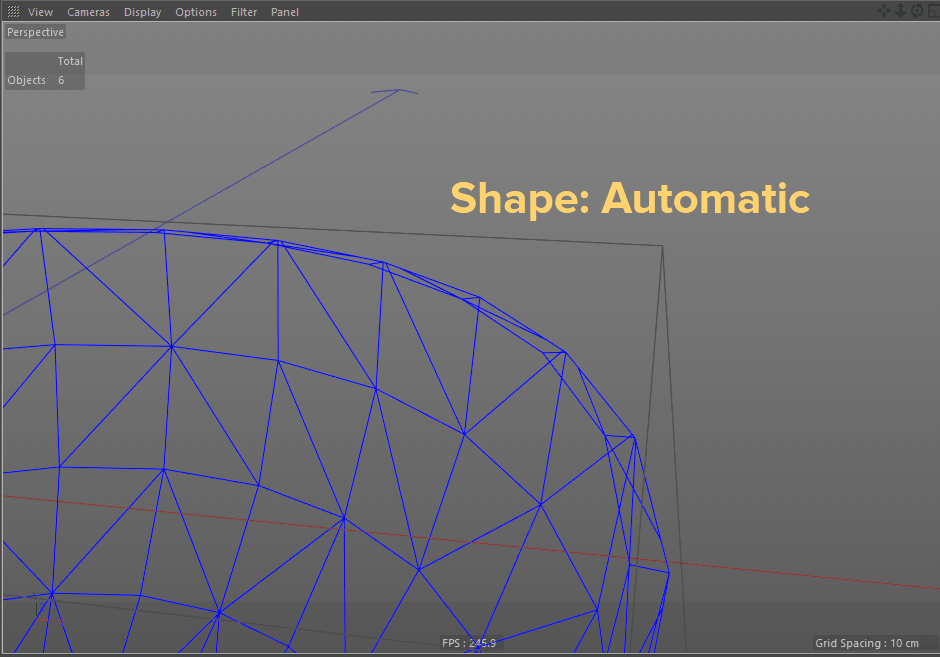
Here we can better see that our candies are not being allowed to fall into the cavity of the bowl. If we look at the collision mesh of the bowl, we see that it is not two-sided like our geometry, but rather, the collision mesh only appears on the outside walls of the bowl (‘a-ha!’ You say, 'the collision shape is wrong!')
SHAPE MATTERS
Okay, so here’s the part where we come full circle. We’ve isolated the problem, and determined that the shape being used for the bowl in the simulation is not the same shape we want it to use. This is one of those times where Cinema4D ‘cheated’ a bit, by ignoring the concave regions of the mesh to simplify the geometry and reduce the calculations it had to make.To change this, we need to go to the Collider Body Tag we placed on our bowl. In the Collision Tab we find the Shape selection menu. By default, this parameter is always set to Automatic, which actually just chooses one of the other options in that list (in the case of our bowl, Convex Hull) based on the type of object to which the tag is applied.
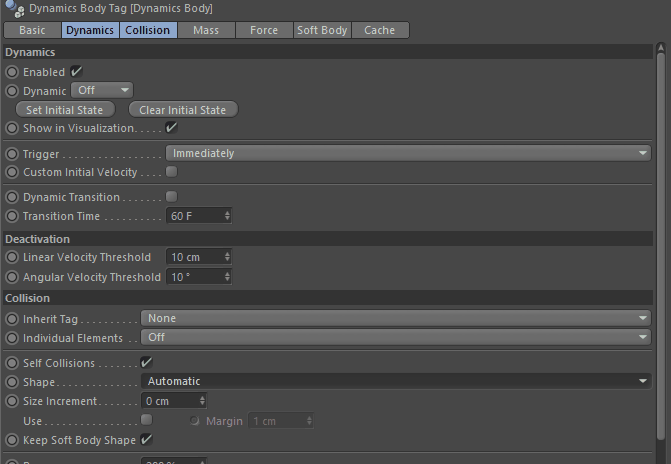
For collider geometry, we generally want Static Mesh, this mode will regard all the geometry of the collider producing more accurate collisions. We’ll get a better idea of the differences between these options by seeing how the Visualized mesh changes in our viewport.
BACK TO SQUARE ONE
No troubleshooting is ever truly done until we can go back to our original setup and have it play error-free. Reactivate your cloner, unhide all your scene geo, and let her rip! Err.. I mean, let her land gracefully and neatly into the bowl.
That’s more like it! Now all you’ve gotta do is texture, light, animate camera moves and smash that render button (you know, the easy stuff). Let the Bowl Company people know you’re done, and make that money rain (that’s more like soft-body dynamics, best we cover that in a separate article).
Now that you've got a hang of dynamics, consider how you can use it for interesting logo reveals! We've got you started on one in the scene below.

{{lead-magnet}}
ENROLL NOW!
Acidbite ➔
50% off everything

ActionVFX ➔
30% off all plans and credit packs - starts 11/26

Adobe ➔
50% off all apps and plans through 11/29

aescripts ➔
25% off everything through 12/6
Affinity ➔
50% off all products

Battleaxe ➔
30% off from 11/29-12/7
Boom Library ➔
30% off Boom One, their 48,000+ file audio library
BorisFX ➔
25% off everything, 11/25-12/1

Cavalry ➔
33% off pro subscriptions (11/29 - 12/4)

FXFactory ➔
25% off with code BLACKFRIDAY until 12/3

Goodboyninja ➔
20% off everything

Happy Editing ➔
50% off with code BLACKFRIDAY

Huion ➔
Up to 50% off affordable, high-quality pen display tablets

Insydium ➔
50% off through 12/4
JangaFX ➔
30% off an indie annual license
Kitbash 3D ➔
$200 off Cargo Pro, their entire library
Knights of the Editing Table ➔
Up to 20% off Premiere Pro Extensions
Maxon ➔
25% off Maxon One, ZBrush, & Redshift - Annual Subscriptions (11/29 - 12/8)
Mode Designs ➔
Deals on premium keyboards and accessories
Motion Array ➔
10% off the Everything plan
Motion Hatch ➔
Perfect Your Pricing Toolkit - 50% off (11/29 - 12/2)

MotionVFX ➔
30% off Design/CineStudio, and PPro Resolve packs with code: BW30

Rocket Lasso ➔
50% off all plug-ins (11/29 - 12/2)

Rokoko ➔
45% off the indie creator bundle with code: RKK_SchoolOfMotion (revenue must be under $100K a year)

Shapefest ➔
80% off a Shapefest Pro annual subscription for life (11/29 - 12/2)

The Pixel Lab ➔
30% off everything
Toolfarm ➔
Various plugins and tools on sale

True Grit Texture ➔
50-70% off (starts Wednesday, runs for about a week)

Vincent Schwenk ➔
50% discount with code RENDERSALE

Wacom ➔
Up to $120 off new tablets + deals on refurbished items


Start Your 3D Journey in Cinema 4D
Master the essentials of 3D modeling, lighting, and animation in C4D. Enroll in All-Access to unlock C4D Basecamp and 50+ other courses.