Start Your 3D Journey in Cinema 4D
Master the essentials of 3D modeling, lighting, and animation in C4D. Enroll in All-Access to unlock C4D Basecamp and 50+ other courses.

Let's take a look at how to create soft lighting in Cinema 4D.
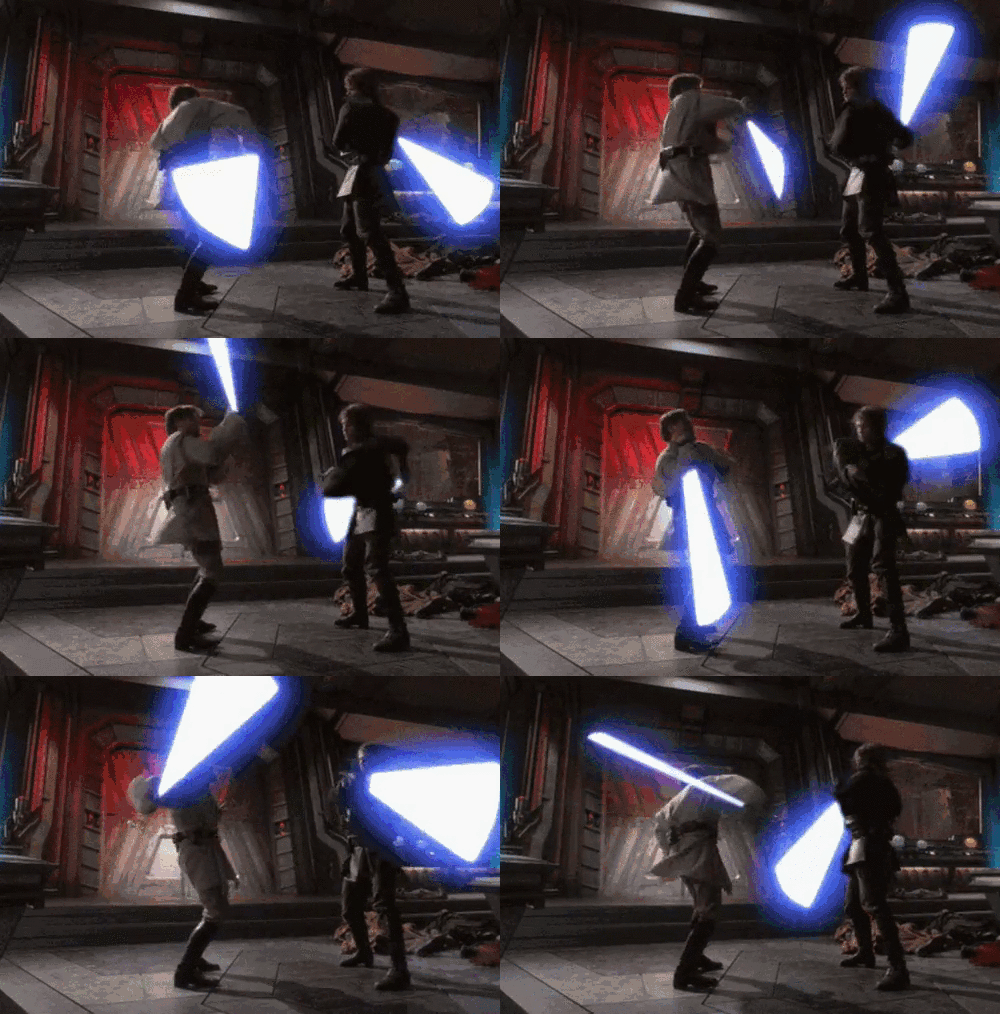
Soft lighting is a term, like many used in 3D rendering, that comes from real world photography. Ironically, it’s most easily characterized by the quality of the shadows it produces over your subject. Soft-lighting drapes over your subject, creating shadows with soft, fuzzy edges. Hard-lighting on the other hand, creates sharp-edged shadows and high contrast.
Let’s look at some examples of the uses of Soft vs. Hard lighting:
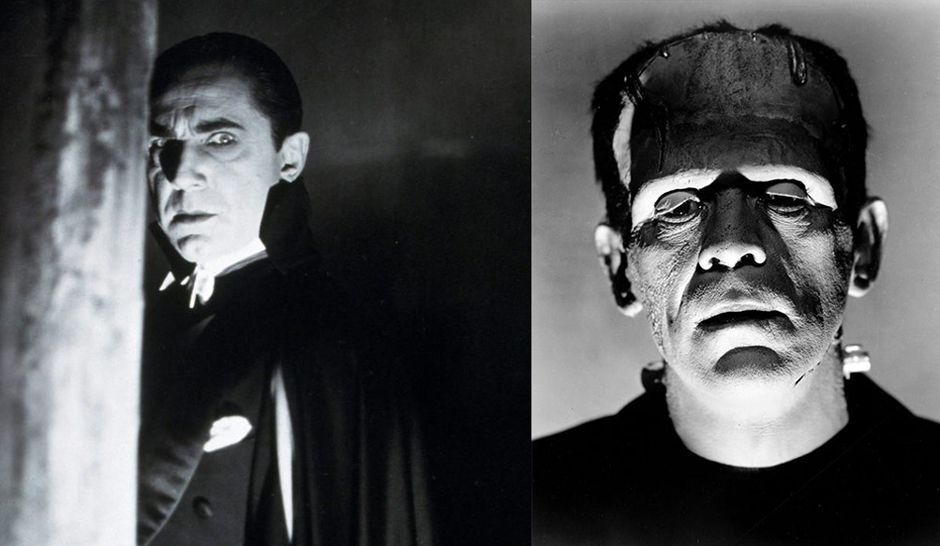
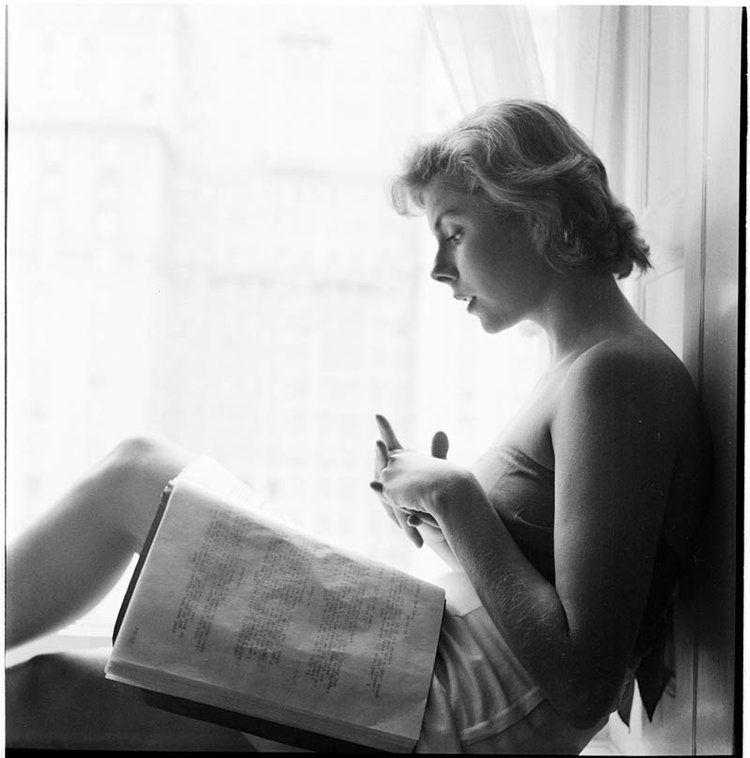
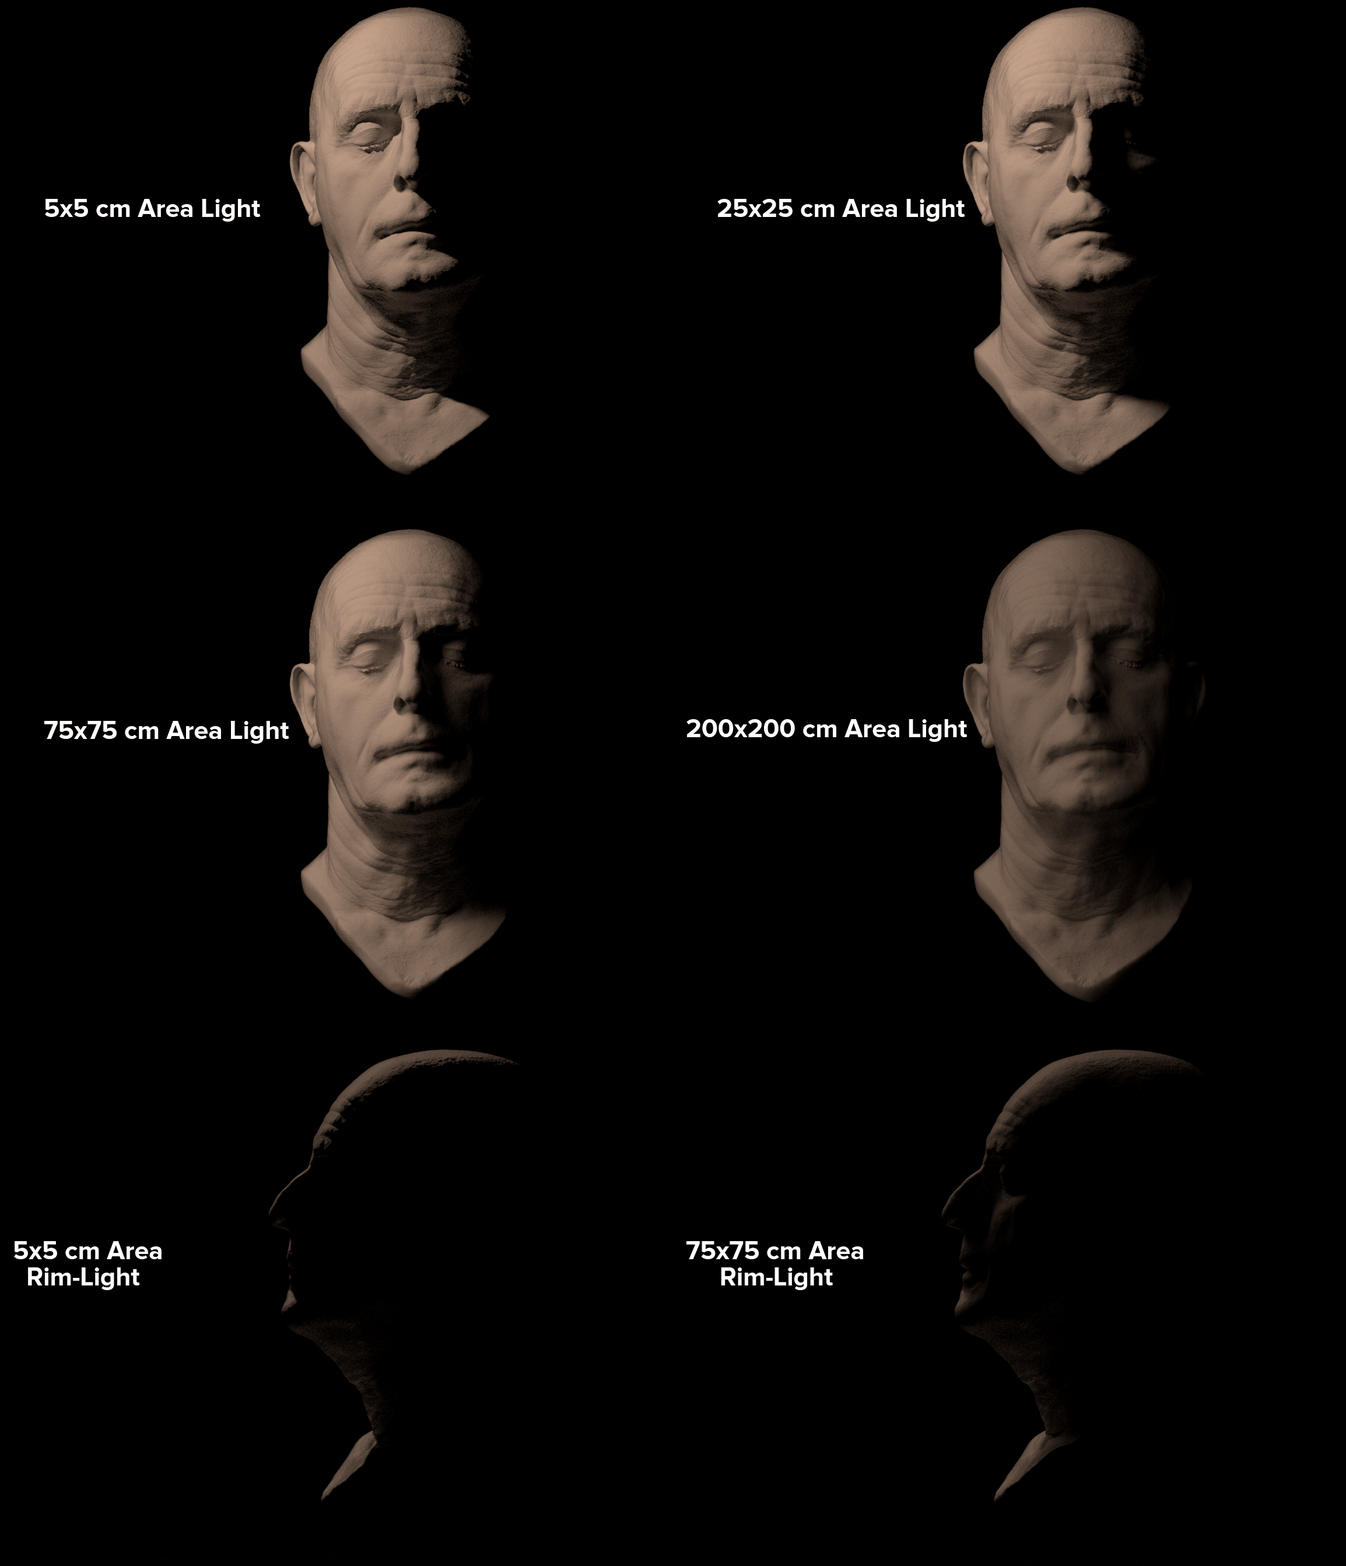
Without getting into the physics of it all, what you need to know is that the softness of your lighting is going to be a product of the size of the light relative to your subject, and the distance between the light and subject. Notice how the large window is acting as the light source in the photo of Betsy von Furstenburg?
- The larger your light source relative to your subject, the softer the lighting will appear.
- The smaller your light source is from your subject, the harder the lighting will appear.
When Should I use Soft or Hard Lighting?
Well, that’s pretty much up to you. There is no right or wrong lighting setup for any given situation, but there are some tried and true methods that have been perfected over decades in the photography world.
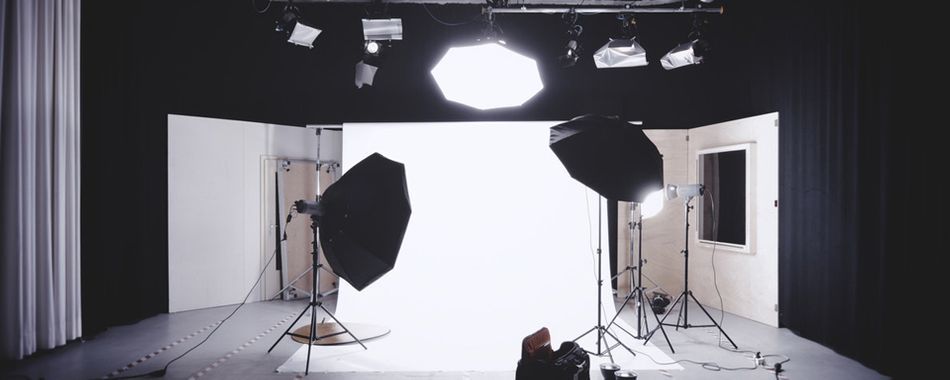
If you venture out of the Cinema4D tutorials on YouTube, you can find thousands of videos on practical lighting setups for real-life photographers. Dimitris Katsafouros has an excellent video demonstrating how well real-world lighting setups can be translated to Cinema4D.
Most importantly, consider your subject and how you want to make your audience feel about it. Are you advertising a cuddly plush doll? Or are you rendering a creepy zombie face sculpt for a poster? Maybe you want the audience to recognize the zombie’s heart of gold by lighting it with a nice big area light? Lighting is a tool for you to tell the story you want.
How Do I Light a Scene in Cinema 4D?
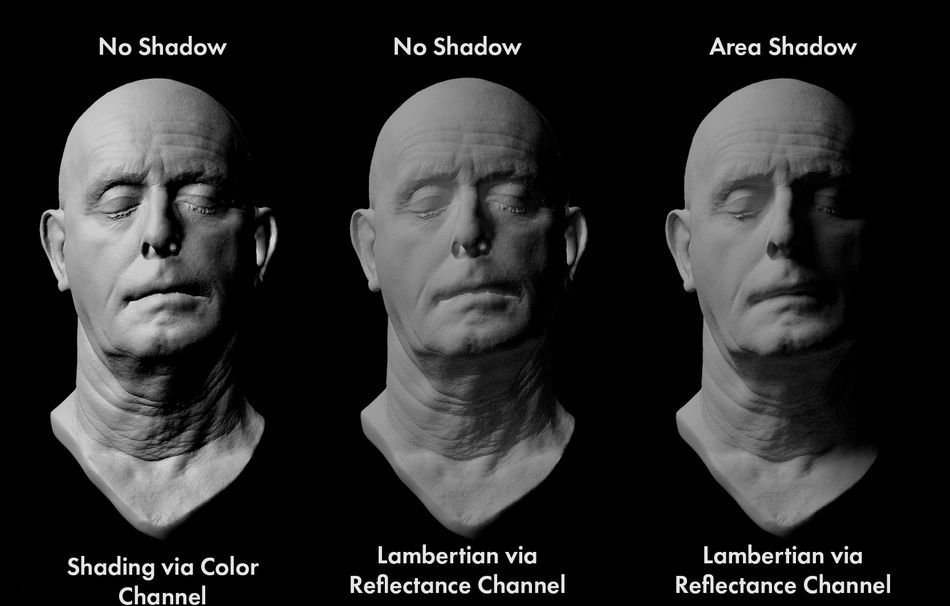
Cinema 4D’s default settings for its Light objects are a quick way of achieving that late-90’s era CG look (and I don’t mean Toy Story). This can be a bit discouraging at first and make a beginner believe they need to grab the latest and greatest third-party renderer to get better lighting. But with a little tweaking of some of those settings you can start getting much nicer results out of Cinema4D’s Standard and Physical Renderers.
{{lead-magnet}}
Remember how we said that the 'softness' of light is based on the relative size of the light source compared to the subject? That's no joke, try changing the size of the Key Light in the scene file above and notice how the shadows on the subject are affected (Or just take a gander at these results).
Now, this is already making a huge difference in our lighting. But wait! There’s more…
LIGHT FALLOFF IN CINEMA 4D
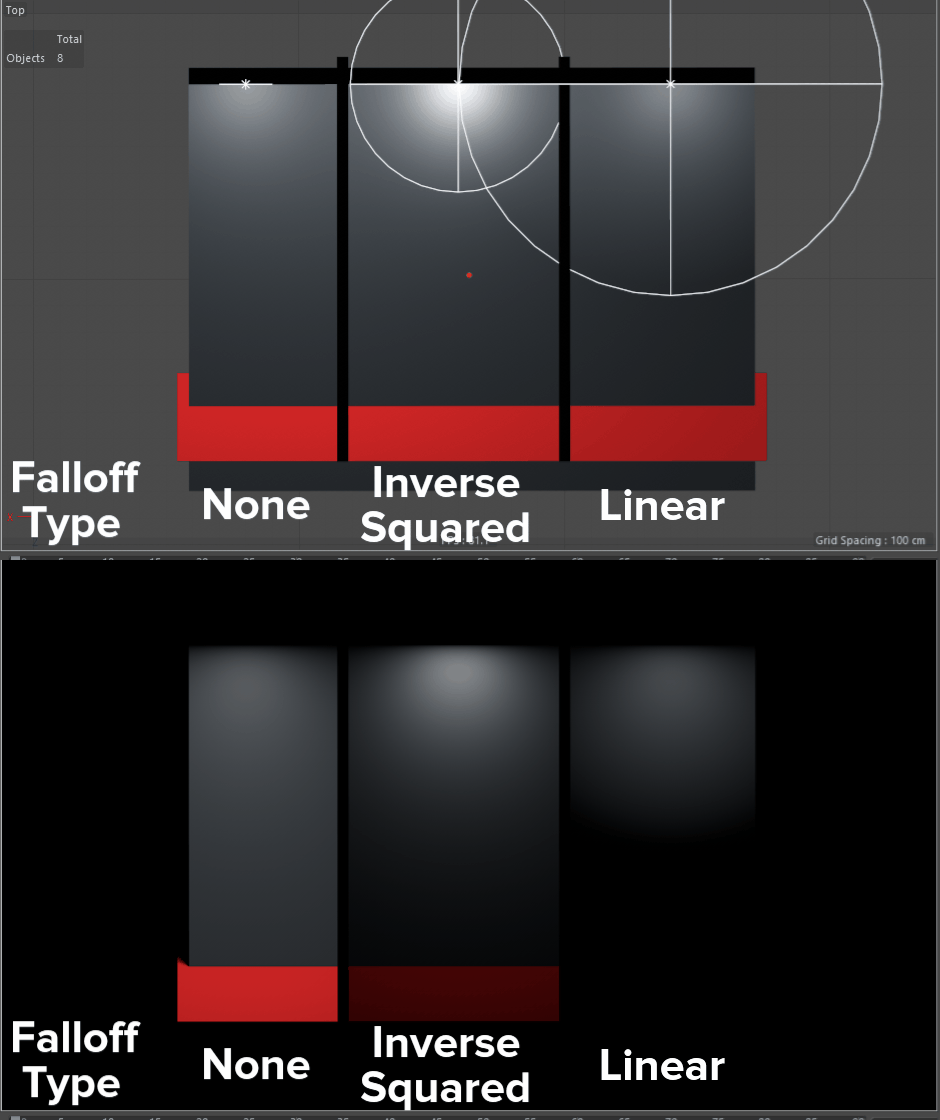
Light loses energy as it travels through space, meaning an object illuminated by a flashlight 1 foot away will be brighter than that same thing illuminated from 10 feet away. This is a quality of all lights. To get this behavior in your 3D lights you need to change the Falloff Type in the Details tab from None to Inverse Square (Physically Accurate).
This will create a wireframe sphere in your viewport which you can resize interactively, modifying the distance from the light at which the value set in Intensity will be met. It’s not a bad idea to resize this sphere so that it just meets the surface of your subject. This is one of those nice changes you can make that won't affect your render time, but will go a long way to add a bit of realism to your render.
REALISTIC LIGHTING SETTINGS IN CINEMA 4D
The default settings are optimized for speed, so there are little boxes to be checked to get more realistic results.
- In the Details tab, enable Show in Reflection to get metallic materials to reflect area lights. This is more realistic than the default Show in Specular option which uses a Phong shading ‘cheat’. By all means enable both if you like the look.
- Also in Details tab, Area Shape gives you a slew of area light options. While the default Rectangle is great for approximating Soft Boxes, there are options for Cylinders, Spheres, and more which will each cast light in a unique way in your scene.
- The Shadow tab gives you the option to change the Color or Density of area shadows in your scene. This is a great way to circumvent Global Illumination rendering in your scene (although it won’t be as realistic).
- Using Color Temperature for your lights is an easy way to add some realism to your scene, as many photographic light equipment is set by those values.
Finally, remember that rules, like eggs, are meant to be broken. There are no 'correct' lighting set-ups for any given scenes, you just have to experiment until you find the best one for the story you are trying to tell.
Learn More About Cinema 4D
If you want to learn more about Cinema 4D check out Cinema 4D Basecamp here on School of Motion and of course check out the blog for tons of great Cinema 4D content.
ENROLL NOW!
Acidbite ➔
50% off everything

ActionVFX ➔
30% off all plans and credit packs - starts 11/26

Adobe ➔
50% off all apps and plans through 11/29

aescripts ➔
25% off everything through 12/6
Affinity ➔
50% off all products

Battleaxe ➔
30% off from 11/29-12/7
Boom Library ➔
30% off Boom One, their 48,000+ file audio library
BorisFX ➔
25% off everything, 11/25-12/1

Cavalry ➔
33% off pro subscriptions (11/29 - 12/4)

FXFactory ➔
25% off with code BLACKFRIDAY until 12/3

Goodboyninja ➔
20% off everything

Happy Editing ➔
50% off with code BLACKFRIDAY

Huion ➔
Up to 50% off affordable, high-quality pen display tablets

Insydium ➔
50% off through 12/4
JangaFX ➔
30% off an indie annual license
Kitbash 3D ➔
$200 off Cargo Pro, their entire library
Knights of the Editing Table ➔
Up to 20% off Premiere Pro Extensions
Maxon ➔
25% off Maxon One, ZBrush, & Redshift - Annual Subscriptions (11/29 - 12/8)
Mode Designs ➔
Deals on premium keyboards and accessories
Motion Array ➔
10% off the Everything plan
Motion Hatch ➔
Perfect Your Pricing Toolkit - 50% off (11/29 - 12/2)

MotionVFX ➔
30% off Design/CineStudio, and PPro Resolve packs with code: BW30

Rocket Lasso ➔
50% off all plug-ins (11/29 - 12/2)

Rokoko ➔
45% off the indie creator bundle with code: RKK_SchoolOfMotion (revenue must be under $100K a year)

Shapefest ➔
80% off a Shapefest Pro annual subscription for life (11/29 - 12/2)

The Pixel Lab ➔
30% off everything
Toolfarm ➔
Various plugins and tools on sale

True Grit Texture ➔
50-70% off (starts Wednesday, runs for about a week)

Vincent Schwenk ➔
50% discount with code RENDERSALE

Wacom ➔
Up to $120 off new tablets + deals on refurbished items


Start Your 3D Journey in Cinema 4D

Master the essentials of 3D modeling, lighting, and animation in C4D. Enroll in All-Access to unlock C4D Basecamp and 50+ other courses.


