Start Your 3D Journey in Cinema 4D
Master the essentials of 3D modeling, lighting, and animation in C4D. Enroll in All-Access to unlock C4D Basecamp and 50+ other courses.

How to Add Imperfections in Cinema 4D.
In this tutorial, we're going to explore how adding imperfections improves your render. Make your materials more realistic and engaging by following along!
In this article, you'll learn:
In addition to the video, we've created a custom PDF with these tips so you never have to search for answers. Download the free file below so you can follow along, and for your future reference.
{{lead-magnet}}

As 3D artists, we’re always fighting perfection. By default CG looks perfect, and the real world is full of imperfections. Surfaces get dented, scratched, dusty, and greasy, and it’s our job to add those details.
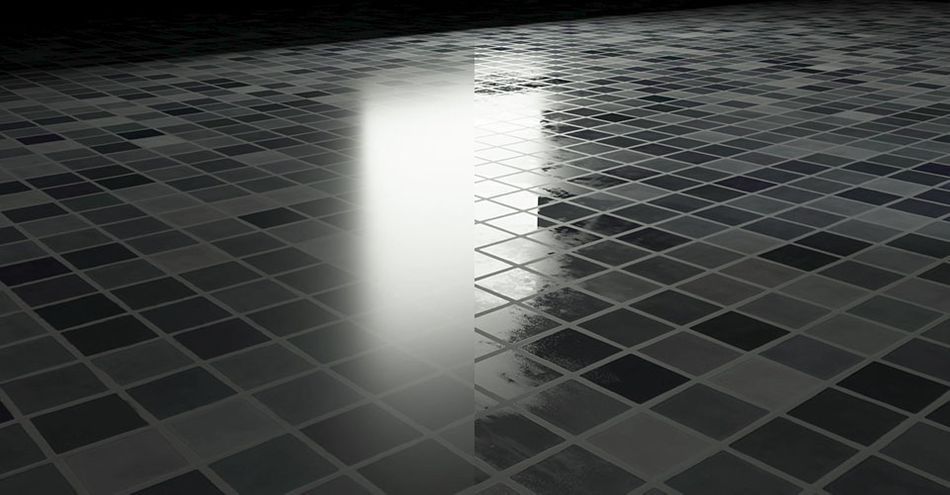
Let’s start with probably the simplest example: roughness maps. Surfaces with more micro detail—such as sandpaper—are rougher, so the light that hits them bounces off at many different angles and is therefore less reflective than a smooth surface that’s highly polished and reflective.
When we add in a roughness map which is a simple black and white texture, we vary the roughness over the surface and suddenly it looks far more realistic. We can even layer multiple maps like this together with add or multiply nodes in octane.
If we grab the tiles texture from Poliigon.com, it looks a little too clean and perfect. But watch what happens when we add in the roughness map. Here it’s actually a glossy map (which is the inverse of a roughness map), so we need to click the invert button.
Next let’s add in the specular map, which is very similar—but instead of varying the roughness, it varies the specularity, or intensity, of the reflection. Then we'll add the normal map. This causes the surface to act like it’s raised and in general normal maps do the same kind of thing as bump maps but are more accurate because they take into account all the normal directions and angles light can hit the surface.
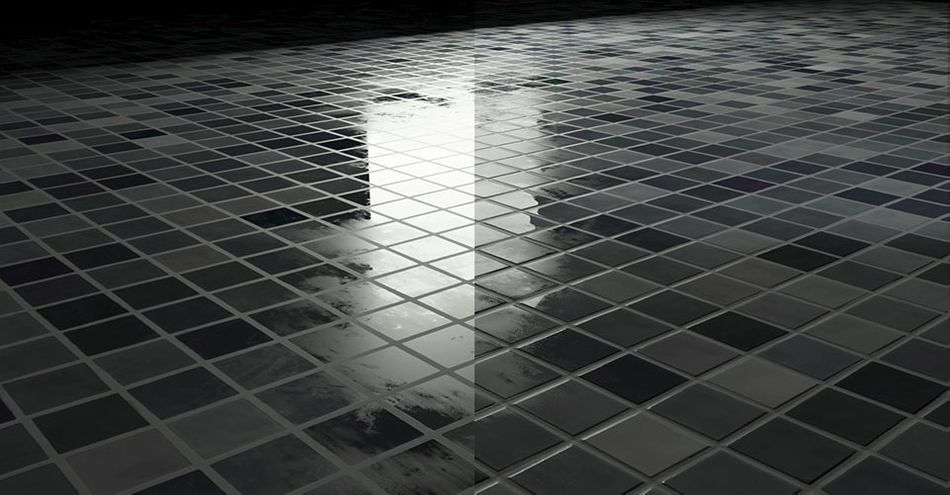
Note though that these maps aren’t actually raising the surface, just giving the impression of a raised surface. Speaking of bump maps, we can add one of those in too to create some additional scratches on the surface. Bump maps in Octane are usually too strong so we need to mix them down with a multiply node. This is just like the multiply Blend mode in Photoshop or After Effects. If you multiply by a number less than 1, you’re reducing the intensity, so this setup becomes like a mix slider.
Finally, displacement maps actually do move the surface outwards and inwards, so they produce an even more realistic result than normal maps for very raised surfaces, though they are more heavy.
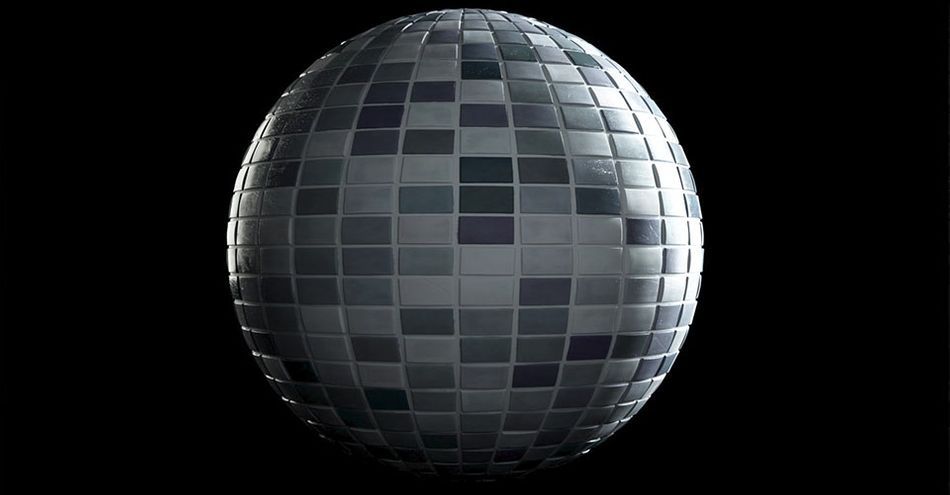
Let’s talk about another overly perfect and computer-generated looking thing that happens in 3D: texture repetitions. Seamless textures tend to be repetitive, but just by creating a duplicate and scaling up, we can have another variation.
Let’s also rotate it 90 degrees for some more randomness. Now if we add in a mix node in Octane, we can blend between the two. And if we use a procedural Octane noise or even another texture, we can use that to vary between the two scales of the original texture.
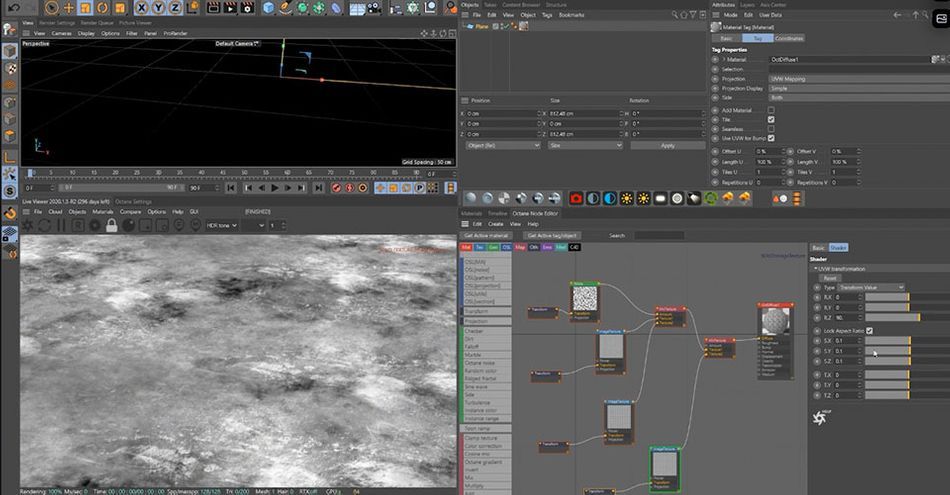
Now this is looking a lot less repetitive. We can keep doing this too with a third scale, and just keep adding more randomness.
This same thing can be done by layering displacement maps. The more maps we add, the more of an organic looking surface we get.

Finally, let’s take a look at another way to add imperfections by using curvature maps—in Octane it’s called the Dirt node. The edges of objects are typically the surfaces that get the most damaged; often we’ll see something like a metal that’s painted and on the edges the paint is eroding.
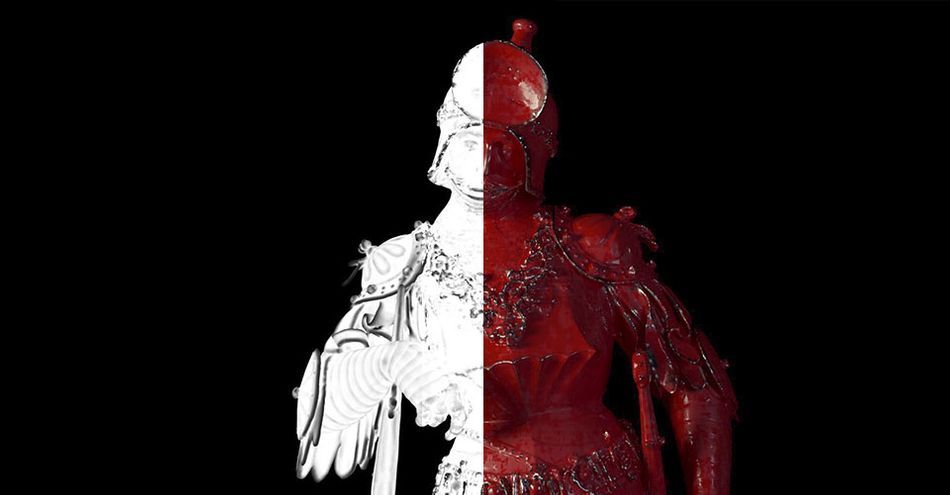
To do this, we just create a composite material in Octane, one as a paint and one as a metal. Then we use the dirt node as a mask to show the metal on the edges and the paint as the main surface.
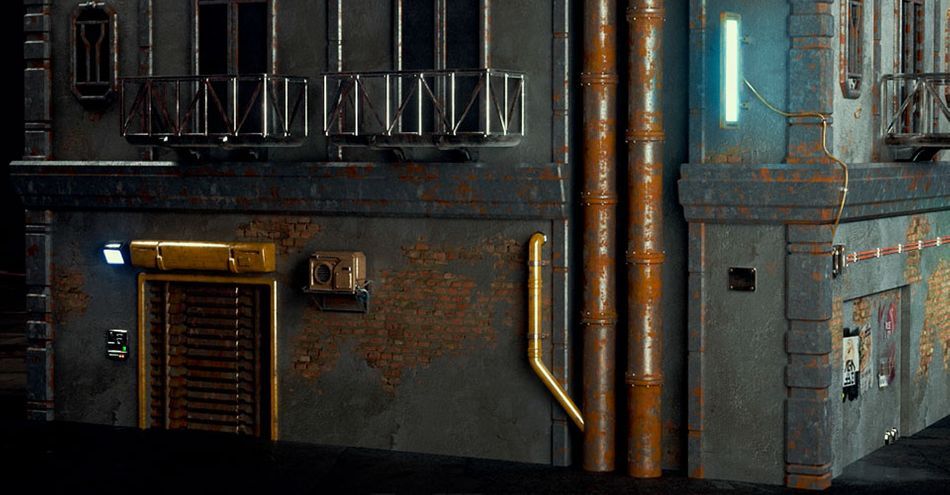
Also we can create more complex mats like this. We took a brick pattern with just the diffuse color, but it was weirdly reflecting the neon lights. Once we added in the roughness map, we solved that problem, and the normal map allowed it to catch the light properly.
Next we created a concrete material and repeated the process. Finally, we created a complex mask to blend between the two using noises and black and white textures, and now it looks like concrete with patches of exposed brick.
Go around your home and take a look at the various surfaces and objects. Notice all the little details, from the scratches on surfaces to the fingerprints left behind on glass. These are the imperfections that you need to bring to your renders to make them more realistic, and—most importantly—a lot more interesting.
Want more?
If you're ready to step into the next level of 3D design, we've got a course that's just right for you. Introducing Lights, Camera, Render, an in-depth advanced Cinema 4D course from David Ariew.
This course will teach you all of the invaluable skills that make up the core of cinematography, helping to propel your career to the next level. You’ll not only learn how to create a high-end professional render every time by mastering cinematic concepts, but you’ll be introduced to valuable assets, tools, and best practices that are critical to creating stunning work that will wow your clients!
-----------------------------------------------------------------------------------------------------------------------------------
Tutorial Full Transcript Below 👇:
David Ariew (00:00): I'm going to show you how adding surface and perfections to your materials makes them more realistic and engaging.
David Ariew (00:14): Hey, what's up, I'm David Ariew and I'm a 3d motion designer and educator, and I'm going to help you make your renders better. In this video, you'll learn how to add roughness, specular, bump, normal and displacement maps, and how each contribute to the realism of your materials. Avoid texture, repetitions, and how to use the dirt note to erode materials at the edges. Do you want more ideas to improve your renders? Make sure to grab our PDF of 10 tips in the description. Now let's get started as 3d artists. We're always fighting perfection because by default CG looks perfect and the real world is full of imperfections surfaces, get dented, scratched, dusty, and greasy. And it's our job to add those details in let's start with probably the simplest example, which is roughness maps. In reality surfaces with more micro detail, like sandpaper for instance are rougher.
David Ariew (01:00): So the light that hits them bounces off at many different angles and is there for a less reflective than a smooth surface like this that's polished and highly reflective. When we add in a roughness map, which is a simple black and white texture, we vary the roughness over the surface and suddenly it looks far more realistic. We can even layer multiple maps like this with add or multiply nodes in octane here with this tiles texture from polygon.com. This is what happens when we add in the roughness map here, it's actually a glossy map, which is the inverse of a roughness map. So we need to click the invert button next. Let's add in the specular map, which is very similar, but instead of varying the roughness, it varies the specularity, which means the intensity of the reflection. Now here's a big one. The normal map, this causes the surface to act like it's raised.
David Ariew (01:44): And in general, normal maps do the same kind of thing as bump maps, but are actually more accurate because they take into account all the normal directions and angles like can hit the surface note though, that these maps aren't actually raising the surface, just giving the impression of a raised surface by reacting to the lighting. Speaking of bump maps, let's add one of those into, to create some additional scratches on the surface, but maps and octane are usually too strong. So we need to mix them down with a multiply node. This is just like the multiplied blend mode and Photoshop or after effects. If you multiply by a number less than one, then you're reducing the intensity. So this set becomes like a mixed slider. Finally, displacement maps actually do move the surface, outwards and inwards. So they produce an even more realistic result than normal maps for very raised surfaces.
David Ariew (02:24): They are more heavy and taxing to use. Next. Let's talk about another overly perfect and computer generated looking thing that happens in 3d and that's texture repetitions here. We've got a seamless texture and it's obviously repetitive, but just by creating a duplicate and scaling that up, we have another variation. Let's also rotate it 90 degrees for some more randomness. Now, if we add an, a mix node in octane, we can blend between the two. This is a 50% opacity blend here by default. Here's one texture. And now the other. Now, if we use a procedural octane noise or even another texture, we can use that to vary between the two scales, the original texture. Now this is looking a lot less repetitive. We can keep doing this too with a third copy and just keep adding more and more randomness. Now, when we zoom out and make some slight adjustments to the scale of the textures, we don't see any repetitions in the whole surface.
David Ariew (03:14): Super cool. The same kind of thing can be done too. By layering displacement maps here, we've got an obviously repetitive map, but when we add in another and put a displacer object with a noise in it, the second displacement map will intersect in patches with the other one and break up the repetition. And the more maps we add, the more of an organic looking surface we get. Finally, let's take a look at another way to add imperfections and that's by using curvature maps or an octane, it's called the dirt node. The edges of objects are typically the surfaces that get the most damaged and often we'll see something like a metal that's painted and on the edges, the paint is eroding to do this. We just create a composite material in octane to blend between the two materials. One is a paint and the other one is the metal.
David Ariew (03:53): Then we use the dirt note as a mask to show the metal on just the edges and the paint as the main surface. It's still missing some breakup though. And to do this, it's gotten much easier in octane recently because you can pipe a noise directly into the dirt note for extra breakup on the edge. Here's the before and after and the dirt map. So a before and after, as we get further into creating imperfections in our materials, we can build up more and more complex materials like this. For instance, here's a brick wall with just the diffuse color and you can see how it's weirdly reflecting the neon lights. Then once we add in the roughness map, we solve that problem and it looks much more natural. And then the normal map allows the raised areas of the brick to catch the light properly.
David Ariew (04:33): Next, we create a concrete material and we've got the same reflection issue until we add in the roughness map and then the normal map to catch the light and create natural bumps in the surface. Now we create a complex mask to blend between the two using noises and black and white textures. And now it looks like concrete with patches of exposed brick so much more interesting. Finally, if we use the mask and the bump channel of both the brick texture and the concrete texture, it feels like there's an edge or indent between the concrete and where it's eroded to the brick. So it feels much more realistic for a final note, try and think of additional ways you can add imperfections. For example, with this wall, I added additional layers of paint smudges, as well as a final layer of graffiti to sell the realism by keeping these tips in mind, you'll be well on your way to consistently creating awesome renders. If you want to learn more ways to improve your renders, make sure to subscribe to this channel, hit the bell icon. So you'll be notified when we drop the next tip.
ENROLL NOW!
Acidbite ➔
50% off everything

ActionVFX ➔
30% off all plans and credit packs - starts 11/26

Adobe ➔
50% off all apps and plans through 11/29

aescripts ➔
25% off everything through 12/6
Affinity ➔
50% off all products

Battleaxe ➔
30% off from 11/29-12/7
Boom Library ➔
30% off Boom One, their 48,000+ file audio library
BorisFX ➔
25% off everything, 11/25-12/1

Cavalry ➔
33% off pro subscriptions (11/29 - 12/4)

FXFactory ➔
25% off with code BLACKFRIDAY until 12/3

Goodboyninja ➔
20% off everything

Happy Editing ➔
50% off with code BLACKFRIDAY

Huion ➔
Up to 50% off affordable, high-quality pen display tablets

Insydium ➔
50% off through 12/4
JangaFX ➔
30% off an indie annual license
Kitbash 3D ➔
$200 off Cargo Pro, their entire library
Knights of the Editing Table ➔
Up to 20% off Premiere Pro Extensions
Maxon ➔
25% off Maxon One, ZBrush, & Redshift - Annual Subscriptions (11/29 - 12/8)
Mode Designs ➔
Deals on premium keyboards and accessories
Motion Array ➔
10% off the Everything plan
Motion Hatch ➔
Perfect Your Pricing Toolkit - 50% off (11/29 - 12/2)

MotionVFX ➔
30% off Design/CineStudio, and PPro Resolve packs with code: BW30

Rocket Lasso ➔
50% off all plug-ins (11/29 - 12/2)

Rokoko ➔
45% off the indie creator bundle with code: RKK_SchoolOfMotion (revenue must be under $100K a year)

Shapefest ➔
80% off a Shapefest Pro annual subscription for life (11/29 - 12/2)

The Pixel Lab ➔
30% off everything
Toolfarm ➔
Various plugins and tools on sale

True Grit Texture ➔
50-70% off (starts Wednesday, runs for about a week)

Vincent Schwenk ➔
50% discount with code RENDERSALE

Wacom ➔
Up to $120 off new tablets + deals on refurbished items


Start Your 3D Journey in Cinema 4D
Master the essentials of 3D modeling, lighting, and animation in C4D. Enroll in All-Access to unlock C4D Basecamp and 50+ other courses.