Start Your 3D Journey in Cinema 4D
Master the essentials of 3D modeling, lighting, and animation in C4D. Enroll in All-Access to unlock C4D Basecamp and 50+ other courses.

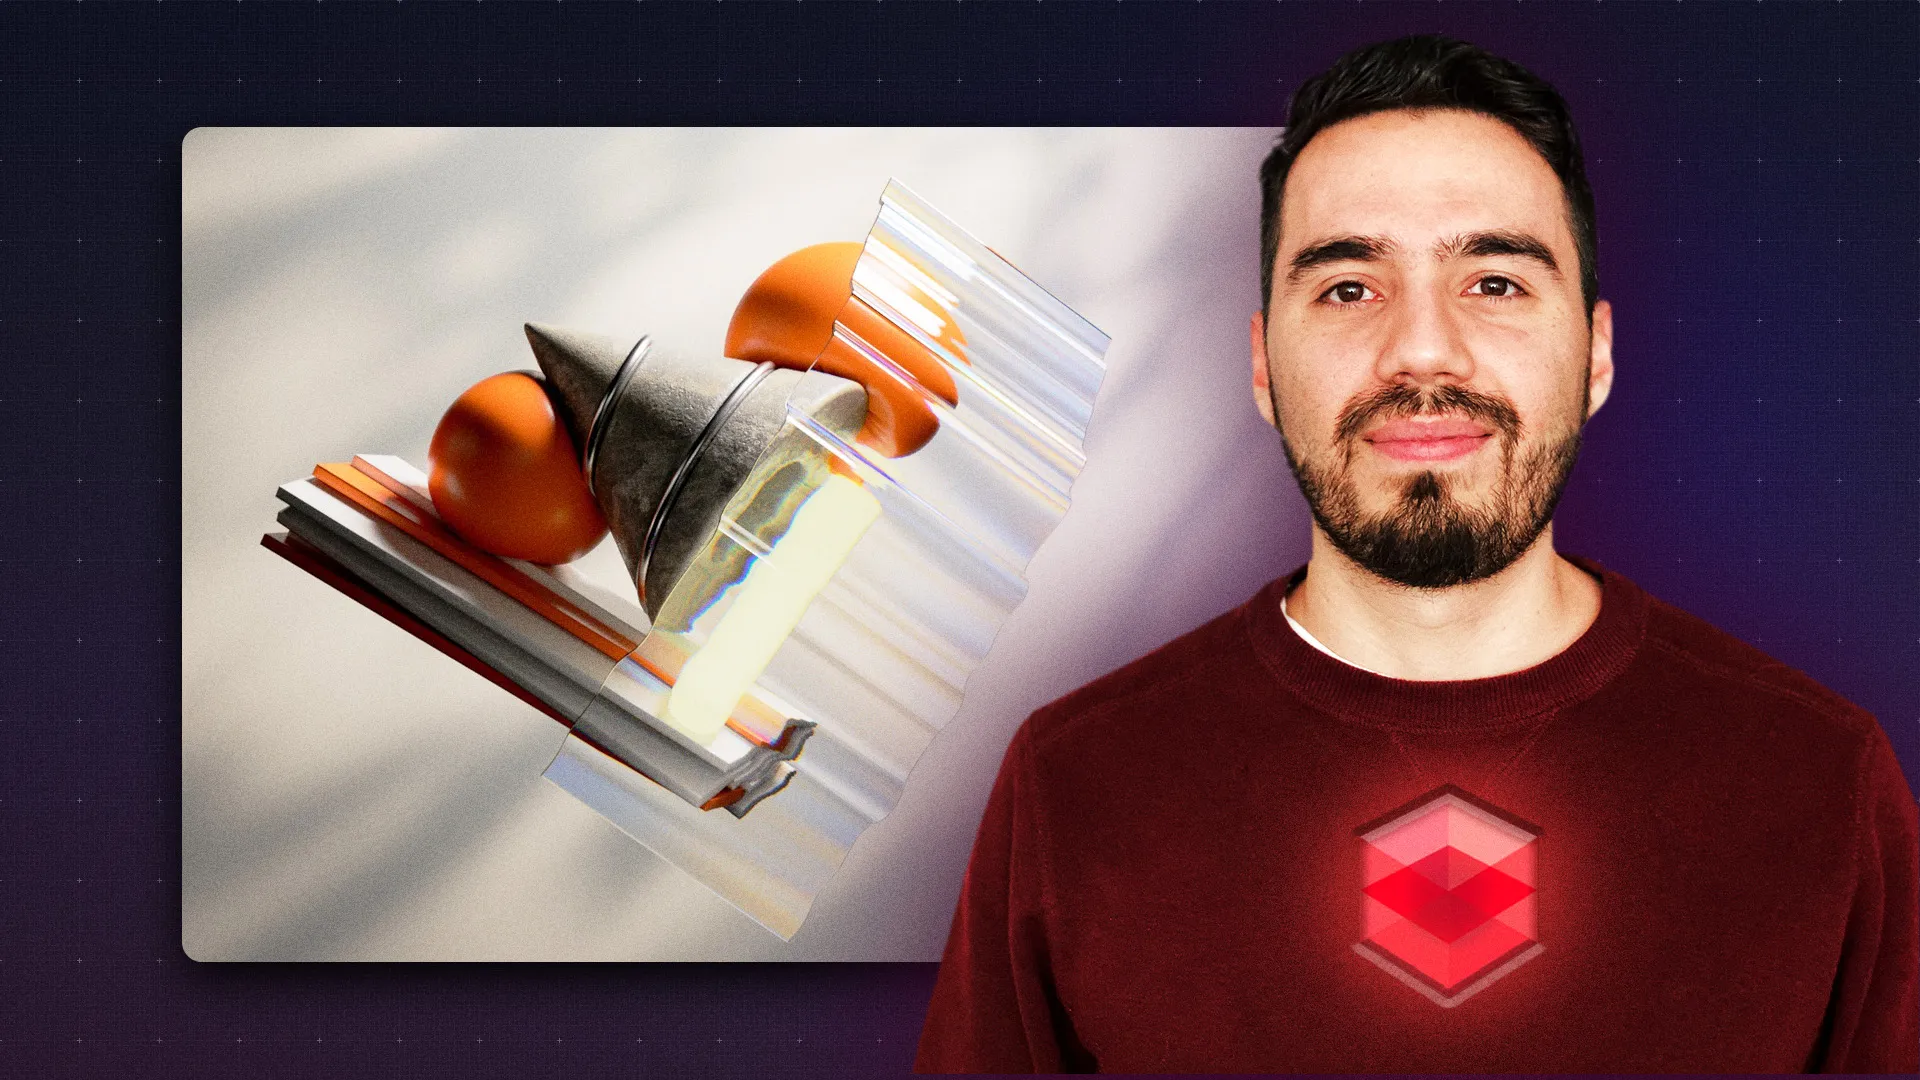
If you want to design and animate in 3D, here is your intro to Redshift Render!
Redshift is one of the most powerful render engines out there, but it can seem intimidating if you’ve never been introduced. Today we are going to show you all you need to know to get started using Redshift in Cinema 4D.
3D render engines have a huge impact on your workflow, composition, and final animation. If you’re unfamiliar with how to use them, these engines can seem complicated and intimidating. Fortunately, we have a personal friend of Redshift here to make the intro. Who knows? This might be your personal meet-cute with the render engine of your dreams.
In this video, you’ll learn:
- What is Redshift?
- How to use the Redshift Interface
- How to get started with node materials
- Lighting and rendering in Redshift
If you want to follow along feel free to download the working files below.
ENROLL NOW!
Acidbite ➔
50% off everything

ActionVFX ➔
30% off all plans and credit packs - starts 11/26

Adobe ➔
50% off all apps and plans through 11/29

aescripts ➔
25% off everything through 12/6
Affinity ➔
50% off all products

Battleaxe ➔
30% off from 11/29-12/7
Boom Library ➔
30% off Boom One, their 48,000+ file audio library
BorisFX ➔
25% off everything, 11/25-12/1

Cavalry ➔
33% off pro subscriptions (11/29 - 12/4)

FXFactory ➔
25% off with code BLACKFRIDAY until 12/3

Goodboyninja ➔
20% off everything

Happy Editing ➔
50% off with code BLACKFRIDAY

Huion ➔
Up to 50% off affordable, high-quality pen display tablets

Insydium ➔
50% off through 12/4
JangaFX ➔
30% off an indie annual license
Kitbash 3D ➔
$200 off Cargo Pro, their entire library
Knights of the Editing Table ➔
Up to 20% off Premiere Pro Extensions
Maxon ➔
25% off Maxon One, ZBrush, & Redshift - Annual Subscriptions (11/29 - 12/8)
Mode Designs ➔
Deals on premium keyboards and accessories
Motion Array ➔
10% off the Everything plan
Motion Hatch ➔
Perfect Your Pricing Toolkit - 50% off (11/29 - 12/2)

MotionVFX ➔
30% off Design/CineStudio, and PPro Resolve packs with code: BW30

Rocket Lasso ➔
50% off all plug-ins (11/29 - 12/2)

Rokoko ➔
45% off the indie creator bundle with code: RKK_SchoolOfMotion (revenue must be under $100K a year)

Shapefest ➔
80% off a Shapefest Pro annual subscription for life (11/29 - 12/2)

The Pixel Lab ➔
30% off everything
Toolfarm ➔
Various plugins and tools on sale

True Grit Texture ➔
50-70% off (starts Wednesday, runs for about a week)

Vincent Schwenk ➔
50% discount with code RENDERSALE

Wacom ➔
Up to $120 off new tablets + deals on refurbished items


Download this free Redshift Texture Pack!
Redshift is the world’s first fully GPU-accelerated, biased renderer. This means that the engine takes full advantage of your GPU to create photorealistic textures, lighting, and effects. As a biased engine, it makes estimates as to value in order to render out images faster (although this does mean a small tradeoff in accuracy).
Redshift is offered through a subscription, although you can also bundle it with the Maxon One package. Once you have your license, you’re ready to rock.

In Cinema 4D, navigate over to the Redshift menu tab on the top and let’s take a look at the Render View.

Click on the Start/Stop Render button to begin the render. You’ll see your composition window mirrored, but with Redshift rendering any inputs.

Use your scroll wheel to zoom in and out of your render view. When you rotate your objects, your render will rotate as well. This shows you that the image is live and ready for you to get to work.

If you need to refresh your render, hit the Refresh icon to the right of the Start/Stop button. If you want Redshift to focus only on one area, use the Region button (looks like a crop symbol).

There are two render modes in Redshift: Progressive and Bucket. Progressive favors speed over quality, while Bucket favors quality over speed. Depending on the work you’re doing, you’ll find the mode that works best for you.
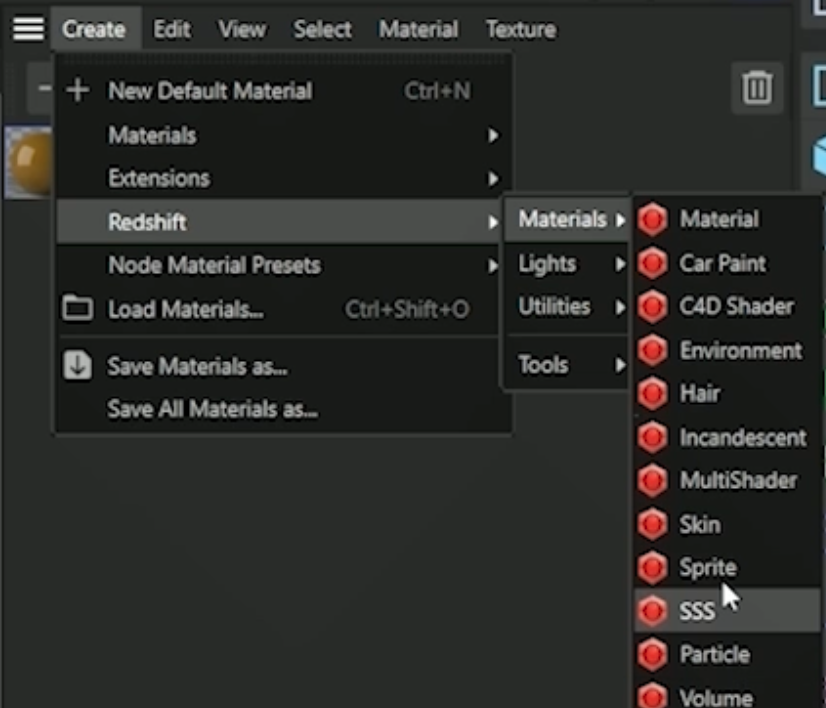
Creating a Redshift Material

To get started with materials, navigate to the Redshift menu, twirl down to Materials, and you’ll see all the options for materials available. For now, let’s just use Material.

Double-click on the material to open up the Shader Graph.

Redshift uses a node based shader graph to create any materials for your scene. For those of you who may not be familiar with node based material workflows, it may seem odd from the outset, but you will get a handle on how this works. We’ll start slow.
Where you’ll do most of your material work is inside the RS Material Node. Inside you’ll see all the options available for affecting the color, diffuse, reflection, refraction, and other main aspects of your material.
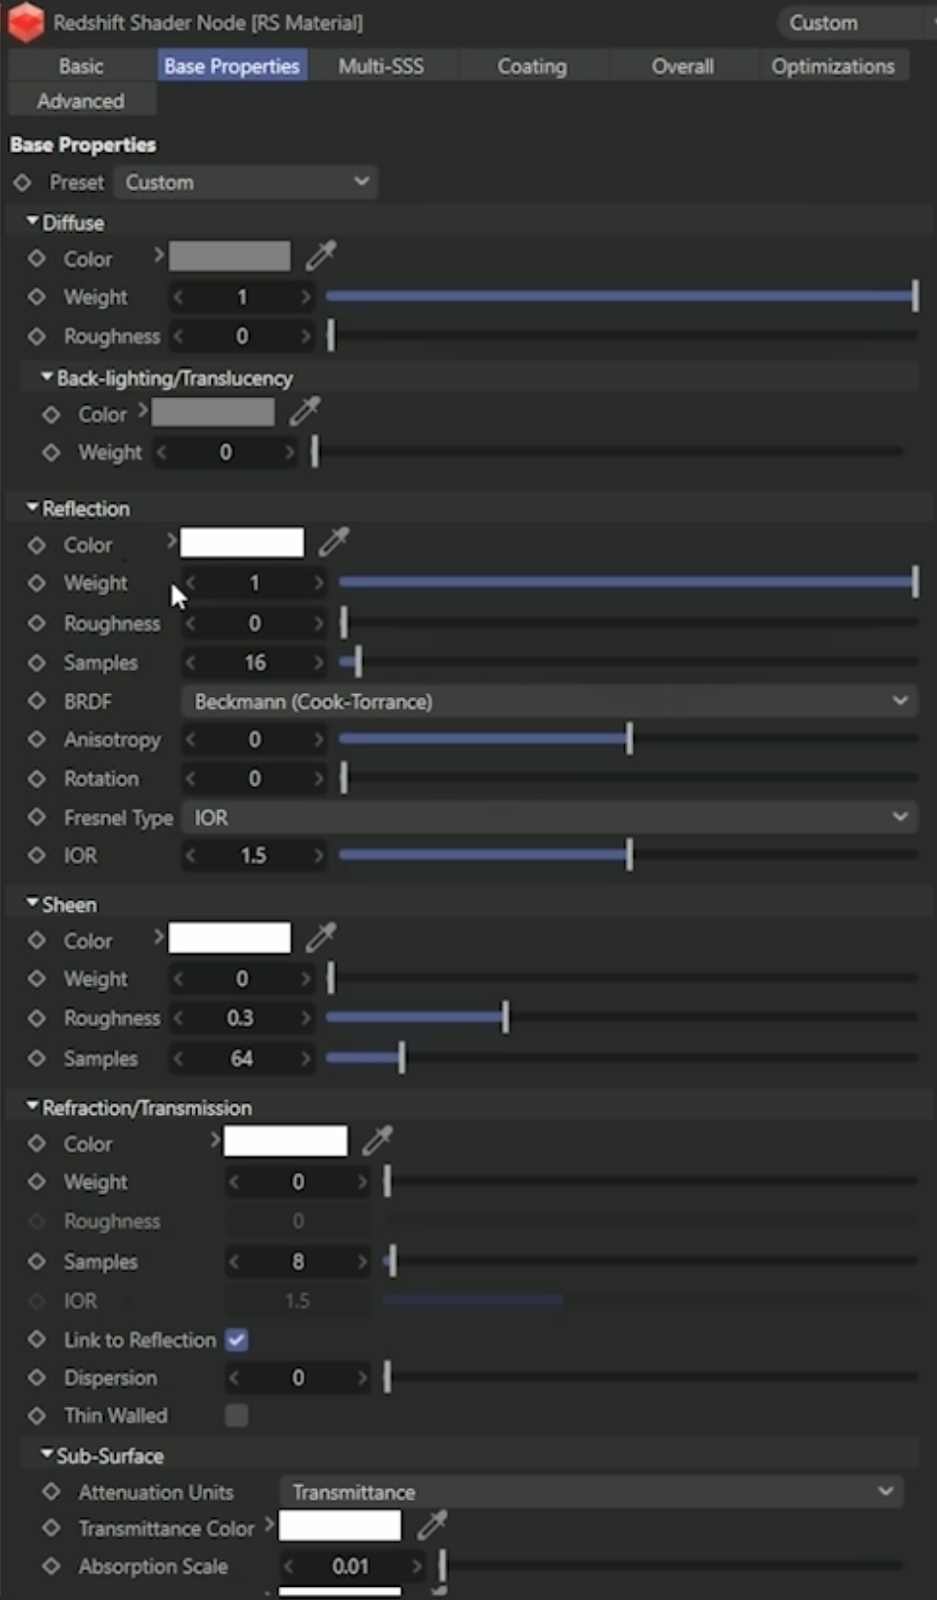
With our material applied to objects in our scene, we can dial in the color and reflection to start designing our final look. If you set your Viewport to show the render (in Viewport go to Redshift > Start IPR), you’ll see the effect take place instantly.

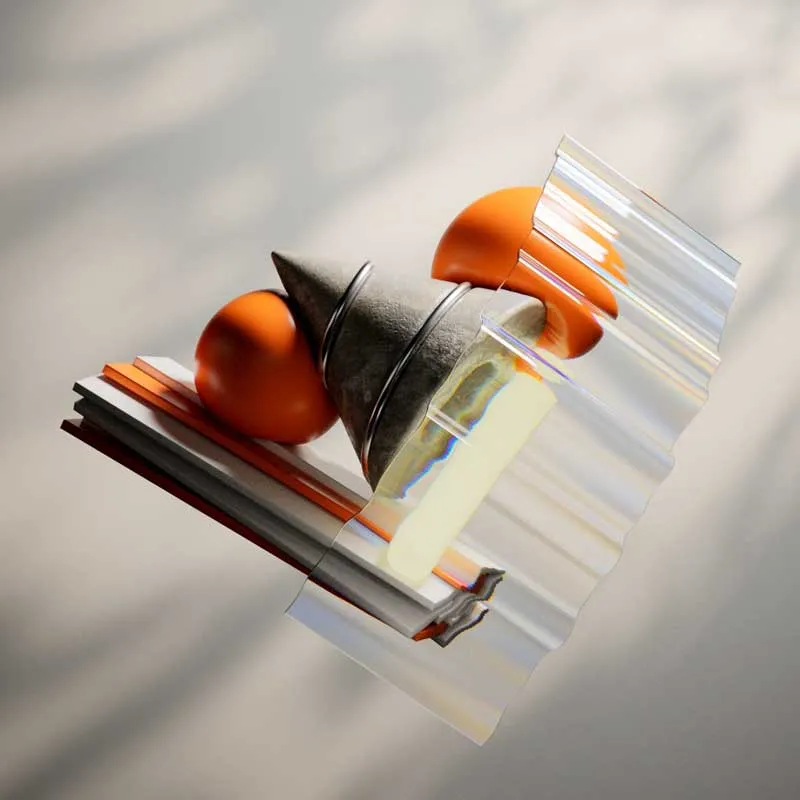
Now we can play around with our Roughness and Reflection until we have our material close to our intended look. What is the material you’re trying to mimic? Always helps to use references to try to match the actual texture you’re wanting to recreate!
Aside from your standard RS Material node, there are many other nodes you can use. To view all the nodes at your disposal, you’ll want to pull up your Node Panel by going to View > Node Panel. Alternatively, you can also use Shift+C to call up the Commander and type in whatever node you need.

Let’s create yet another material, again you can do this by going to your Materials panel and going to Create > Redshift > Materials.
Let’s name this one Glass. If you’ve never designed your own glass material, you’re in luck. Redshift comes with plenty of presets to get you started. Simply go to your Node Graph on the selected material and go to Presets > Glass.

These presets are great learning tools, since you can see all the settings needed to recreate the same material. Once you’re more comfortable with the Node Graph, you can experiment to create your own textures and materials.
Creating a Concrete Texture in Redshift
Now it’s time to add a concrete texture to our cone object so we can finish out our design.

Create a new material, open your Node Graph, and open the Node Panel. Now let’s select Texture and add that to our graph. You can also drag and drop from your Explorer.

Now these textures aren’t connected to anything, which means they won’t affect our material. We have to connect them. Click the circle underneath the texture and you’ll see a line attached to your cursor. Now click on the blue bucket in the material node.

Now assign this to the correct property. Any Color textures will get output into your Base Properties > Diffuse input channel.

Now our Displacement Map needs to be routed through a Displacement Node to work, so drag a RS Displacement node from your panel (or search in your Commander) and then attach the map to the node. Attach the displacement texture as a Texture Map, then attach the Displacement Node to the Output Node Displacement input.
We know these steps can seem confusing, but you are doing great so far. Trust us. This becomes second nature faster than you think.

Now for a final step. You’ll notice that your object isn’t showing any of the displacement in your render view. This is because we need to do one more step. In your Object Manager, right-click the object that has the displacement texture applied to it and add a Redshift Object Tag.

In Attributes, under Geometry, check the box marked Override Geometry. Make sure under Displacement to check Enabled. Finally, click on the material and under Tag Properties change Projection from UVW Mapping to Cubic.

Now it’s time to bring this image to life…which means we need to focus on lighting.
Lighting
To get started in lighting, go to the top menus and go to Redshift > Lights.

Let’s add a Dome Light. Click on Dome Light to add it to your scene

Now if you downloaded the files up above you’ll have an HDRI that we’re going to apply to this Dome Light to get our desired effect. We used HDRI Haven, but there are a ton of resources out there for you.
You can literally just drag the HDRI file over to the Texture box and voila!

With an HDRI, we can rotate the Dome Light to affect the reflections on our scene. Using the controls above, you can tweak your intensity, color, and saturation to create an entirely new final product.

Finally, let’s drop an Area Light in here as a Key Light to finish out the composition. Once you’ve added the light, you’ll see a representation in your Viewport showing the size and angle of the light.
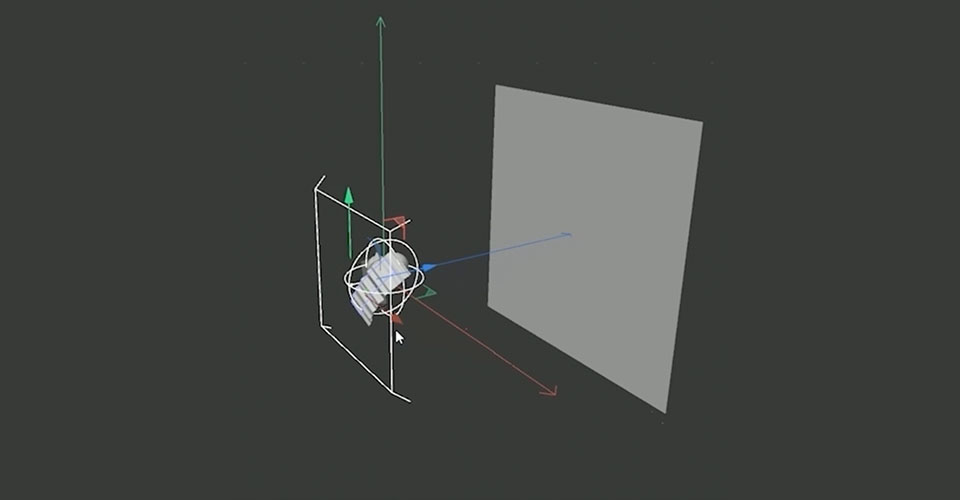
Again, we have full control over the size, shape, and values of our light. Area Lights are great for creating strong directional lighting, which can affect the entire mood of your composition.
We’re adding another Area Light onto our background to create a nice gradient effect. Play with the Intensity and Exposure settings until you achieve the look you’d like. Finally, we’ll add a Gobo so we can get some textured shadows in the background. Now how are we looking?

Oh…we’re looking nice. Now it’s time to render this scene.
Rendering
Pull up your render settings and make sure you are on Redshift.

Now we have two settings to choose from: Basic and Advanced.
In Basic, we’ll be able to select a Bucket Quality of Low, Medium, High, Very High, or Custom. We also have control over Progressive Passes. Obviously the more detail you want, the longer the render will take.
Double check that Global Illumination is checked on. If you turn it off, you’ll see how much light data you lose in the render window.
Under Output, you can change the final size of your composition, as well as a number of aspects and even your frame range.

Now have a look at the Advanced settings.

Under Unified Sampling, you can select Automatic Sampling to have Redshift perform a scan of your composition. It will apply the settings that it deems best for your final render. The Threshold tells Redshift how much noise to clean up in the image.
Finally, on the right side of the Render View, click the Gear icon.

This shows you a list of Post Effects you can use. We really like the Photographic Filter, but you can play around to see what look fits your work the best.
You also have access to any LUTs you want to add. We’ve been using Portra_100, but these are great ways of adding a new dynamic tone to your render.
Now, in your Render Viewer, go to File > Save Image As, and select your final destination.

With Redshift being owned by Maxon, I think we’ll be seeing it gradually become more integrated inside of Cinema 4D—making it even more important to learn.
Thank you so much for sticking around! We know this is a tricky subject, but learning these renderers will make you a stronger artist in the long run. And if you want to really flex those 3D muscles, check out Cinema 4D Ascent!
In Cinema 4D Ascent, you'll learn to master marketable 3D concepts in Cinema 4D from Maxon Certified Trainer, EJ Hassenfratz. Over the course of 12 weeks, this class will teach you the fundamental 3D concepts you need to know to create beautiful renders and tackle any task a studio or client might throw at you.
Take Your Skills Further with Lights, Camera, Render
Check out Lights, Camera, Render, available with School of Motion All-Access.
Start Your 3D Journey in Cinema 4D
Master the essentials of 3D modeling, lighting, and animation in C4D. Enroll in All-Access to unlock C4D Basecamp and 50+ other courses.