All-Access Pass
Unlimited access to 50+ courses, unlimited critique, live events, and 24/7 community. Join School of Motion All-Access today.

Here's a few awesome ways to use Joysticks 'n Sliders in After Effects.
Joysticks n’ Sliders is well-known for taking pain-staking tasks out of character animation. In addition however, it has some pretty powerful features that makes other tasks easier. This is not a step by step tutorial on how to use it, but f you want to learn more about Joysticks 'n Sliders basics, head over to the JnS landing page on aescripts + aeplugins.
Here are 3 ways you can take advantage of this script:
1. Animating Graphs in After Effects
We all make graphs at some point...maybe TOO often...in our work. Whenever you create and animate something, having as much flexibility as possible is smart. Using sliders, we can quickly rig graphs that can easily be adjusted and animated on the fly.
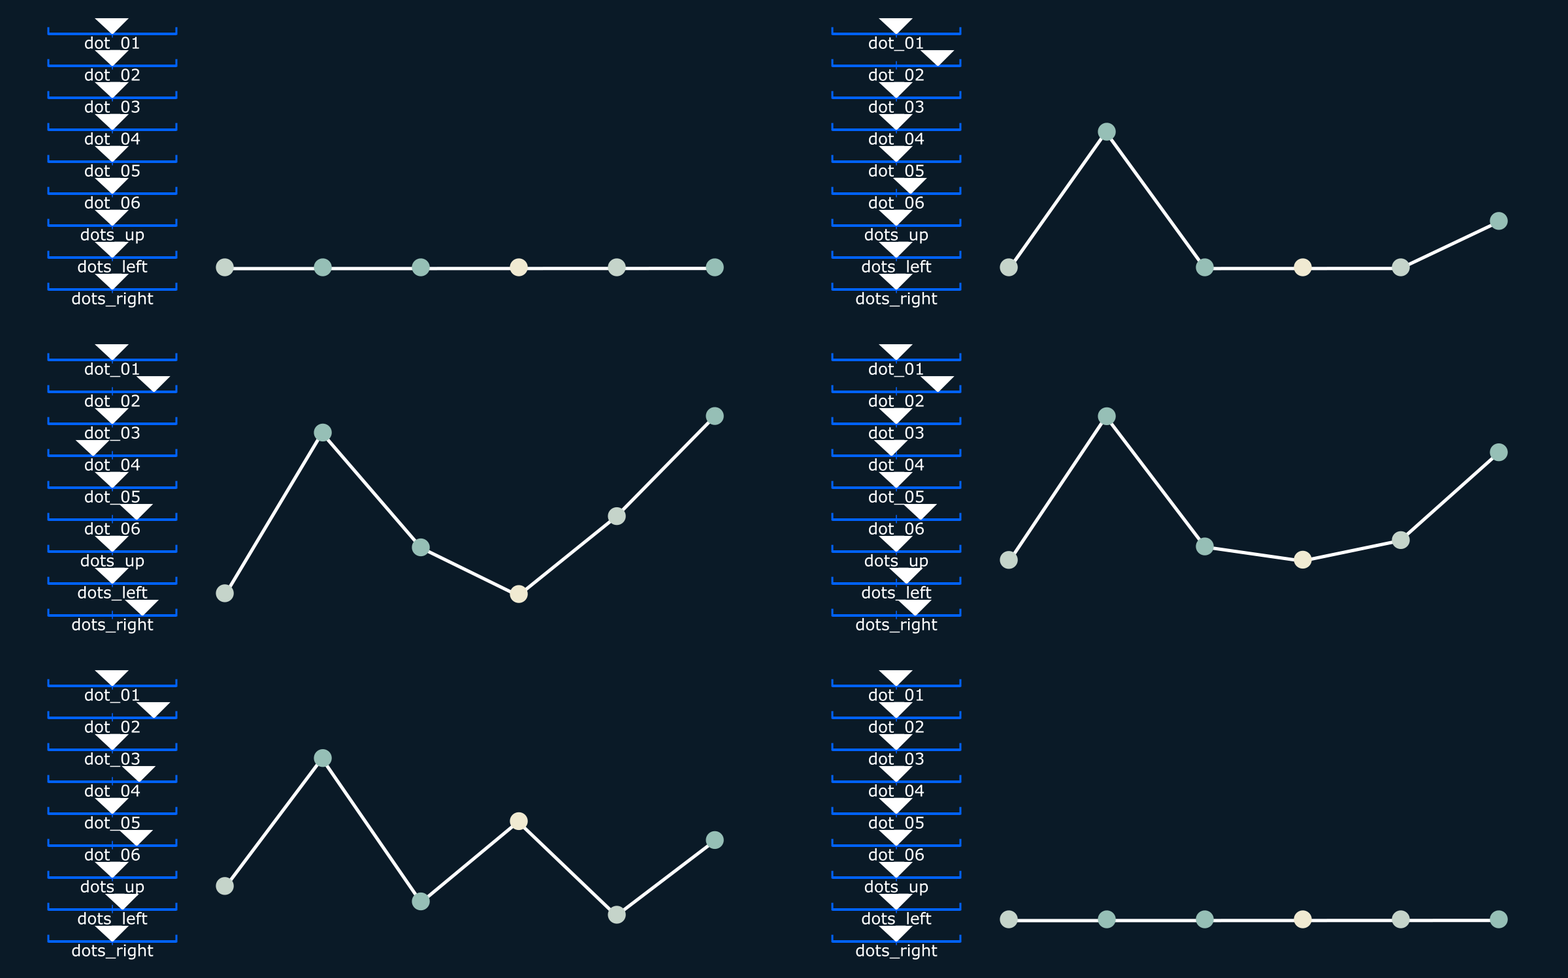
Here, I built two different types of graphs.
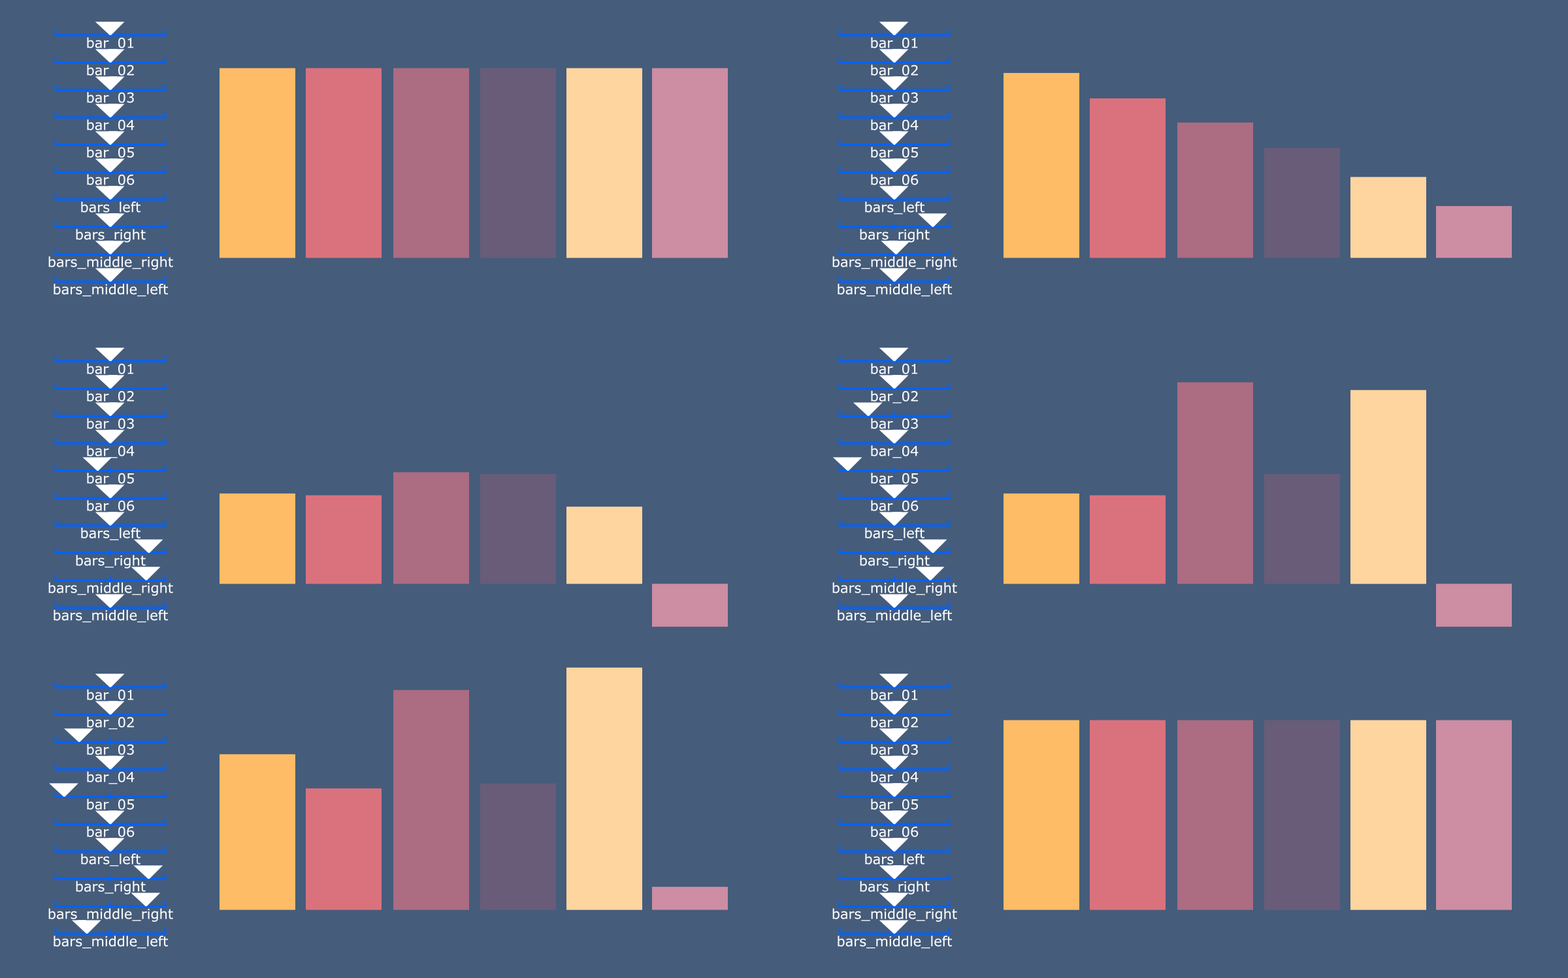
For the first graph, you can create one shape layer, and create six rectangles in that shape layer, with the anchor point at the bottom of each rectangle. Then, keyframe the “y” scale at 100% on frame 1 for every rectangle. Now on frame 2, scale the first rectangle to 0. Frame 3, scale the second rectangle to 0, frame 4, the third rectangle to 0, and so on. Just look at the GIF below too see what i'm talking about.

I also added a few other scales on frames 8-11. This just gives the freedom to make interesting animations if wanted to when it comes to it.
Remember, every frame creates a new slider. So you can change any property on that one frame, and a slider will be created to control those values.
For the second graph, I did the same thing, except used circles instead of squares. Also, I used an expression from Mt. Mographs script called Motion 2. It has a feature that connects a line between two shapes in order to connect all the circles with lines. A poor man's "plexus" if you will. Don’t have motion 2? No problem. This can easily be solved by adding a line with six points on the path. Keyframe each point on the path to follow the respected circle, so when you adjust a slider, the path will follow so it seems like the lines are connected to the circles. Take a look at the GIF below.

2. Repeating Movements in After Effects
What i mean by this, is if you want multiple shapes or paths to react together, you can create a slider to animate all of it at the same time. This gives you a lot of power come animation time.
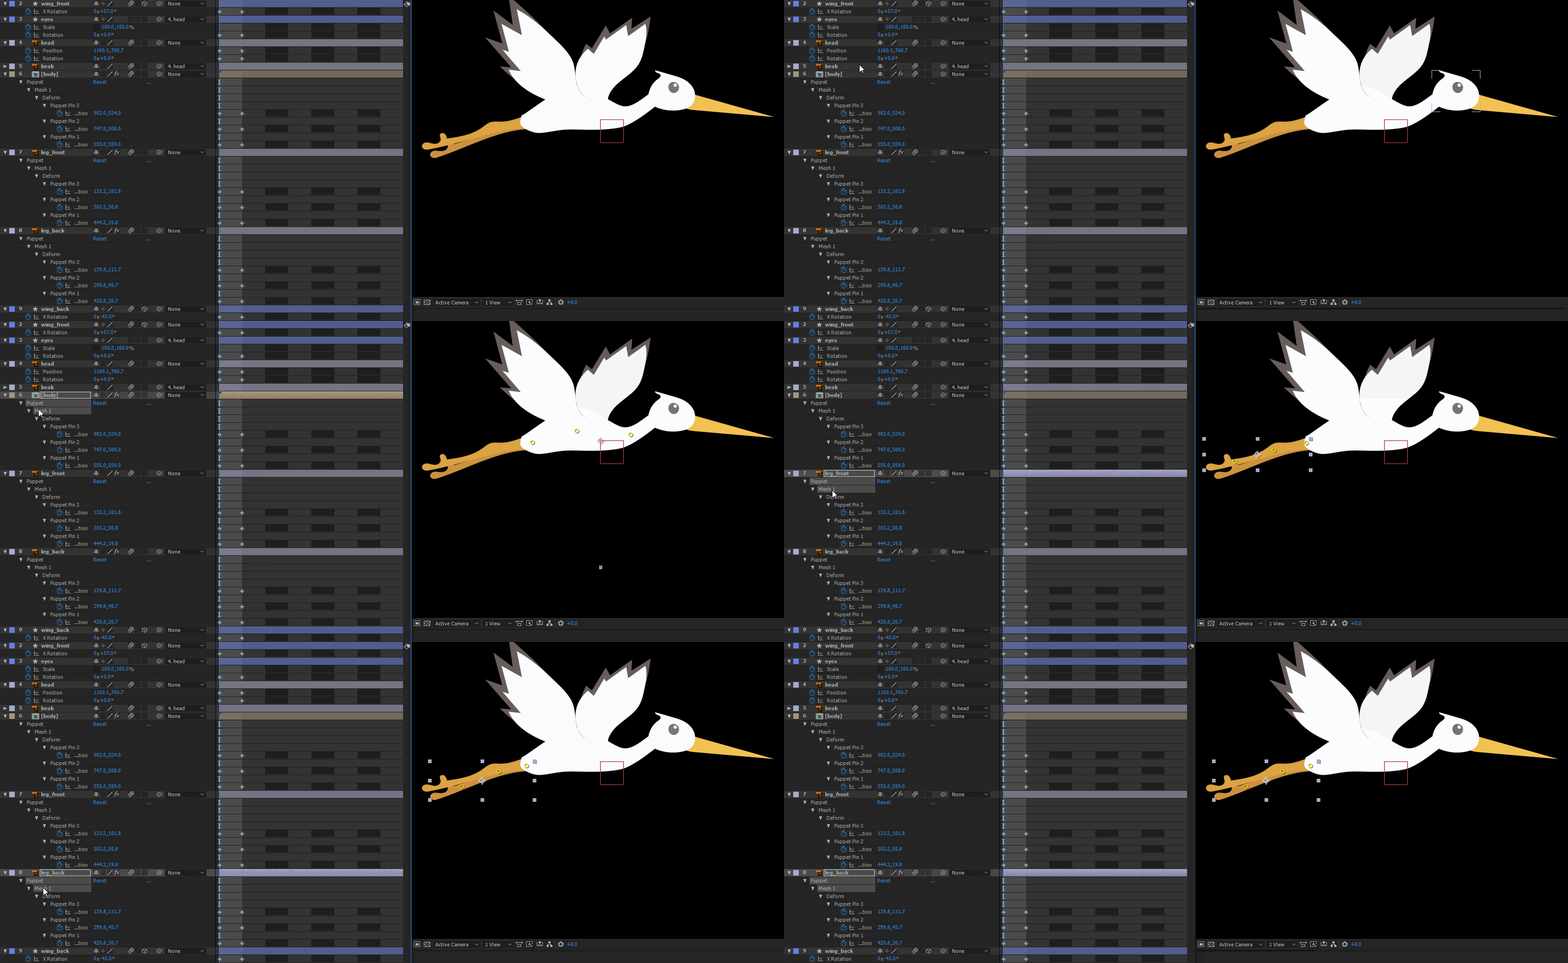
Here, I created a bird. When a bird flaps its wings, other subtle movements happen to really sell the animation. It's body curves up and down, it's neck bends, head rotates, leg's bend, etc.
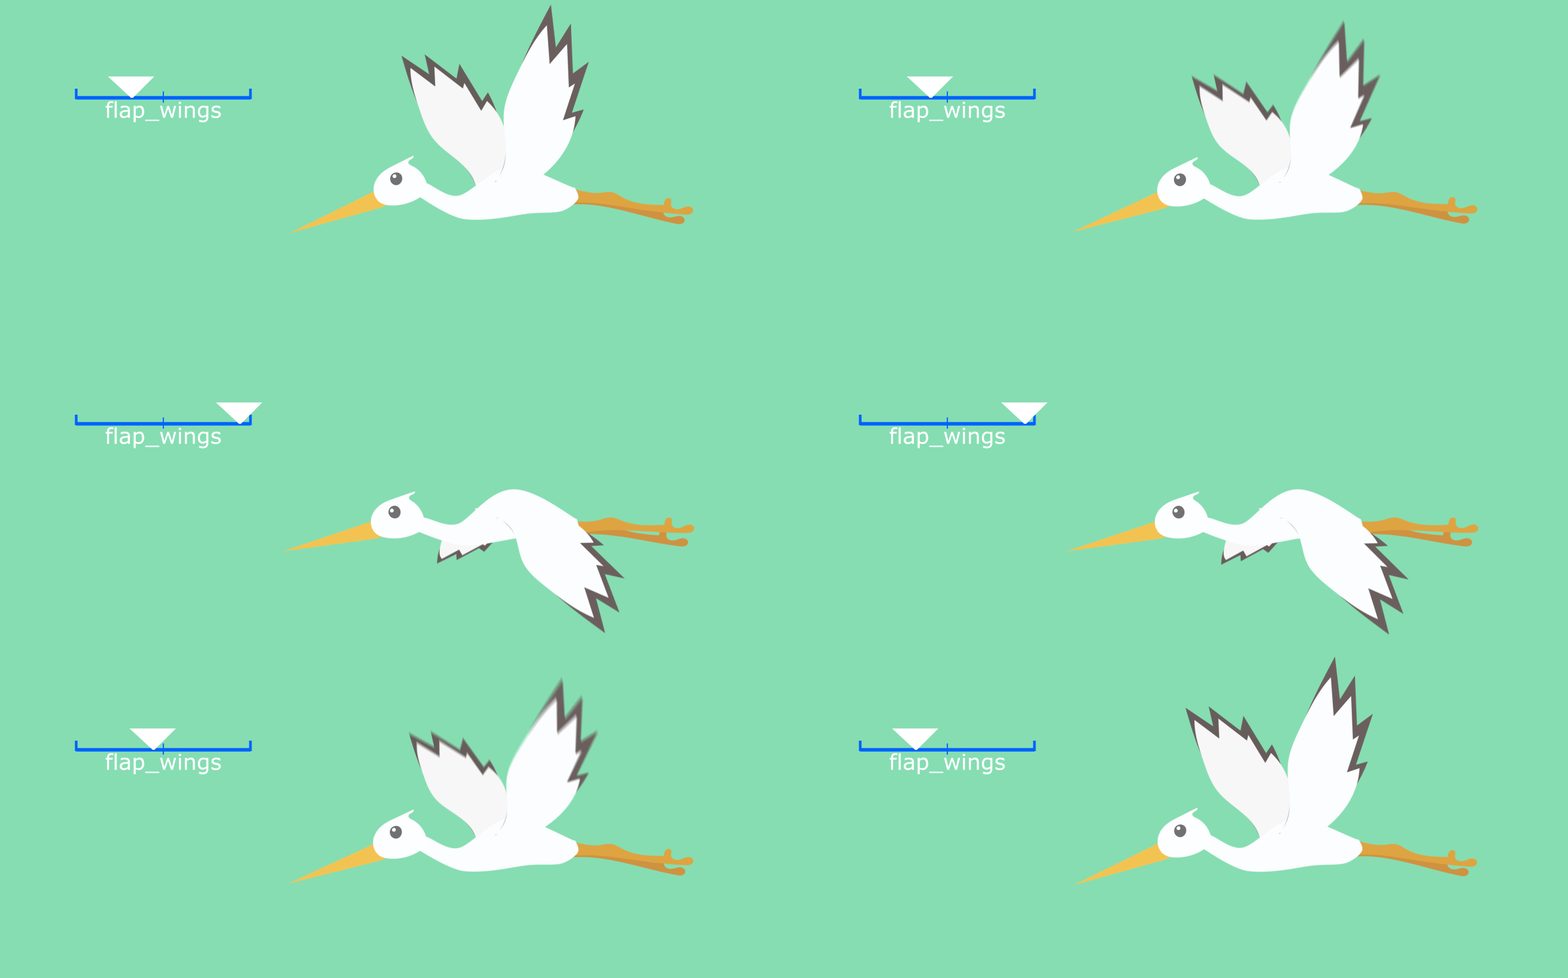
In order to achieve this, you would need to animate every puppet pin exactly as you want it, over and over. As you can see with the GIF below, you can use the puppet tool to create bends in the shapes, as well as rotate the wings in 3D, and add other subtle movements. So on frame 1, keyframe all the values that will be animated, and create a pose when the wings are "up." The next frame, create a pose when the wings are "down." Then, select all the animated layers and create a slider!
3. Faking 3D Object in After Effects
Taking your animations from great to amazing are usually subtle movements. With Joysticks 'N Sliders you can create a rotational dimension to your movements and control it with one joystick.
You should know how Joysticks 'N Sliders works by now. Here are two examples of adding extra animation to your objects to take them over the edge.
This first example I created a cell phone, and set up a joystick to give the illusion of the phone being rotated, as well as adding parallax to the screen.

This second example is from and actual client. I was animating the logo and wanted to give it some extra dimension. So I created a joystick to rotate the logo.

This is just the tip of the iceberg. This is the bottom line: When you have a way to group any number or shapes, properties, and paths together and put into a slider or joystick control, possibilities are endless.
We also talked about using Joysticks 'n Sliders in our Quickly Create a Character in After Effects article. Go check it out if you do a lot of Character Animation work.
ENROLL NOW!
Acidbite ➔
50% off everything

ActionVFX ➔
30% off all plans and credit packs - starts 11/26

Adobe ➔
50% off all apps and plans through 11/29

aescripts ➔
25% off everything through 12/6
Affinity ➔
50% off all products

Battleaxe ➔
30% off from 11/29-12/7
Boom Library ➔
30% off Boom One, their 48,000+ file audio library
BorisFX ➔
25% off everything, 11/25-12/1

Cavalry ➔
33% off pro subscriptions (11/29 - 12/4)

FXFactory ➔
25% off with code BLACKFRIDAY until 12/3

Goodboyninja ➔
20% off everything

Happy Editing ➔
50% off with code BLACKFRIDAY

Huion ➔
Up to 50% off affordable, high-quality pen display tablets

Insydium ➔
50% off through 12/4
JangaFX ➔
30% off an indie annual license
Kitbash 3D ➔
$200 off Cargo Pro, their entire library
Knights of the Editing Table ➔
Up to 20% off Premiere Pro Extensions
Maxon ➔
25% off Maxon One, ZBrush, & Redshift - Annual Subscriptions (11/29 - 12/8)
Mode Designs ➔
Deals on premium keyboards and accessories
Motion Array ➔
10% off the Everything plan
Motion Hatch ➔
Perfect Your Pricing Toolkit - 50% off (11/29 - 12/2)

MotionVFX ➔
30% off Design/CineStudio, and PPro Resolve packs with code: BW30

Rocket Lasso ➔
50% off all plug-ins (11/29 - 12/2)

Rokoko ➔
45% off the indie creator bundle with code: RKK_SchoolOfMotion (revenue must be under $100K a year)

Shapefest ➔
80% off a Shapefest Pro annual subscription for life (11/29 - 12/2)

The Pixel Lab ➔
30% off everything
Toolfarm ➔
Various plugins and tools on sale

True Grit Texture ➔
50-70% off (starts Wednesday, runs for about a week)

Vincent Schwenk ➔
50% discount with code RENDERSALE

Wacom ➔
Up to $120 off new tablets + deals on refurbished items


All-Access Pass

Unlimited access to 50+ courses, unlimited critique, live events, and 24/7 community. Join School of Motion All-Access today.


