
Create Stunning 3D Textures
Master Substance Painter for photorealistic and stylized 3D textures. Enroll in All-Access to unlock Substance Painter for Motion Designers and 50+ other courses.
Substance Painter is a powerful tool to add to your belt, but most motion designers haven't even tried it out. We're here to show you how to get started
Improving your renders means adding detail and life to your assets, but the built-in tools of today's leading software might not be enough, or might be too cumbersome to manage. That's why it's time for us to have the talk: Have you considered...Substance Painter?
Substance Painter is a powerful addition to your C4D workflow. With the ability to quickly and easily author your own highly-detailed materials, and the ability to edit them while inside of C4D, SP opens up your 3D material workflow in a big way.
In this tutorial, I'll show you:
- What is Substance Painter?
- How to prepare a model in C4D
- How to bake the model in Substance Painter
- How to use masks and generators
- How to export back to C4D
- How to build Shaders in C4D
Before we begin, don't forget to grab my project files so you can follow along
{{lead-magnet}}
A Quick Guide to Getting Started in Substance Painter
What is Substance Painter?
Think of Substance Painter as a Photoshop for 3D models. You can paint your models by hand and combine them with procedural tools for edge wear.
A common issue I find with different render engines is that they all have different methods for achieving similar results. Substance Painter acts as a universal material editor that allows you to create effects that will look identical across render engines. So if you have a really awesome material in Octane, you can easily convert it for standard render, Redshift, or even Unreal Engine.

It’s an extremely versatile tool that automatically takes care of the technical parts of converting your textures to different pieces of software, allowing you to to focus on you do best, and that is being creative.
It does require your models to be UV unwrapped. If you are unfamiliar with UV unwrapping, check out this tutorial from EJ on how to use the newest UV tools in S22. But to make things easier, we’ve provided a 3D model already UV unwrapped so you can follow along!
Let's hop into Cinema4D so we can prepare the model!
How to Prepare a Model in C4D
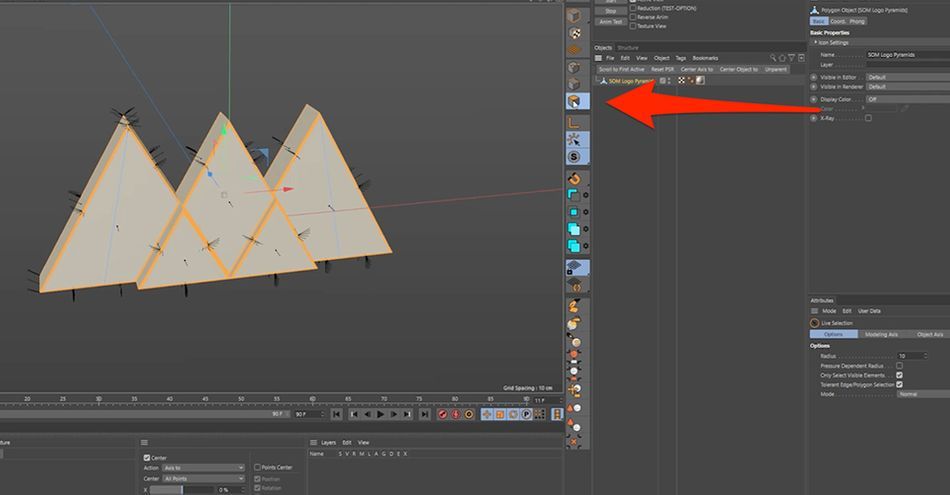
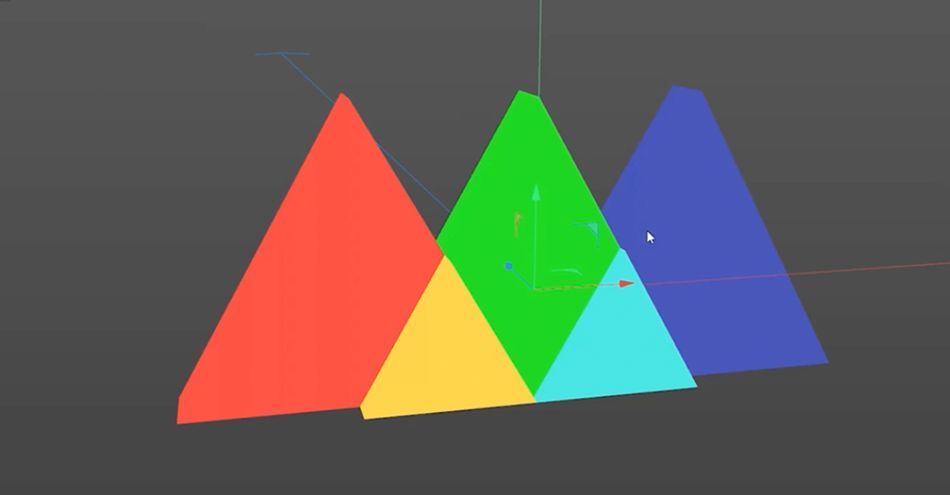
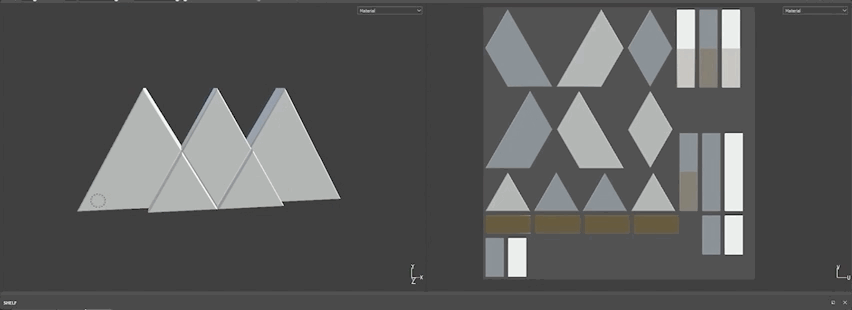
First we're going to make a new material for this object, the SOM Pyramids.
By using just one material, it saves a ton of time once we get over to Substance. Trust me on this.
Select your object and go here to Polygons.
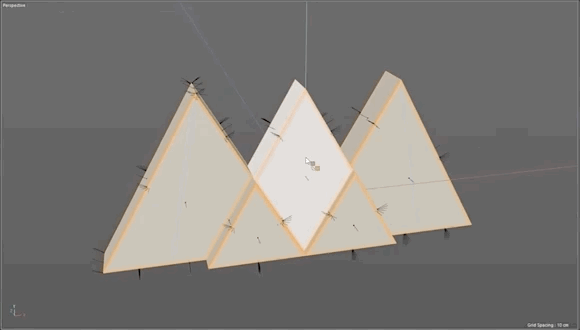
Using U+F, you switch over to your Fill Selection Tool. Now I can choose each pyramid individually.
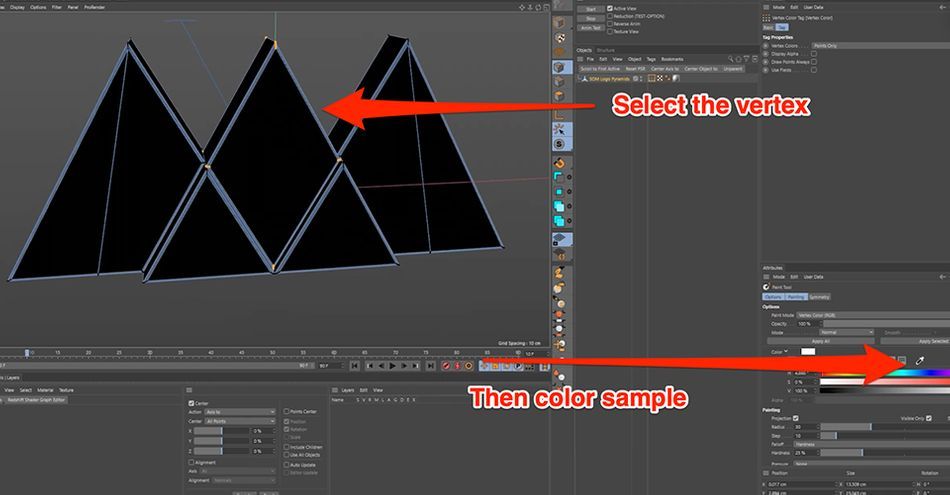
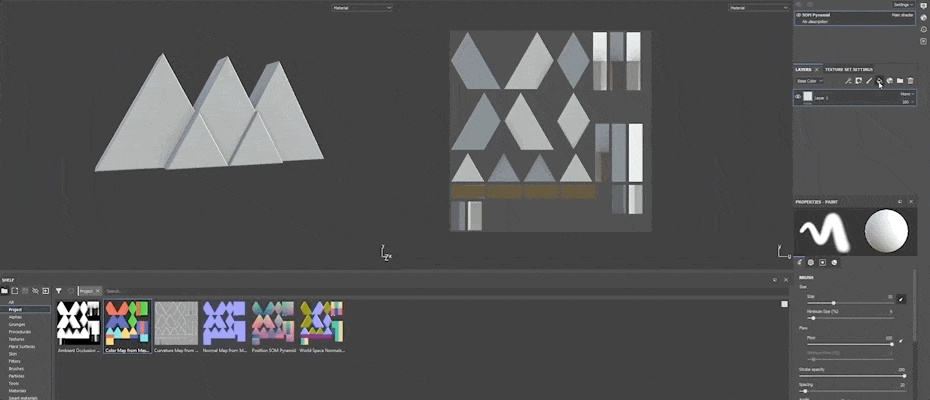
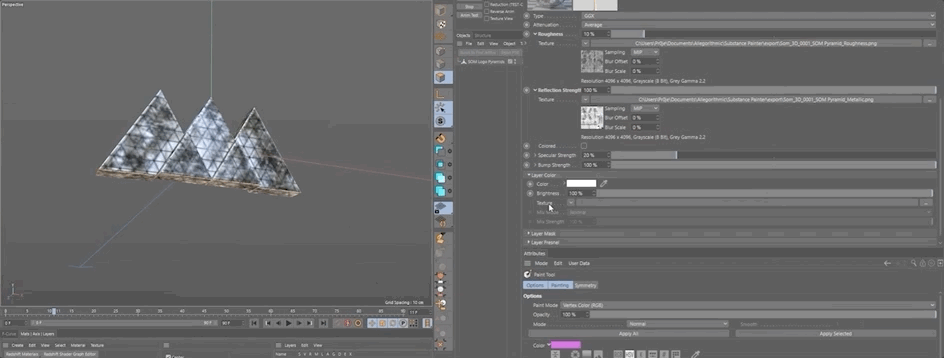
I select one and hold down Shift and switch over to the points, and now I can drop in a vertex color. Hit Shift+C to bring up your Commander, then type in "Vertex."
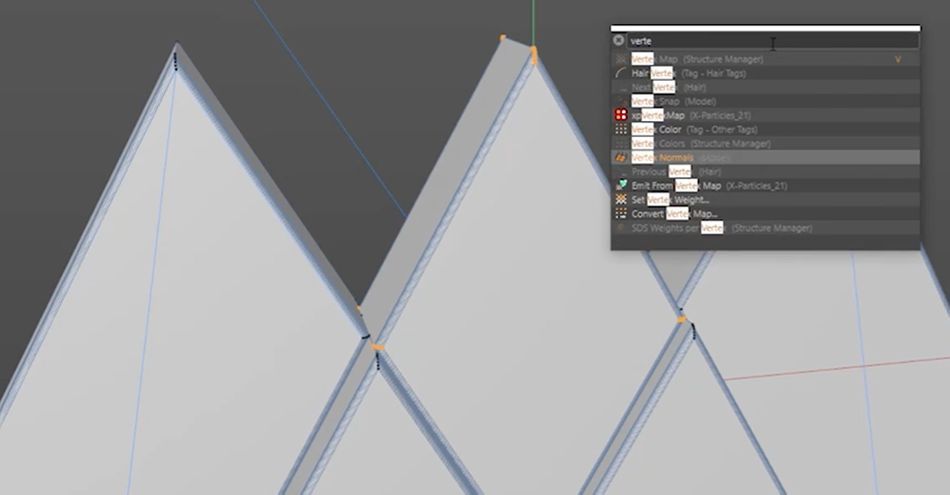
Now you should see your object completely in black.

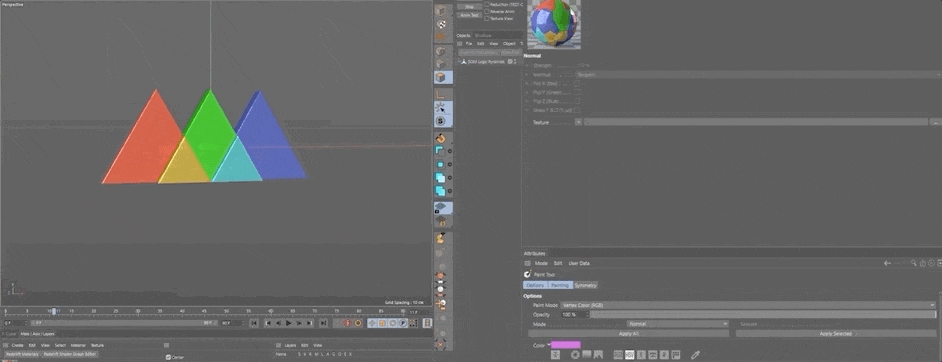
Now I'm going to color pick the School of Motion Logo (in the program files up above) so I can make sure my color scheme is correct. Simply select your pyramid and sample the color, then hit Apply Selected.
Now that I have the pyramids colored correctly, it's time to take things over to Substance.
How to Bake the model in Substance Painter
Make sure UV tag is on the model. This contains all of our UV information. Then go to File > Export > FBX. In the export window, make sure the Vertex Colors box is selected
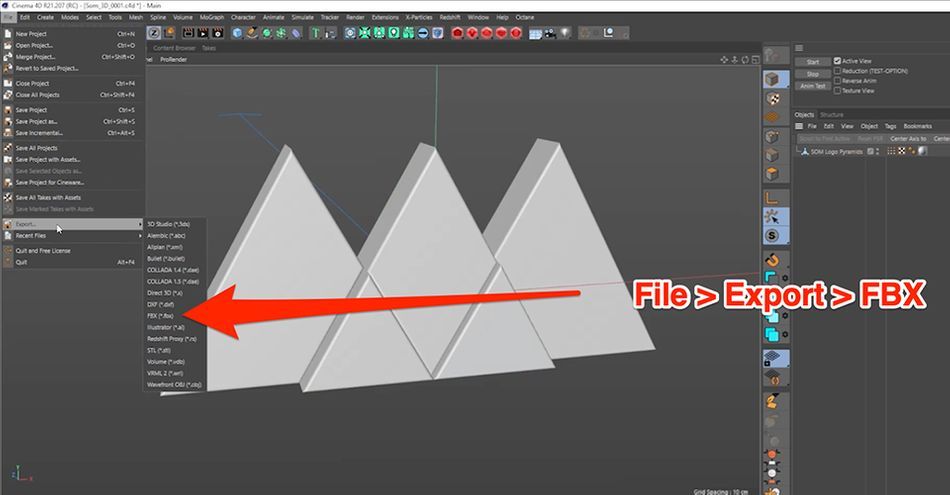
Hit OK, select where you would like to save the file, and you're ready to go.
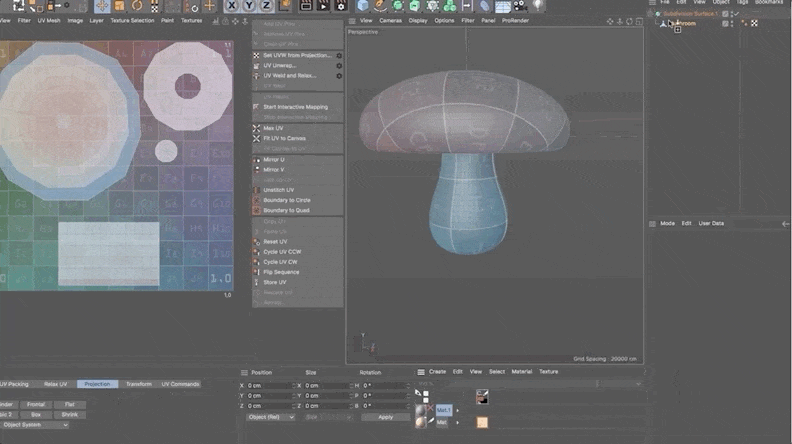
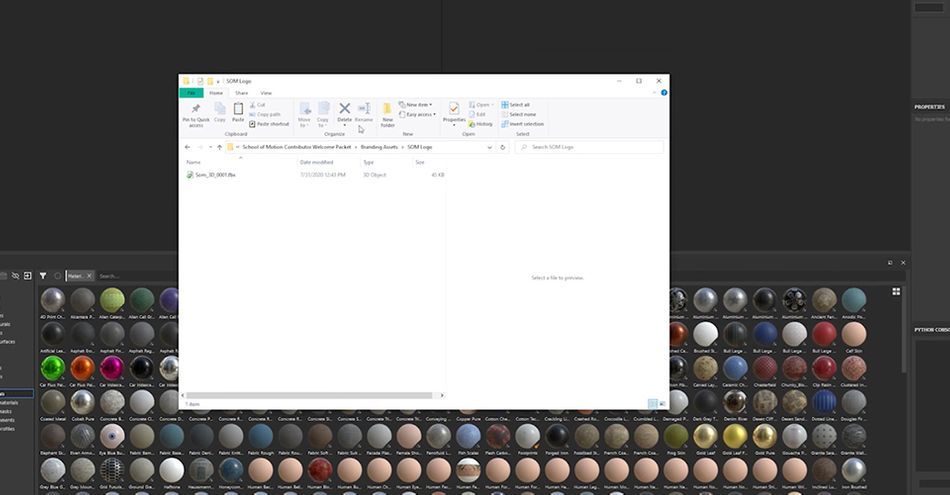
Inside Substance Painter, open the FBX file.
Drag in the file, and make sure Auto-Unwrap is deactivated and your Template is set to Metallic Roughness before clicking OK. You can see our model and UV map appear.
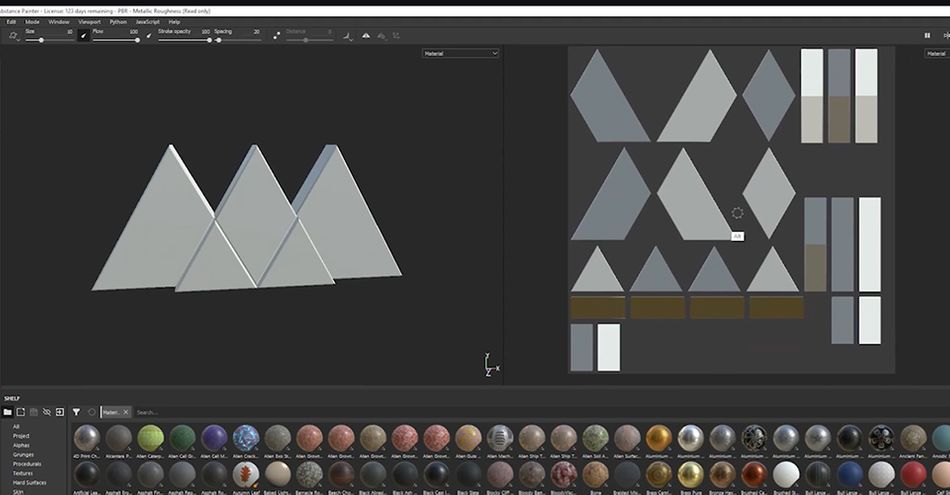
You can test that things are functioning correctly by drawing on the model. You'll see that the markings are reflected on the UV map.
Before we can really start devouring this program, we need to bake the model.
First, we need to go into Texture Set Settings.
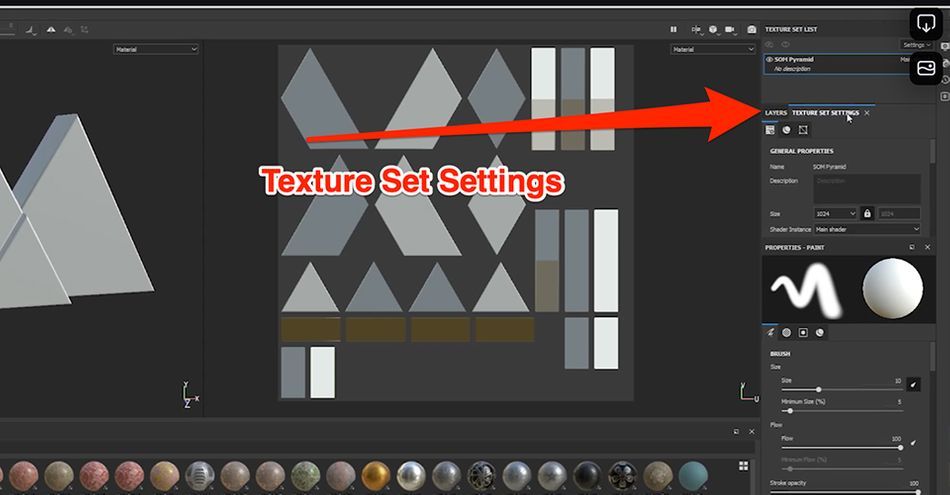
Scroll down until you see Bake Mesh Maps. When you click, you'll open a small window. This is usually where people will bring in their hi-poly mesh, such as a Zbrush model, and then bake it down. We're not doing that today.
Go to ID, then change the color to Vertex Color.

I'll also go to Common and bring up the resolution, in this case to 2K. Then hit Bake Selected Textures.
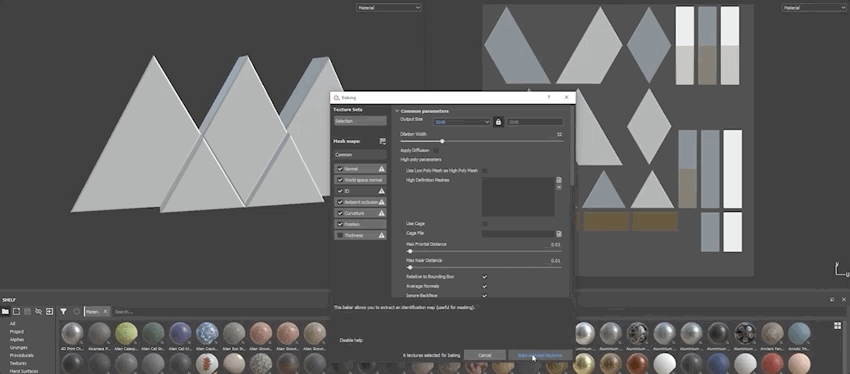
Baking essentially creates extra maps that tell the software how to to treat edges, ambient occlusion, normals. Think of them as Utility passes. These will be helpful when we get to Generators.
How to Use Masks and Generators in Substance Painter
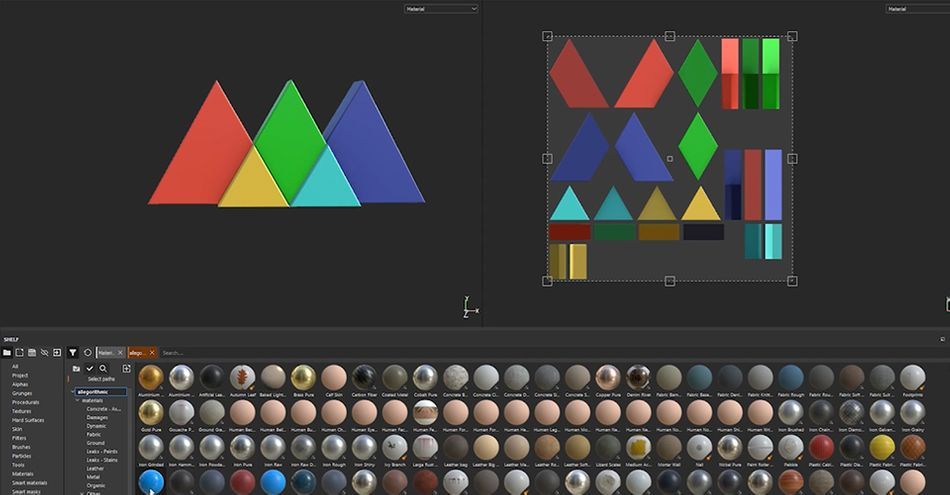
If we look in the Project tab of our textures, we'll see the UV map we colored in C4D came over as well.
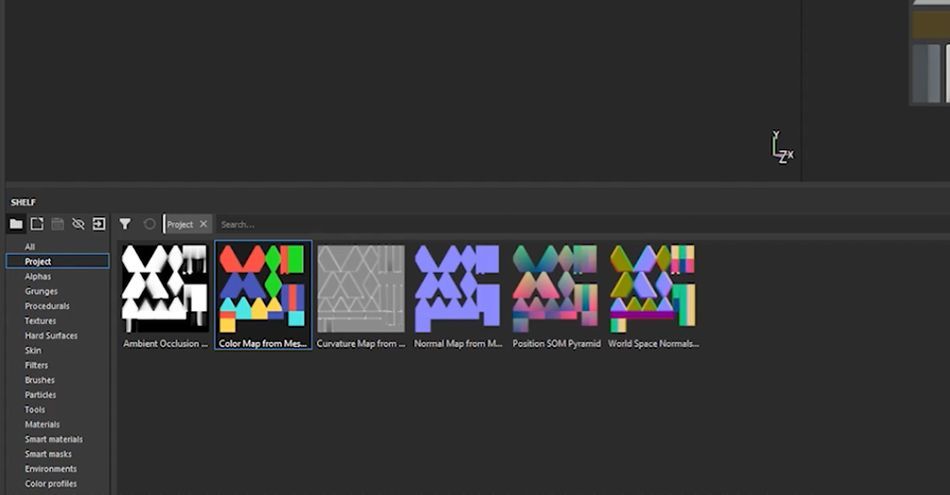
And if I drag those colors into the Fill option...
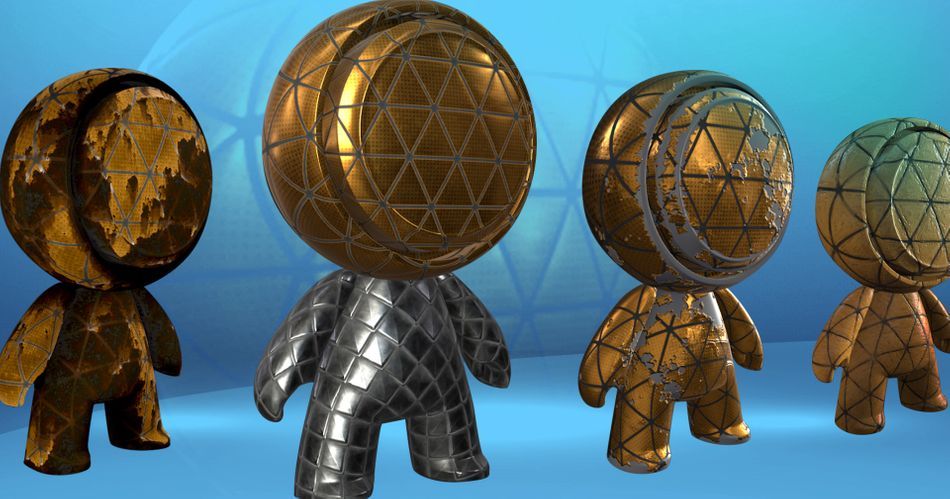
Now we'll explore the Shelf and find some Materials. I'm actually going to use two and show you how to mix them together. For this logo, I want a plastic base with a metallic surface.
When I drop the plastic layer onto my object, you'll notice that it overrides the color. Since I don't want that, I just need to deselect the color from that layer. Now Substance will use the colors from the Fill layer that we made in C4D.
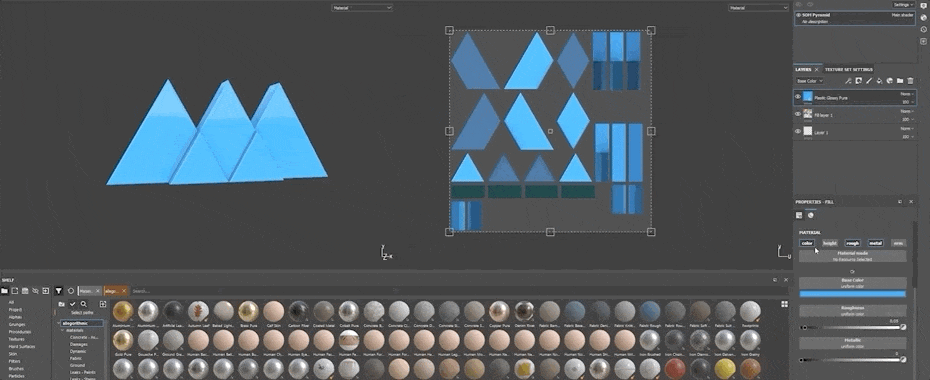
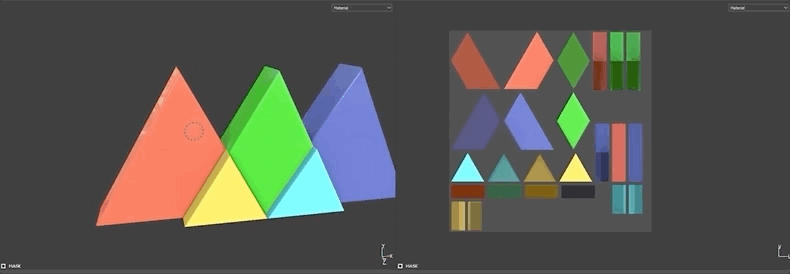
The object retains the properties of the material, but with my color scheme. Now I'll do the same with some Aluminum...
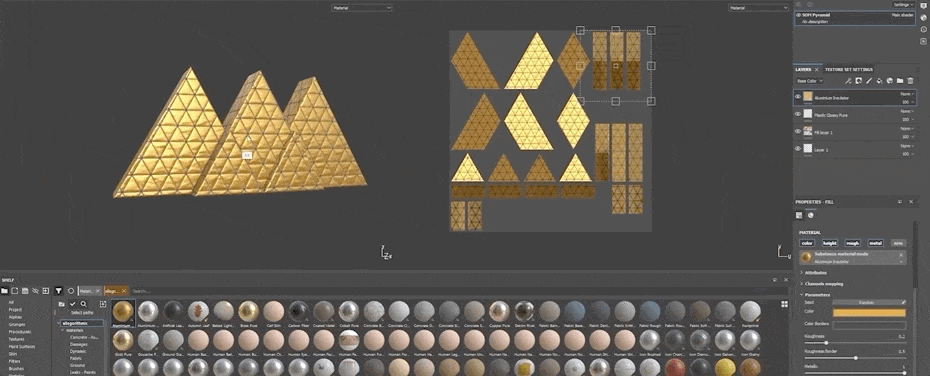
This looks good, and this texture gives the object a bit more personality. Now I want to isolate these metallic bits to the edges. A uniform look isn't realistic. So we're going to create a Black Mask. Simply to to Masks and select Add Black Mask.
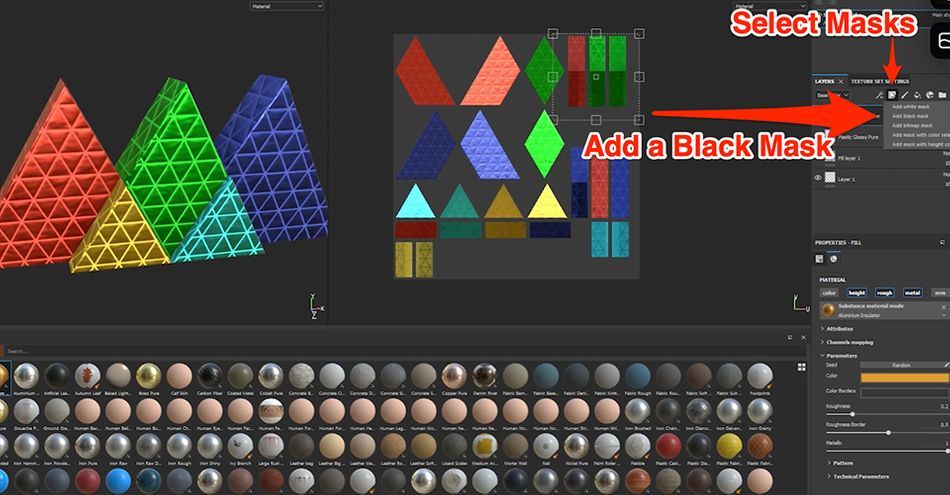
The mask hides the physical characteristics of the layer, and you can paint it away just as you would in Photoshop.
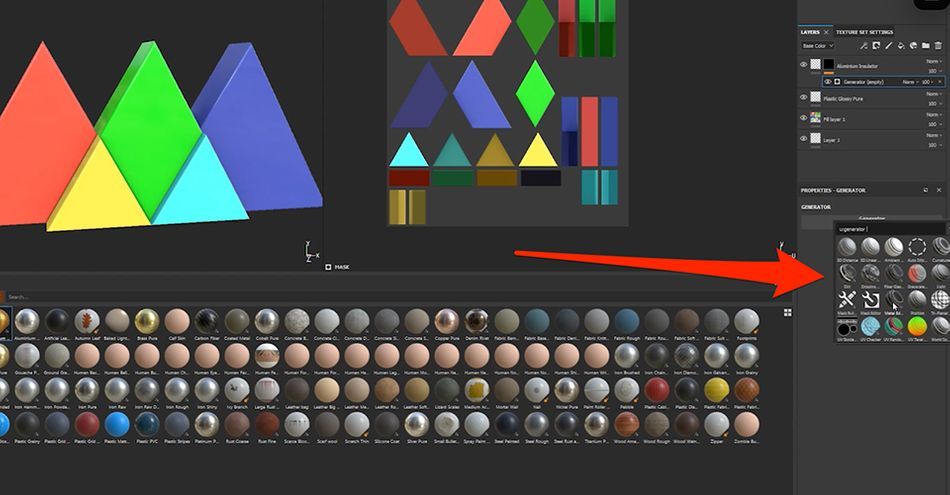
With the mask selected, click the Wand icon and select Add Generator.
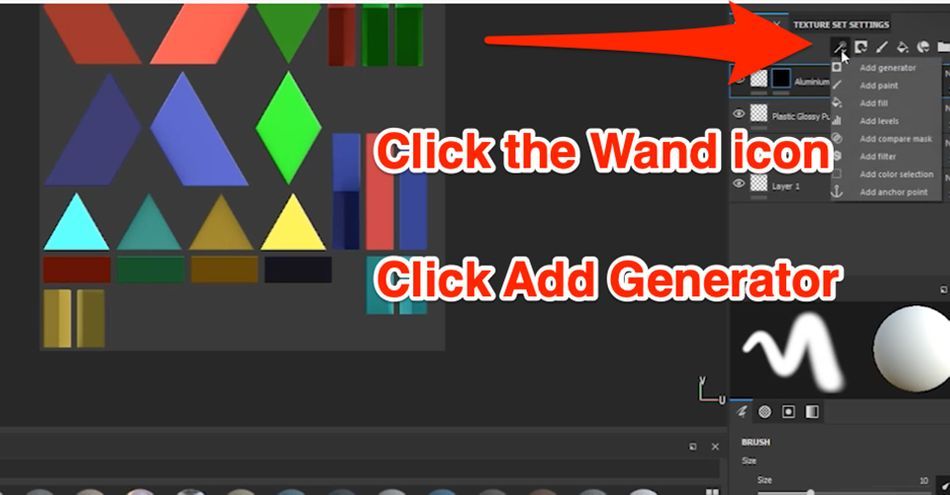
This will give you a set of Generators. I'm going to select one called Metal Edge Wear...
And you can see how the edges of my object show the underlying aluminum material.

These generators are why Baking is absolutely required. These depend on the information created by those utility maps. Without them, the results would not look as clean and impressive.
Now you can tweak the object to your heart's content. Once you're done, it's time to head back into C4D.
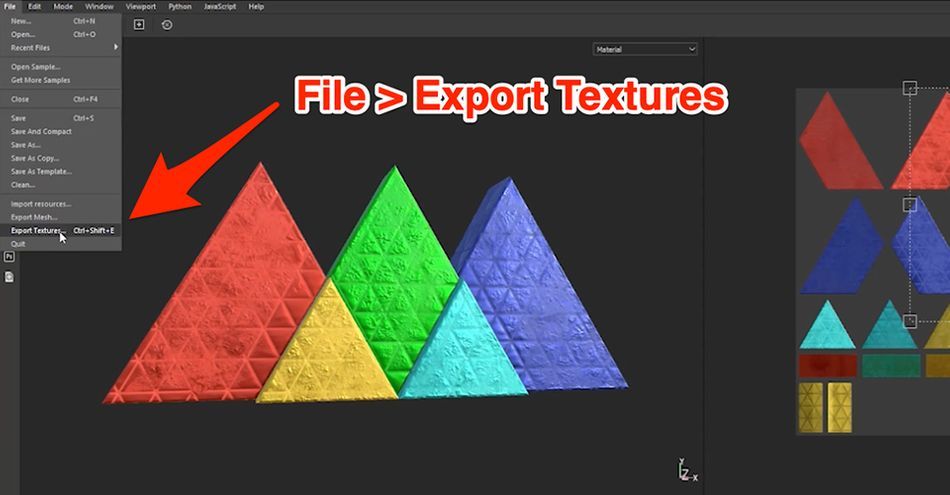
How to Export Back to C4D
Time to bring this model over to C4D. Go to File and Export Textures.
You can actually see all of the textures files you'll be bringing over. We may not need all of them, but it won't hurt anything to leave them there. Select your file destination, set Texture to Metallic Roughness (which works best for C4D), and hit Export.
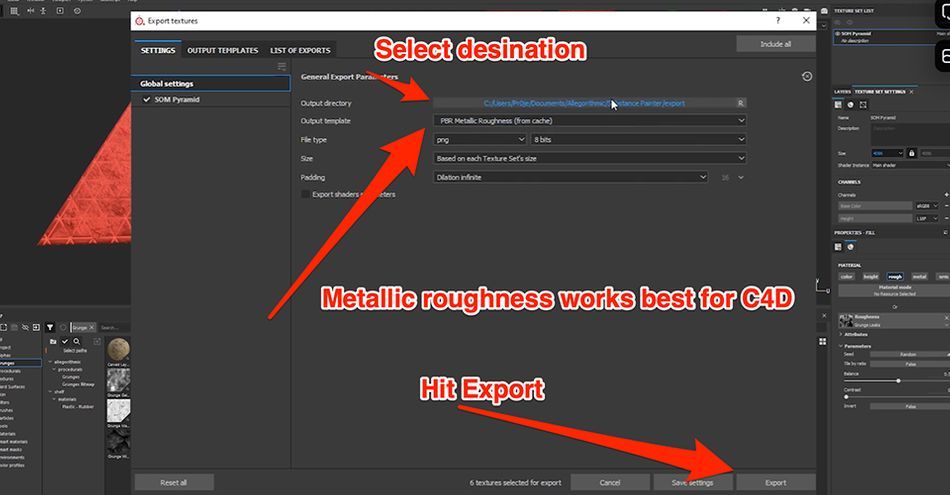
Keep in mind that Redshift and Octane can both use the Redshift preset. The default preset works for Standard C4D materials. Finally, let's take a look at building a shader in Cinema 4D.
How to Build Shaders in C4D
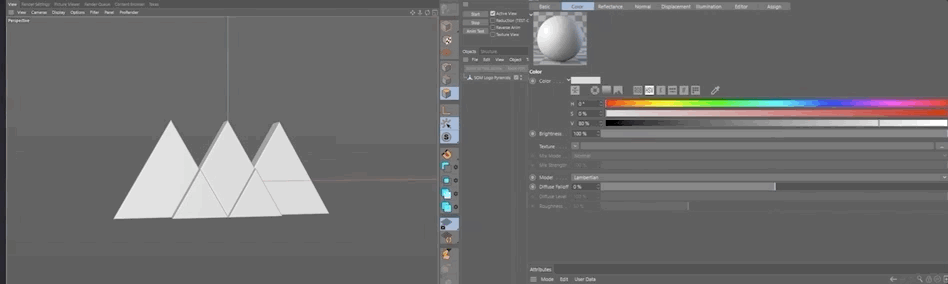
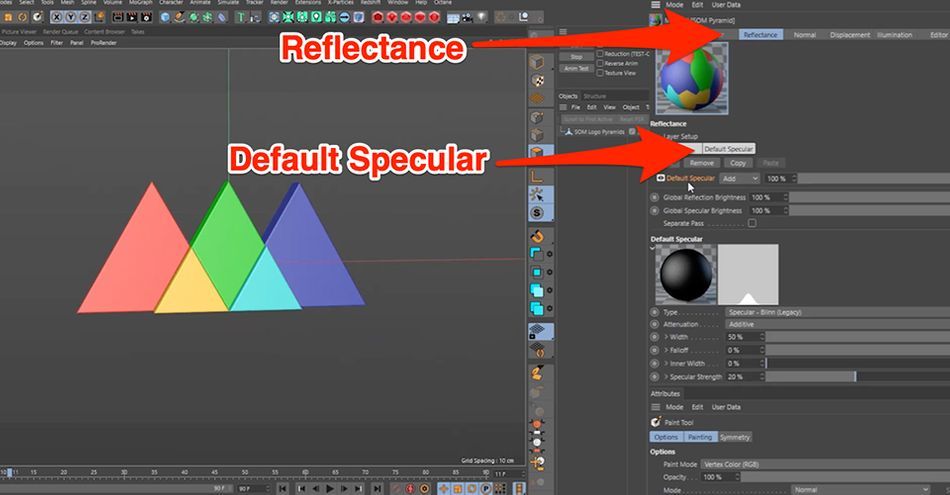
Back in C4D, I'll select the material we created all the way back at in the beginning. Then, in the Basic menu, you can see our options for creating shaders. We can actually do all of this work in Reflectance, but I'll show you Color today.
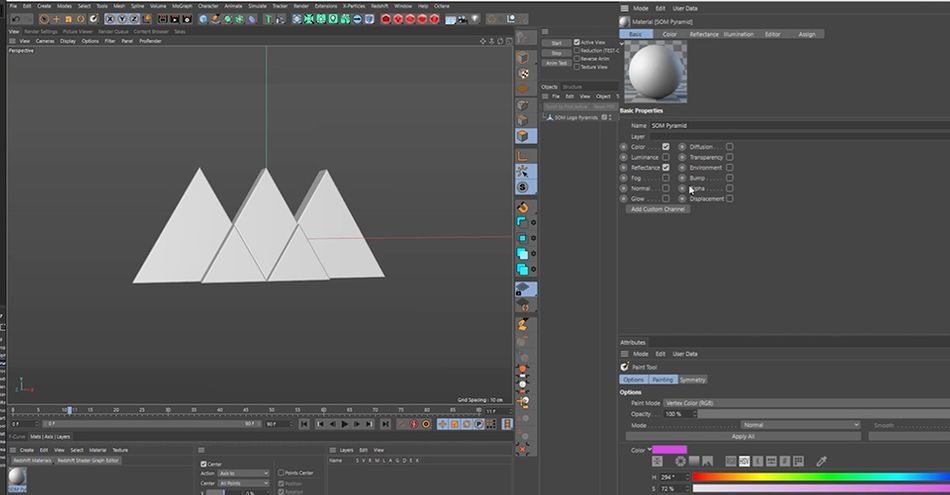
Activate Normal (we'll need that for our Bump Map) and Displacement. Under Color, under Texture, we're going to drag and drop in the one that says "Base Color."
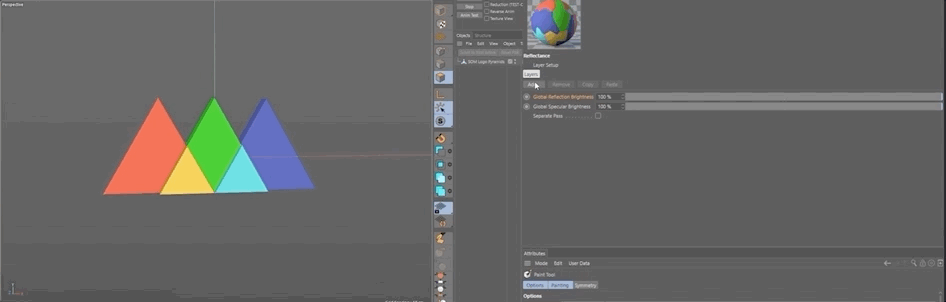
You can see we have all our colors from before. Now go to Reflectance and remove Default Specular.
Add new layer, and select GGX. Nice and shiny.
Now we scroll down to Roughness, twirl open to Textures, and drag in our Roughness Map.
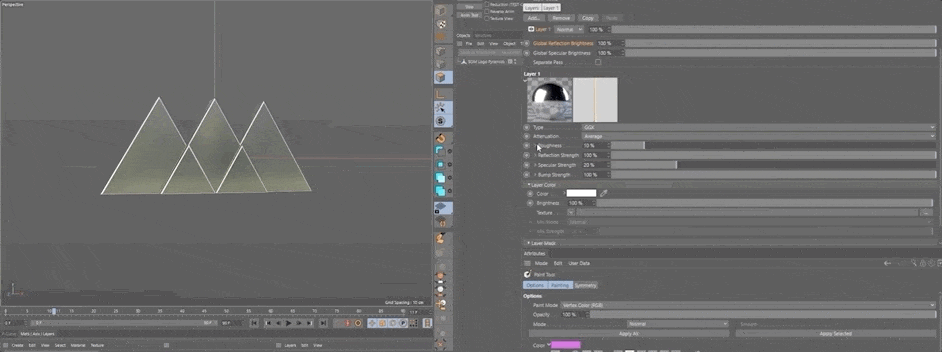
Under Reflection Strength, we can add our Metallic layer.
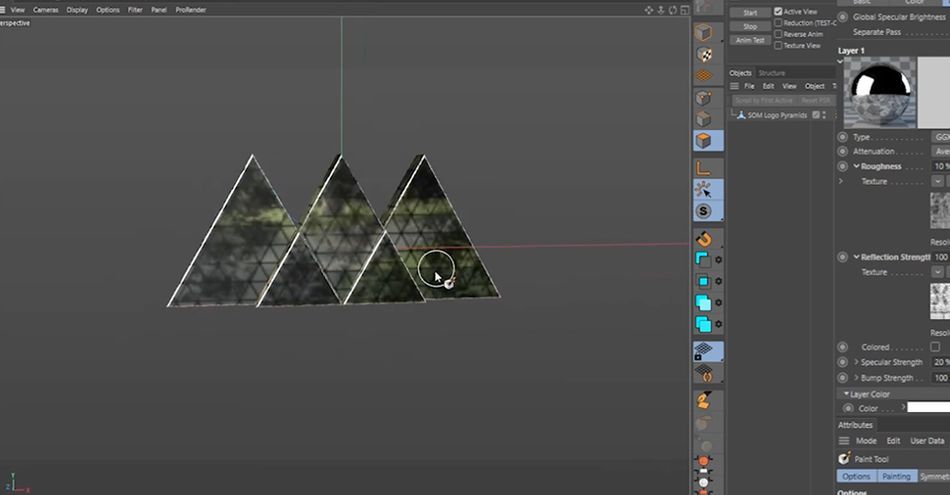
Now this is looking more interesting. However, if we render now, we'll only get what is on our screen, which is just a reflection with some rough spots. Go Layer Color and drop the Base Color inside our Texture, and...
Next, go to the Normal tab and drop in our Normal map.
And last, we go to Displacement and add some height to our textures.
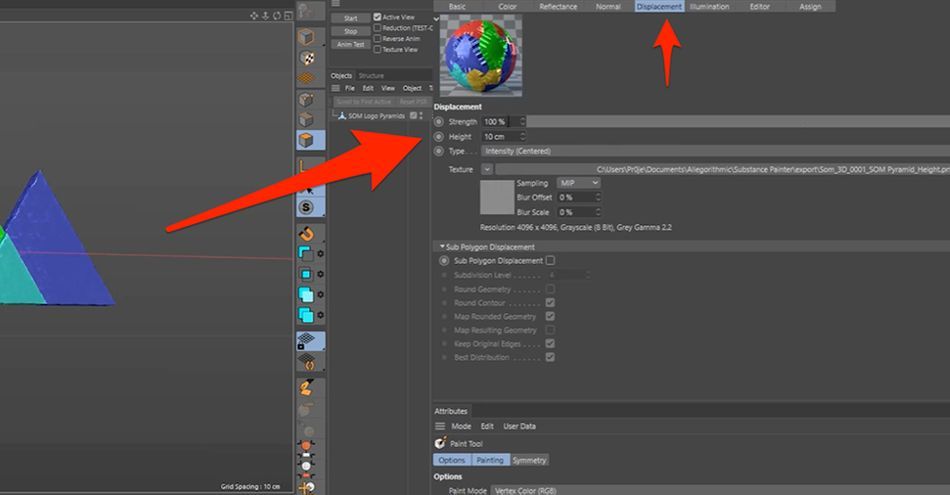
Be sure to set your Height low at first, as a high number can blow out and distort your model in different ways. Activate Sub Polygon Displacement, it subdivides your model so there are more polygons to displace.
With the texture rendered, add the model to an environment, add some lighting...
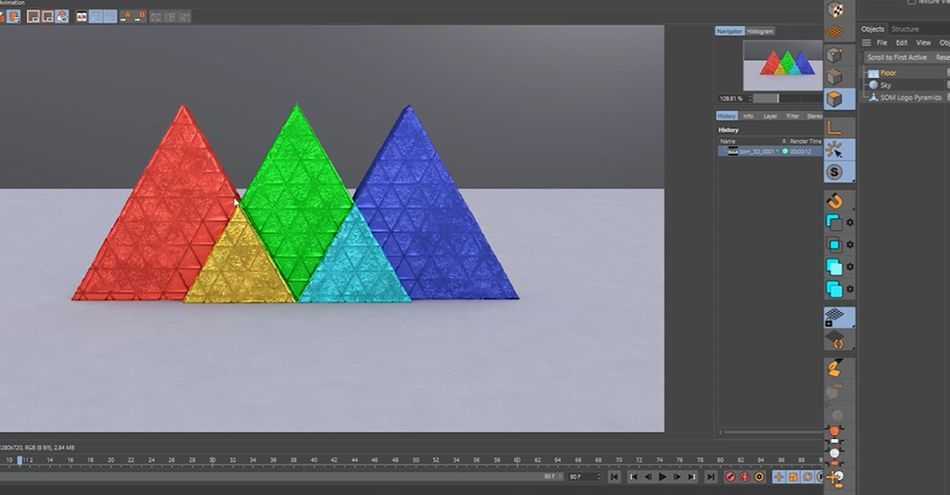
Look at how well our textures transferred over!
We Hope You Found This...Substantive
And that’s it! Now that you know the basics of importing and exporting in Substance, use this opportunity to dive into the software and take advantage of the wonderful tools to make your textures that much more interesting. And if you're ready to take your 3D skills to the next level, you need to see our newest course: Cinema 4D Ascent!
Cinema 4D Ascent will teach you the fundamentals of some of the most important and marketable 3D concepts. Over the course of 12 weeks, you’ll go from beginner to intermediate level 3D artist that’s fluent in Cinema 4D and familiar with other 3D tools.
ENROLL NOW!
Acidbite ➔
50% off everything

ActionVFX ➔
30% off all plans and credit packs - starts 11/26

Adobe ➔
50% off all apps and plans through 11/29

aescripts ➔
25% off everything through 12/6
Affinity ➔
50% off all products

Battleaxe ➔
30% off from 11/29-12/7
Boom Library ➔
30% off Boom One, their 48,000+ file audio library
BorisFX ➔
25% off everything, 11/25-12/1

Cavalry ➔
33% off pro subscriptions (11/29 - 12/4)

FXFactory ➔
25% off with code BLACKFRIDAY until 12/3

Goodboyninja ➔
20% off everything

Happy Editing ➔
50% off with code BLACKFRIDAY

Huion ➔
Up to 50% off affordable, high-quality pen display tablets

Insydium ➔
50% off through 12/4
JangaFX ➔
30% off an indie annual license
Kitbash 3D ➔
$200 off Cargo Pro, their entire library
Knights of the Editing Table ➔
Up to 20% off Premiere Pro Extensions
Maxon ➔
25% off Maxon One, ZBrush, & Redshift - Annual Subscriptions (11/29 - 12/8)
Mode Designs ➔
Deals on premium keyboards and accessories
Motion Array ➔
10% off the Everything plan
Motion Hatch ➔
Perfect Your Pricing Toolkit - 50% off (11/29 - 12/2)

MotionVFX ➔
30% off Design/CineStudio, and PPro Resolve packs with code: BW30

Rocket Lasso ➔
50% off all plug-ins (11/29 - 12/2)

Rokoko ➔
45% off the indie creator bundle with code: RKK_SchoolOfMotion (revenue must be under $100K a year)

Shapefest ➔
80% off a Shapefest Pro annual subscription for life (11/29 - 12/2)

The Pixel Lab ➔
30% off everything
Toolfarm ➔
Various plugins and tools on sale

True Grit Texture ➔
50-70% off (starts Wednesday, runs for about a week)

Vincent Schwenk ➔
50% discount with code RENDERSALE

Wacom ➔
Up to $120 off new tablets + deals on refurbished items


Create Stunning 3D Textures
Master Substance Painter for photorealistic and stylized 3D textures. Enroll in All-Access to unlock Substance Painter for Motion Designers and 50+ other courses.