Learn After Effects the Right Way
Master the After Effects interface and build a real animation skillset. Enroll in All-Access to unlock AE Kickstart and 50+ other courses.

Here are five pro tips to help you move vector files from Affinity Designer to After Effects with less clicks and more flexibility.
Now that we have covered the basics of moving vector files from Affinity Designer to After Effects, let’s look at five pro tips for sending vector files from Affinity Designer to After Effects. In this article-extravaganza we’ll get more efficient and properly prepare our EPS files to avoid potential pitfalls.

Tip 1: Export Multiple Vector Paths
Here's a question for you: What do you do if you have a sequence of several consecutive layers with strokes in Affinity Designer and you want each stroke on its own layer when you import the files into After Effects?

By default, when you convert your EPS file into a shape layer and then explode your shape layer to individual elements, all the paths will be contained in one group within the single shape layer.
This might be the behavior that you are looking for, but what if you want all the paths on separate shape layers?

In order to have the ability to explode all the stroke layers to individual layers in After Effects, we need to do one of two things.
Exploding Shape Layers Option One
Stagger the layers inside of Affinity Designer so that the strokes with similar attribute are not next to one another. This may not be possible depending on your project file and is one technique that I don’t use often.

In the scene above, squares were added in Affinity Designer that will be deleted in After Effects. This method is kinda like using an iron to toast panini's. It works, but there are definitely better options out there...
Exploding Shape Layers Option Two
Select all of your strokes with similar attributes and apply a fill to the strokes. Strokes that are made up of straight lines will appear unchanged, while strokes with direction changes will be filled. Don’t panic yet, we will fix it easily inside of After Effects.

Once you're inside of After Effects, convert your EPS file to a shape layer and explode it to individual elements. Select all of the layers that contain the strokes with the fill applied. With your layers selected, hold down the “Alt” + click the shape layer fill color pallete three times to cycle through the color options that consist of Fill > Linear Gradient > Radial Gradient > None. Here's how it's done:

Tip 2: Group Elements
Within a scene in Affinity Designer, you may have multiple layers that make up one object. If the individual elements don’t need to be animated, export the objects as their own EPS file using the Export Persona in Affinity Designer.
Select all the layers that make up the object of interest. Use the keyboard shortcut “CTRL (COMMAND) + G” to group the elements. Once you have grouped all of your layers, move to the Export Persona.

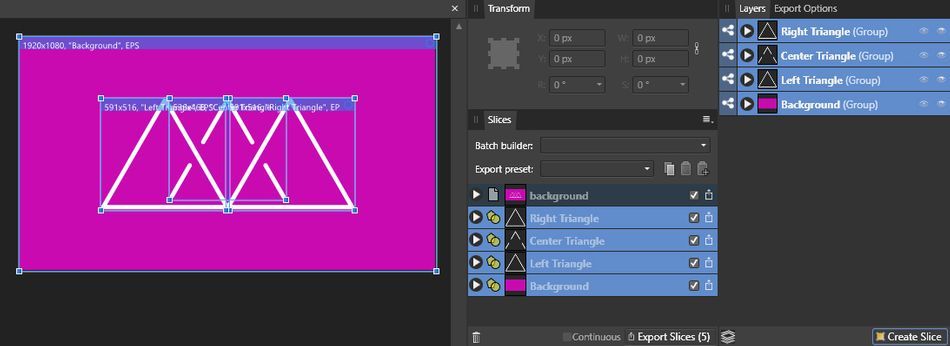
On the right, layers/groups will appear in the panel titled “Layers” and the left panel titled “Slices” will show which layers will be exported as individual files. By default, there is a slice for the entire scene, which can be unchecked to keep it from being exported.
In the Layers Panel, select the layers/groups of interest and click the button titled “Create Slice” found at the bottom of the panel. Once clicked, the slices will appear in the Slices Panel.

The slices created will be the size of the elements within the layer/group. In order for the elements to be in the correct location within the comp when the asset is imported into After Effects, we need to zero out the position and set the size to our comp dimensions.
For example, if we are working in HD, we need the transform properties of the slice to appear as seen below.

Tip 3: Use Macros to Prep Elements
If you're exporting several slices, setting the transform for each slice can be a bit repetitive. So it's time to use that Wacom tablet to its fullest.
You can easily setup a keystroke macro with the Wacom to quickly change the transform properties of your slices to save you a few keystrokes.

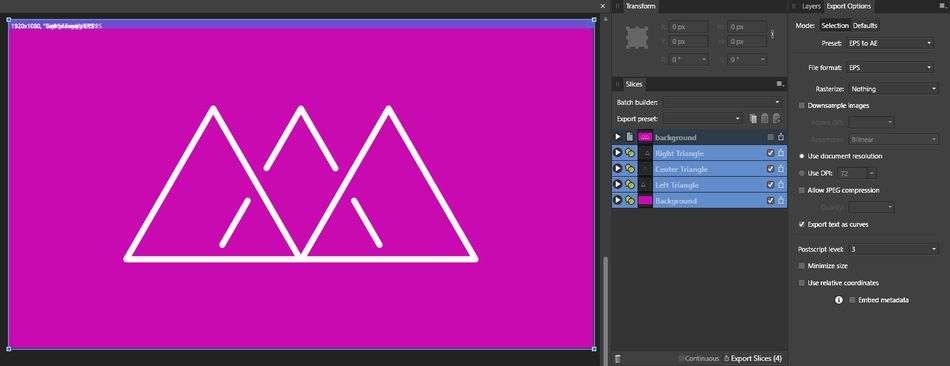
Now that you have all of your slices ready to export, jump over to the Export Panel to specify which format the slices will be exported as. All the slices can be changed at once as long as they are all selected. Or, you may choose to export different slices as different formats.

Once the file formats of your slices have been set, click on the button titled “Export Slices” found at the bottom of the Slices Panel.
Tip 4: Export as Different File Formats
Exporting an Affinity Designer asset as multiple file formats can be a powerful option when using a combination of raster and vector data. In the scene below most of the slices were exported from Affinity Designer as raster images (PSD) because the layers contained raster brush imagery.
The conveyor belt slices were exported as vector images so they could be extruded using the Cinema 4D 3D engine inside of After Effects.

Tip Five: Use Illustrator for Naming
Stay with me here...
In order to retain layer names in After Effects an Illustrator the file must be exported as an SVG (Scalable Vector Graphics). Early in my exploration of vector formats I thought that SVG was going to be a great file choice, but SVG's don't play well with After Effects.
One possible workflow is to export your Affinity Designer assets as SVG, open the SVG asset in Illustrator and then save the asset as a native Illustrator file, which will give you the same options as any other Illustrator file.
Another possibility is to use a third party tool called Overlord by Battleaxe. Overlord gives users the ability to export assets directly from Illustrator to After Effects preserving everything from gradients to layer names all while converting your artwork to shape layers. Sure you're having to use Illustrator, but if you really need those layer names retained it's worth the hassle.
Now get out there and create something! In the next article we will look at exporting raster data to preserve all those gradients and grain. Fancy!
ENROLL NOW!
Acidbite ➔
50% off everything

ActionVFX ➔
30% off all plans and credit packs - starts 11/26

Adobe ➔
50% off all apps and plans through 11/29

aescripts ➔
25% off everything through 12/6
Affinity ➔
50% off all products

Battleaxe ➔
30% off from 11/29-12/7
Boom Library ➔
30% off Boom One, their 48,000+ file audio library
BorisFX ➔
25% off everything, 11/25-12/1

Cavalry ➔
33% off pro subscriptions (11/29 - 12/4)

FXFactory ➔
25% off with code BLACKFRIDAY until 12/3

Goodboyninja ➔
20% off everything

Happy Editing ➔
50% off with code BLACKFRIDAY

Huion ➔
Up to 50% off affordable, high-quality pen display tablets

Insydium ➔
50% off through 12/4
JangaFX ➔
30% off an indie annual license
Kitbash 3D ➔
$200 off Cargo Pro, their entire library
Knights of the Editing Table ➔
Up to 20% off Premiere Pro Extensions
Maxon ➔
25% off Maxon One, ZBrush, & Redshift - Annual Subscriptions (11/29 - 12/8)
Mode Designs ➔
Deals on premium keyboards and accessories
Motion Array ➔
10% off the Everything plan
Motion Hatch ➔
Perfect Your Pricing Toolkit - 50% off (11/29 - 12/2)

MotionVFX ➔
30% off Design/CineStudio, and PPro Resolve packs with code: BW30

Rocket Lasso ➔
50% off all plug-ins (11/29 - 12/2)

Rokoko ➔
45% off the indie creator bundle with code: RKK_SchoolOfMotion (revenue must be under $100K a year)

Shapefest ➔
80% off a Shapefest Pro annual subscription for life (11/29 - 12/2)

The Pixel Lab ➔
30% off everything
Toolfarm ➔
Various plugins and tools on sale

True Grit Texture ➔
50-70% off (starts Wednesday, runs for about a week)

Vincent Schwenk ➔
50% discount with code RENDERSALE

Wacom ➔
Up to $120 off new tablets + deals on refurbished items


Learn After Effects the Right Way

Master the After Effects interface and build a real animation skillset. Enroll in All-Access to unlock AE Kickstart and 50+ other courses.


