Creating Depth-of-Field in Cinema 4D, Nuke, & After Effects
If realism in your 3D renders is something that you want to achieve you're going to want to know how to add and control depth of field. What is depth of field you ask? The short answer is that some things are in focus while others are not. By default everything is going to look crisp and clean in your 3D render. To get it to look like something that was shot with a real camera you're going to need to know the ways that you can add depth of field, and in this tutorial we're going to show you exactly how to do that.
-----------------------------------------------------------------------------------------------------------------------------------
Tutorial Full Transcript Below 👇:
Music (00:02):
[intro music]
Joey Korenman (00:11):
Hey there, Joey here for school emotion. And in this lesson, we are going to take a look at how to create depth of field in your 3d renders. This is a very important technique to know for adding realism to your composites. We'll take a look at the pros and cons of two different ways of achieving this effect by baking the depth of field into your render and by rendering out a separate pass that you can use in your favorite compositing software, don't forget to sign up for a free student account. So you can grab the project files from this lesson, as well as assets from any other lesson on school emotion. And now let's jump in. So here we are in cinema and I have just set up a really, really simple scene, um, with these nine objects kind of arranged in a grid. Um, and, uh, I did that just so we had something to, uh, you know, something that could be the foreground and the background, and be easy to show you guys, um, depth of field.
Joey Korenman (01:08):
So if we, uh, if we look at this render here through the editor camera, um, you can see there's no depth of field. It looks very synthetic, very CG. Uh, so, uh, a lot of times to help with that, we, uh, we use depth of field and if you're not completely familiar with depth of field, um, that the field is that effect you get, when a, you take a picture with a camera, for example, and you're focused on something far away, but in between you and your subject, there's something close to the camera and that thing gets blurry. Um, it it's, it goes out of focus. So that's depth of field and what depth the field, what the words, depth the field, uh, are referring to are actually the region, uh, that is in focus in your image. Um, so if you have, uh, a very narrow, um, a very narrow piece of your image, that's in focus, that's called having shallow depth of field.
Joey Korenman (02:07):
Um, and, and a lot of people try to go for that effect because it's cool looking and it, it, it can, you know, make things look like a you're really, really close to them, or they're really, really small, and you can get a lot of neat effects. So anyway, um, to get depth of field, uh, from cinema, um, the first way I'm going to show you guys is to create a depth pass and then composite with that. Um, so, uh, the first thing you need to do to create a depth fast is enable multipass rendering and enable the depth channel. Um, and I've already done that here, but I'm going to erase this and just show you guys. So, um, I went to my render settings and, uh, I made sure multipass is checked. Um, and what I'm going to do really quickly is I'm going to, uh, go into my saved settings and I'm going to, uh, erase the file name here so that I can use my picture viewer, but not actually save a file on that's a trick I like to use a lot.
Joey Korenman (03:09):
Um, so then we have our multipass checks, that's enabled, and, uh, we're going to click on the multipass tab, go down here and add the depth channel. So now when you render a, you're seeing you're going to get a depth pass now, um, let's add a camera. All right. And, um, a lot of times, if you don't know a lot about photography or cinematography, and I don't know that much, but, um, I have some experience with it and I find it helpful because, um, it's easy to overdo it with depth of field and add too much just because it looks neat. Um, but if you're trying to make things look real or maybe not look real, but feel like they were shot, um, then you don't want to overdo it. And you want to have a sense of what's the appropriate amount of, of blur to have on your image.
Joey Korenman (04:00):
Um, and in general, longer lenses, meaning lenses with a higher focal length, uh, they are going to give you more depth of field because their, their focus area is, is a little shallow or it's a little narrower. Um, so in general, a wider lens. And right now I have this set to a 35 millimeter lens. Um, a 35 millimeter lens is not going to have as much depth of field. If we, you know, if we took, if this was a picture that we were taking, we wouldn't expect to have a lot of blur in this image. However, if we came in here and took this picture, you know, the closer you get to an object, um, you know, the, the more out of focus it will, it will be, let's say we're focused. We're focused on this object in the center here. This cube is going to be a little bit out of focus. So I'm going to, I'm just going to set up a framing here. That's going to give us, um, a nice range of things to focus on or not focus on. All right. So let's try this. All right. So this is the render with no depth of field. Now, um, if I send this to the render viewer, I'm just hitting shift R or clicking, uh, clicking, send a picture viewer right here.
Joey Korenman (05:20):
Um, by default, your picture viewer is going to be set up to show you the image, and you'll see that there is a depth pass, but you won't be able to look at it. If you change this to single pass mode, now you can look right at your depth channel. Um, and right now it looks a little strange, uh, the background, um, which is just a sky object, is black. All of my objects are white, and then I've got this kind of gradient fading off into the distance. Okay. Now the way a depth channel, a depth pass is supposed to work is that, um, things that you want in focus, uh, will be black, um, things that you don't want, focus will slowly fade to white. Um, another way to use a depth pass. And this is the way I'm actually going to show you is you can simply make a gradient through your scene where things that are close to the camera or black things that are far away or white.
Joey Korenman (06:20):
Um, and then you can choose what's in focus later in after effects or nuke. Um, so the first thing we need to do is get this depth past, to look right. We need, you know, we need, uh, this cube to be fairly black, and then we need all this stuff behind it. You know, the, this little pyramid and this Bucky ball, we need those to be, um, to be white in our net fast. And then the background should be all white because it's really far away. So, um, the way you do that in cinema is you actually set that up in your camera. Um, so what I'm going to show you is if we, um, click on the camera, come down here to focus distance right now, it sets a 2000 centimeters, which as you can see, it's focused way back here, not even close to our objects. So I'm just going to click and that is not the right handle. Let me fix that.
Joey Korenman (07:18):
I'm going to click and drag all the way back. So now we're focused just on that front cube. All right. And, uh, if I send that to the picture of you are now our dev past, still doesn't look that great. Um, and that's because, uh, that's basically, because right now, um, cinema is only calculating a depth pass from the start of the camera to this. So if I scoot this all the way back like this, oh, and, and another stupid thing that I'm doing is I'm not actually looking through the camera. That's why that didn't change. Uh, let's actually look through the camera and render that there we go. Um, all right, so now we're starting to get something resembling a usable depth pass. Um, now the problem is everything's very dark and, uh, your depth pass will work best. If you have a good range of values to pick from, um, you know, this color is very close to this color. Um, so it's going to be tough to really differentiate, um, you know, in, in your, in, after effects or nuke, which part of the image should be in focus. Um, now let's scoot in close, let's frame this back up the way we will.
Joey Korenman (08:45):
Okay. Um, so now, if, uh, if I take the focus of the camera back, pretend that we want just this cube be in focus. Um, again, you're seeing that now our depth past is black. So, um, one of the things that it took me a while to figure this out, and I never really, uh, I never found a nice, concise detail tutorial explaining it. So, um, here it is, this is the trick you take your camera. Uh, you set the focus distance to just before the very first object in your scene that you'd like to control, then go to details. And I, and by the way, I'm on, um, cinema 40 R 13. I think these were in a slightly different position, uh, on the camera object in our 12. And I've never used our 14. So I'm assuming that, you know, there's, they're called something similar, but what you're looking for is the rear blur.
Joey Korenman (09:47):
And if you enable the rear blur, you now get a second sort of faint or set of lines coming out from the camera. And I'm just going to bring those way back to 200. And you want to position the rear blur just behind the last object. And you're seeing that you want to be able to control the focus on all right. So your actual focus is in front of the objects and your rear foot, your rear blur is behind them. So now if we render our depth pass, there we go. This is what we want. This cube that's very close to us is almost black. Everything else fades to white. And the background is totally white because it's really far away. So this is the exact depth paths that we want. Um, now I want to talk a little bit about what these values are actually doing.
Joey Korenman (10:37):
Um, let's say that we know that, that, you know, the, these three back objects here are never going to be in focus. We could pull this rear blur back to here, and now if we look at our depth pass, you'll see that that back row has disappeared. Um, because this is the, the maximum distance that we're going to be able to control with focus. Um, now, and so what it does is it basically compresses the black to white gradient, um, so that you get more values in between your front and your back of your image. Um, and when you're using a depth pass, the more, um, you know, the, the, the tighter, you can keep that range, um, the easier it's going to be to control, because there's only so many values between black and white and what'll happen is if the values are too close together, you're going to get banding.
Joey Korenman (11:35):
And you can even start to see it a little bit in this image. I don't know how it's going to look on the screen capture, but I can actually see some color banding here. And even if you render in 32 bit, you're still going to get some color banding when you have these values that are very close together. So your best bet is always to try and get the maximum contrast. So if you know, you don't ever need these to be in focus, then you don't need to include them in your depth pass. Um, but we don't know that. So we're going to create a depth pass with these settings. Okay. So, um, now we need to render this and I'll show you how to composite this. So I'm going to go to my render settings, and I'm going to set up a new folder here, and I'm just going to call this image.
Joey Korenman (12:22):
Uh, and then I usually just copy and paste, I file name down here into the multipass image, and I'll put underscore MP, uh, for multipass. Um, now I'm rendering, uh, open EXRs for my regular image, and I'm going to render, uh, PNGs, um, for my multipass. You can use, uh, open EXRs for your multipass. Also, um, the after effects sometimes does some funny things with the XR. So, um, when I'm using after effects, I'll use PNGs when I'm using nuke. I always use the EXRs. All right, so now I've got this setup, I'm going to hit render, and we've got our image, our depth fast, and they are rendered. So now let's switch over to after effects and let's import those, okay. Now in after effects, um, the most common plugin that people use to create depth of field is called fresh lift, uh, lens care.
Joey Korenman (13:31):
And here it is, uh, and it comes with two plug-ins depth of field and out of focus. And the one we want is depth of field. So now the depth of field effect is a blur, but the blur needs a depth layer to drive it. Um, so we bring in our depth pass, which you can see is here, and I'm just going to rename this depth, and I'm going to turn it off cause you don't need to see it. Um, so now on our fresh lift effect where it's asking for the depth flare, we pointed to depth, and now we're set up. Um, so what I usually like to do with this plugin is first go, uh, to change where it says, show, change this to, um, sharp zone. All right, what this is going to do is going to bring up, uh, this sort of white, you know, fade over the image.
Joey Korenman (14:25):
Um, but if we crank up the radius a little bit, you'll see it start to change. What this is doing is it's showing us what part of the image we're focusing on. And you can actually use the select depth option here and just click where you want it to be in focus. So now as soon as I click that cube, that cube and a few things behind it became highlighted. That means that they are in my, my focus. Um, and so this will be perfectly in focus. This will be a little bit out of focus and everything that's not highlighted will be totally out of focus. Um, and if I change the radius of the effect, it's sort of tightens up, it makes my depth of field shallow, or it tightens it up. And that also is going to increase the blur on the areas that are not in focus.
Joey Korenman (15:15):
So to start with, let's leave this pretty low. All right. Um, and now we can switch back from depth, sorry, from a sharp zone to normal blur. And you'll see that we now have some depth of field and it's very, very little right now, but if I crank this radius up to say five, you can see that we're starting to get this background a lot more out of focus. Um, and you can crank this up pretty high. Um, and we can actually, you can interactively kind of move this point around and focus on different things, which is cool. All right. So if we're focused on the point of this cube, um, you know, everything else falls out of focus, and this is actually is pretty, you know, this isn't a bad result now. Um, the problem with this approach comes when you want to focus on these back objects.
Joey Korenman (16:12):
So if we move this control and want to look at this ball, all right, so here's the problem. Now, this cube is out of focus as it should be, however right at the border or the two objects meet, it's not out of focus. Um, and if we really start cranking this up, then what you'll see is you're going to start getting these weird artifacts all over your image. Um, and that is happening because in reality, when you take a photo of something and something's out of focus, you can kind of see the object behind your out of focus object, um, and the edges of your out of focus object or soft. And, and so you see detail through them. Um, so in order to actually know, you know, what you're seeing through an object, you have to have the information about that object. So this cube should be blurry out to about here, and we should see the blue ball behind it.
Joey Korenman (17:14):
However, we don't actually have both the information about this yellow cube and what's behind it. We only have a 2d image here. So when you start to make this, this really, really blurry, um, the whole thing starts to fall apart pretty quickly. Um, so using a depth pass in this way, uh, it's only effective, um, in certain certain situations, uh, it works best if the thing you're focused on is the closest thing to the camera and, uh, and everything behind it can be out of focus. And, and if anything in front of it is going to be out of focus, you don't want it to overlap because then you get, you know, you get this problem. Um, and you also can't push this effect very far because you will start to break the edges of your objects and, and it just won't work anymore. Um, there are some compositing tricks you can use, um, to manipulate your depth pass, to help solve some of those problems, but you'll never solve them all.
Joey Korenman (18:20):
Um, really quickly. I want to show you guys how I would do this in nuke, because it's a little different. And the plugin that comes with nuke, uh, is, is in my opinion, it's, it's a lot easier to use than fresh lift and it's, um, it's also more powerful. It's got some more options, um, does a better job. So I just want to show you guys just so you're aware of how this works in other applications, and I'm going to be doing a lot of new tutorials because I think nuke is amazing. And, uh, if you guys are really interested in making your renders and 3d scenes look really, really good nuke is the best way to do that. Um, so I'm going to bring in my, uh, my renders and I'm not going to go over exactly how I'm doing this in nuke. Um, cause this is not really a nuke tutorial.
Joey Korenman (19:07):
Um, so this is my image. And in nuke, uh, when you bring in, um, a multipass image that only has one channel, it shows up in the red channel. Um, so that's why it's red. Um, so in nuke, uh, briefly, um, you have to, um, you have to, yeah, it doesn't work the same way as after effects. I don't, um, I don't put an effect on this clip and then feed it this image. Sometimes you do that, but a lot of times what you actually have to do is first combine these two images. Um, and so what you're, what you're doing is you're, you're taking this image, you're creating a new channel for it. Um, and, and then you're, you're combining that channel with this channel. And it may not make any sense when I'm telling you, but the result of what I just did here is I, uh, I allowed nuke to access both this image and this image here in the same, at the same time.
Joey Korenman (20:10):
Um, and so if I now look at this depth channel, um, you can see that the depth channel is now set to be this image. Um, that was just kind of a housekeeping step I had to do. And now I can use these Z D focus effect that's built into nuke, and this is a nuke seven. Then this is the newest version. Um, this used to be called Z blur, and it didn't have quite as many bells and whistles, but it worked almost the same. Um, so now, uh, I have my Z D focus now, and you can see things are already out of focus and the quality of the blur is really good and nuke. It just seems to do a better job. Um, so now, uh, I need to change a couple things really quickly right now, the math for this effect is set to far equals zero.
Joey Korenman (20:58):
Um, and my other option, I have a bunch of options, but another option is far equals one. My depth pass is set up where things that are far away are white. So zero is black. One is white. Um, so I want far to equal white, which is one. So I'm gonna change that. All right, you can see that this effect, it just like in first lifted has a, a focal point that you can move around interactively and it will change. What's in focus on your scene. Um, what's great about nuke, um, and, and why I prefer doing it this way is because you can also very easily control exactly. What's in focus. What isn't, if I go to output, uh, and I do focal plane setup, all right. Um, if I move this focal plane slider, you can see I'm moving the exact point on my image.
Joey Korenman (21:51):
That will be in focus the same as first lift. But the other thing I can do is I can then expand the depth of field so it can be anywhere I want. So the green is telling me, this is in focus. The blue is telling me this is in front of my focus and the red is behind my focus. Um, and so, whereas in first lift, you had to pick your focal point and then pick your radius of your effect. Um, and that's, that's all the control you have in nuke. You can actually dial this in exactly where you want it and then tell it how much blur to apply. So you get a lot more control. It's easier to get the effect you're going for it. So let's say we want to be focused right there on this cube. All right. Um, and I want the depth of field to be pretty small.
Joey Korenman (22:43):
So even the back of the cube is starting to go out of focus. Um, so now if we go back to result, um, you'll see that now we've got the same effect that we had in, in after effects. Except now I can keep the exact same shallowness of my depth of field. And I can just up the blur level a little bit. Um, and you know, this, this part of the image to this part of the image is still in focus, but the rest of it is now more out of focus. Um, now again, you're seeing the same problems we saw in aftereffects with this edge of the cube should be blurred and it's not. Um, so, you know, we're, we're still running into the same problems in nuke. We ran into an after effects. If you use a depth pass, you were somewhat limited to the result you can get.
Joey Korenman (23:36):
Um, and there's, you know, there's some compositing tricks to help with it, but in the end, um, you're not going to get the best result this way. Um, so now I'm going to show you a different way to do it. And, uh, and I'm going to talk a little bit about the pros and cons. So the pros of doing it the way I just showed you with a depth pass, the main reason is that it's much, much faster. Um, when you render, uh, images in 3d and you have your 3d app calculate depth of field, it takes a lot longer. Um, and then just as important is that if you put the depth of field on, in compositing, you can always change it. If a client says, that's, you know, I don't like how blurry things are getting, can we sharpen that yes, really easily, and you don't have to go back into cinema and rerender things that, you know, may take hours or days or whatever.
Joey Korenman (24:31):
Um, so, you know, it's, it's much more controllable and it's flexible. Um, but the quality of the result will never be as good as just actually doing it in 3d. Um, so w you know, the S the way I kind of look at it is you have to know your client and you have to kind of understand what's important on the project you're working on. If your client is a photography nut, and, you know, a techie guy, then you could safely assume he is going to want to noodle around with your renders. Um, so you probably want to use a depth pass with this guy because, um, you know, he's gonna, he's gonna say things like that's too out of focus. Let's, you know, let's increase the, the depth of field. Um, so, uh, most clients are not like that. And, um, you know, I, I I've recently started doing most of my depth of field, uh, using cinema and actually doing it in 3d because the results so much better, that it just makes everything look nice.
Joey Korenman (25:41):
And in the end, that's the most important thing the client is going to appreciate whatever you do, as long as it looks nice, and they're not going to care how you did it. Um, so you always have to balance, you know, speed versus quality, um, and, uh, and make, you know, make your own decisions. So, uh, what I'm gonna do now is show you how to actually get up the field out of cinema. And, uh, this is something that you couldn't do one release ago, um, without plugins. Um, one of these days I'll get around to doing a V-Ray tutorial. V-Ray, uh, lets you render true depth of field and true motion blur. Um, and the quality is unbelievable, but it is a plugin and you have to learn it. And it works very differently than, than the normal cinema stuff. Um, fortunately cinema added the physical renderer in our 13 and, uh, it has the ability to create depth of field.
Joey Korenman (26:39):
So all you have to do is enable the physical renderer go to depth of field, make sure it's checked. Um, and then there's some quality settings that we're going to leave default for now. Um, I'm also going to, uh, erase I file names in the save so that we can do previews. All right. So, uh, we also don't need this multipass anymore because we're not going to render a depth pass. We're actually just going to run her depth, the field. Um, so the way depth of field works, uh, with the physical renderer is now the focus distance is actually really important. Um, so what we're going to do is, uh, set this focus distance as precisely as we can to focus on this cube here. Um, and you know, it, depending on where your camera is and where your objects are, it's kinda tough to tell exactly where, you know, it needs to be focused.
Joey Korenman (27:39):
I mean, is, is that in focus on this corner of the cube? I can't really tell, you know, the camera's at an angle it's just impossible. So what I like to do is create a Knoll and I'm going to name this focus. Uh, and then in the camera settings under object, you can drag that Knoll to the focus object and that camera's focus distance will now automatically be set, uh, calculated from this note. Um, so now I can just put the Knoll right there. And so now the camera is literally focused right on that point. And I'm gonna actually, I'm going to push it in just a little bit. Okay. Um, and then in the, uh, in the physical settings, um, you know, you, you, you can change these and, uh, and actually control the exposure and things like that. Um, one of the things that I love about using the physical render is that I don't have to worry about that stuff.
Joey Korenman (28:40):
I can if I want to, but I, I don't want to, all I want is to make my scene look nice and then add that the field to it. Um, and really for depth the field, if you're not dealing with exposure, the only setting you need to worry about is the f-stop. All right. And, uh, if I just hit render real quick, let me do a test under here. You will see that now, uh, we have this corner of this cube in focus. Everything else is out of focus and it already looks better because you don't get any of the artifacts. Um, now you are seeing this grainy stuff. That's just because the quality on the physical render isn't, isn't so high, it sets a low right now. Um, and that's good because when you're just setting up your scene, um, you know, you, you want quick renders.
Joey Korenman (29:30):
Once you set that setting high enough, it takes a long time and the result looks great, but you know, this could easily, and this is a very simple scene. This could take, you know, a minute, two minutes per frame, more in full HD on my, my iMac. So, um, you know, you always kind of work low rise like this, and then when you're ready, you, you up the settings. Um, so now the true test is if we move this focus now, and let's say, we want to focus on this pyramid way in the back here. So that's this one and we'll lower it, focus on that. All right. So now I'm gonna hit render again, and you'll see that you're getting a, this, this cube is getting blurry along the edges, but you can actually still see this Bucky ball through it. Um, you're not getting those weird artifacts along edges where things intersect because you're actually calculating depth of field. Um, now let's see what happens if we really crank this up. If we go into the camera and, and change this f-stop to a lower, f-stop say change it to four.
Joey Korenman (30:39):
Now you're getting even heavier depth the field, but you can still see the object through it. Um, so when you do things like rack focus, um, or when you set up scenes like this, the result you get is so much better, um, especially when you crank the quality settings up. Um, so, you know, you do have to always be careful that you're not doing something that's going to take six hours to render, and then you cross your fingers and you hope your client likes it. That's not really a great option either. Um, and a great strategy. Uh, if you ever find yourself in this situation is render one frame and email it to your client and say, this is what I'm thinking. And point out the depth of field. I have a shallow depth of field on this shot. It takes a long time to render, but I think it looks beautiful.
Joey Korenman (31:29):
Let me know what you think. If you like it, this is what I'll go with. And that's all you have to do. And nine times out of 10 that client's going to appreciate the fact that you're asking them, and they're going to look at that and they're going to say, wow, that's really cool. That looks great. Um, you know what, turn the blurriness down 10% and you'll say, okay, and you'll render, you know, a variation of it and you'll send it to them and now they're happy. And now you can have your beautiful depth of field and your client feels like they were serviced. So, um, there you go. That's a free client service to, for you. Um, anyway, so that's it, that's how you do depth, the field and cinema. Um, I want to say, I'll say one other tip too. Um, one of the, one of the most common ways that you can get around, uh, the issue, you know, that you would have here with a depth pass, um, and this sucks to do, and I don't like to do it, but what you can always do is turn this cube off, render your scene, and then render this cube all by itself, separately, that way in after effects or nuke, you could composite this cube back on top and blur it, but still have information about what's behind it.
Joey Korenman (32:41):
So you can still get a nice blur. Um, you know, I don't like doing that just because, you know, then you have two renders to deal with and manage. And if you change that shot or there's a last minute revision, now you have to remember, and you have to track that, oh, I have to render this shot twice. Once with this cube off. And once only with this cube, then I have to composite them together. So, um, it does work, but, um, it it's kind of a pain. So, um, one of the, you know, using a depth pass or doing it this way, those are the most common ways of doing depth of field. I hope this was helpful. Thank you guys for stopping by and I will see you next time. Thanks for watching. I hope you learned a lot about what depth of field is and how to use it effectively to take your 3d scenes to the next level. Thanks again. And I will see you next time.
Dive into real-time 3D with our Unreal Engine beginner's course by Jonathan Winbush. Master importing assets, world-building, animation, and cinematic sequences to create stunning 3D renders in no time! Perfect for motion designers ready to level up.
Explore this Course ➔
Unlock the secrets of character design in this dynamic course! Explore shape language, anatomy rules, and motifs to craft animation-ready characters. Gain drawing tips, hacks, and Procreate mastery (or any drawing app). Ideal for artists seeking to elevate their craft.
Explore this Course ➔
Elevate your freelance motion design career with our guide to client success. Master a repeatable method for finding, contacting, and landing clients. Learn to identify prospects, nurture leads, and develop a thriving freelance philosophy amidst chaos.
Explore this Course ➔
Rev up your editing skills with After Effects! Learn to use it for everyday needs and craft dynamic templates (Mogrts) for smarter teamwork. You'll master creating animated graphics, removing unwanted elements, tracking graphics, and making customizable templates.
Explore this Course ➔
Stand out with Demo Reel Dash! Learn to spotlight your best work and market your unique brand of magic. By the end, you'll have a brand new demo reel and a custom campaign to showcase yourself to an audience aligned with your career goals.
Explore this Course ➔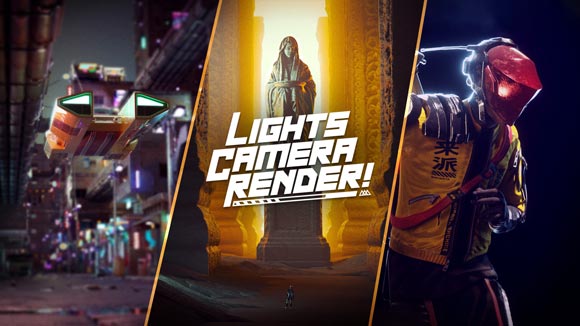
Illuminate your 3D skills with Lights, Camera, Render! Dive deep into advanced Cinema 4D techniques with David Ariew. Master core cinematography skills, gain valuable assets, and learn tools and best practices to create stunning work that wows clients.
Explore this Course ➔
Master After Effects at your own pace with Jake Bartlett's beginner course. Perfect for video editors, you'll learn to create stylish animated graphics, remove unwanted elements, and track graphics into shots. By the end, you'll be equipped for everyday AE needs and more.
Explore this Course ➔
Revolutionize your Premiere workflow with customizable AE templates! Master creating dynamic Motion Graphics Templates (Mogrts) in After Effects to speed up your team's work. By the end, you'll craft easily-customizable templates for seamless use in Premiere Pro.
Explore this Course ➔
Not sure where to start?
If you’re a beginner, here are some great courses to help you get started:
After Effects Kickstart
Dive into the fundamentals of motion design with our most popular (and recently updated) After Effects course.
Photoshop + Illustrator Unleashed
Master the basics of Photoshop and Illustrator and gain invaluable insights in this introductory level course.

Design Kickstart
An introduction to the design principles behind all great work.
More Advanced?
If you’re a more advanced student looking to up your game, here are some great options:

Animation Bootcamp
Learn the art and principles of creating beautiful movements in Adobe After Effects.

Design Bootcamp
Learn to design for motion in this intermediate-level, project-based course.
Cinema 4D Basecamp
Learn Cinema 4D from the ground up in this exciting introductory C4D course.
Now is the time to learn the skills you need to advance in your motion design career:


